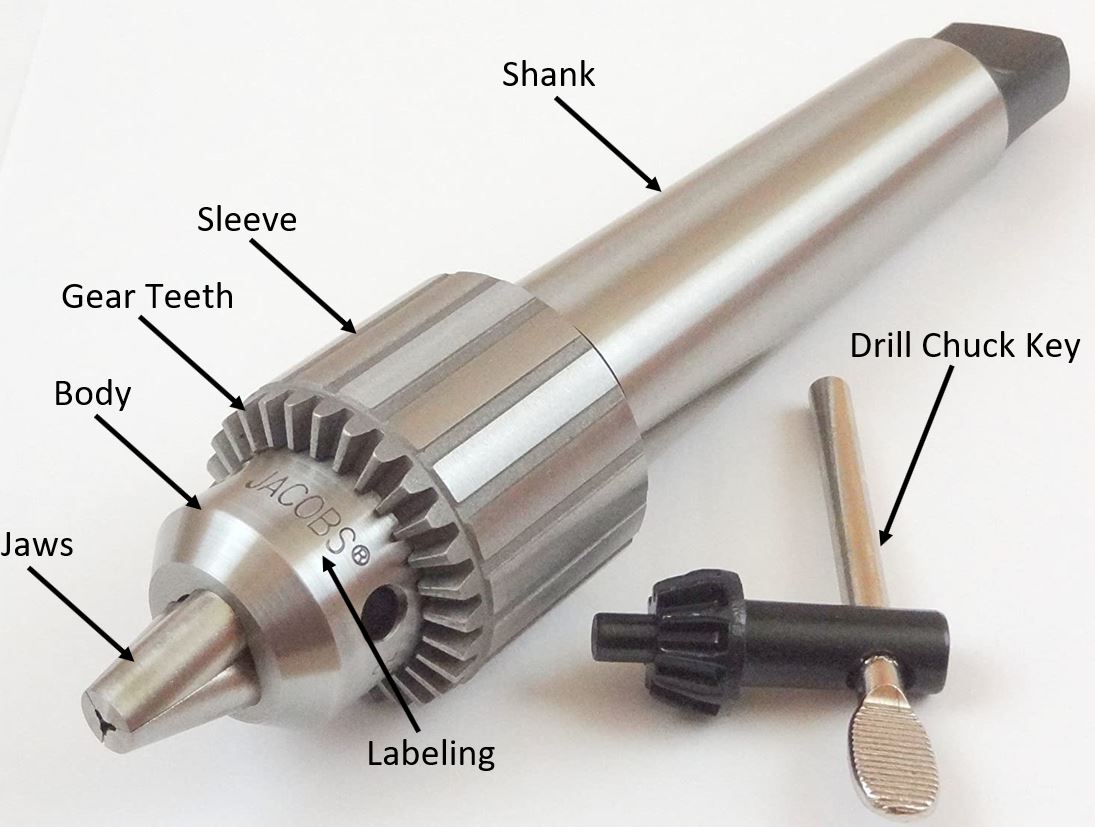
Drill Chucks are used to hold drills & cutting tools to a spindle for high speed turning. Machinists may sometimes refer to them as Jacobs Chucks, as Jacobs is a popular brand that manufactures drill chucks.
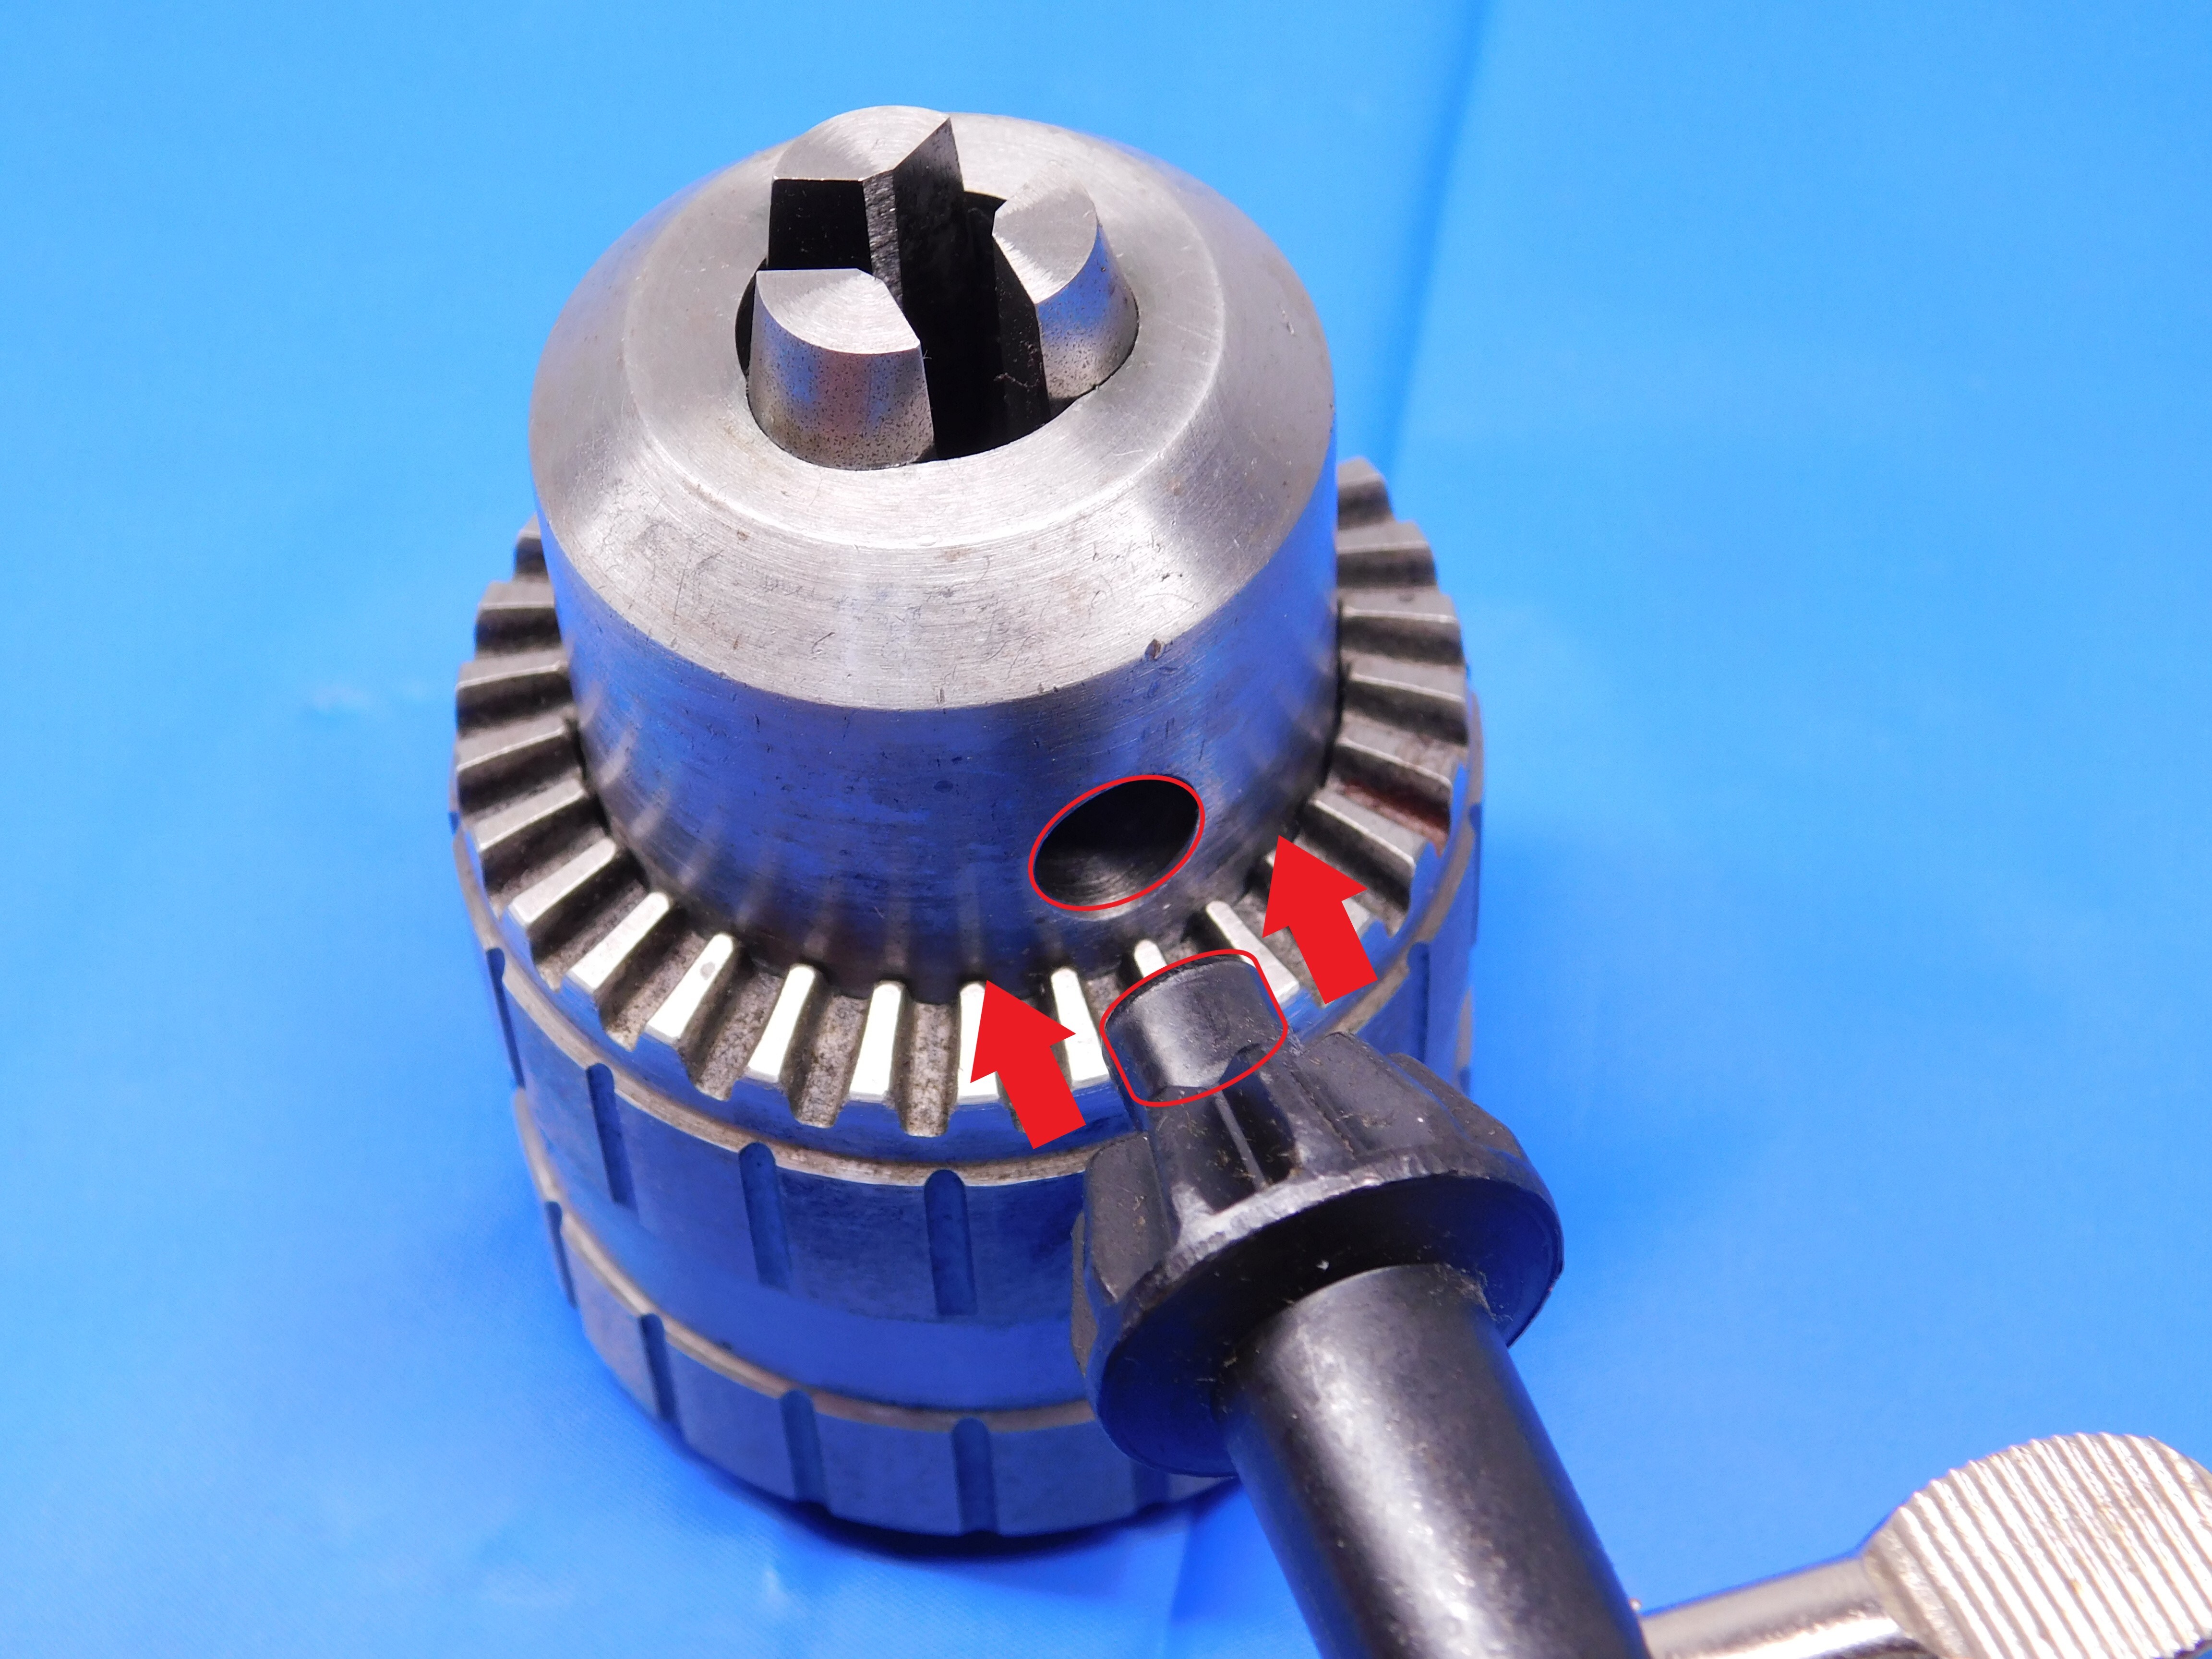
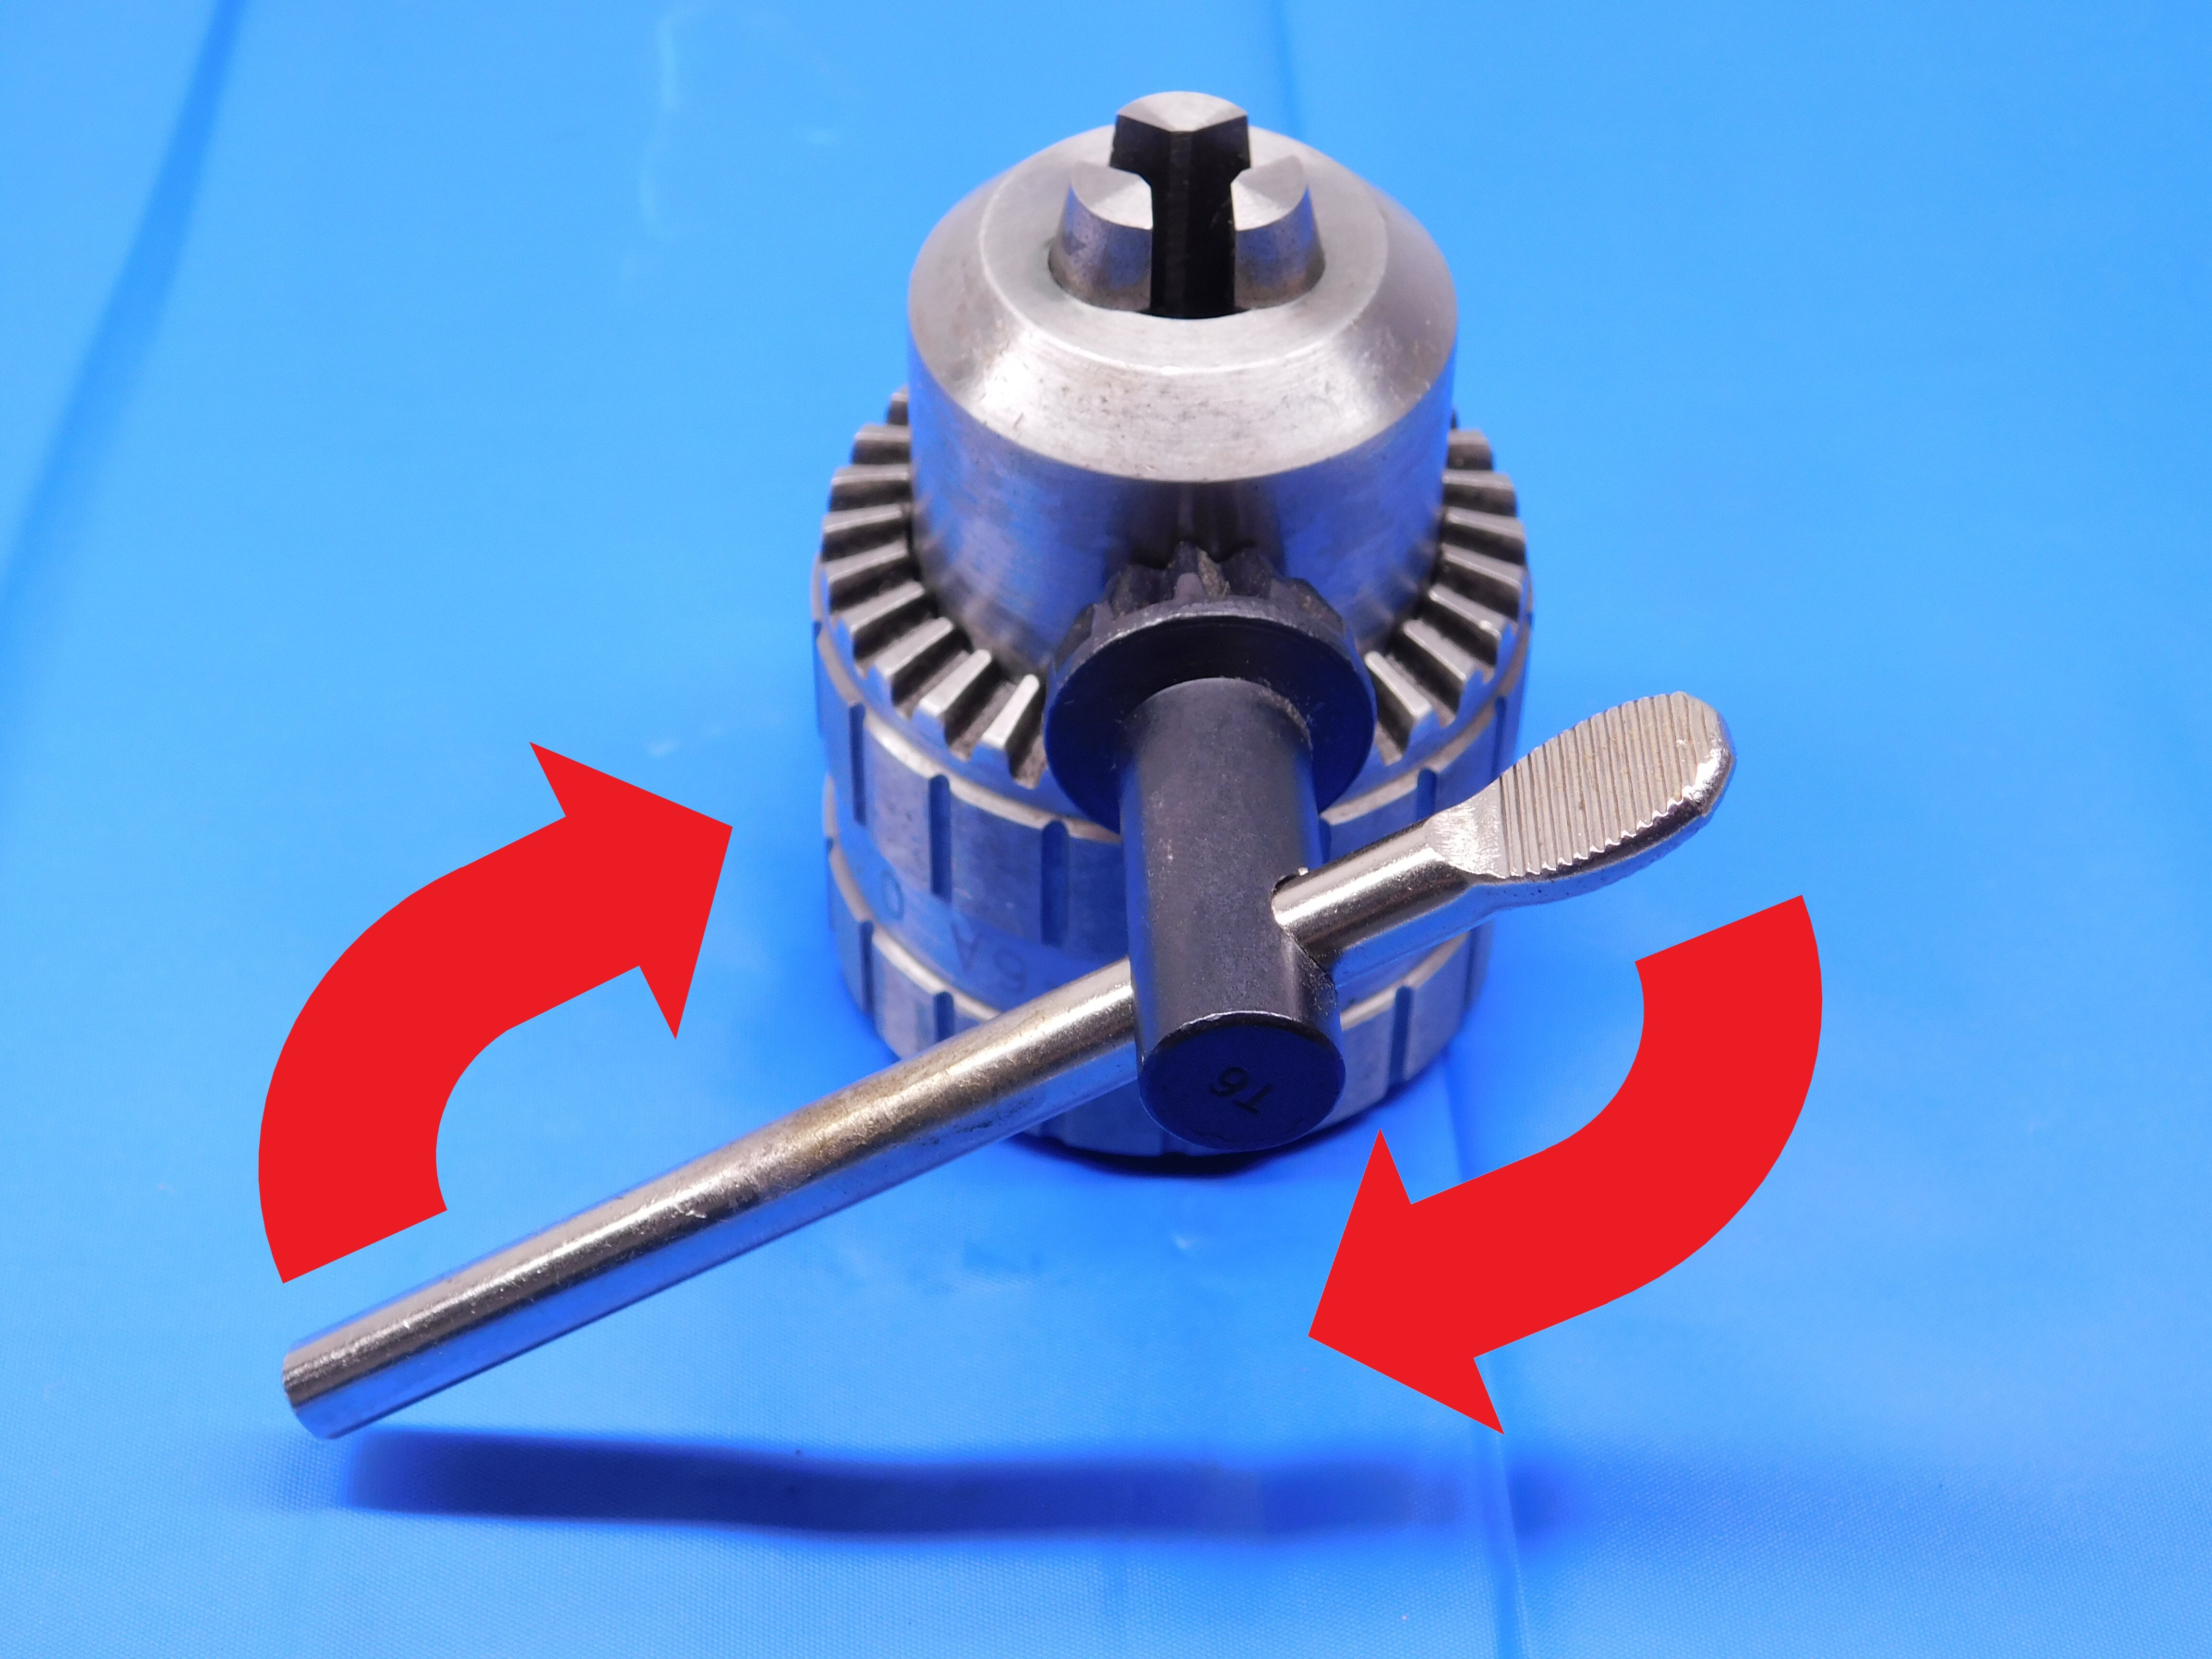
Most drill chucks require a key which is used to turn the gear teeth and open/close the jaws (there are also keyless chucks which, as the name implies, do not require keys - more information can be found further down this FAQ page). ***Drill chucks requiring keys MUST be listed with a key.*** If you have a drill chuck without a key which you believe should require a key, contact your trainer.
Things to look out for:
Does it open & close easily by hand?
You should be able to adjust the drill chuck to it's full capacity (from fully open to fully closed, as shown below) by hand with little resistance and minimal "sticking". Some drill chucks will be able to be turned just with your hands, but others may require the use of a key. If a drill chuck is not able to be fully opened / closed, or if there is a significant amount of resistance, we will often still list the drill chuck but you must describe this information in the "Special Condition" section of the listing (for example: "The chuck opens easily to about half capacity. It can still be opened the rest of the way with a key, but there is some resistance."). If the chuck is fully locked up (does not move at all even with the use of a key), it should be set aside to be scrapped or put in a "for parts" lot with other tools.
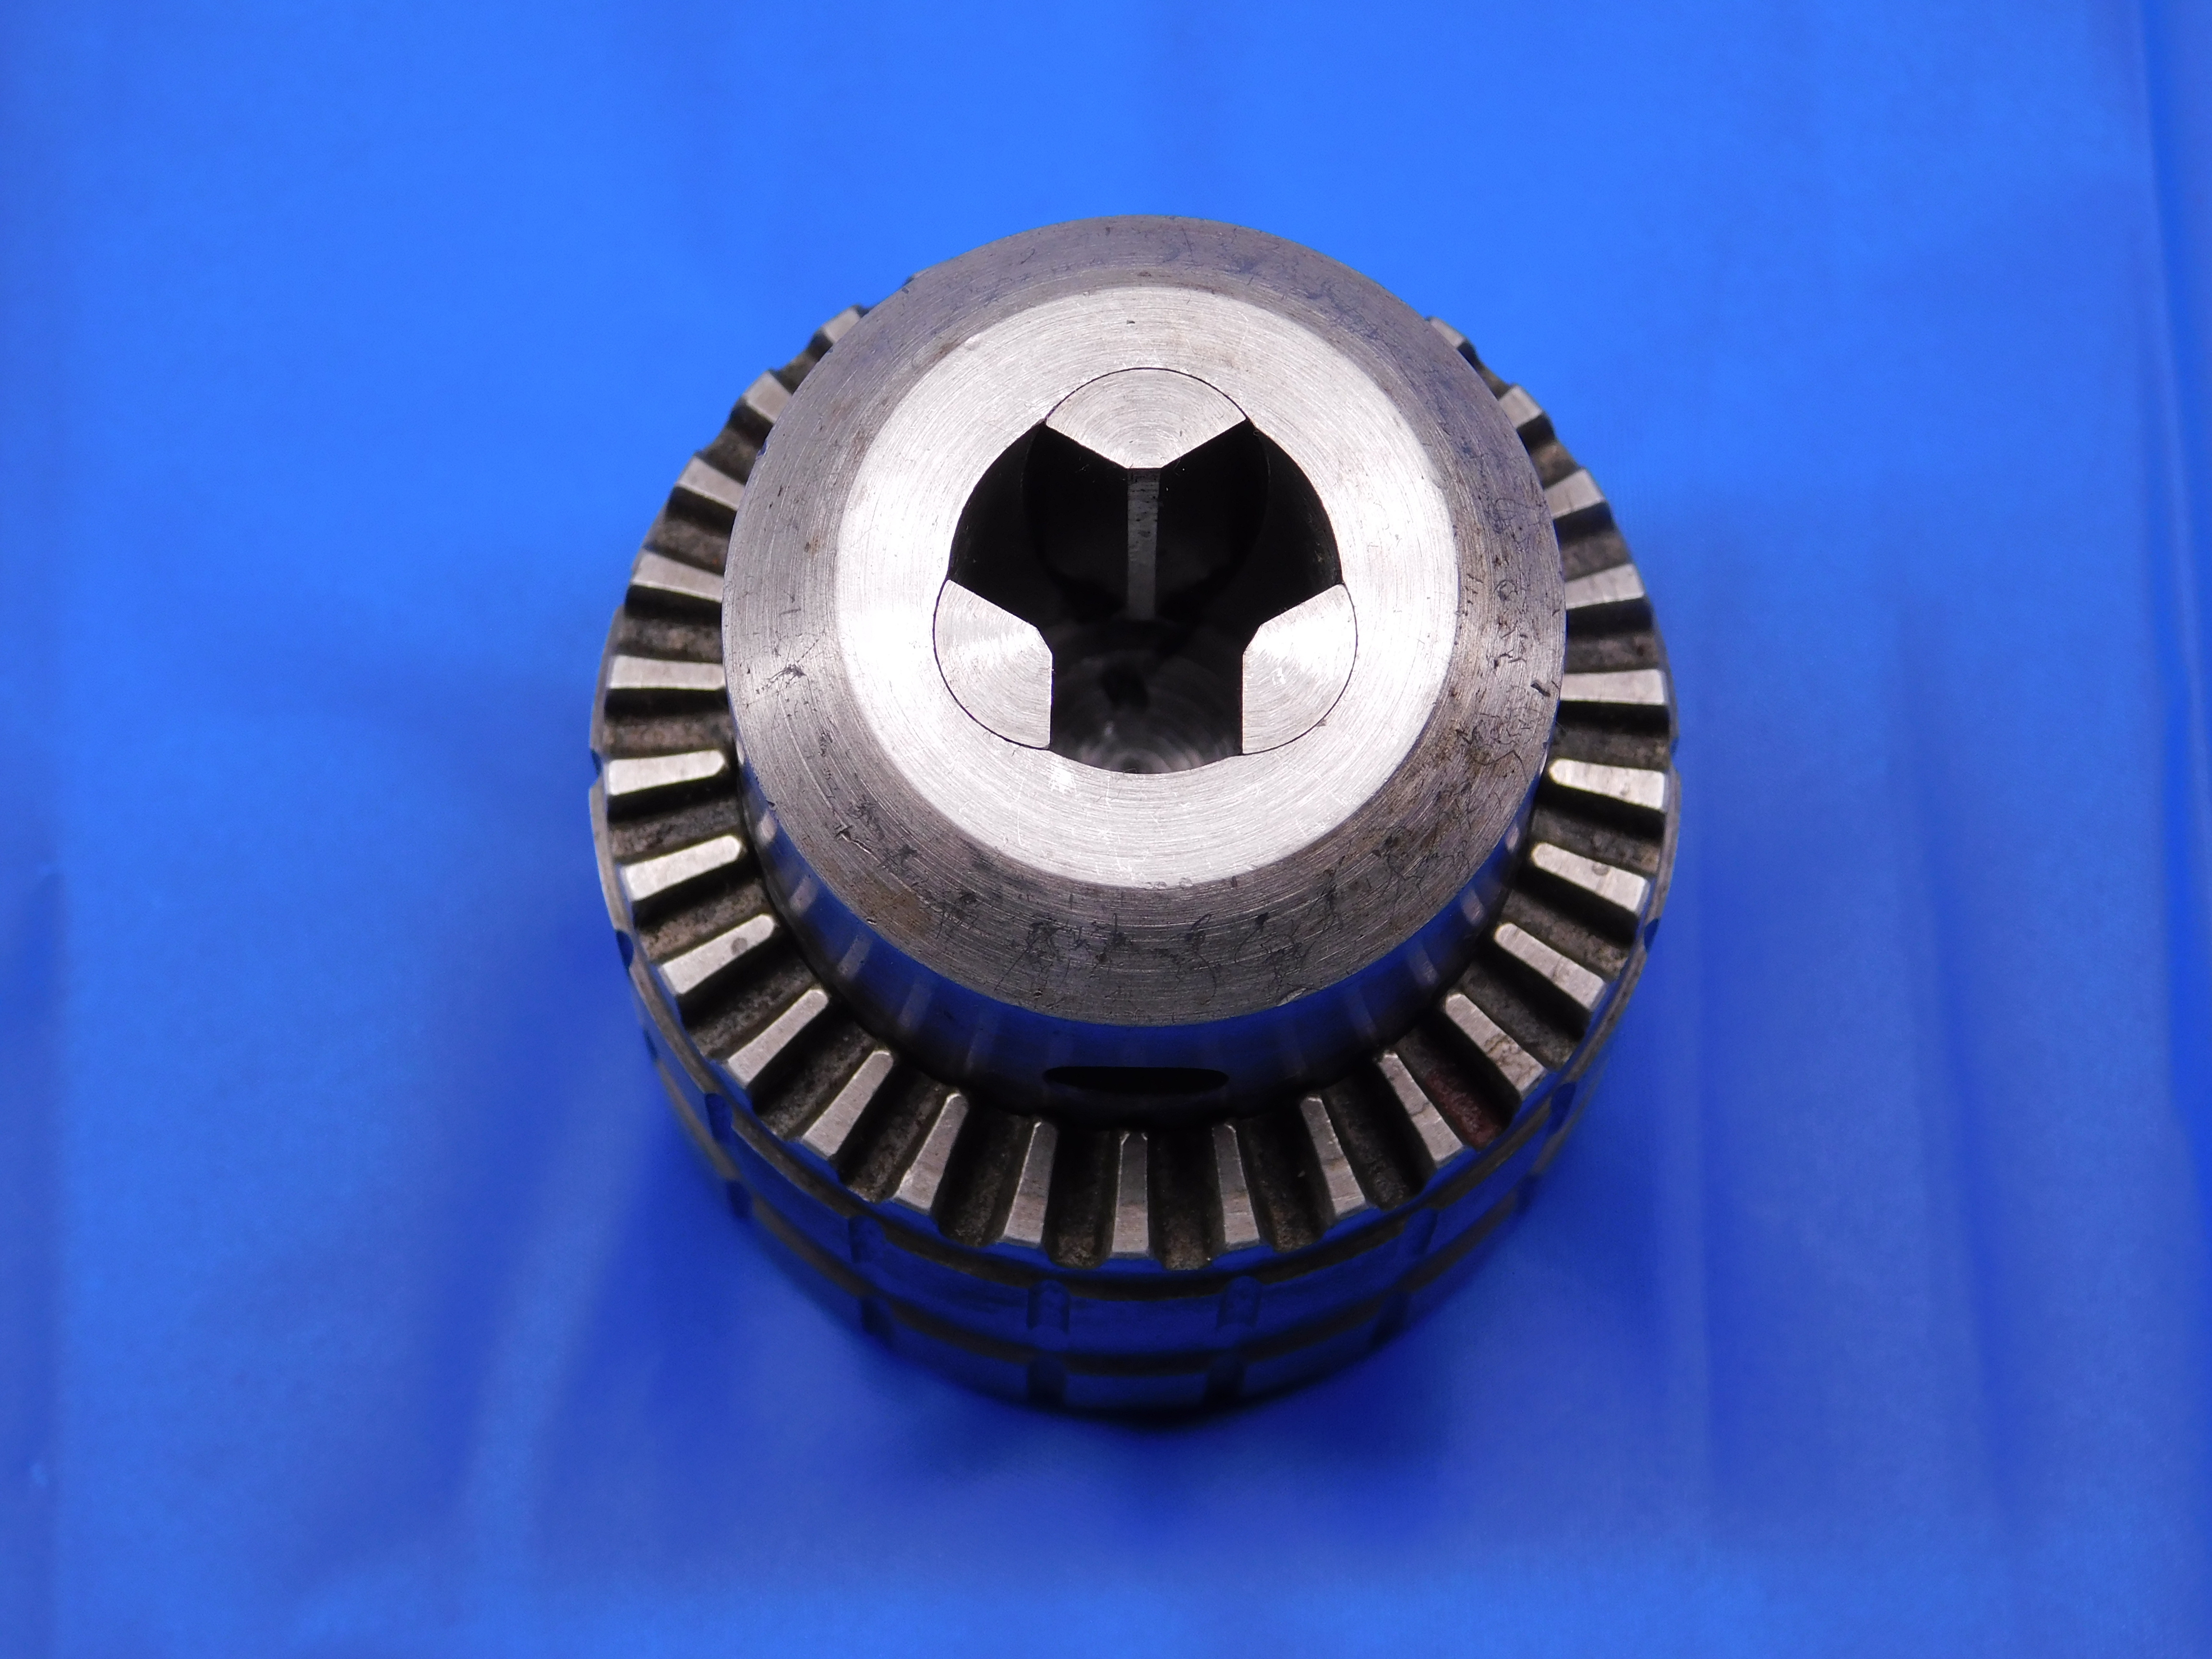
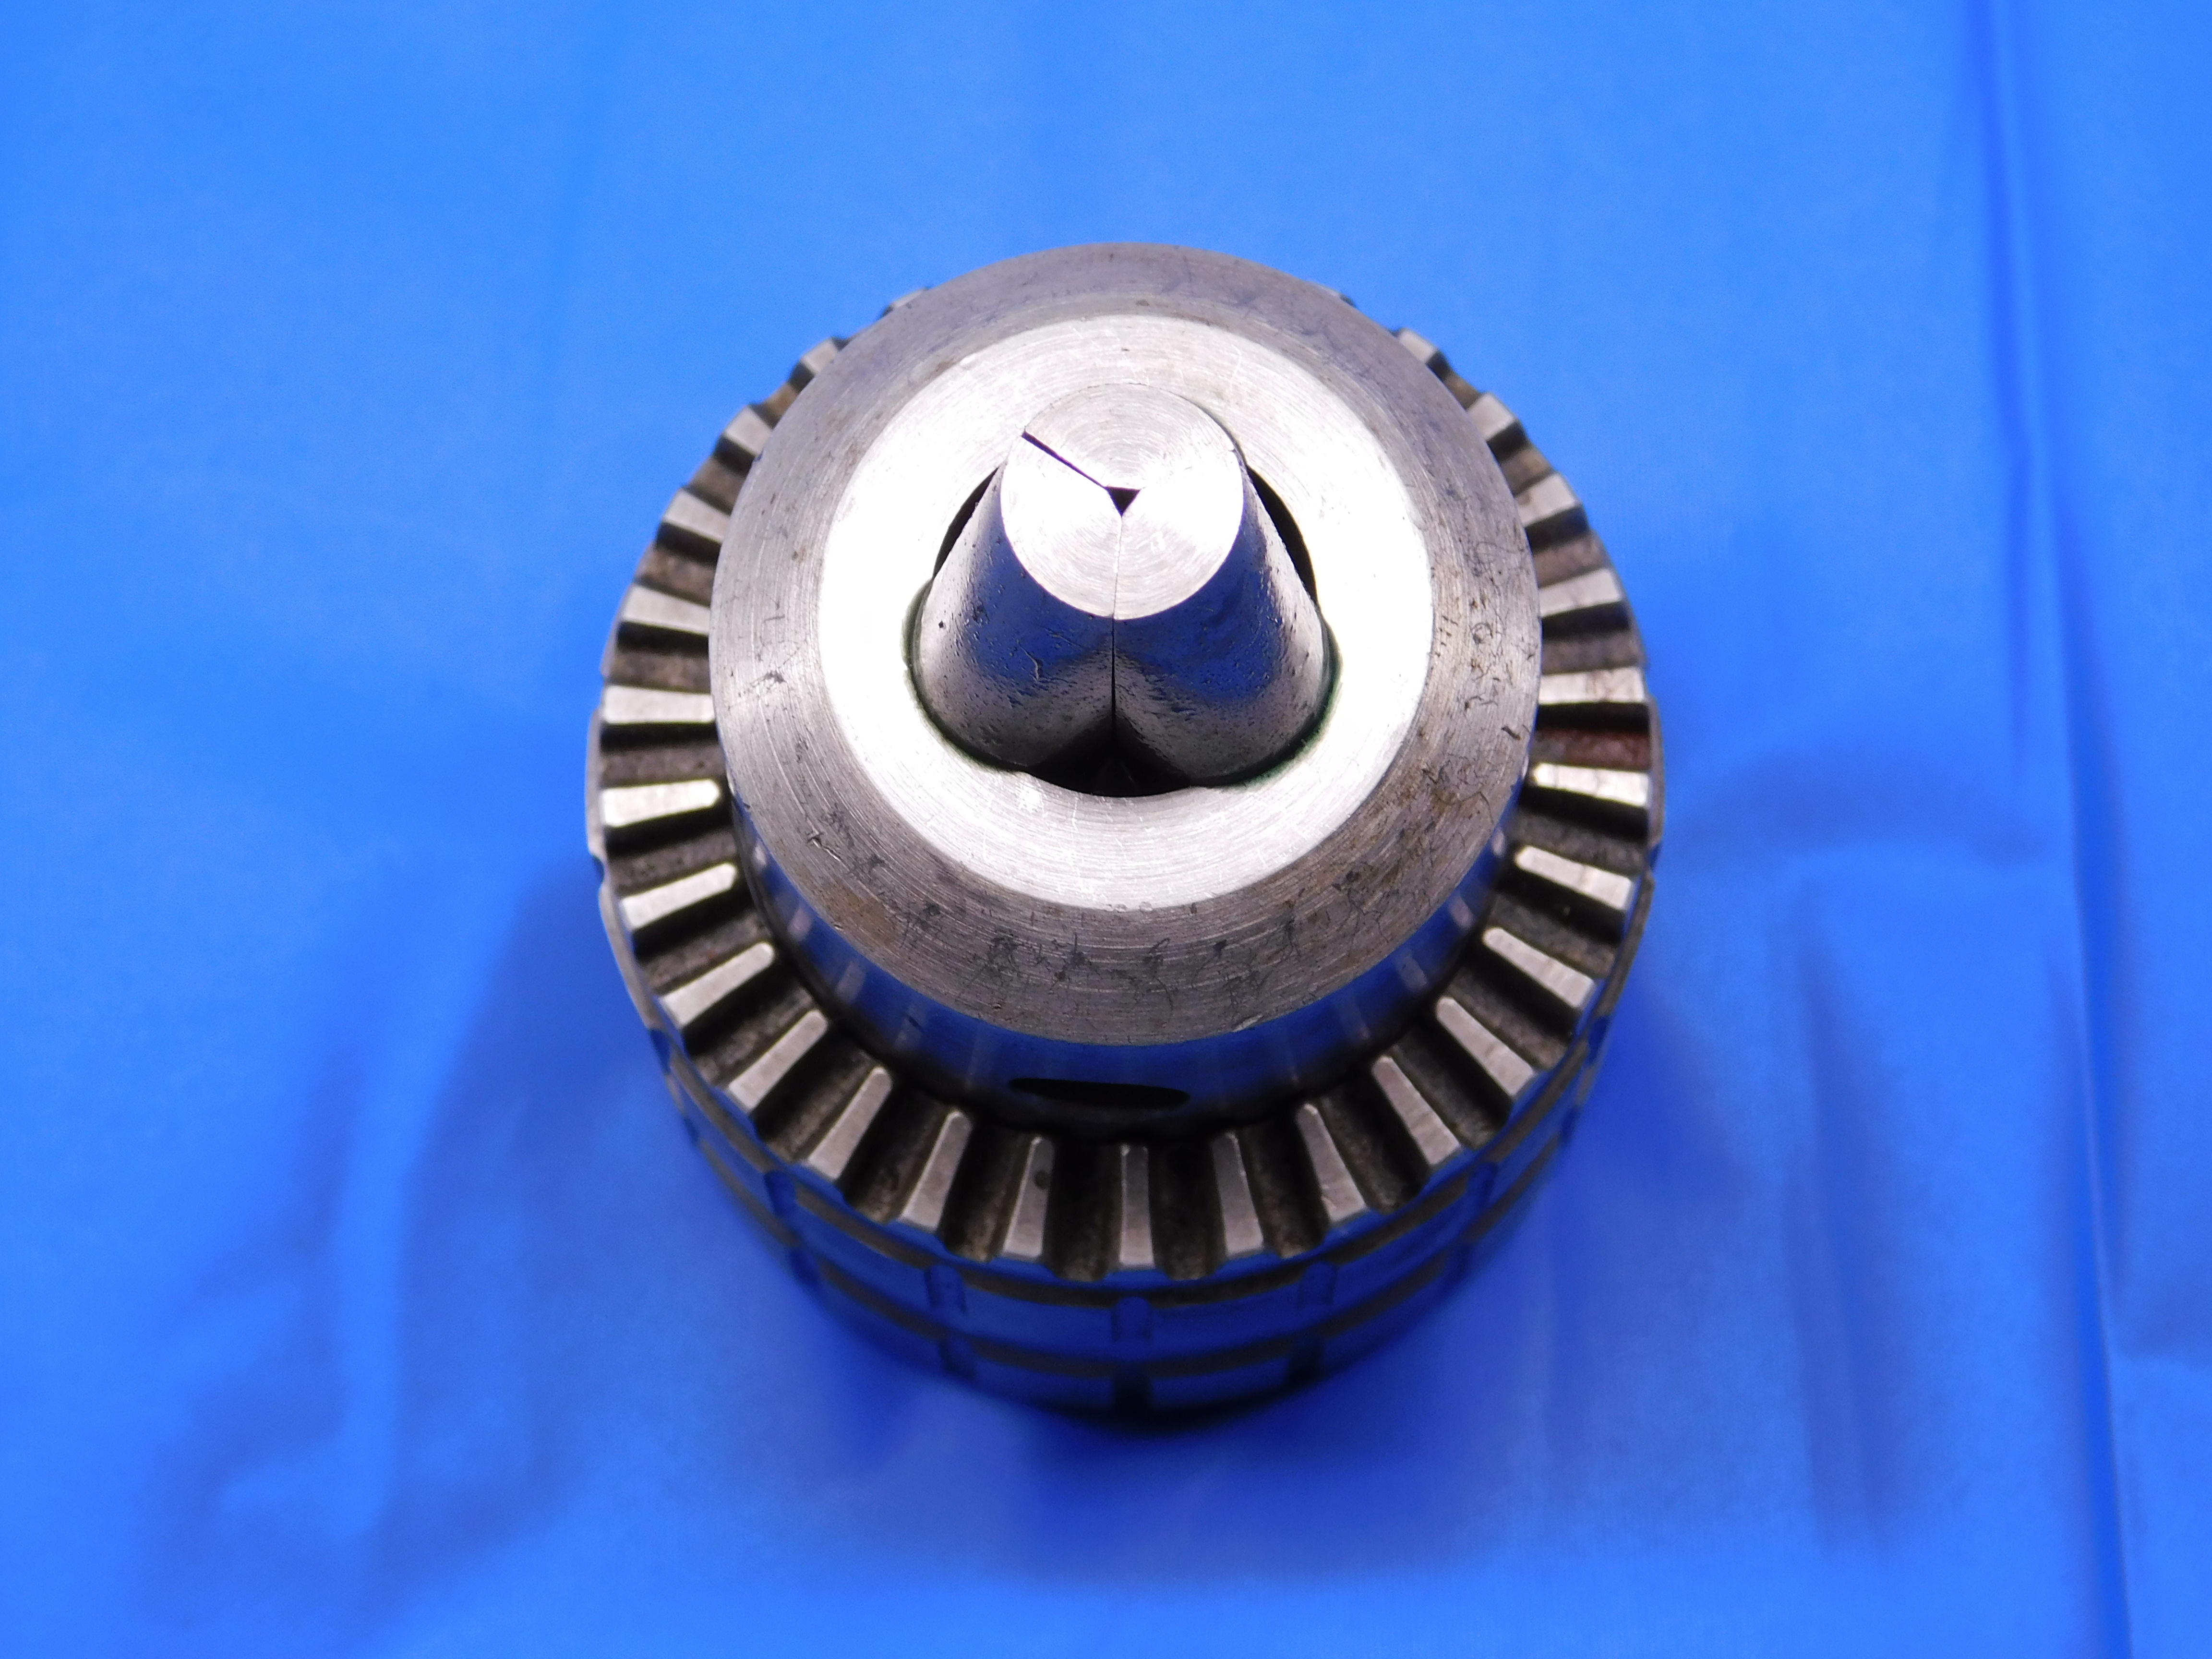
Using a drill chuck key:
Jaw damage / modifications
Damage:
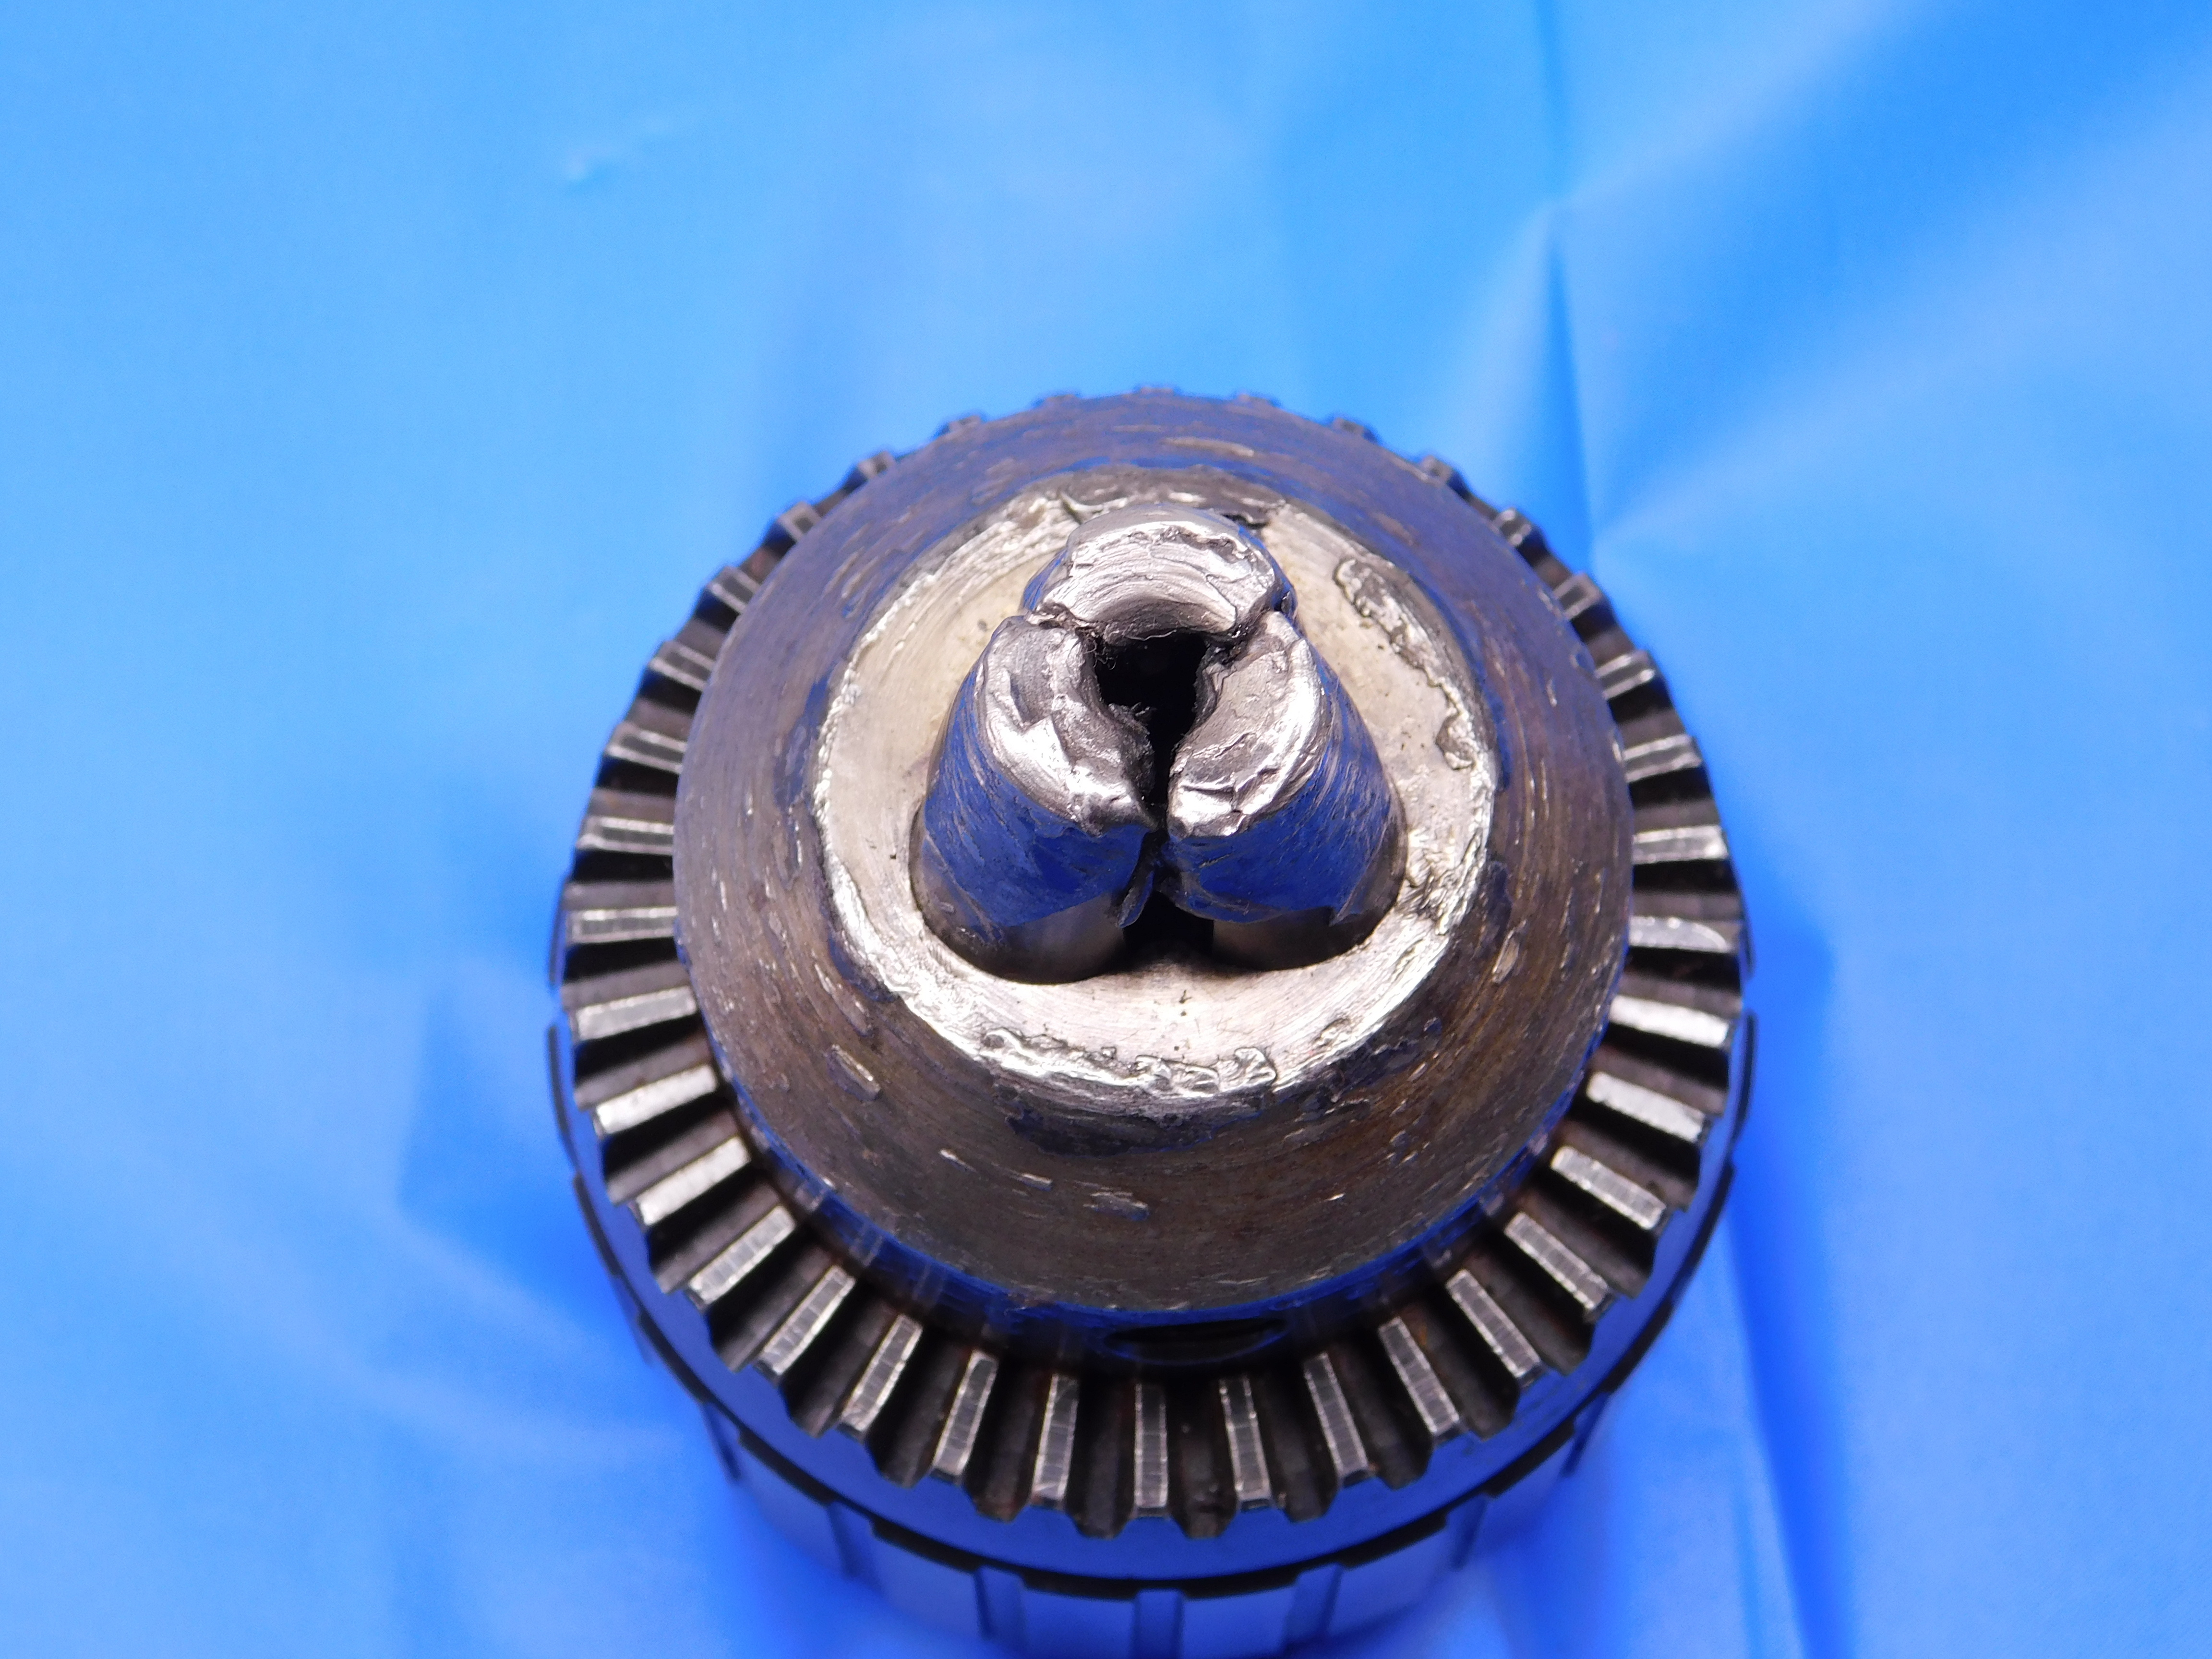
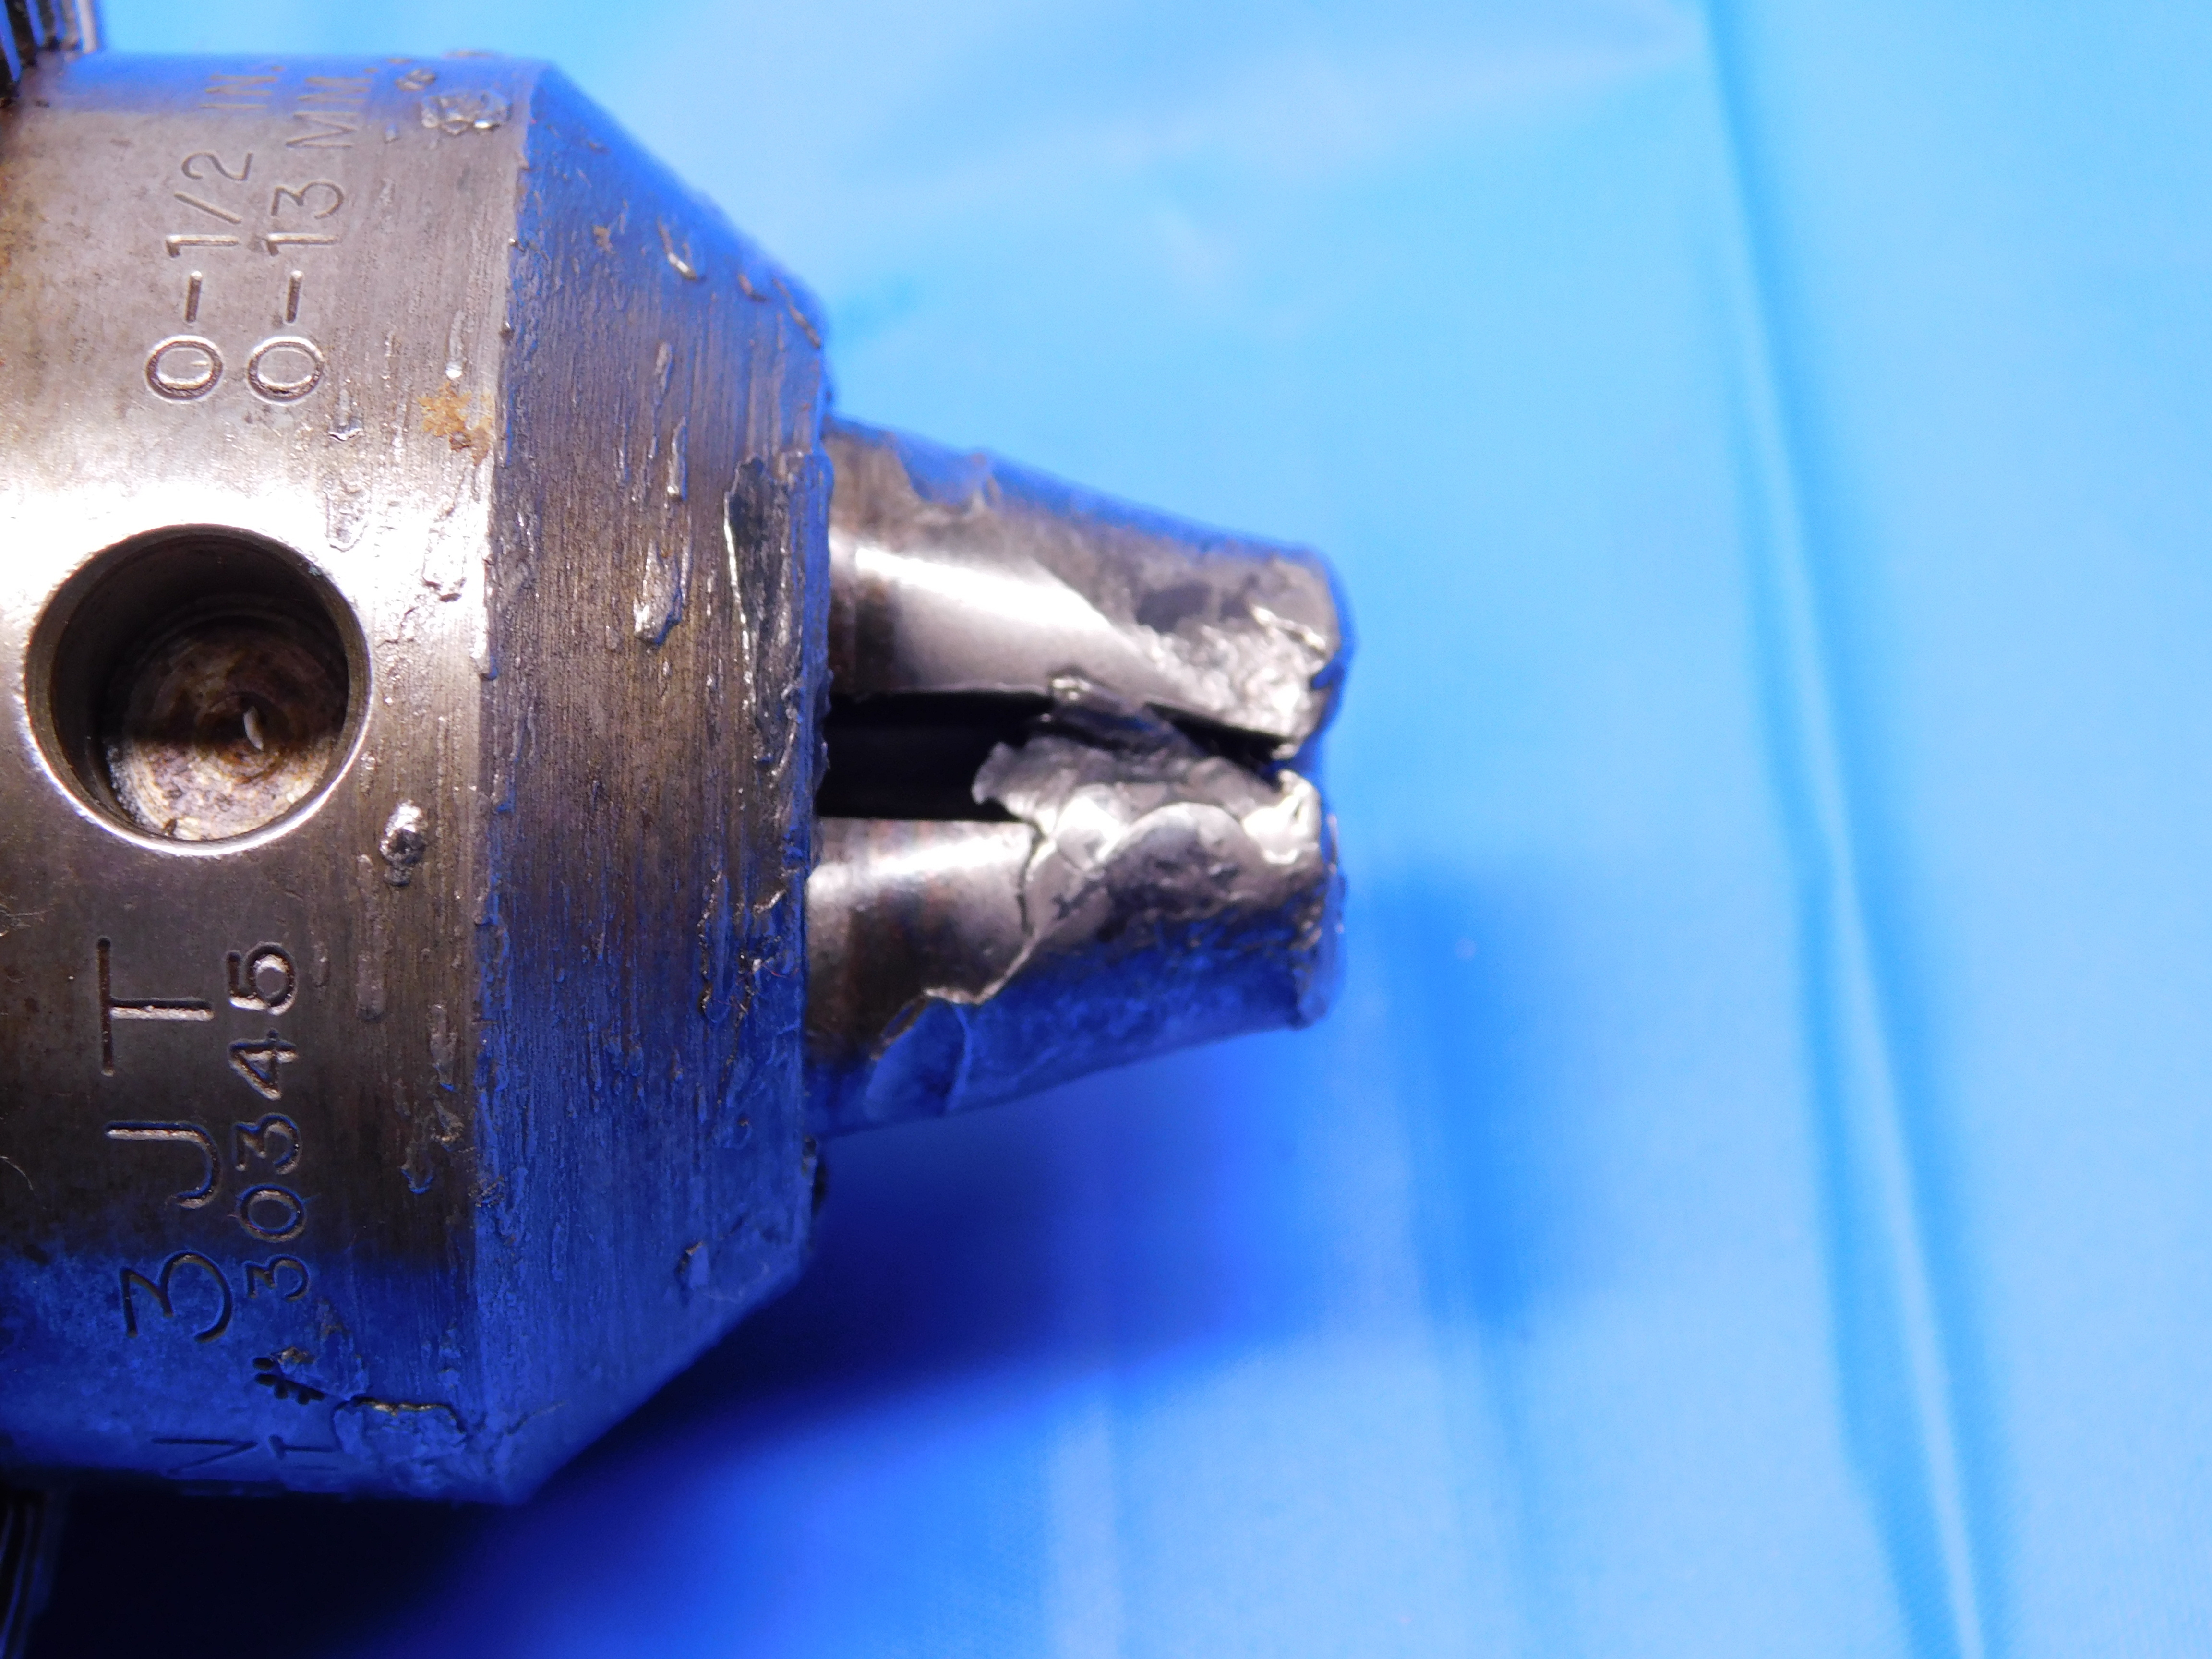
Minor chips / wear on the jaws will typically not impact the use of a drill chuck (but should always be pointed out in pictures), but major damage that prevents the chuck from holding a tool properly will disqualify it from being listed. For example, see the drill chuck pictured below which has metal friction-welded to the jaws, preventing it from clamping properly around a tool. Drill chucks in this condition should be set aside to be scrapped or put in a "for parts" lot.
Modification:
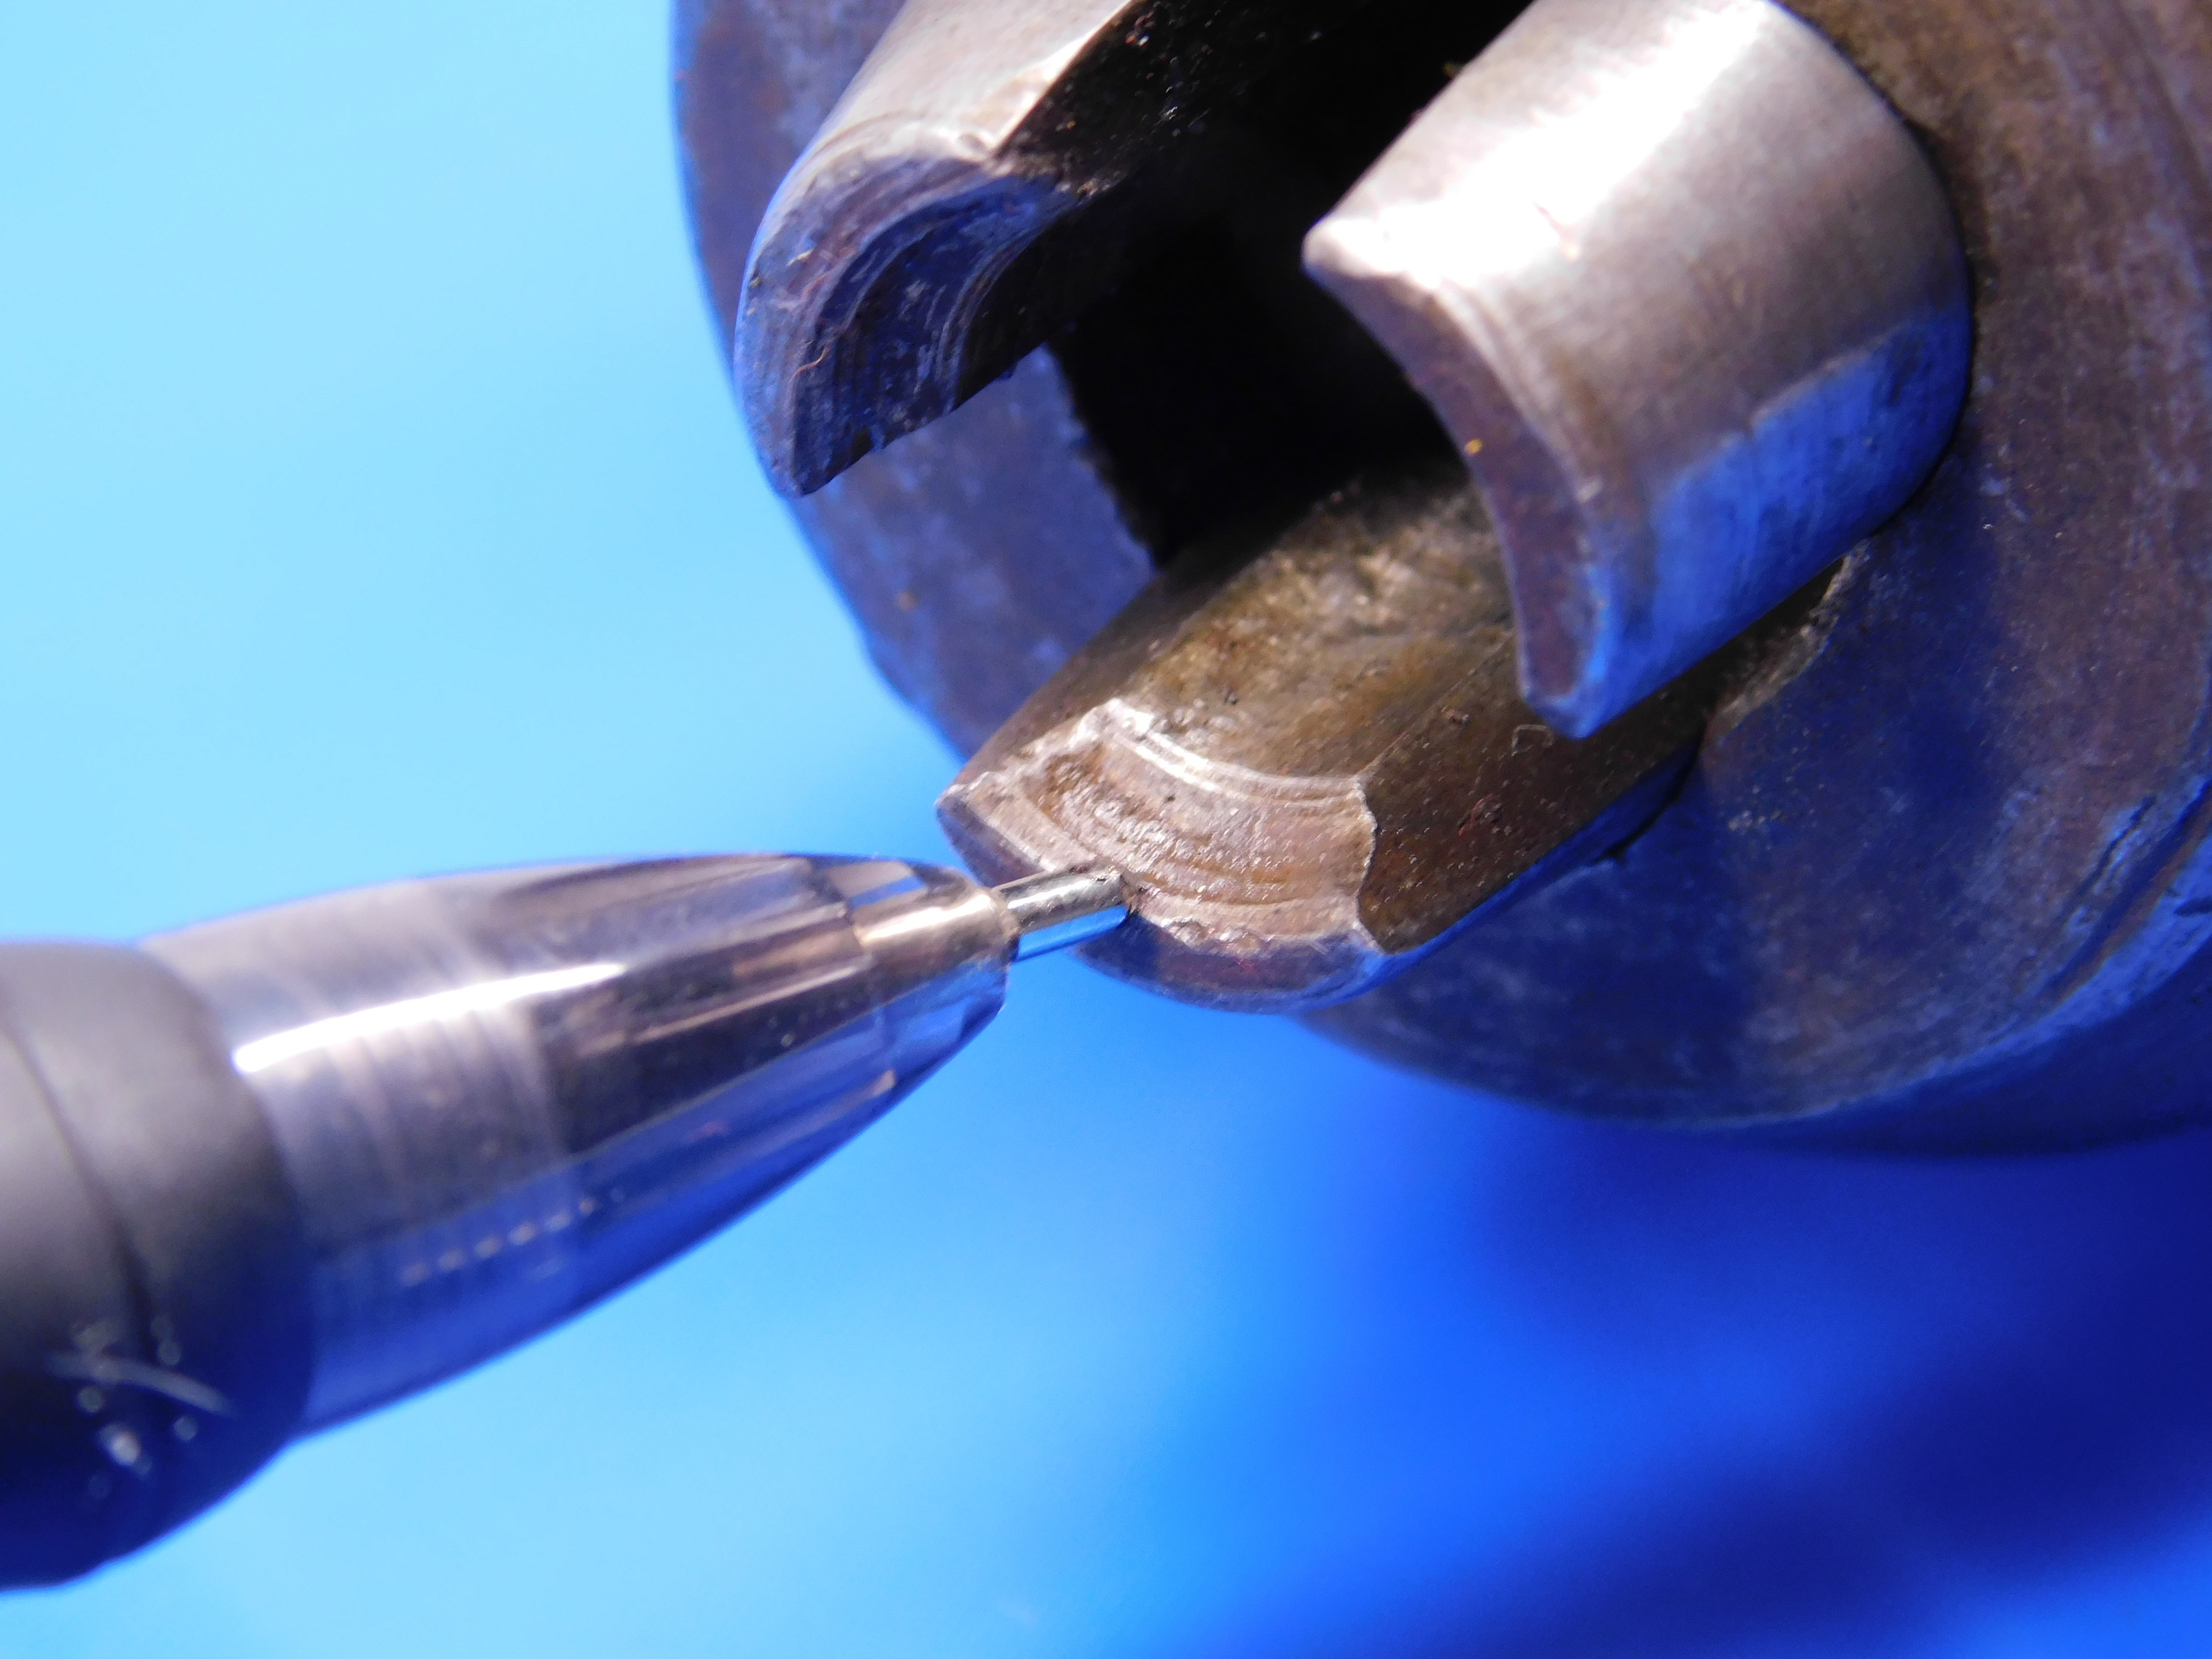
You should also be on the lookout for chuck jaws that have been modified, since this can affect the holding capacity. Refer to the example below: this drill chuck is labeled with a minimum capacity of 1/8" (.125), however the jaws have been ground down resulting in an actual minimum of a little over 1/4" when the chuck is fully closed. This can be measured using calipers as shown below. In this case, we can still list this drill chuck (assuming that it is otherwise in good condition), but it must be listed with the actual measured capacity, and an explanation in the "Additional Specifications" section of why the listed capacity does not match the labeling.
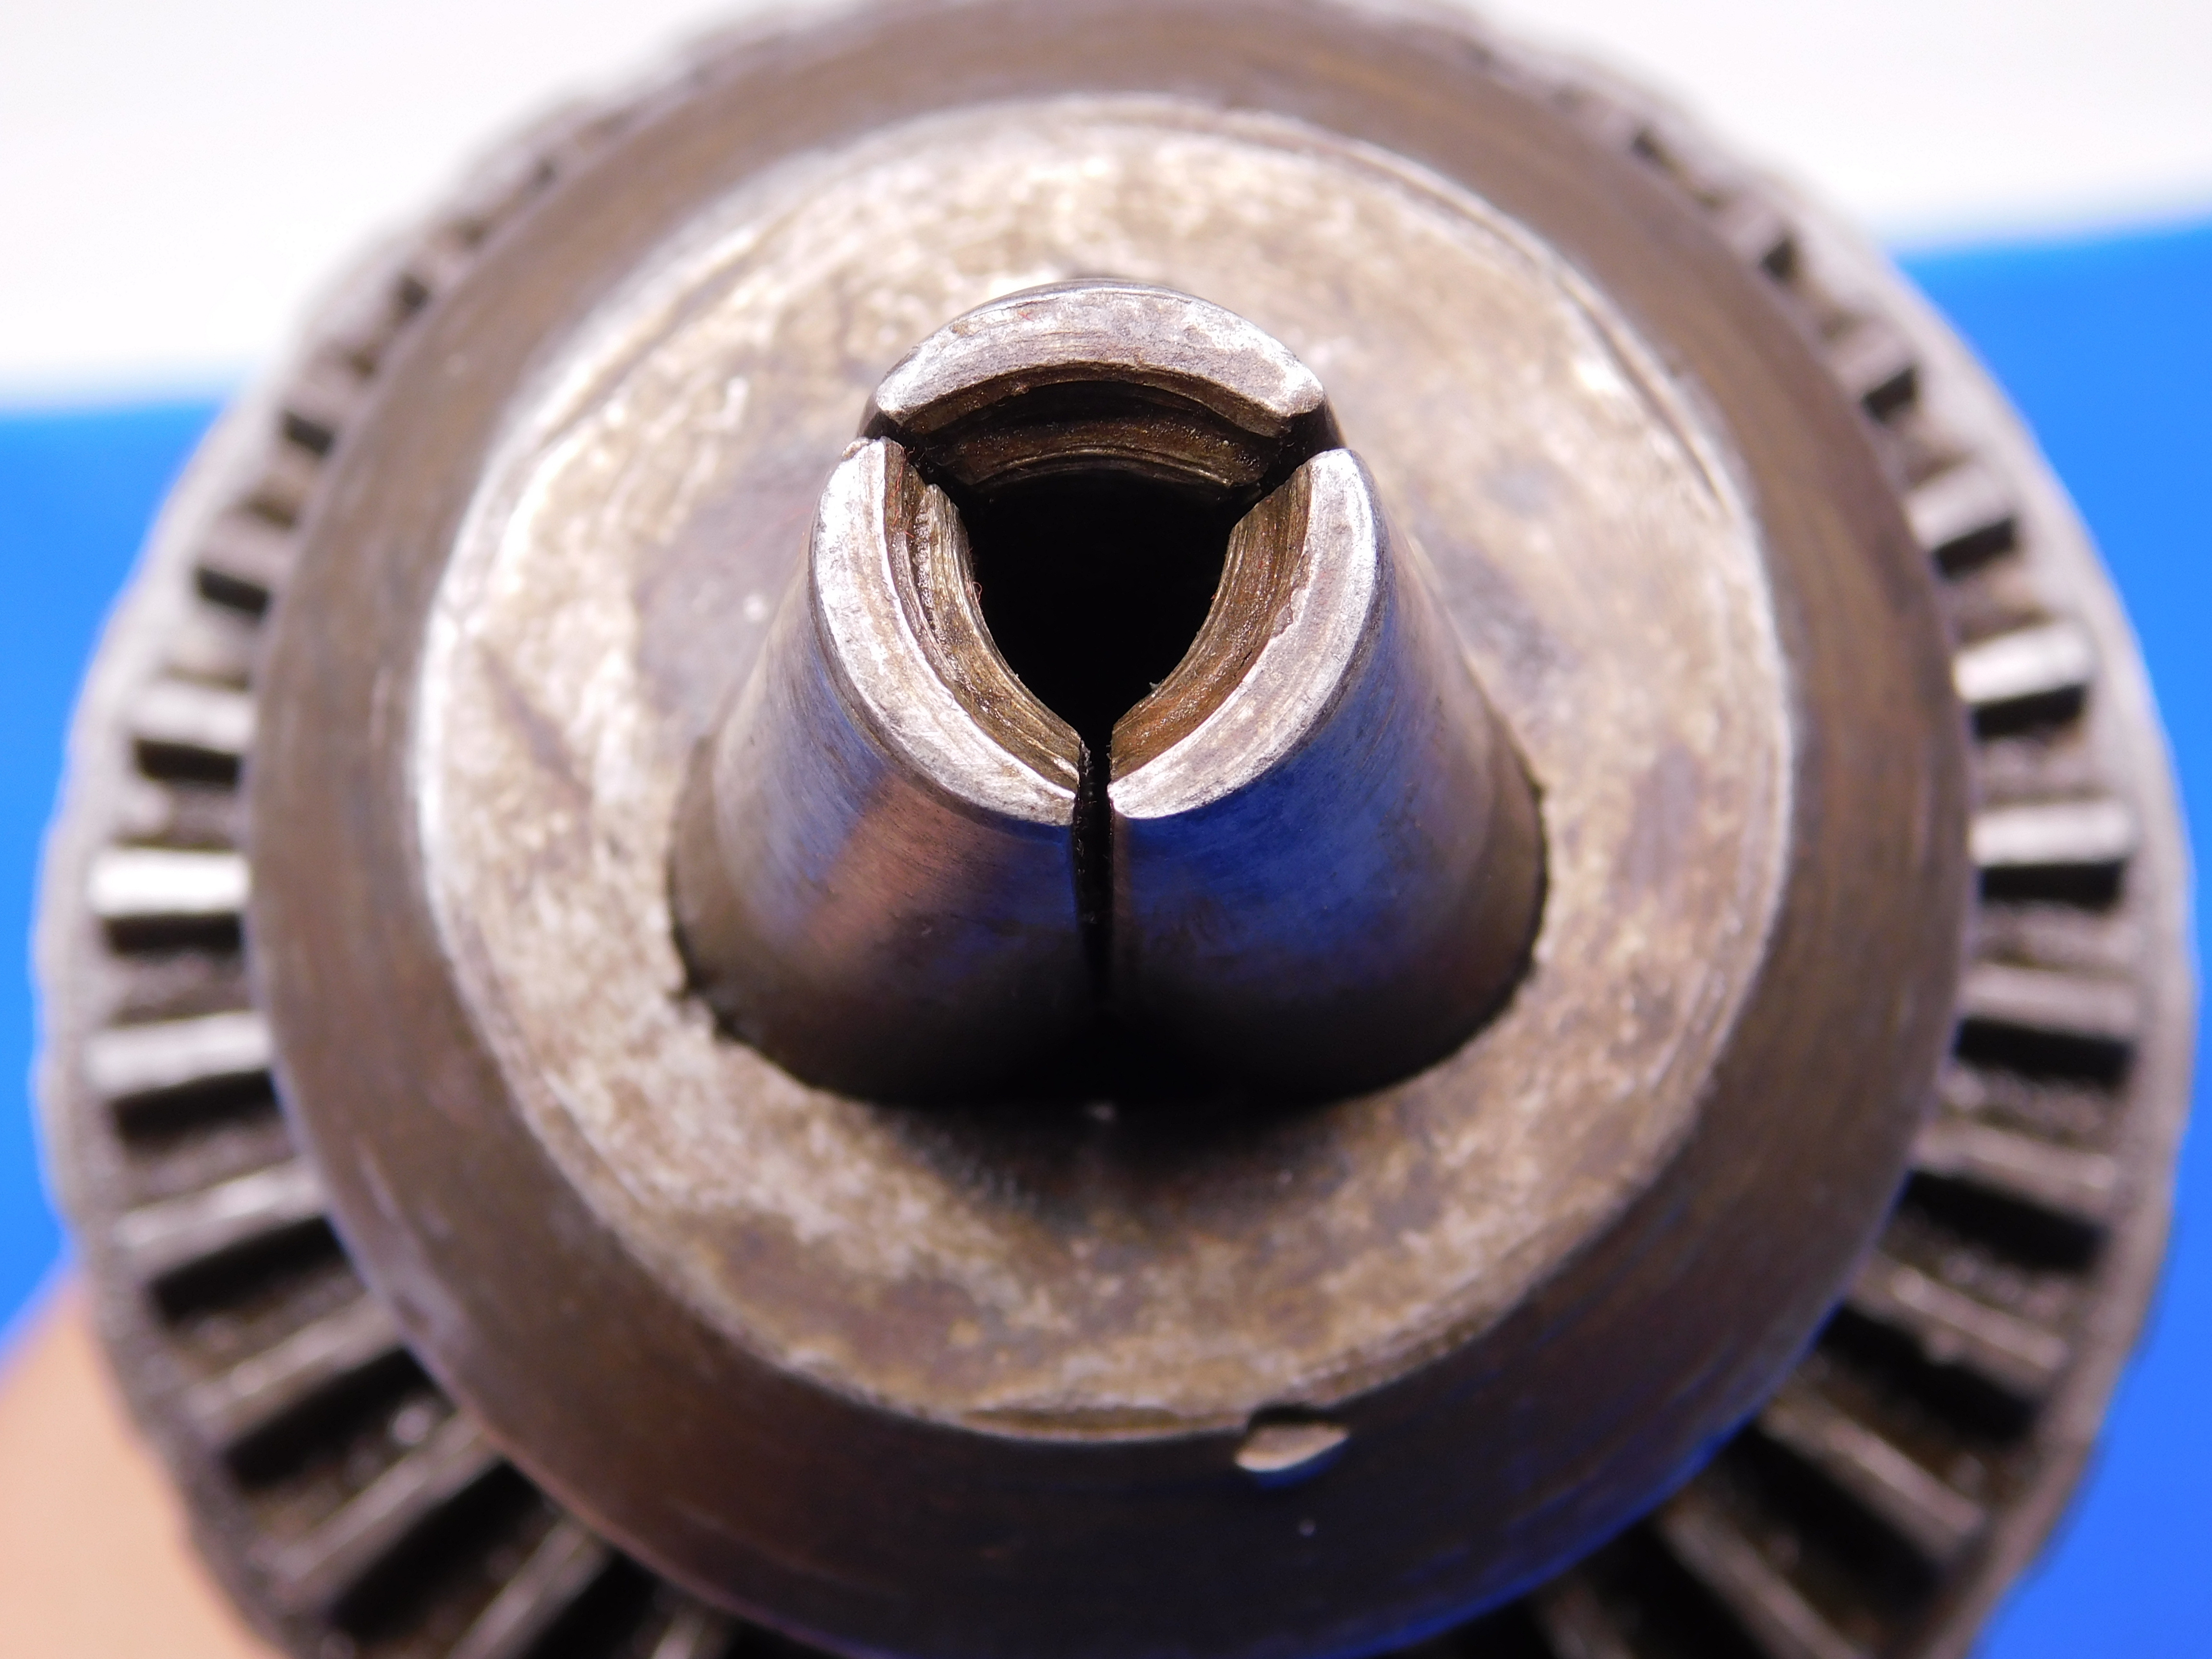
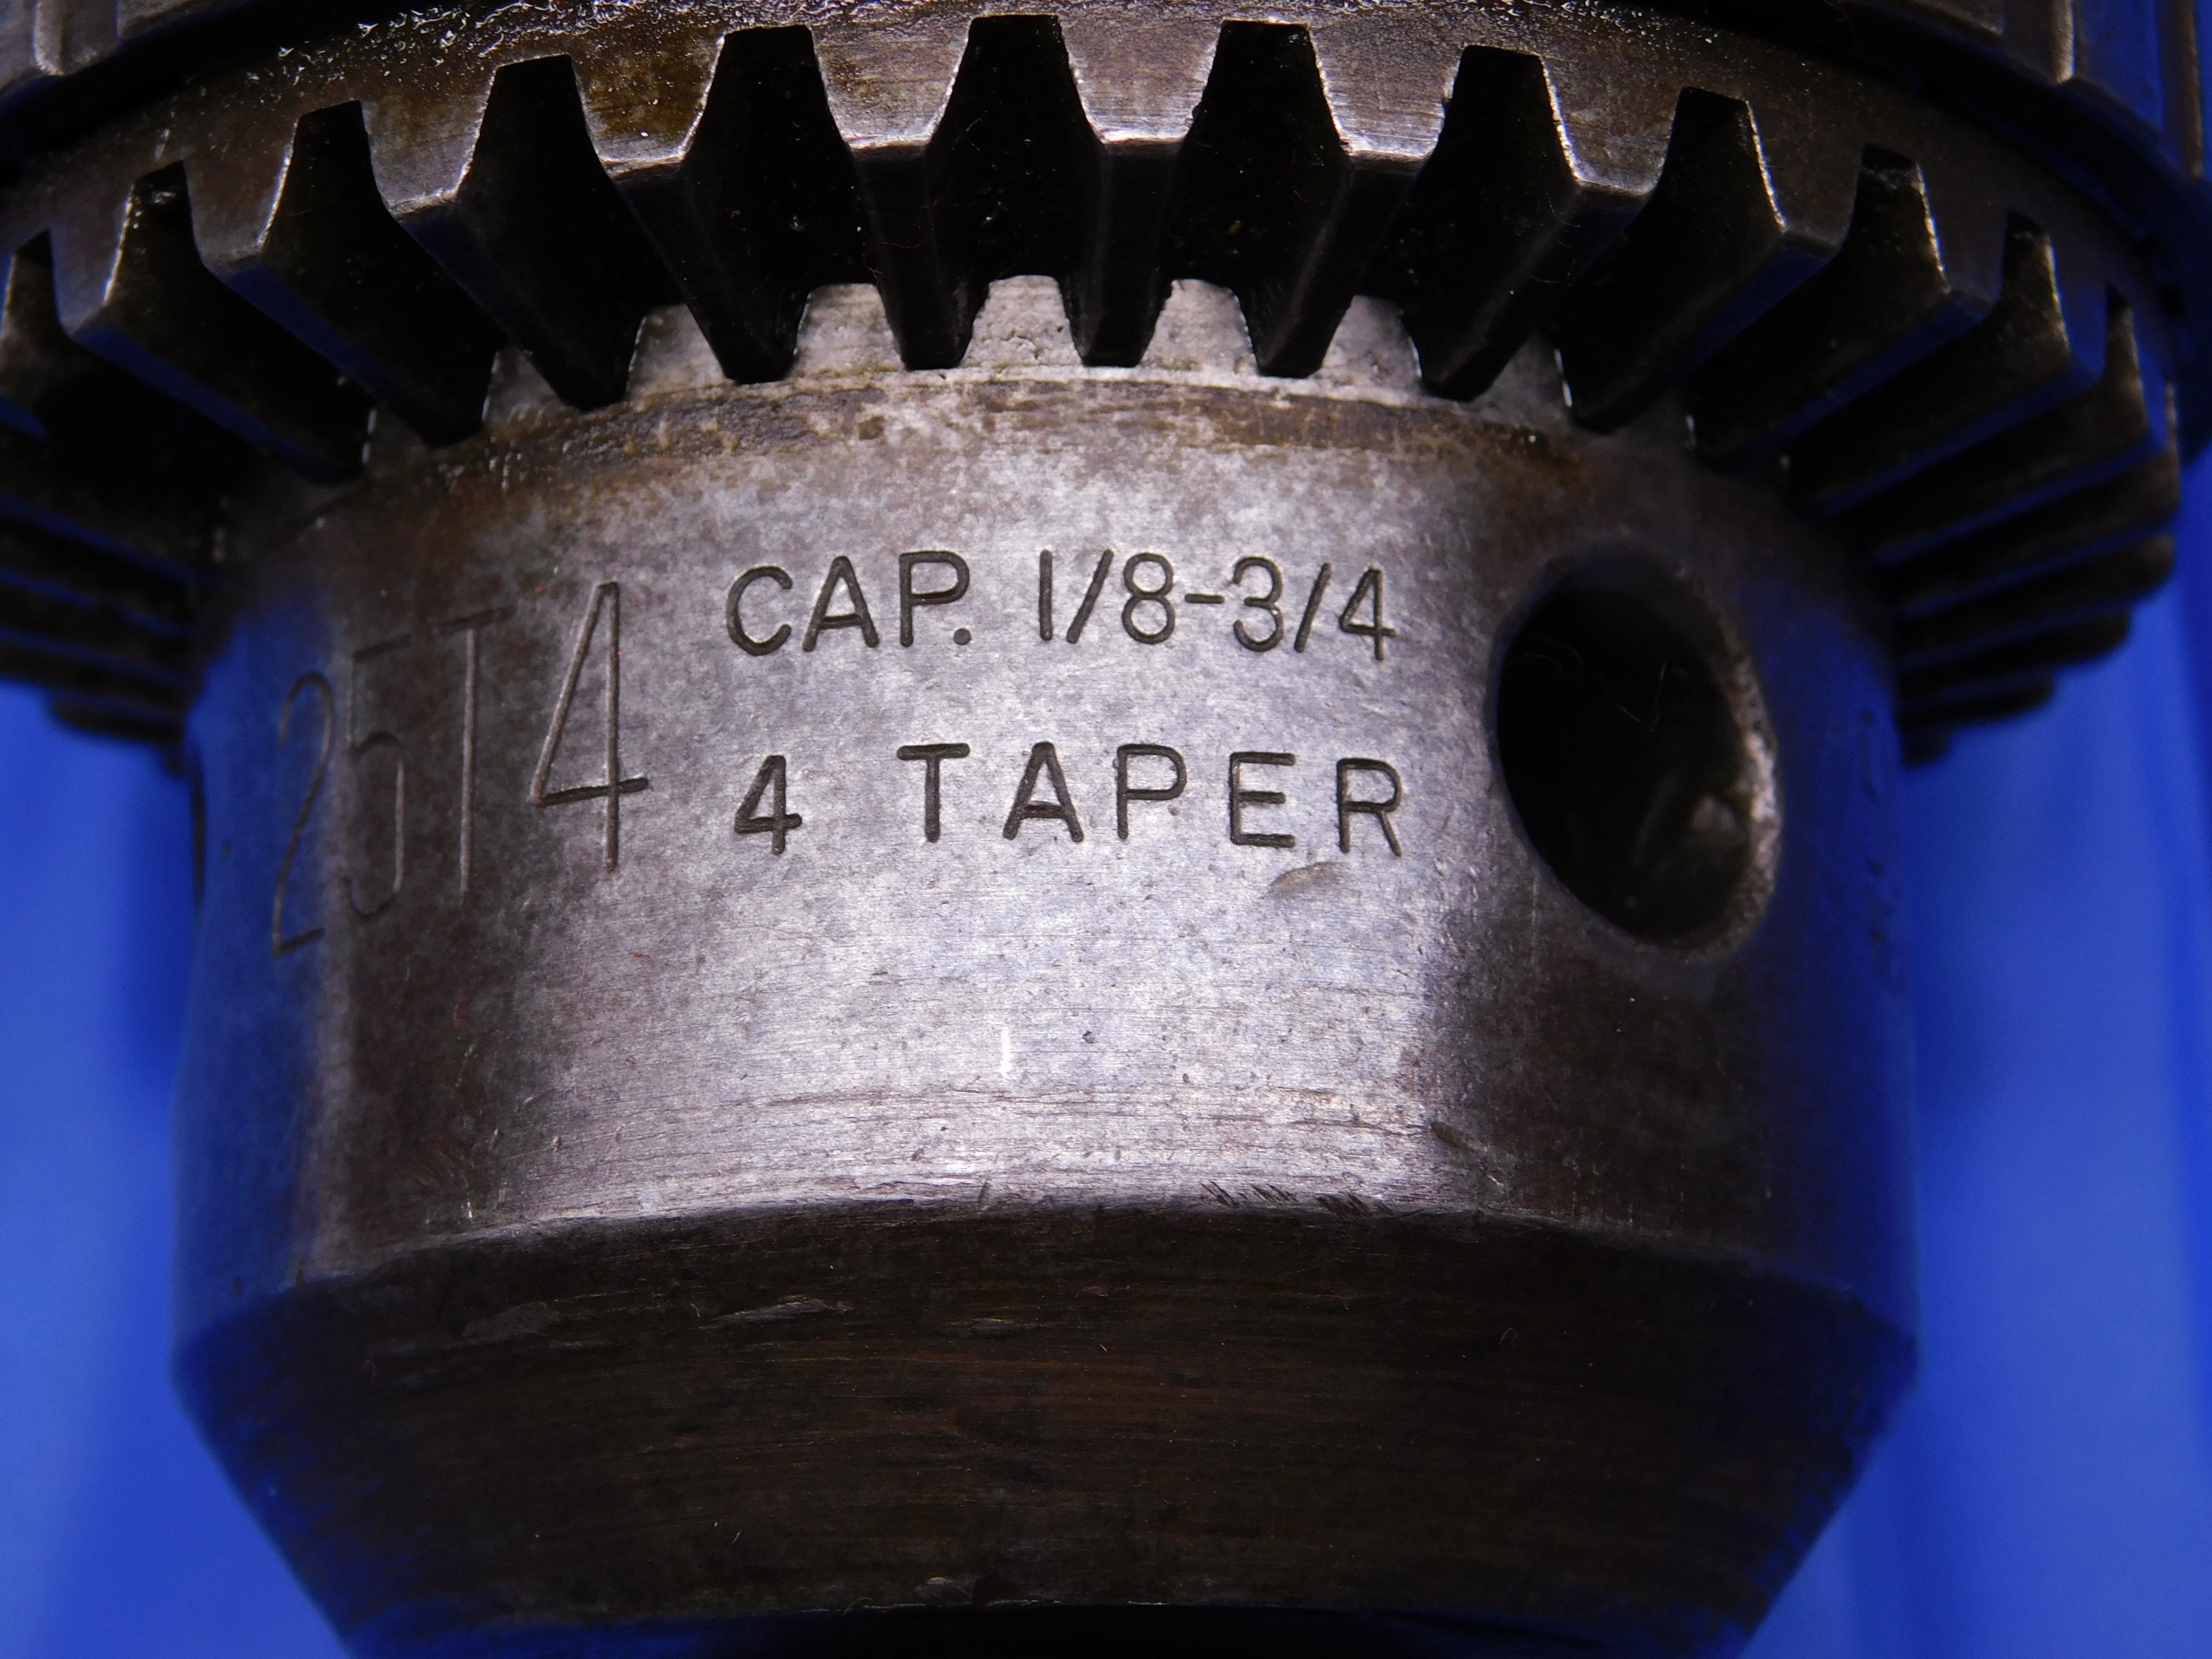
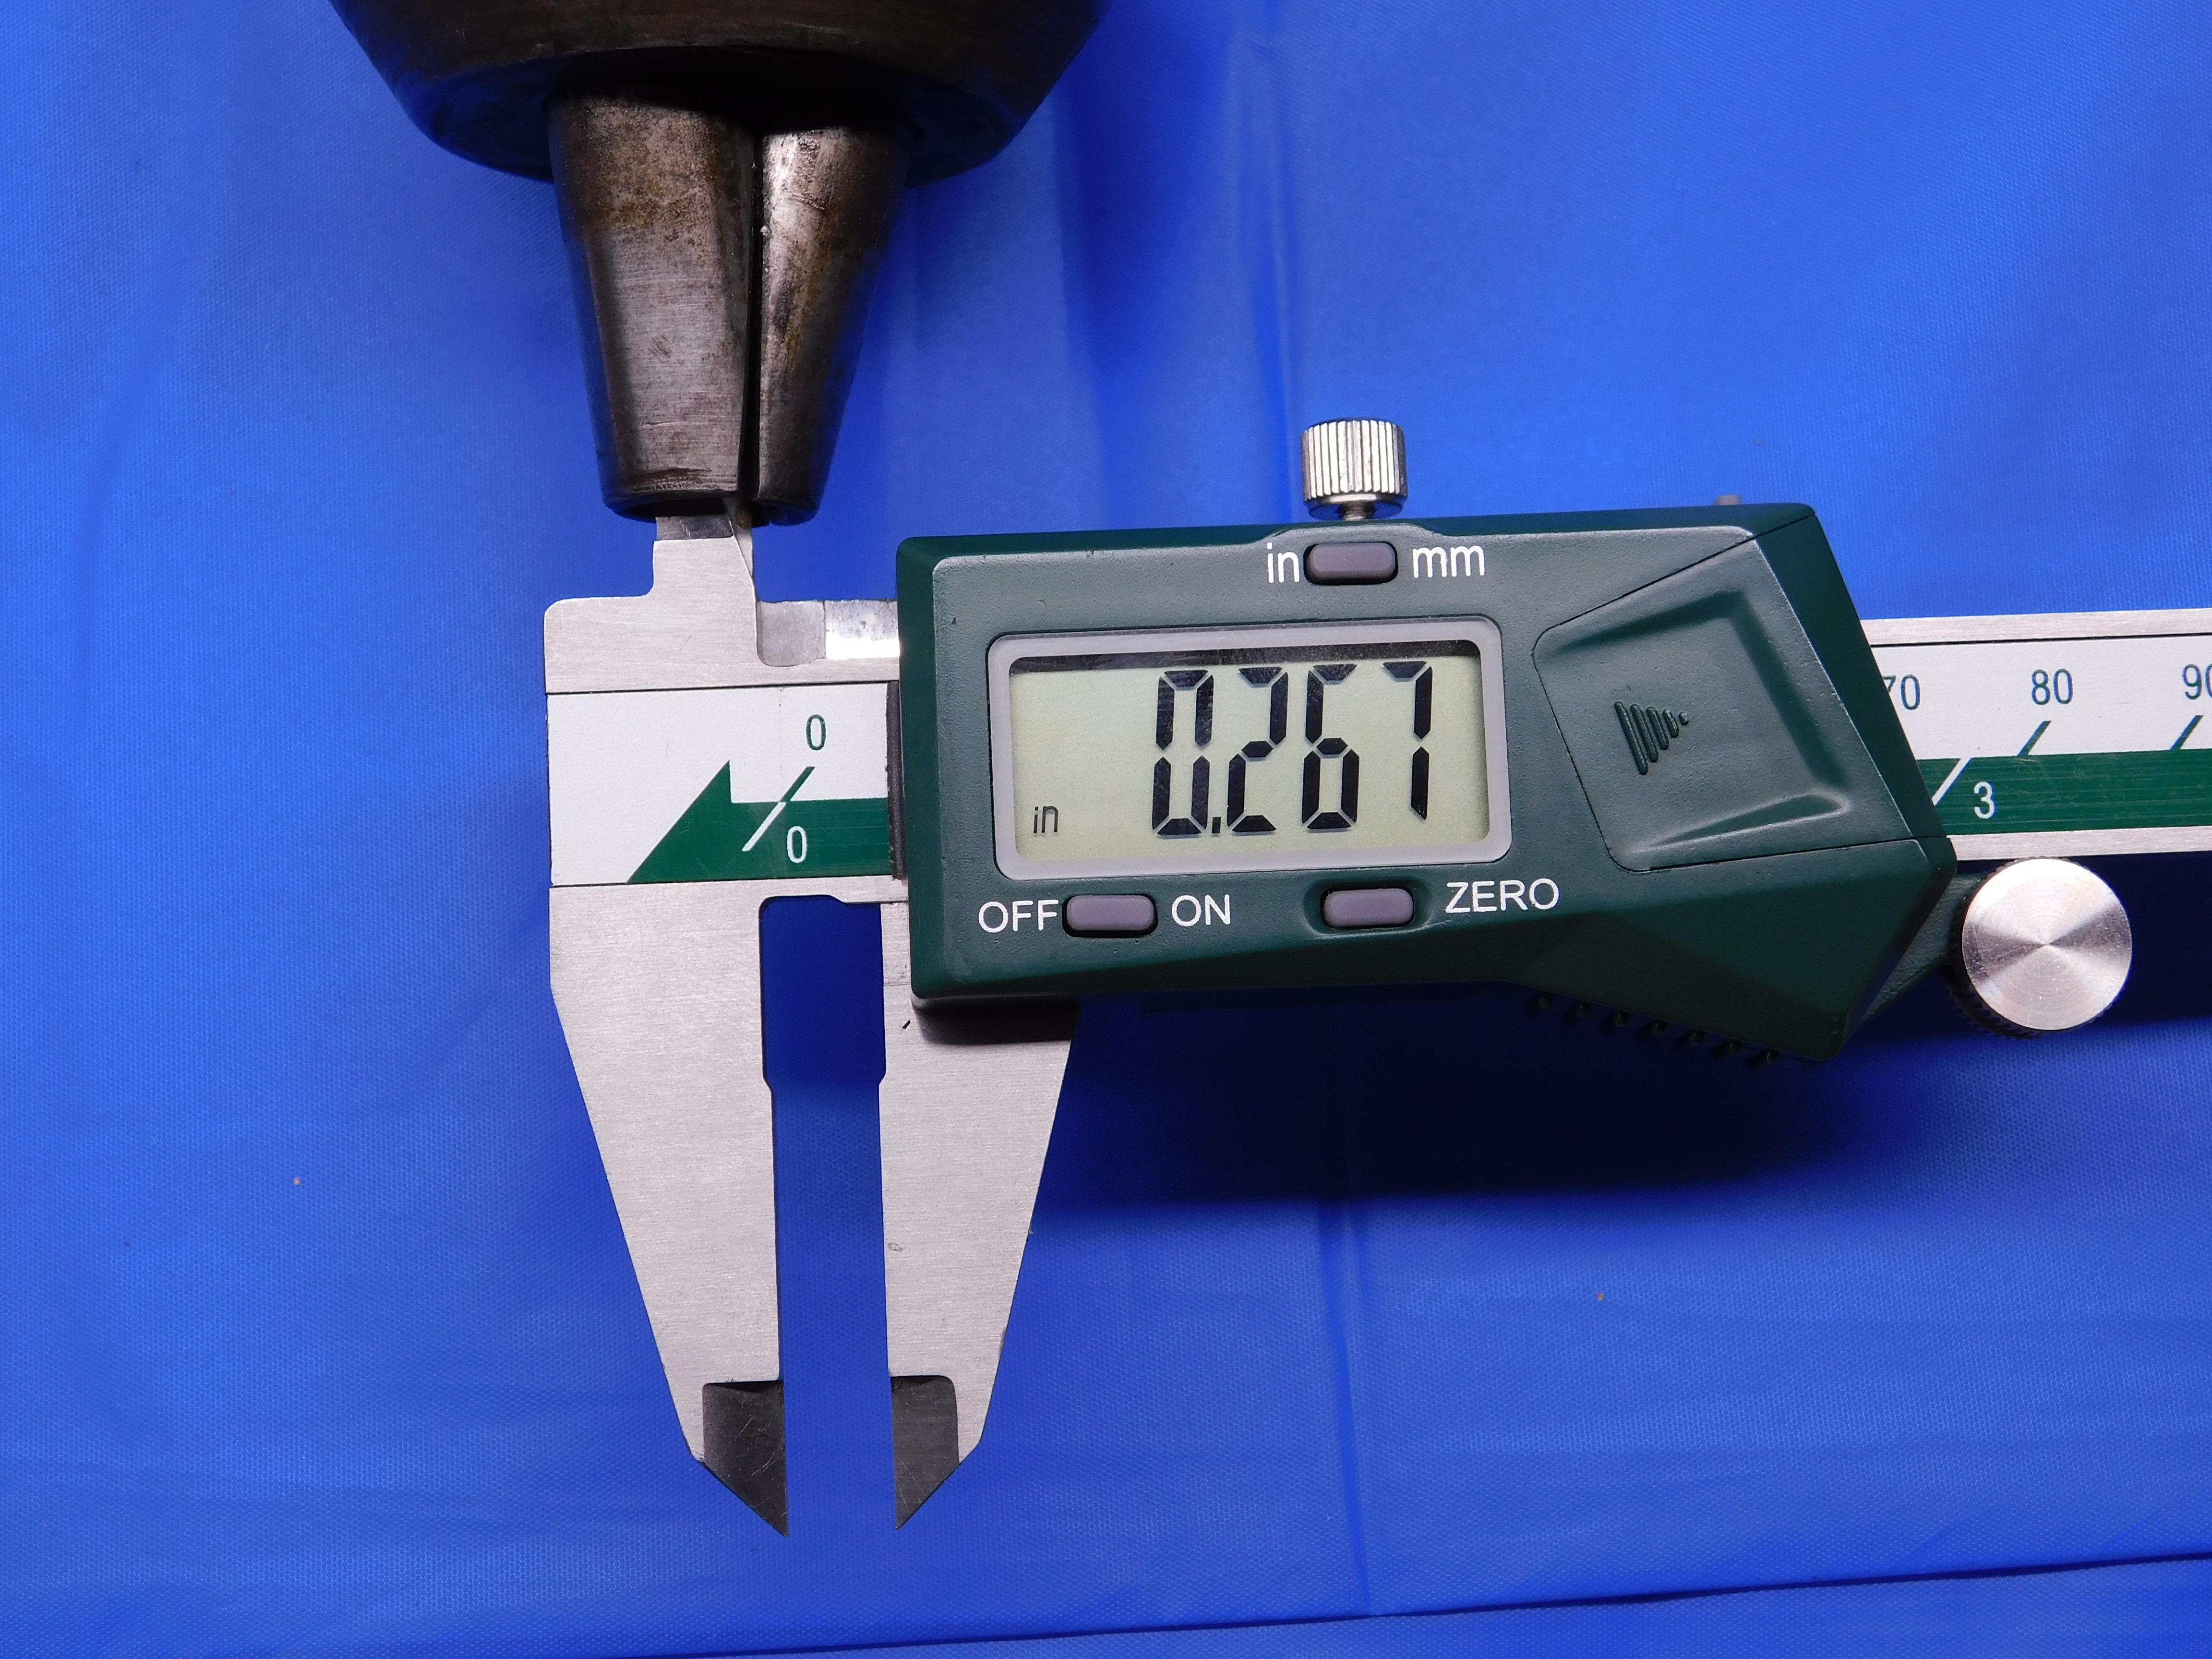
Gear teeth damage
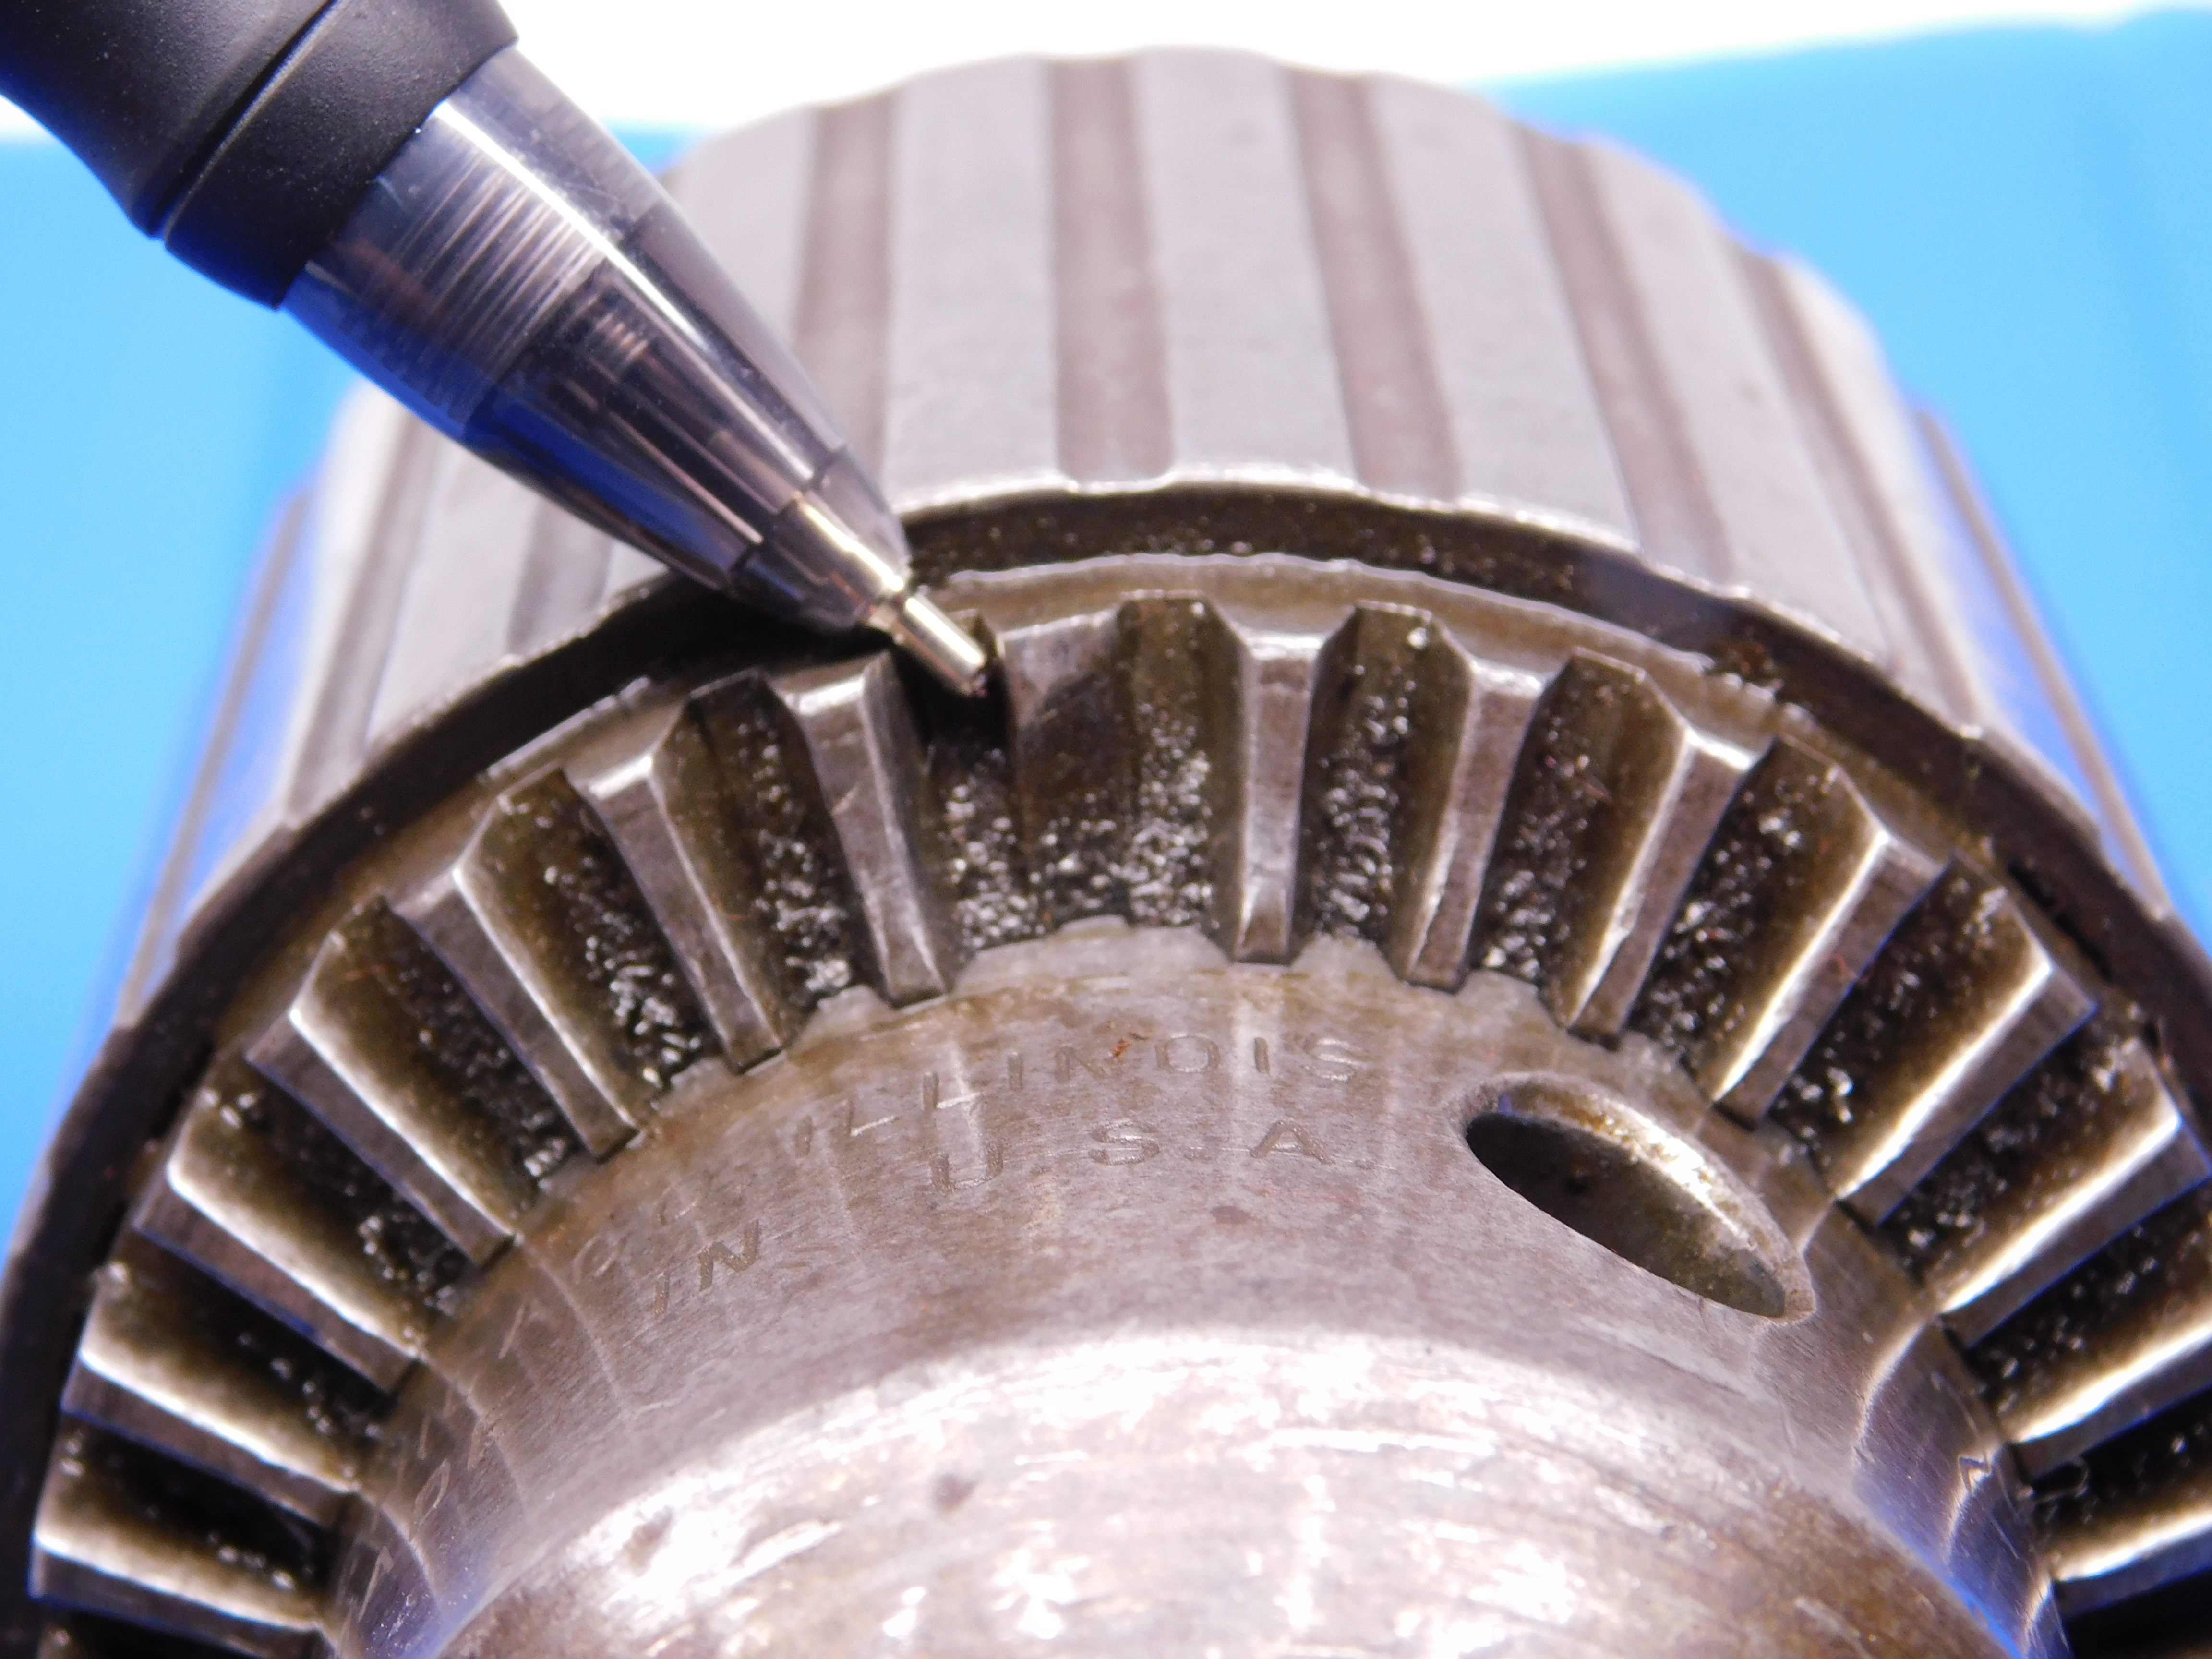
Always check the gear teeth for chips / damage. As long as the chuck can still be fully opened / closed properly with a key, we can still list it - but you must clearly show the damage in your pictures, and be sure to also explain in the "Special Condition" section that the chuck still functions properly despite the damage. See below for examples of damaged teeth:
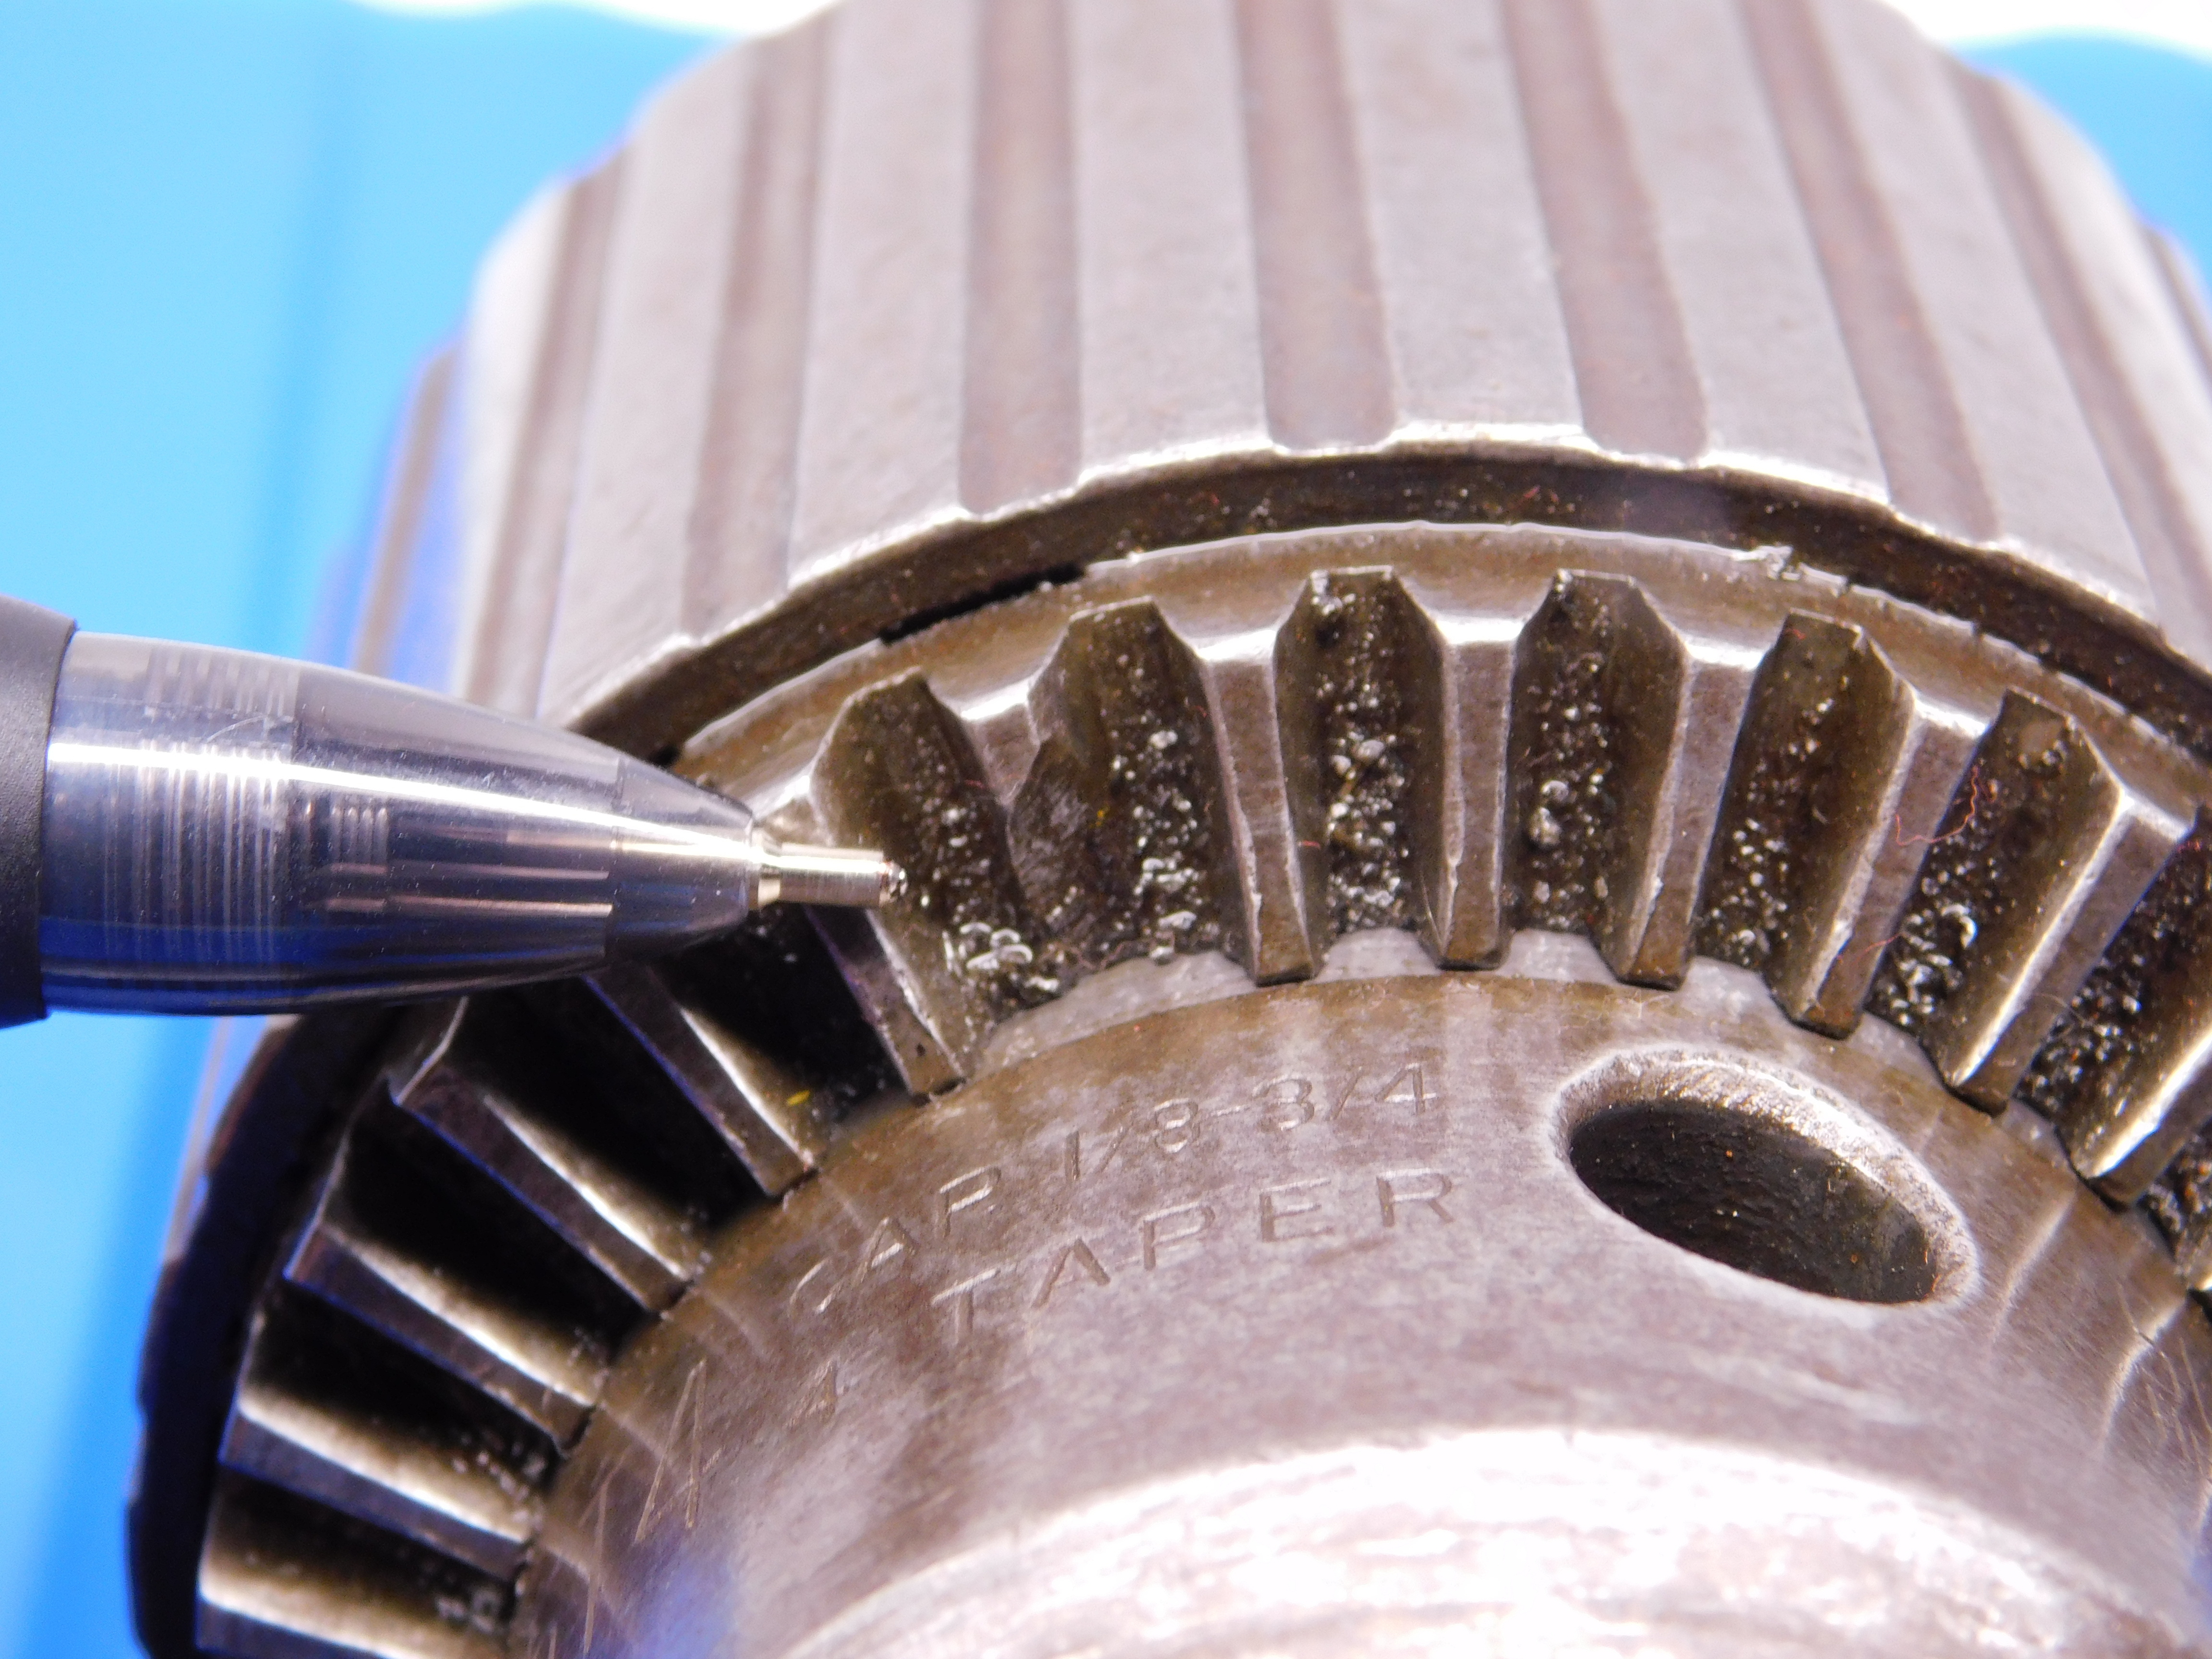
Use WD-40 and a scotch-brite pad to remove any rust or other residue. Wipe down with a dry rag before picturing.
Click here for info on how to upload pictures
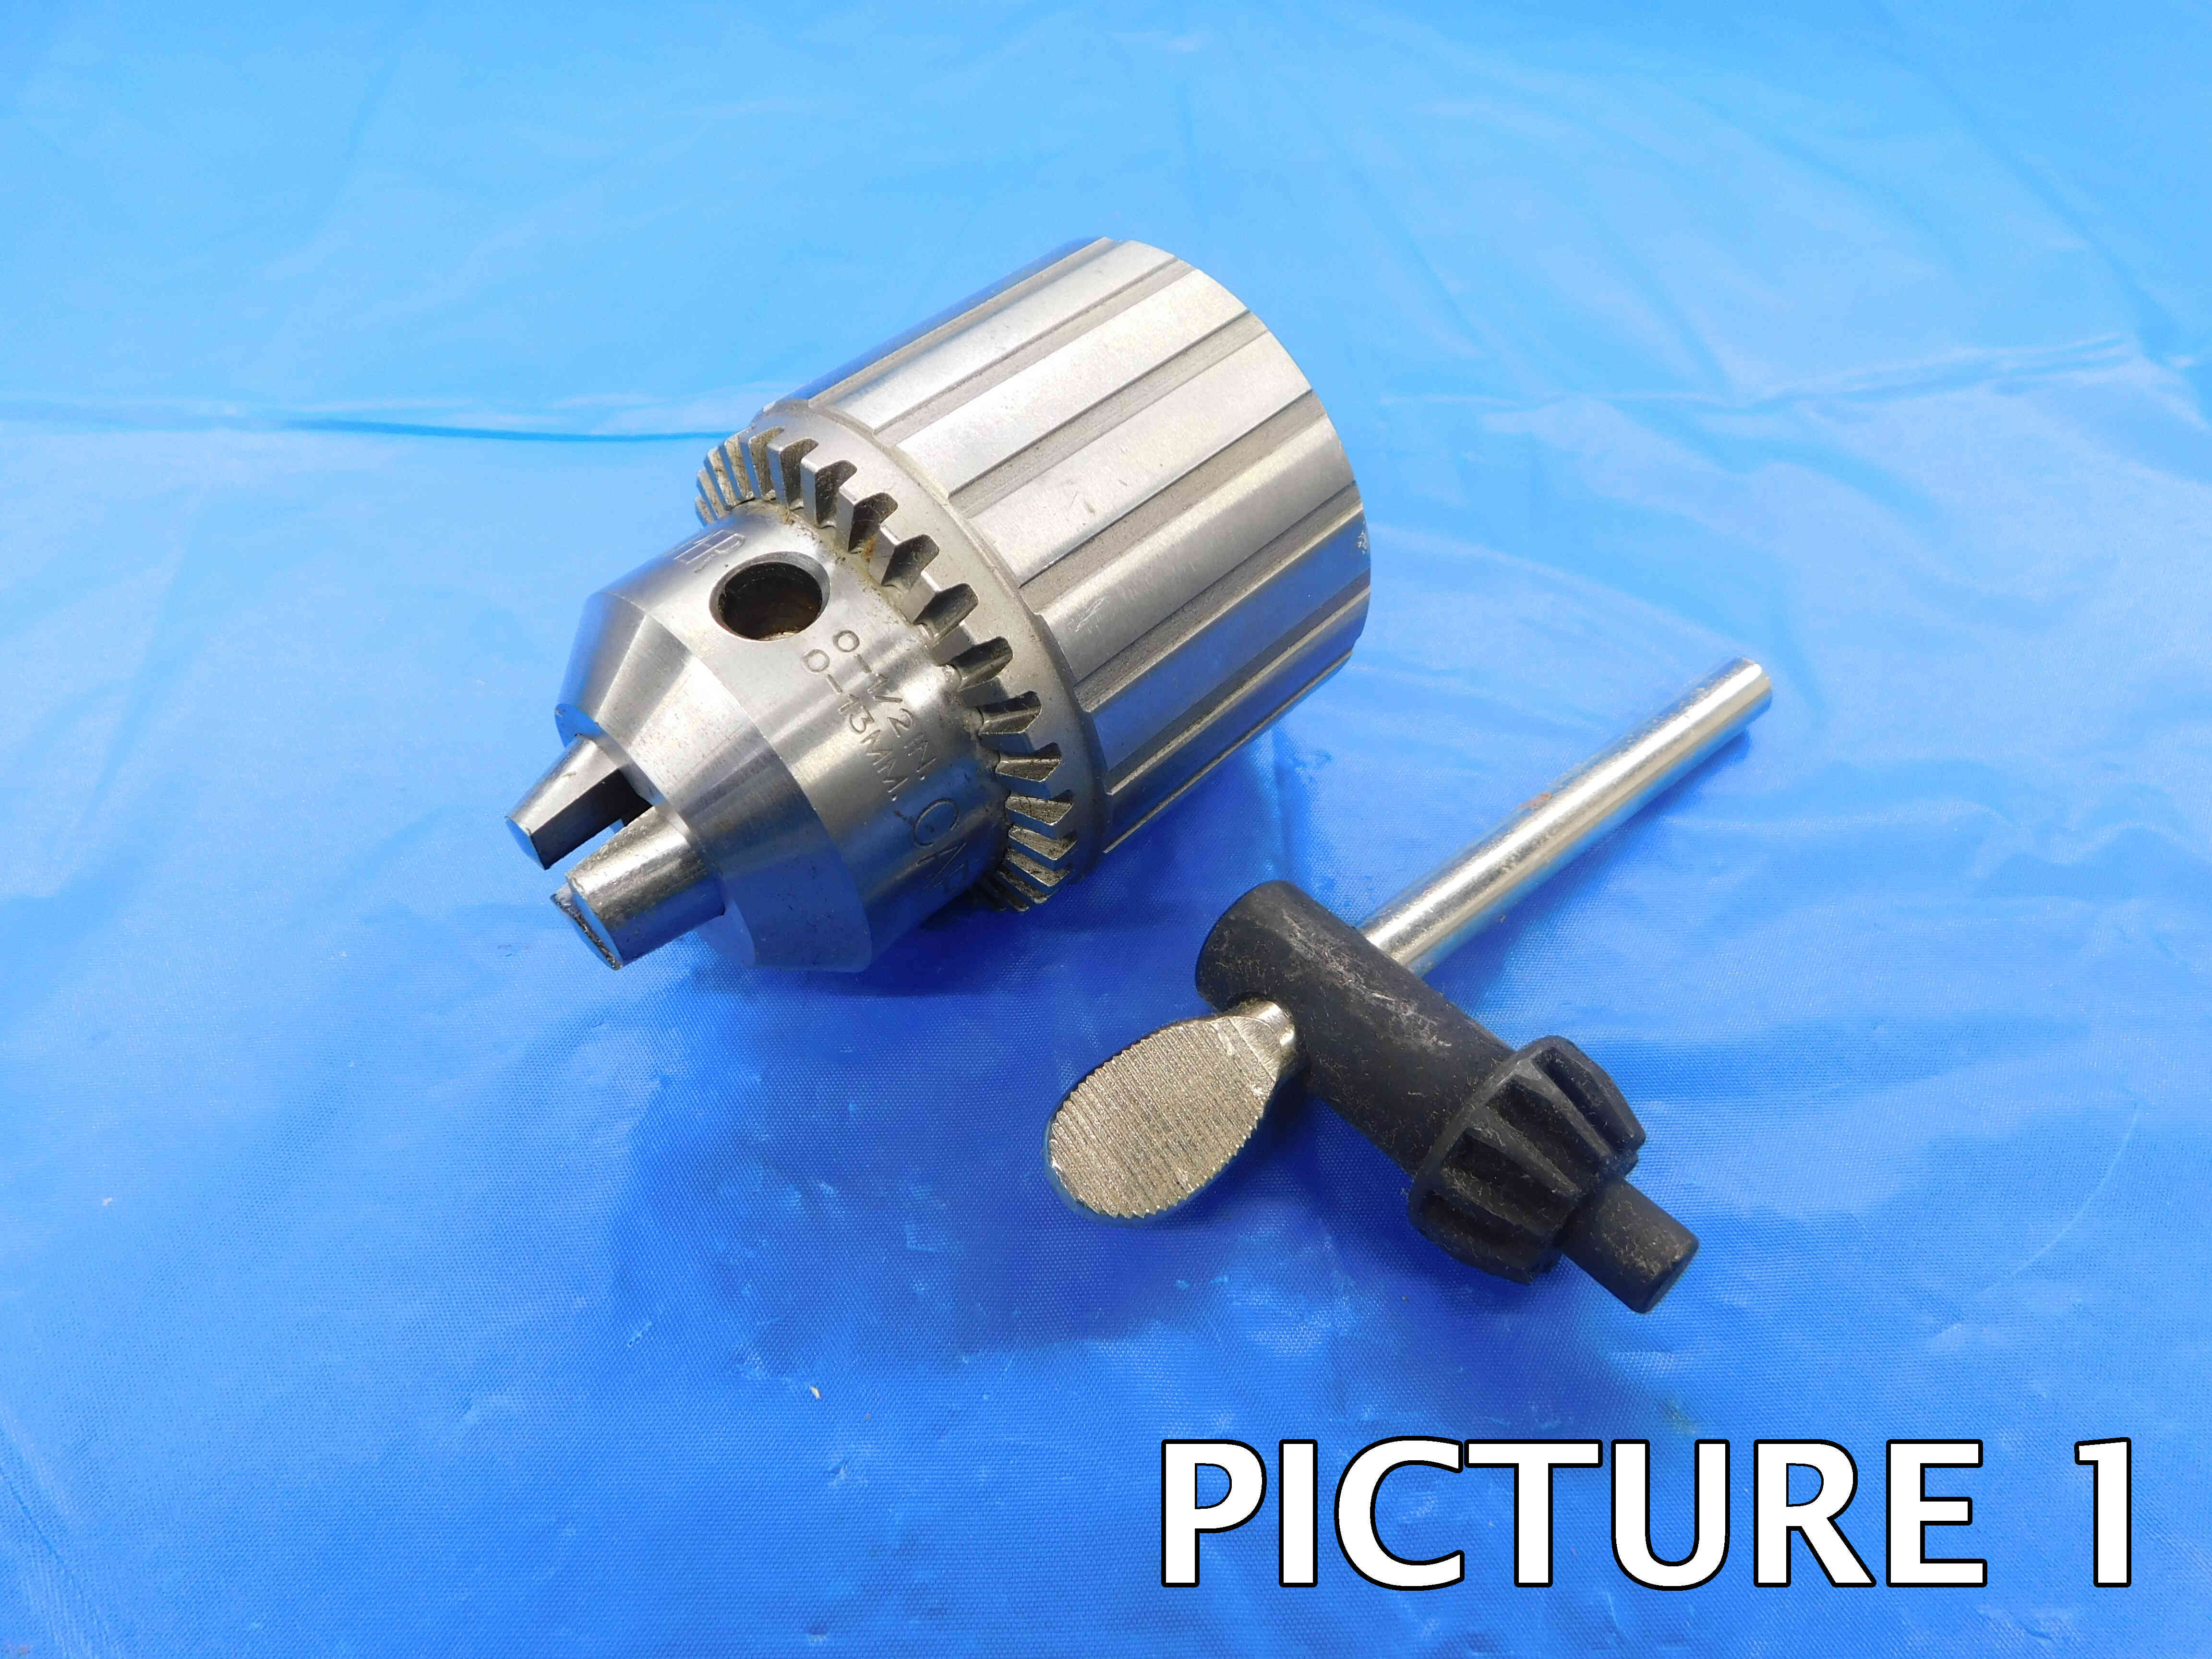
1st Picture: A three-quarters (or "3D") angle of the drill chuck, with the working end (the jaws) toward the camera. If the chuck comes with a key, make sure to include it in this picture as well. Any packaging should also be included in this picture.
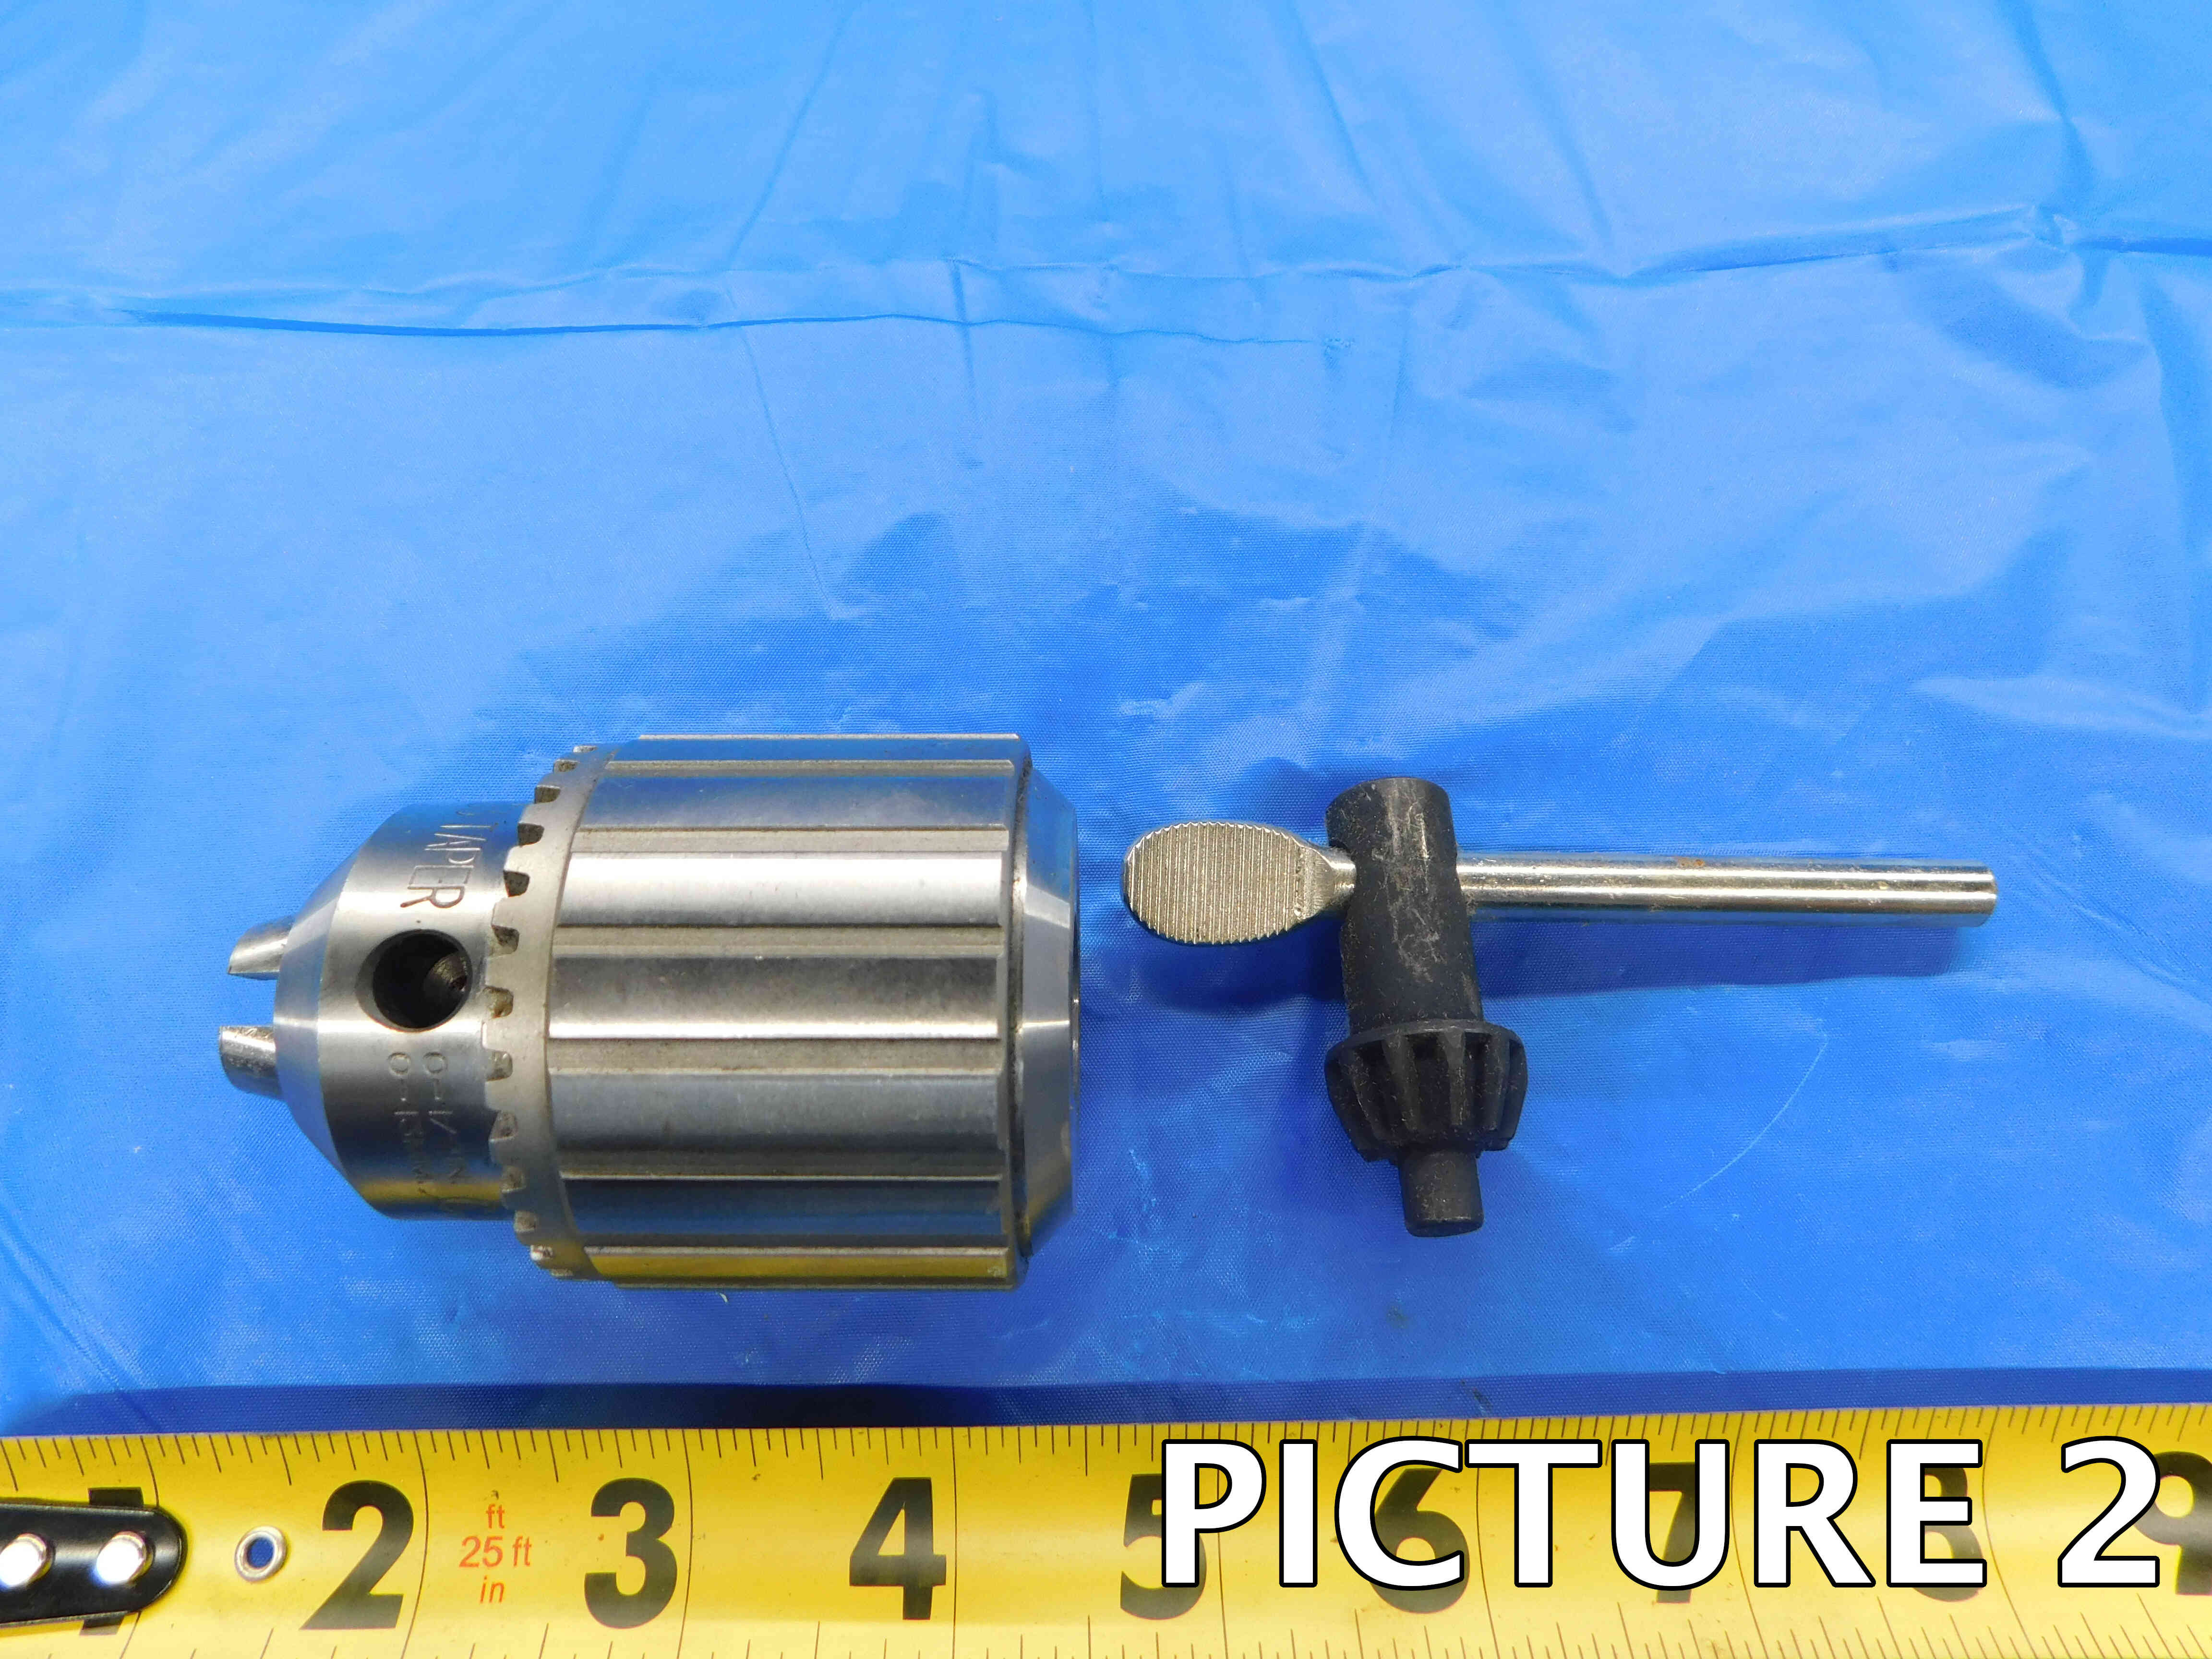
2nd Picture: A side view of the drill chuck, with a tape measure at the bottom of the frame to provide size reference. Like the first picture, the key should be included if there is one. Make sure there is sufficient space between the tap and the tape measure so that the tape measure is not covering up any part of the tap. Any packaging should be included in this picture as well.
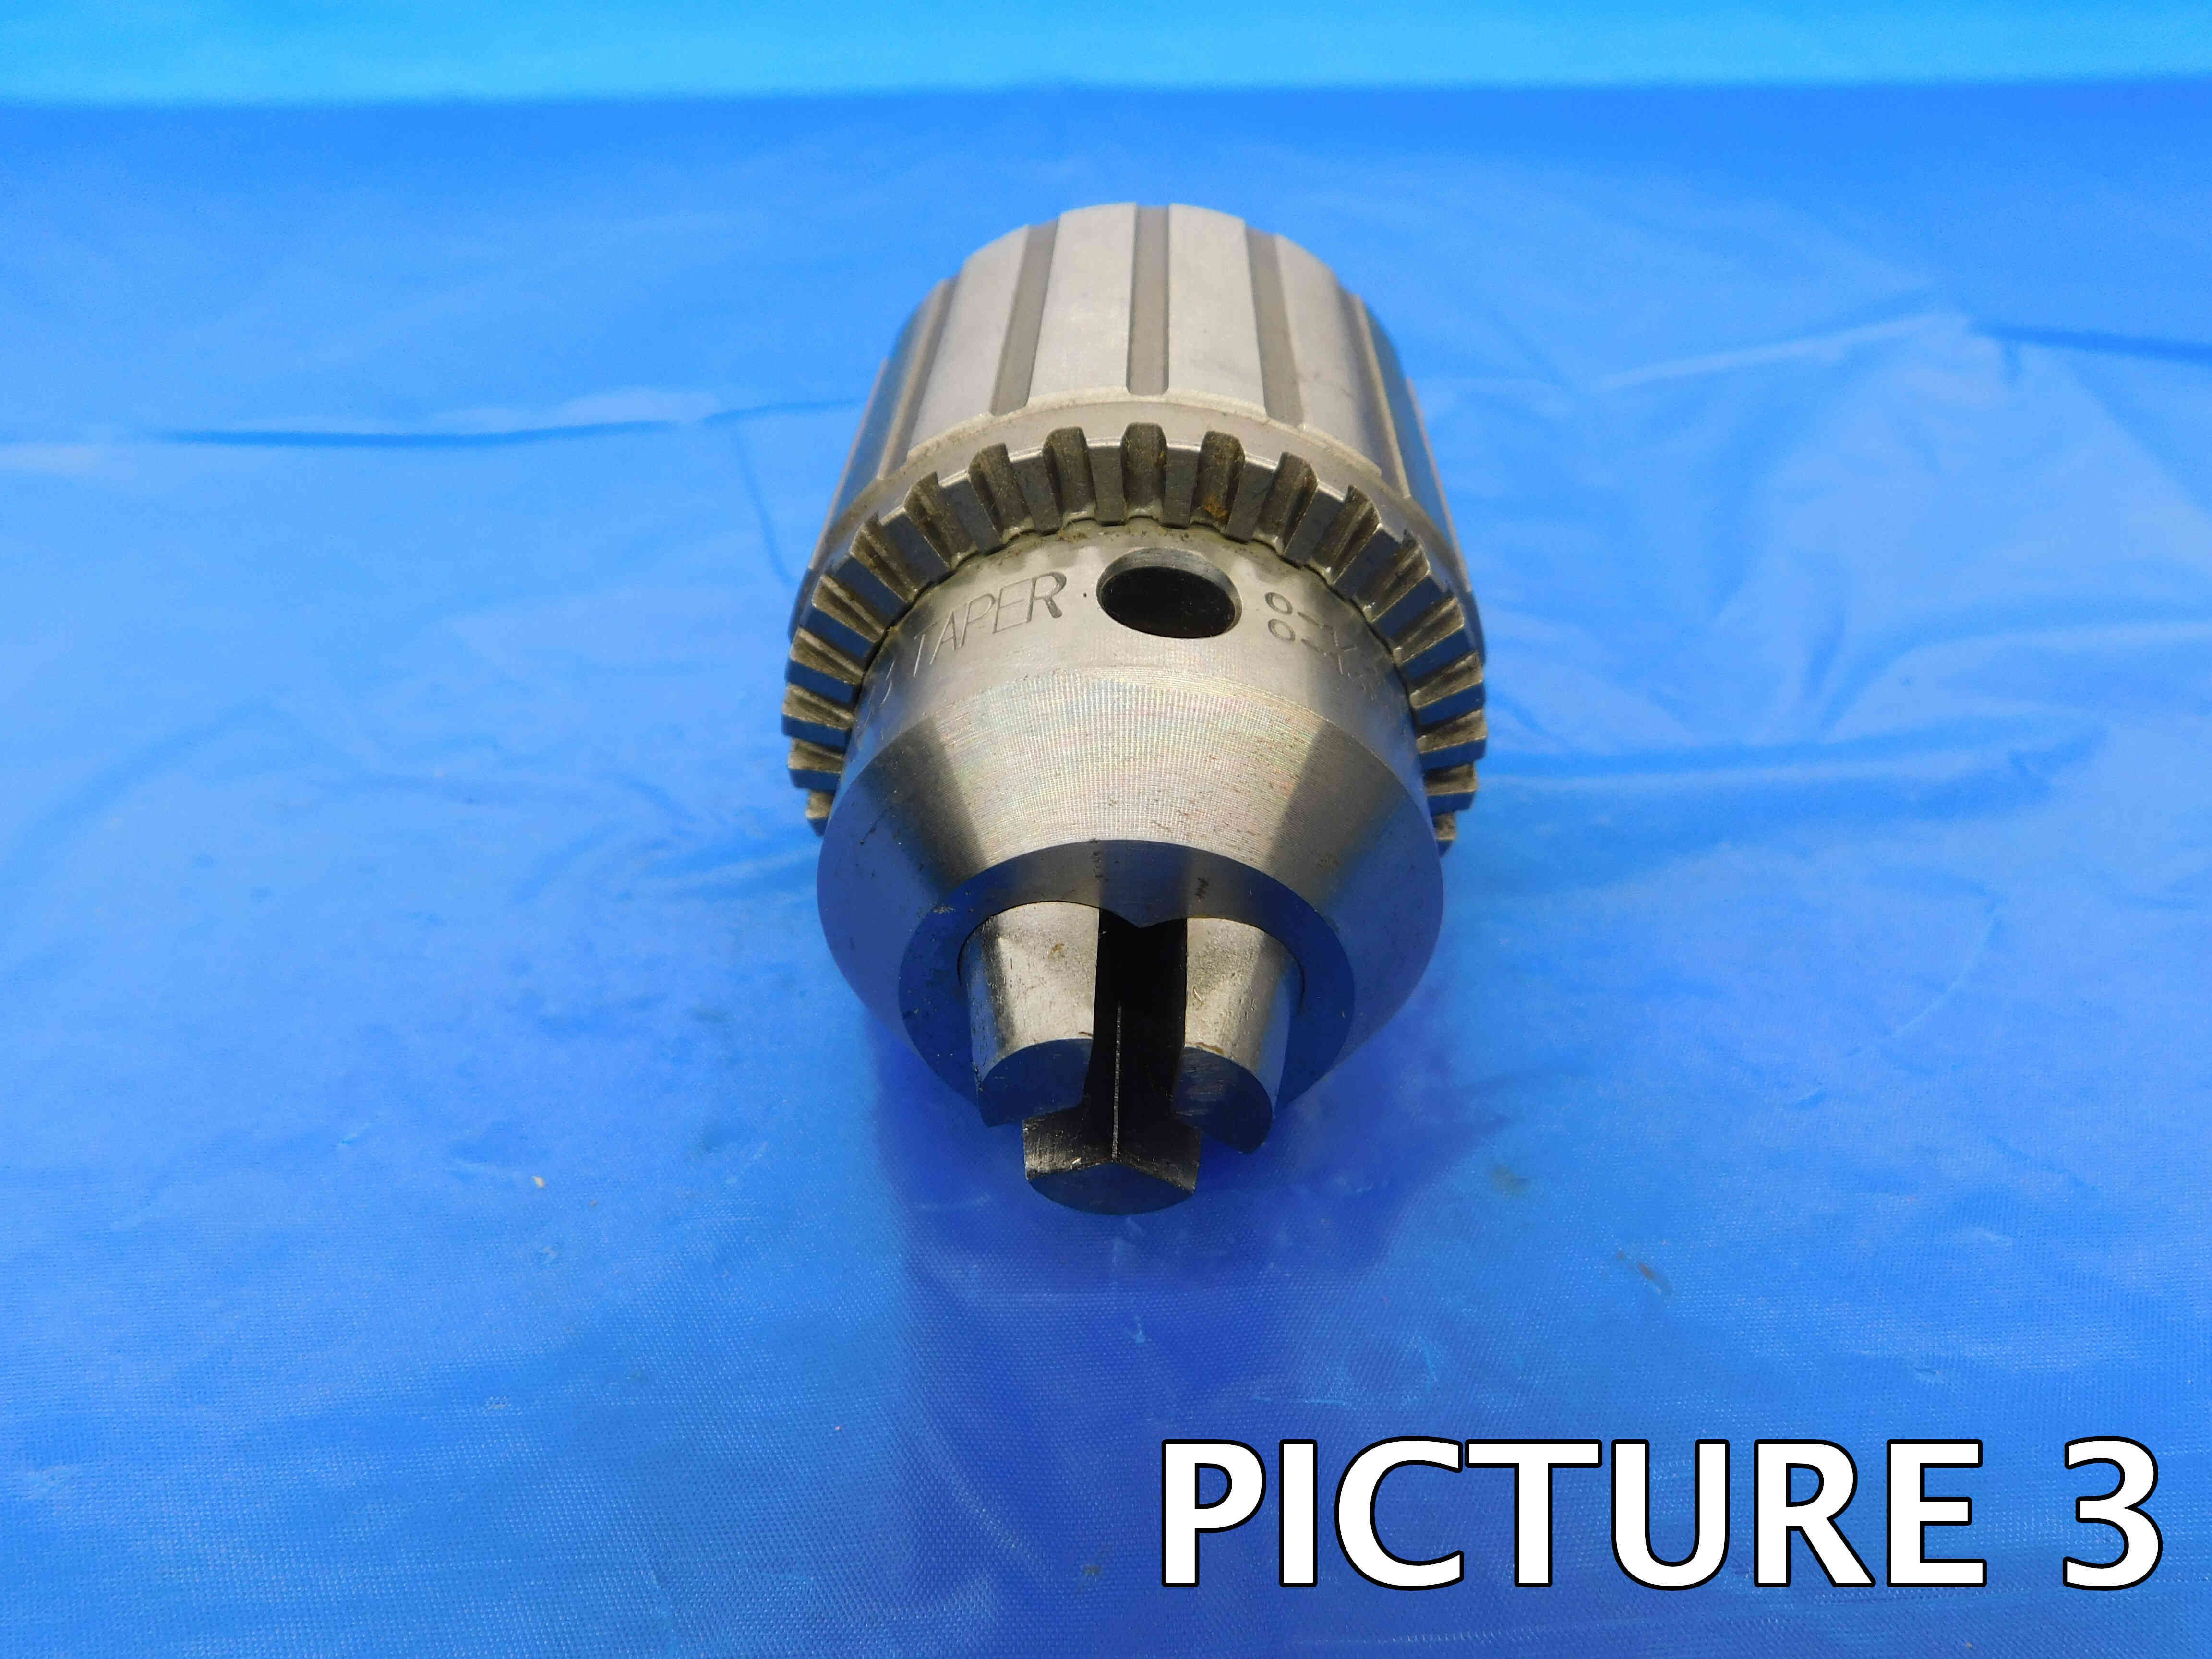
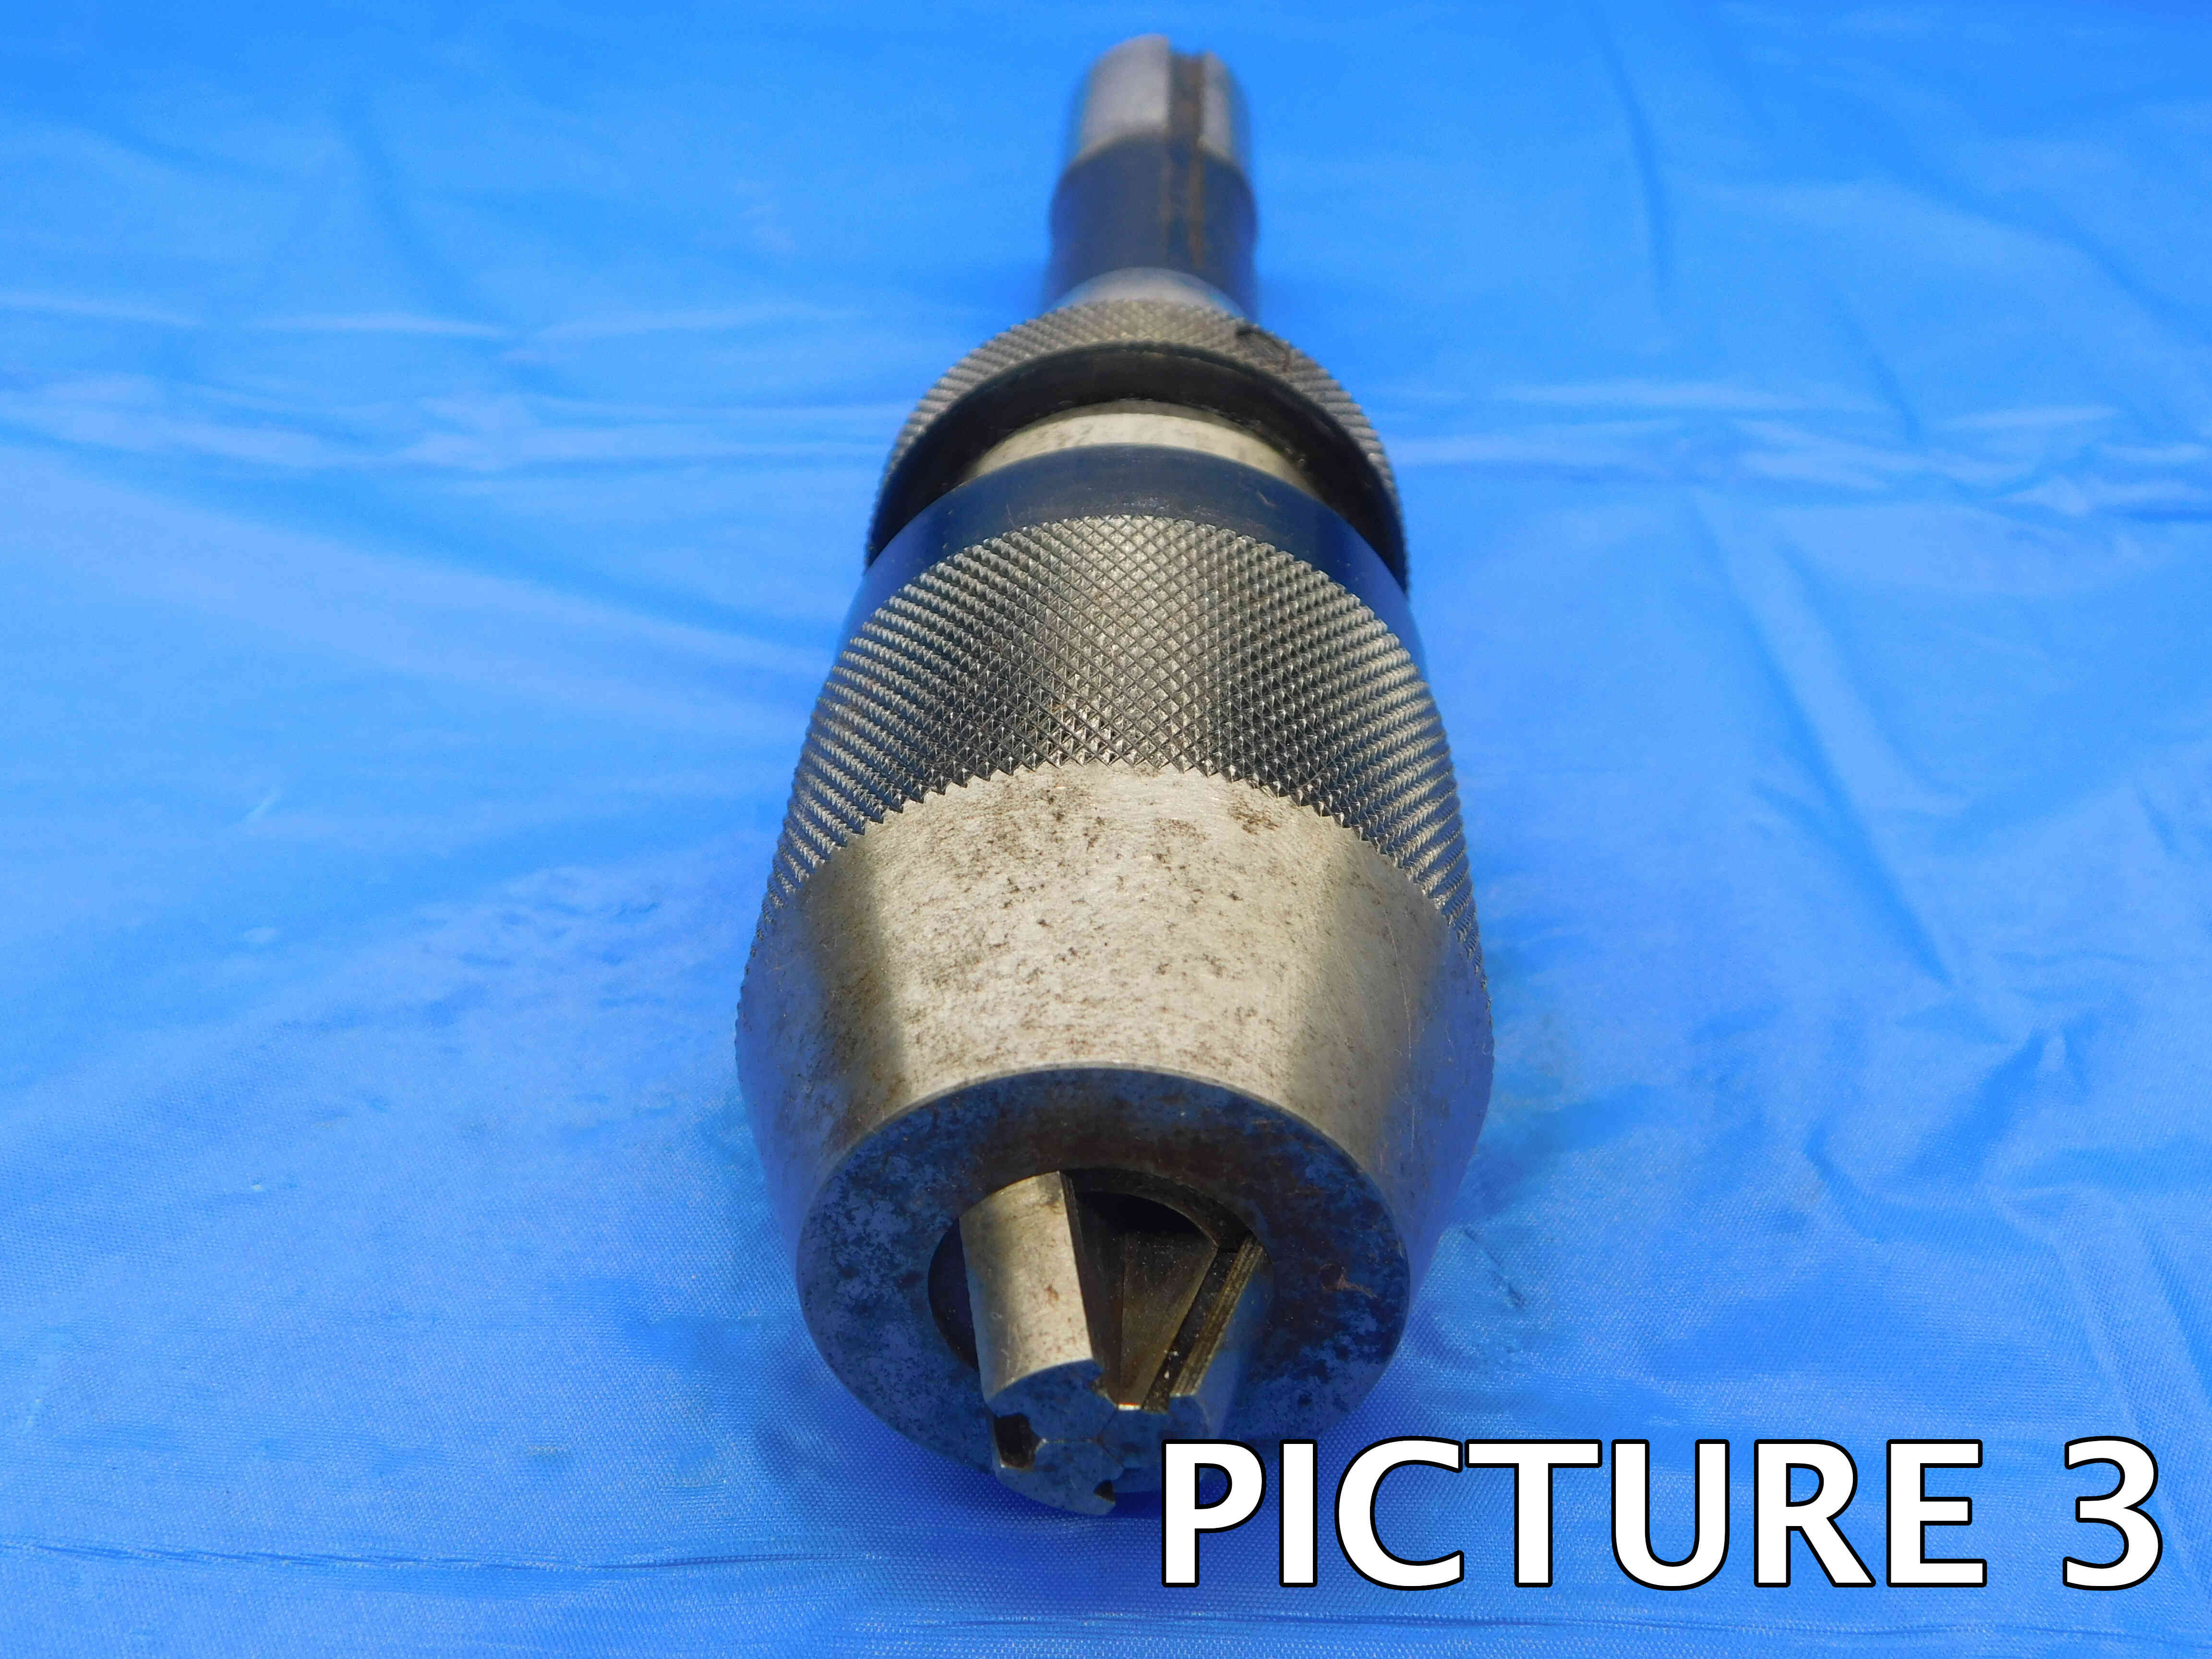
3rd Picture: A close-up, head-on shot of the working end (jaws).
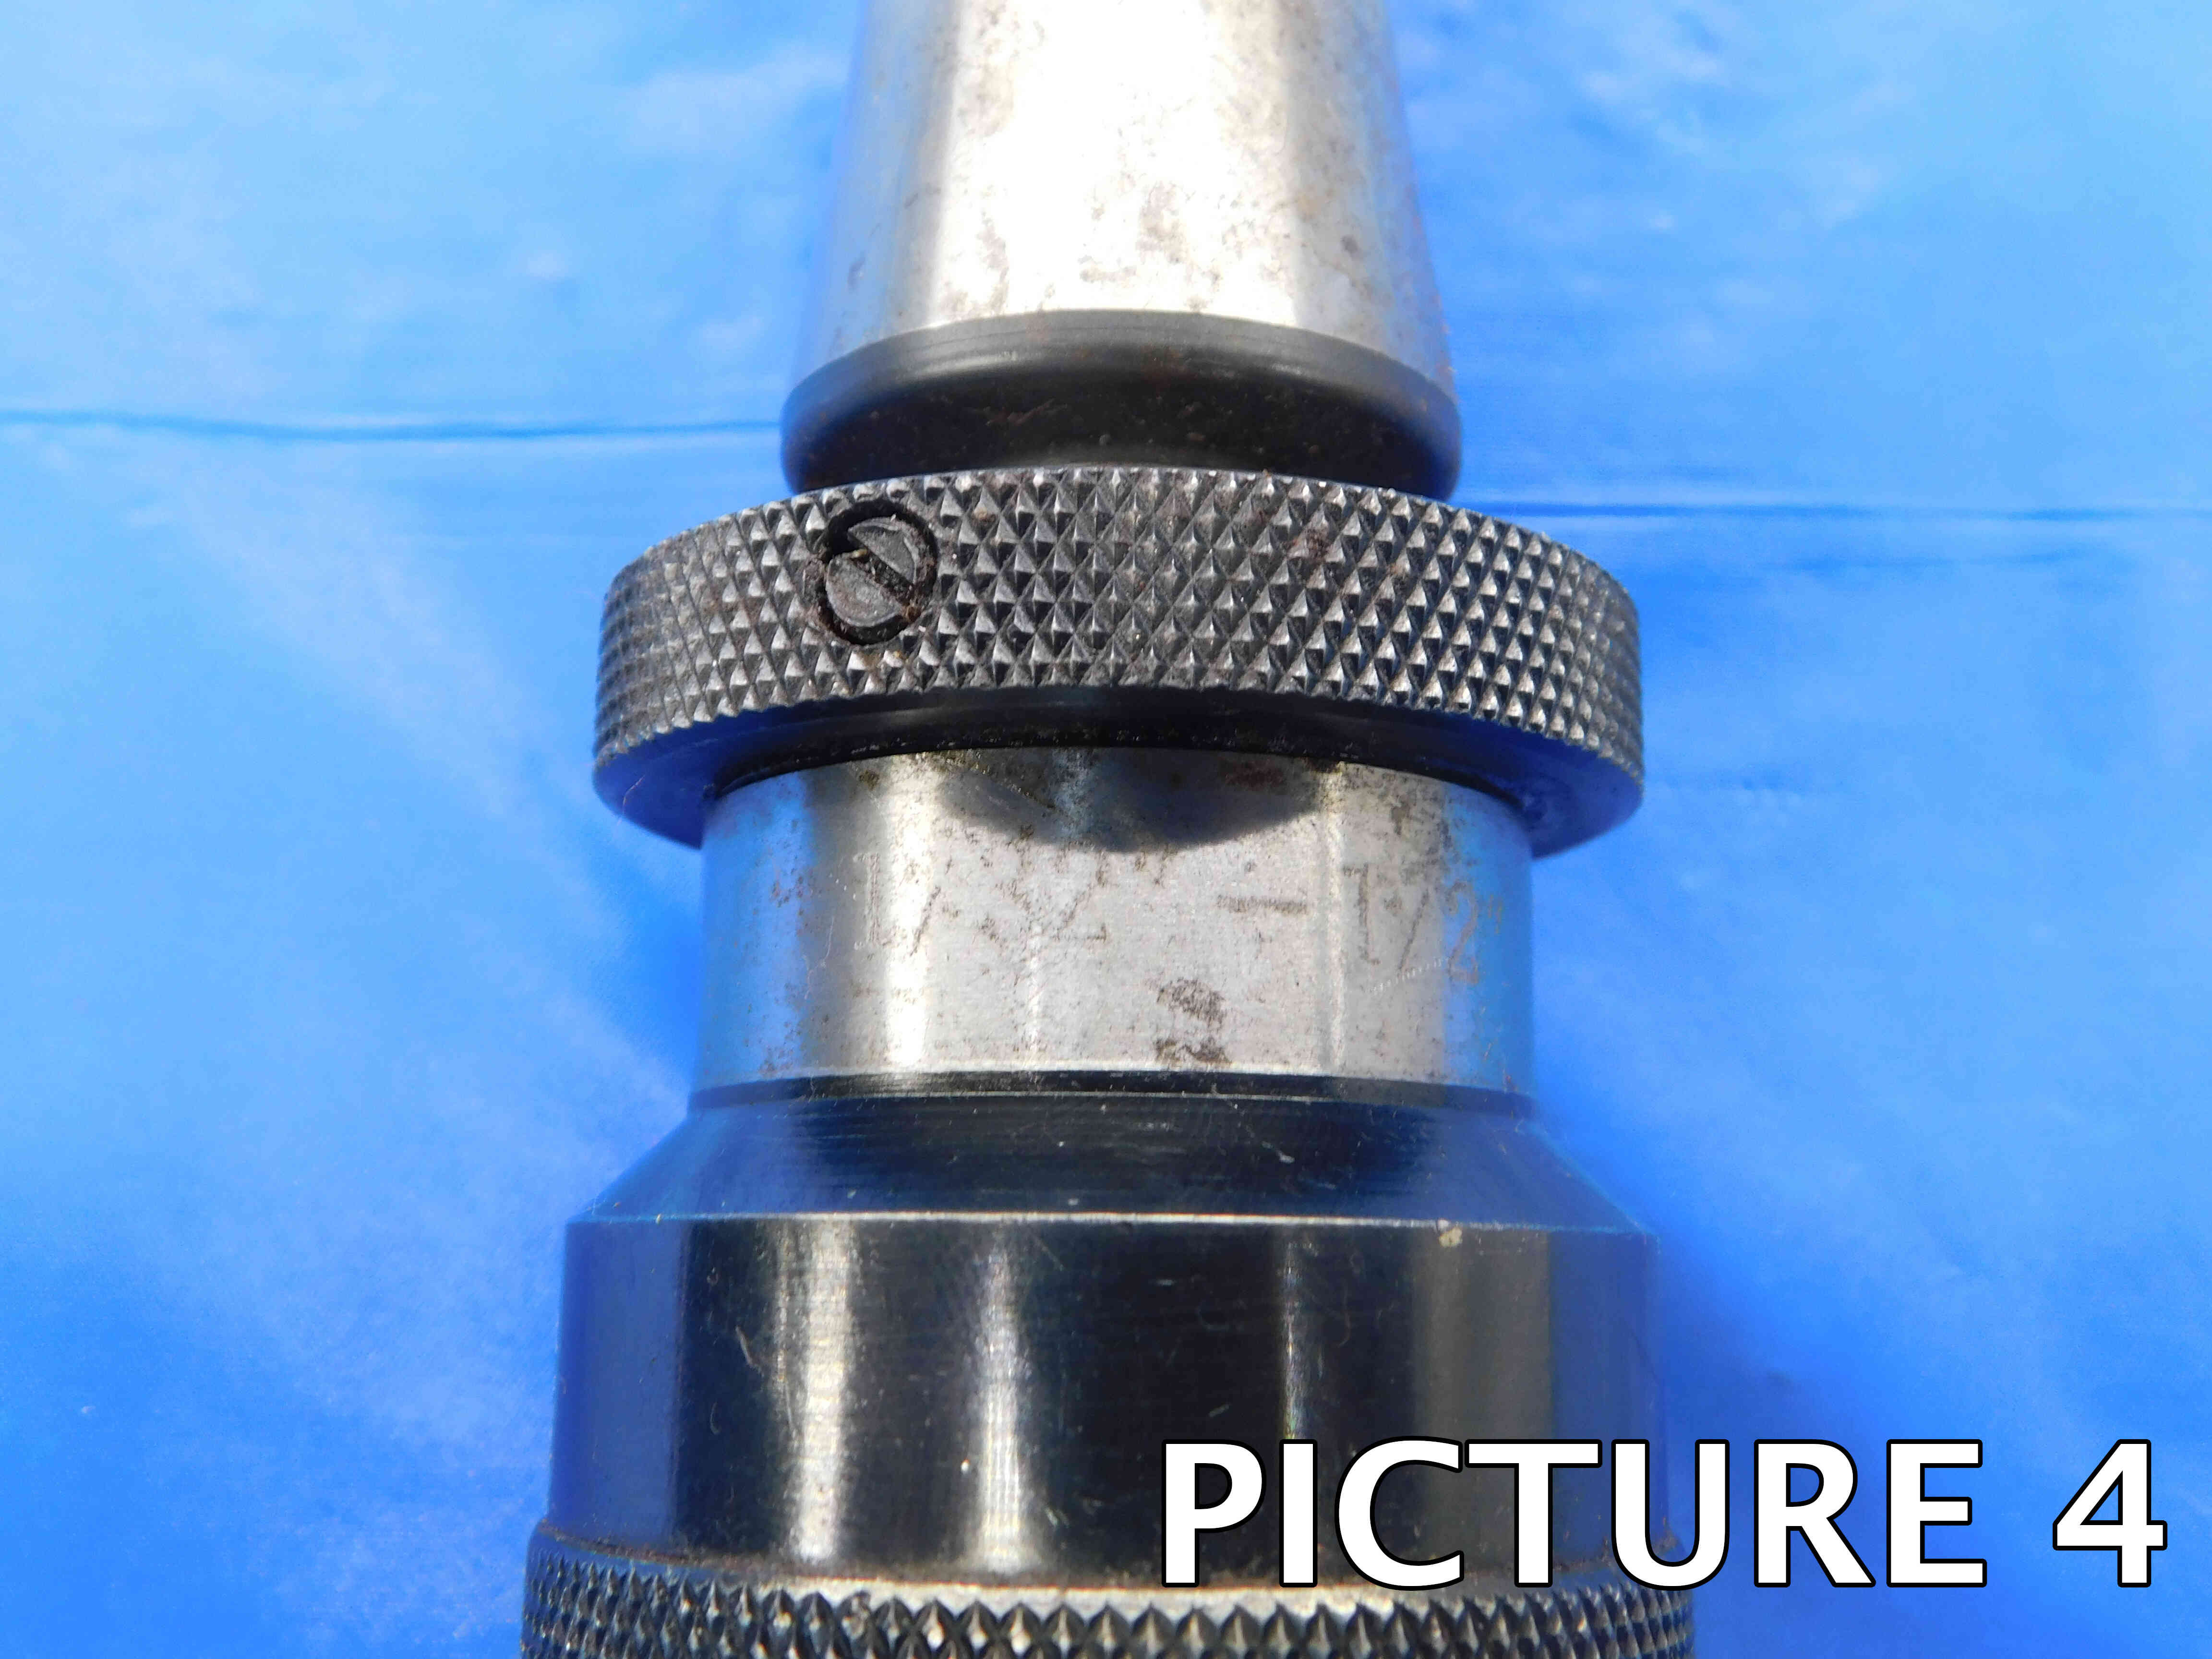
4th Picture: A close-up shot of the labeling. Drill chuck labeling frequently goes around the entire body, so this will likely require more than one picture, such as in the first set of example pictures below. If there is no labeling present, skip this picture.
Additional Pictures: Any damage or modification to the chuck must be clearly pictured. Use a pen to point to the damaged / modified area. If you believe additional pictures are needed for any other reason, contact your trainer to verify if it is necessary.
Please refer to the pictures below for examples:
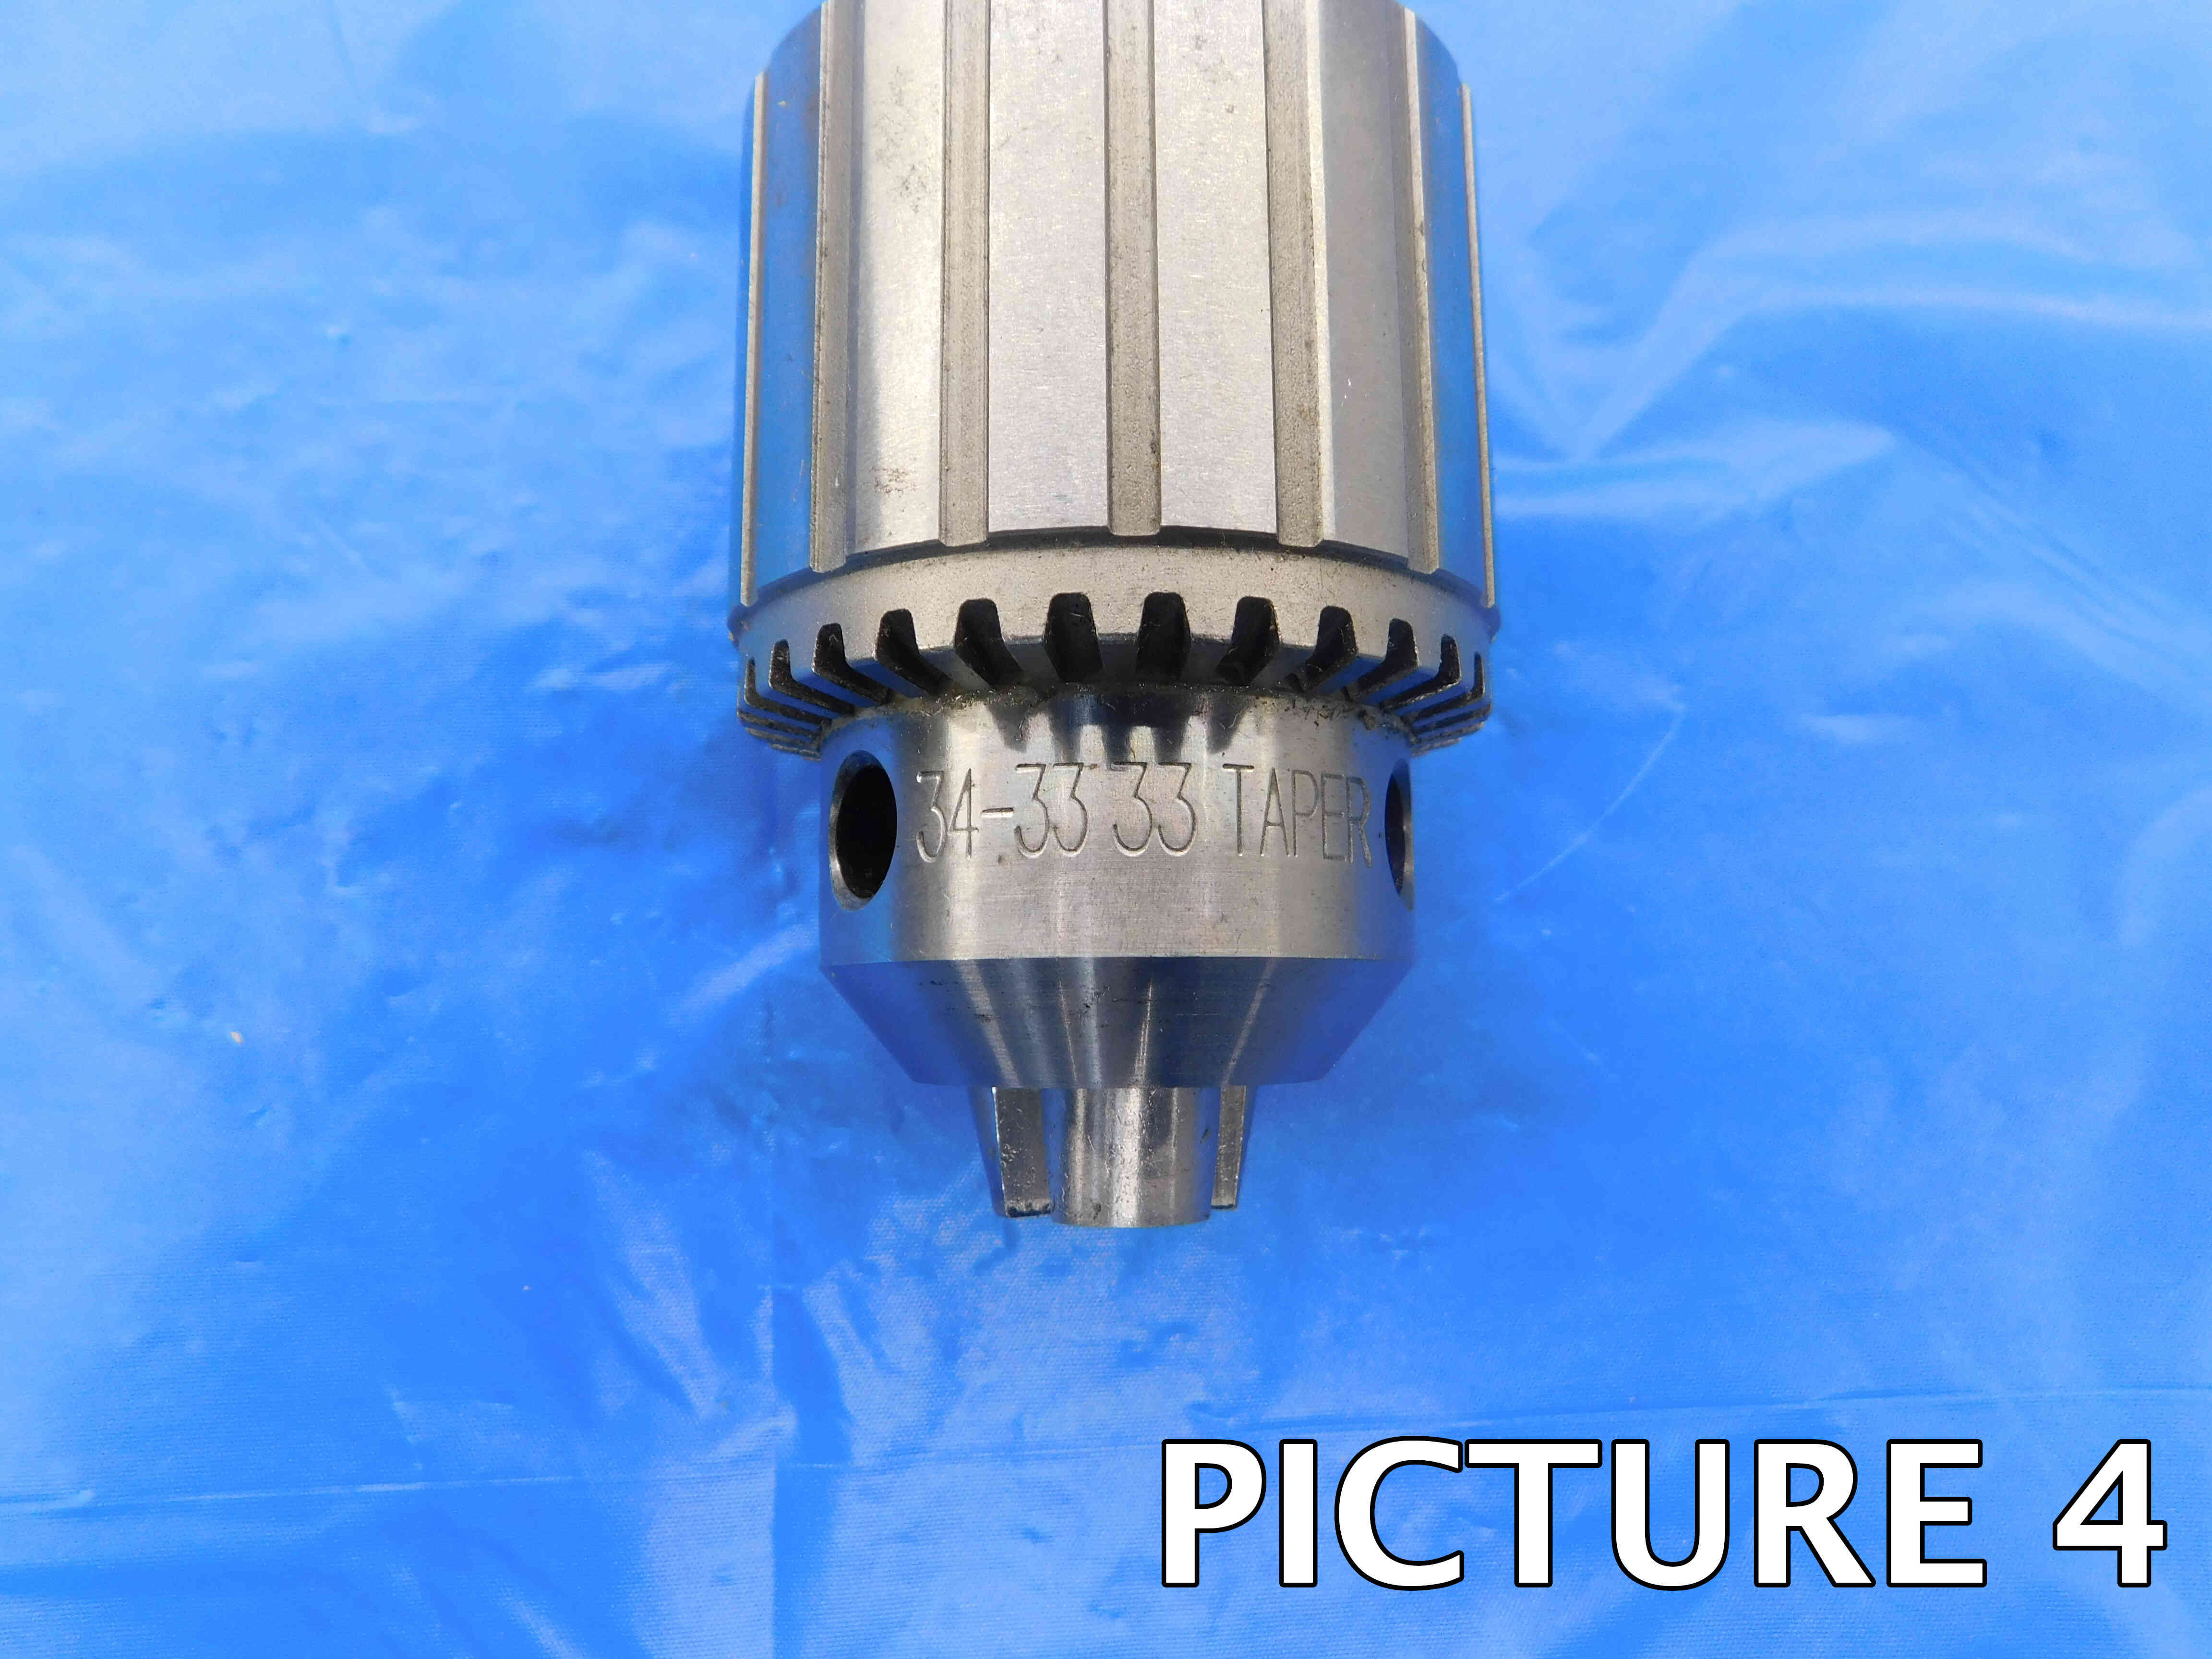
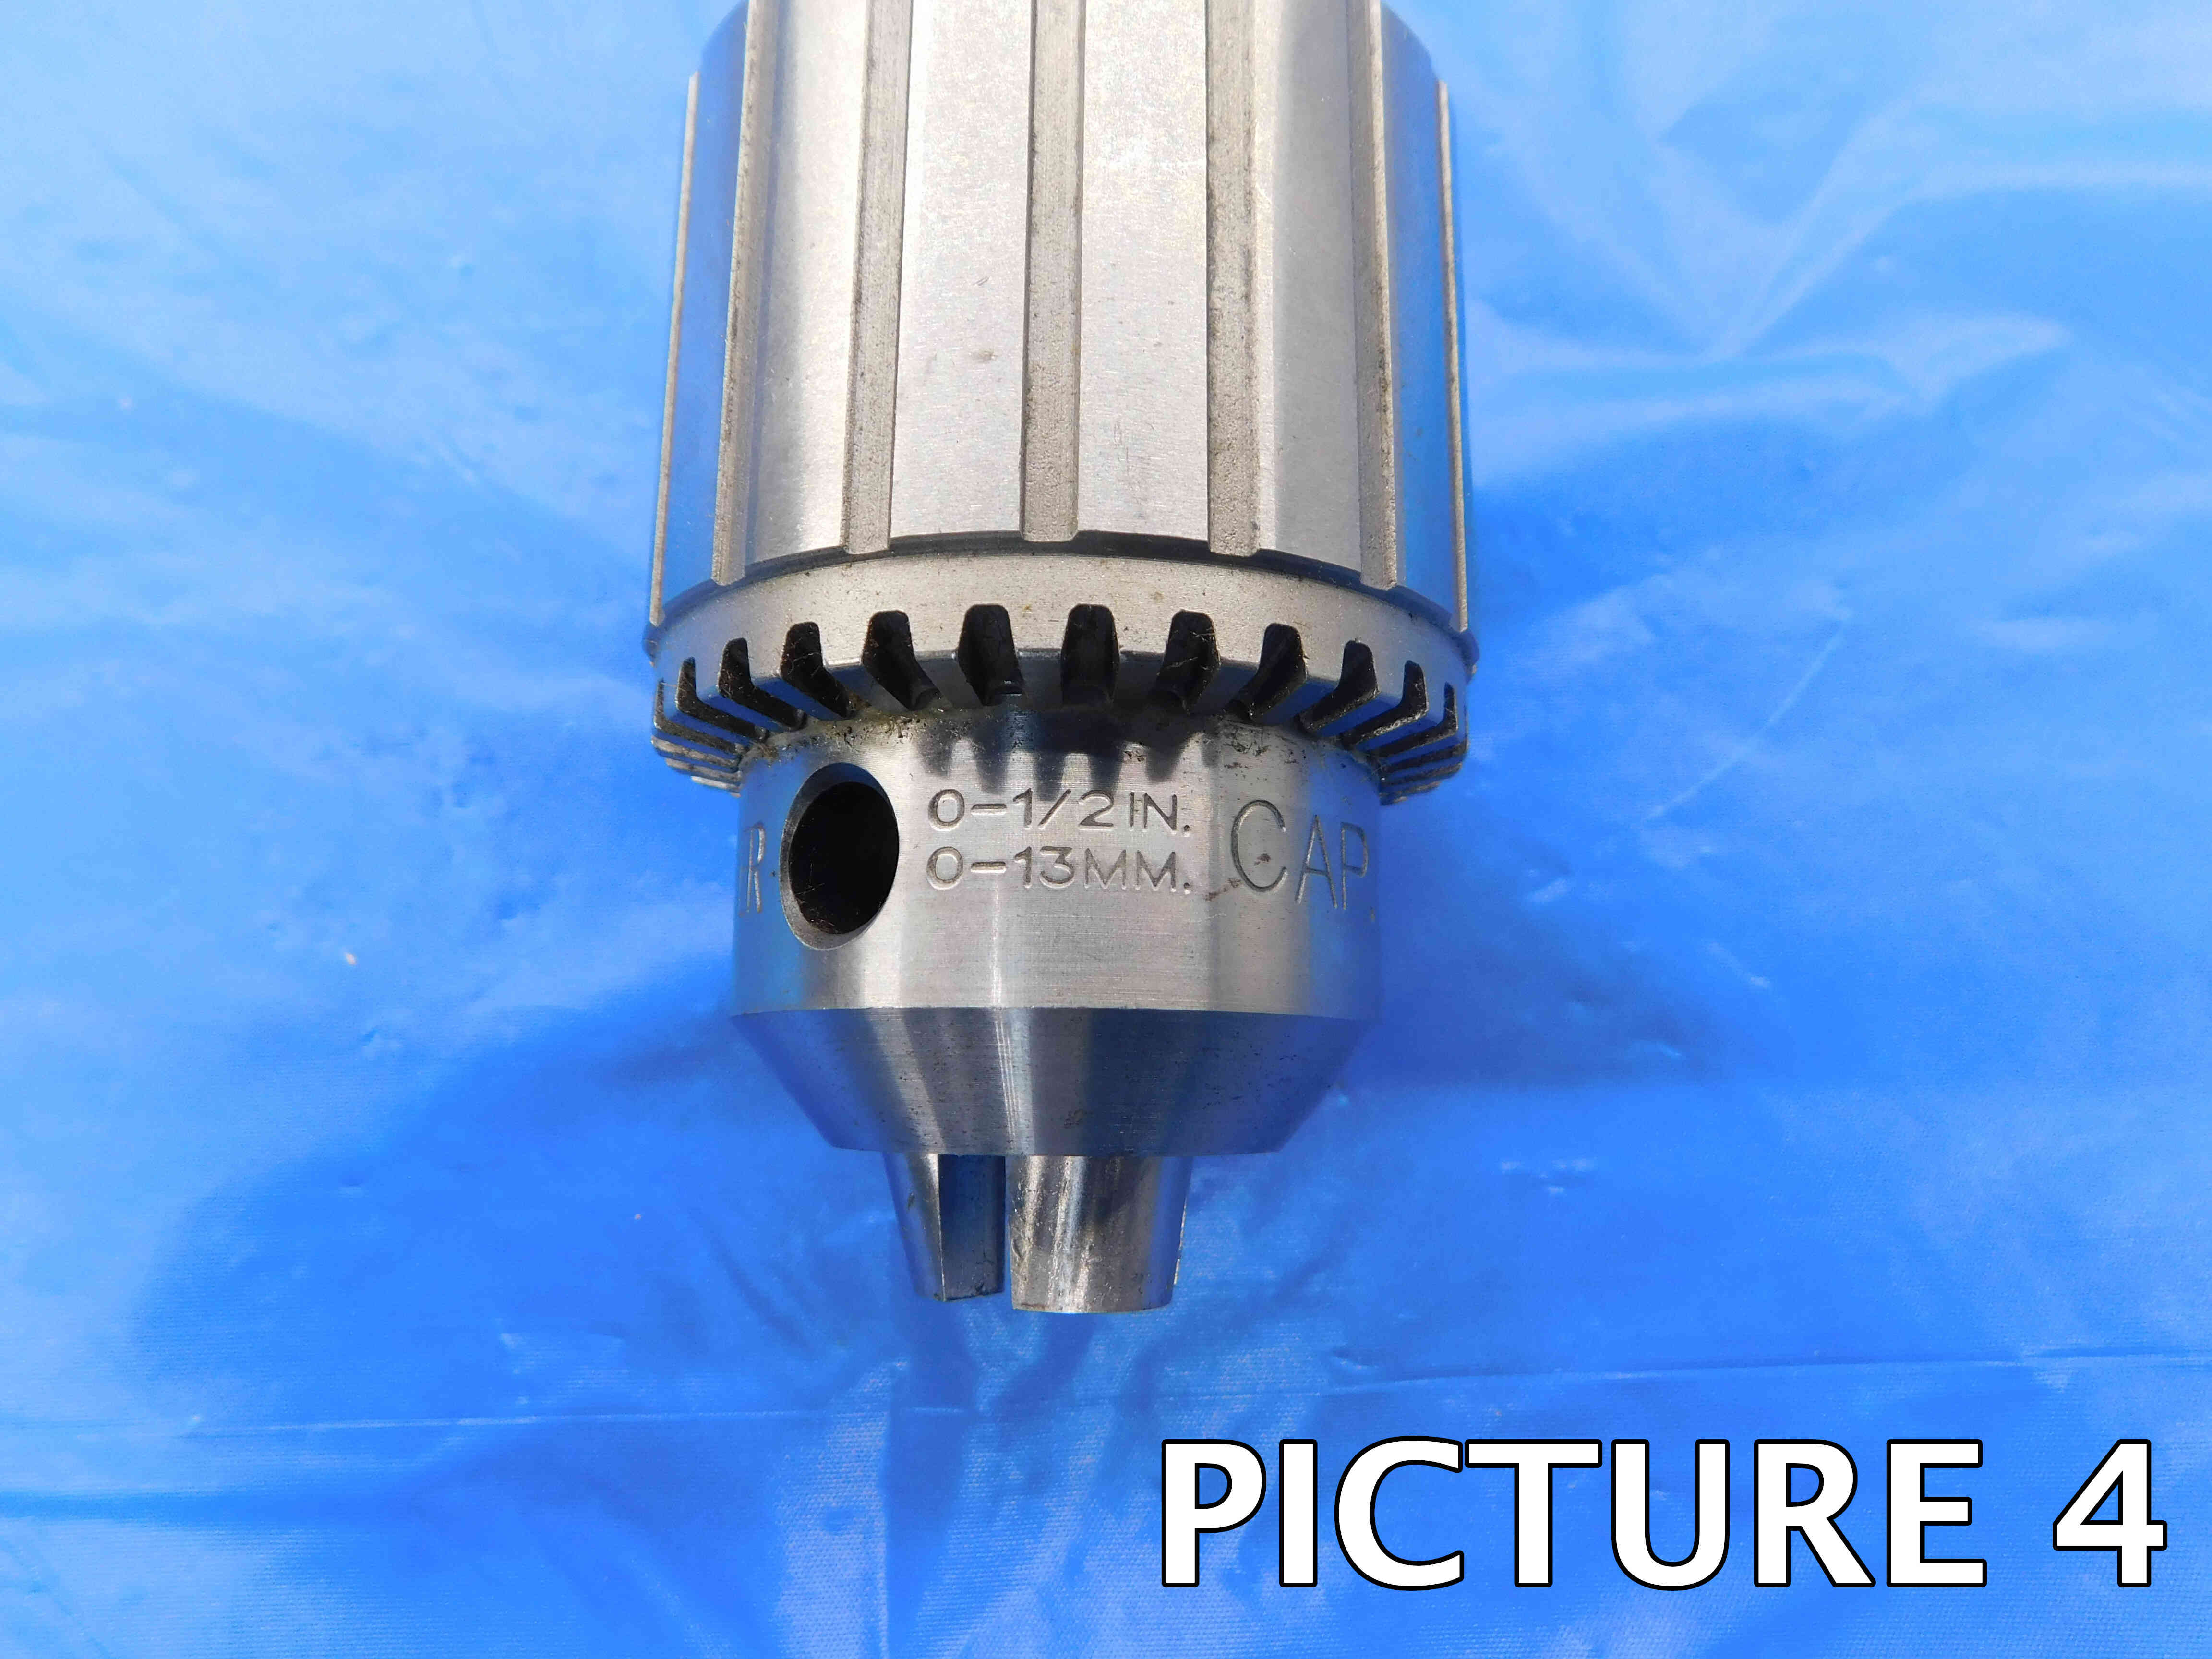
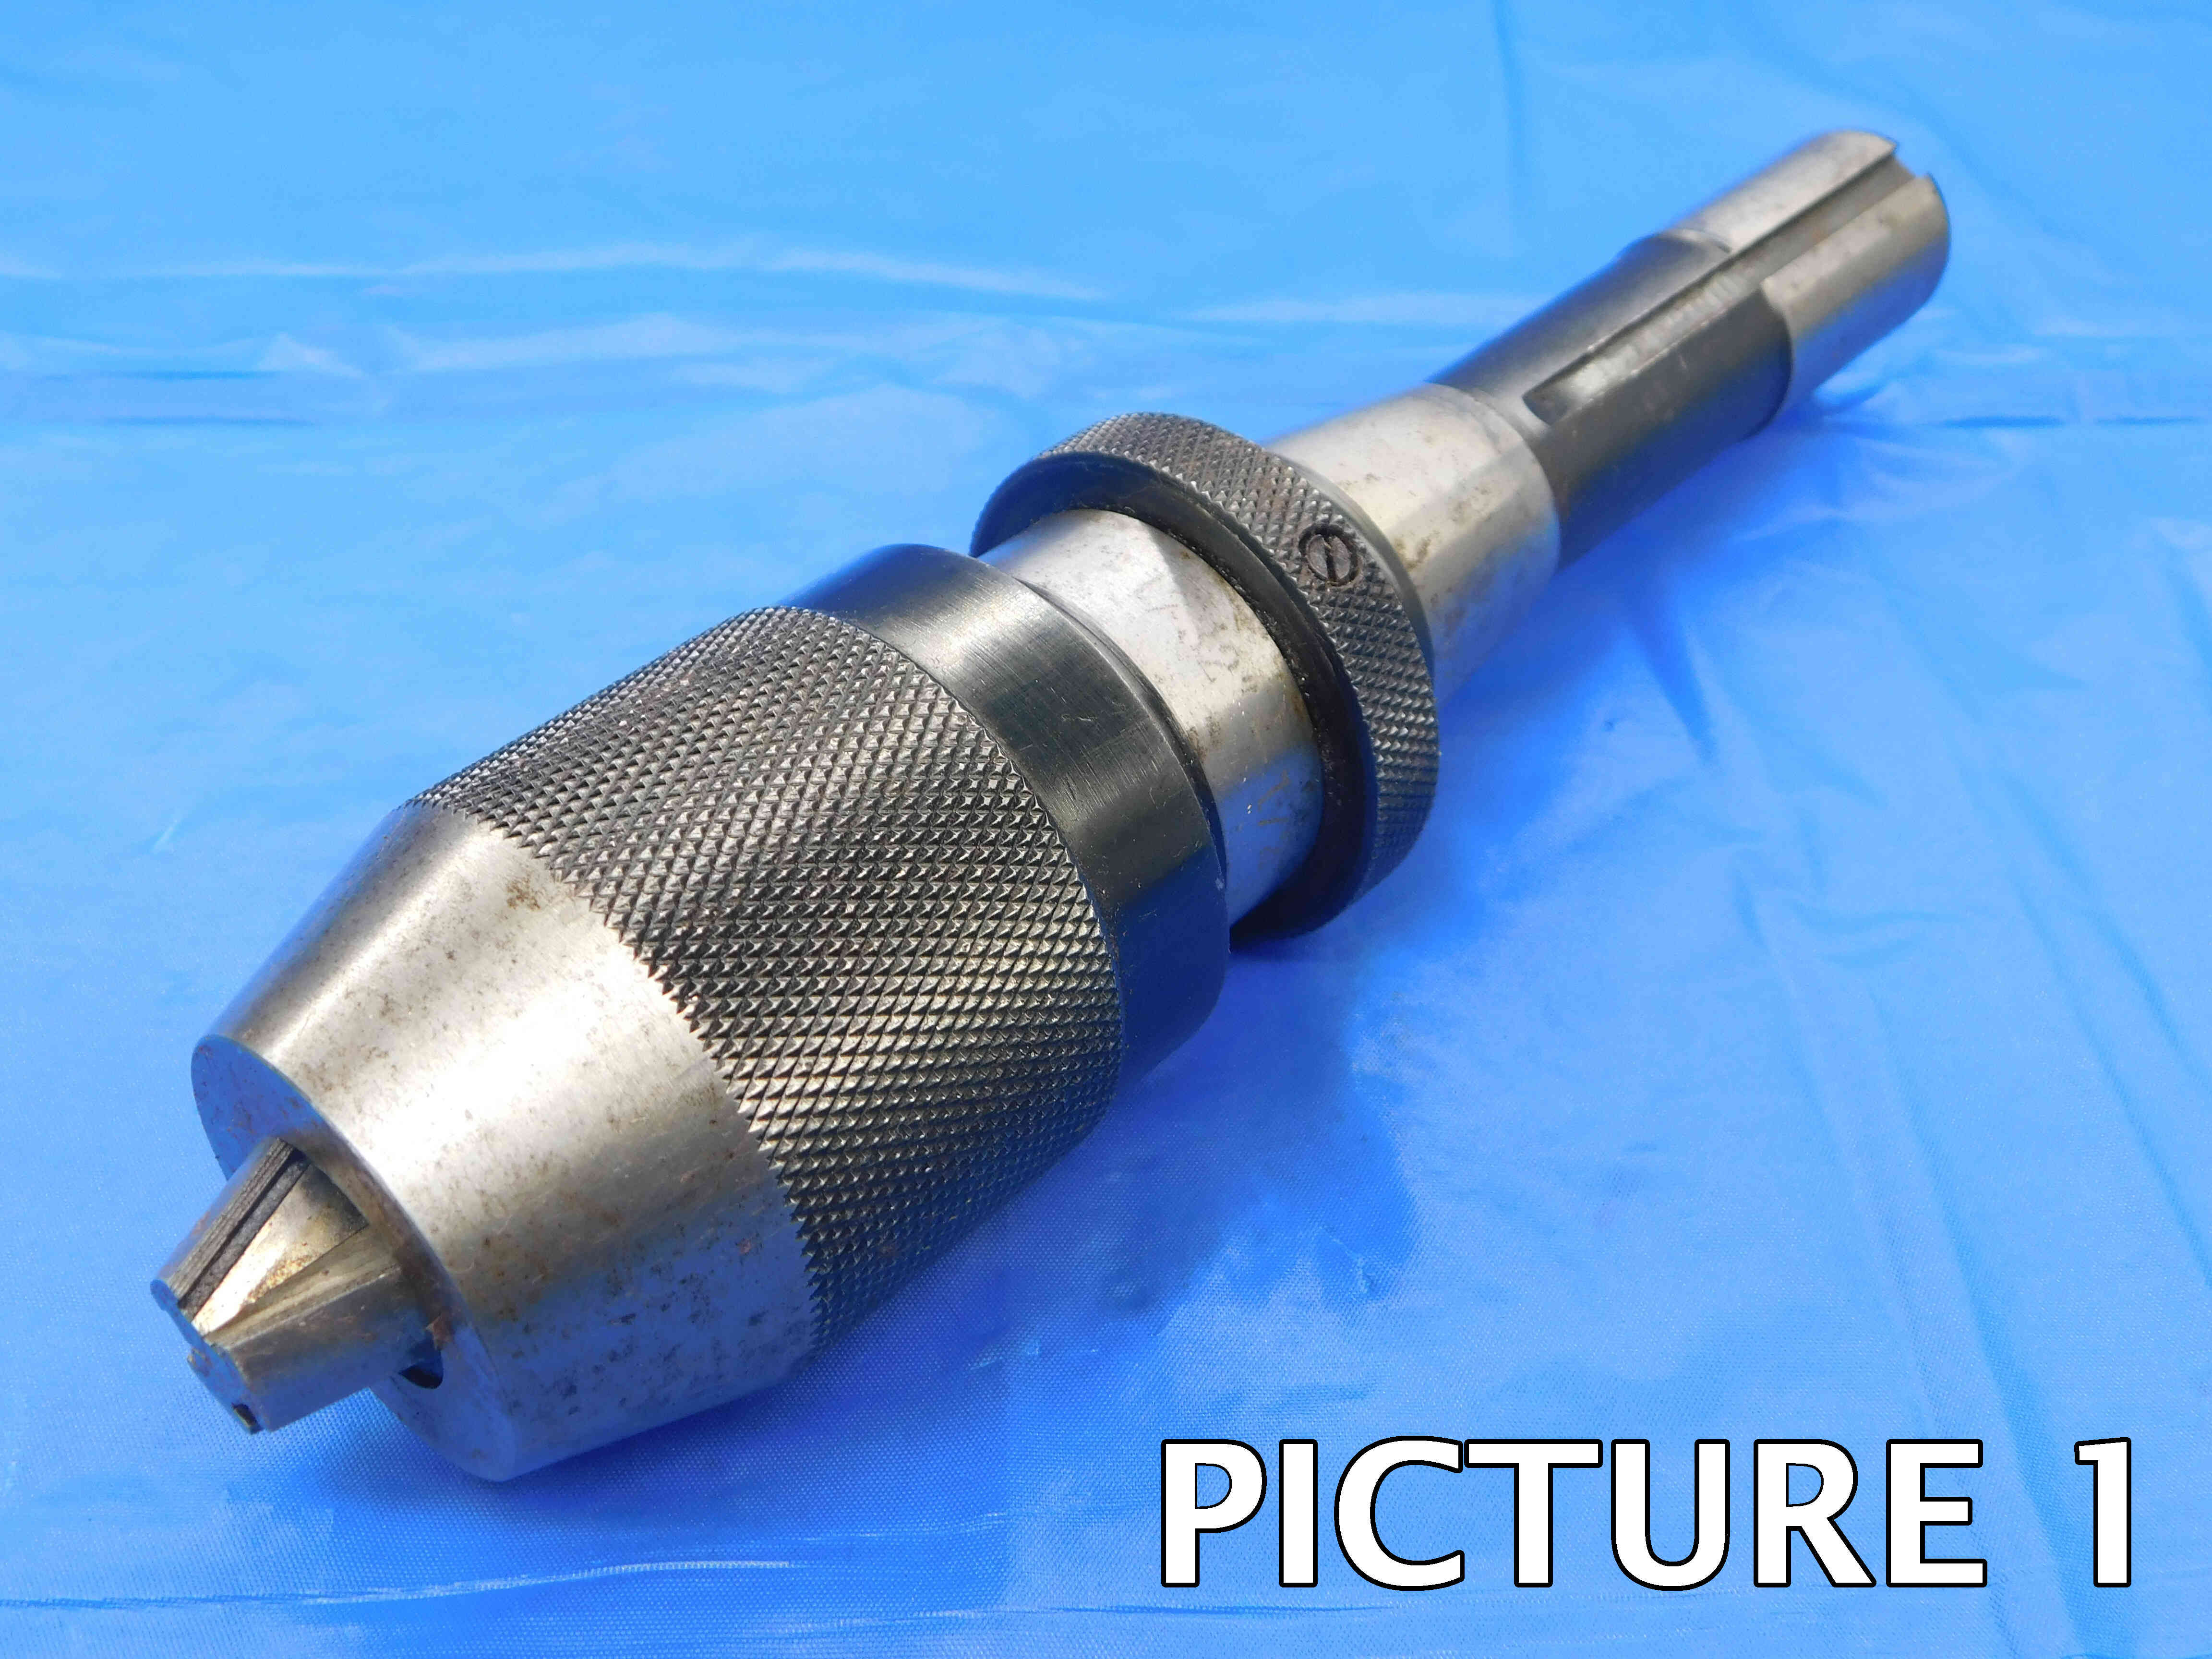
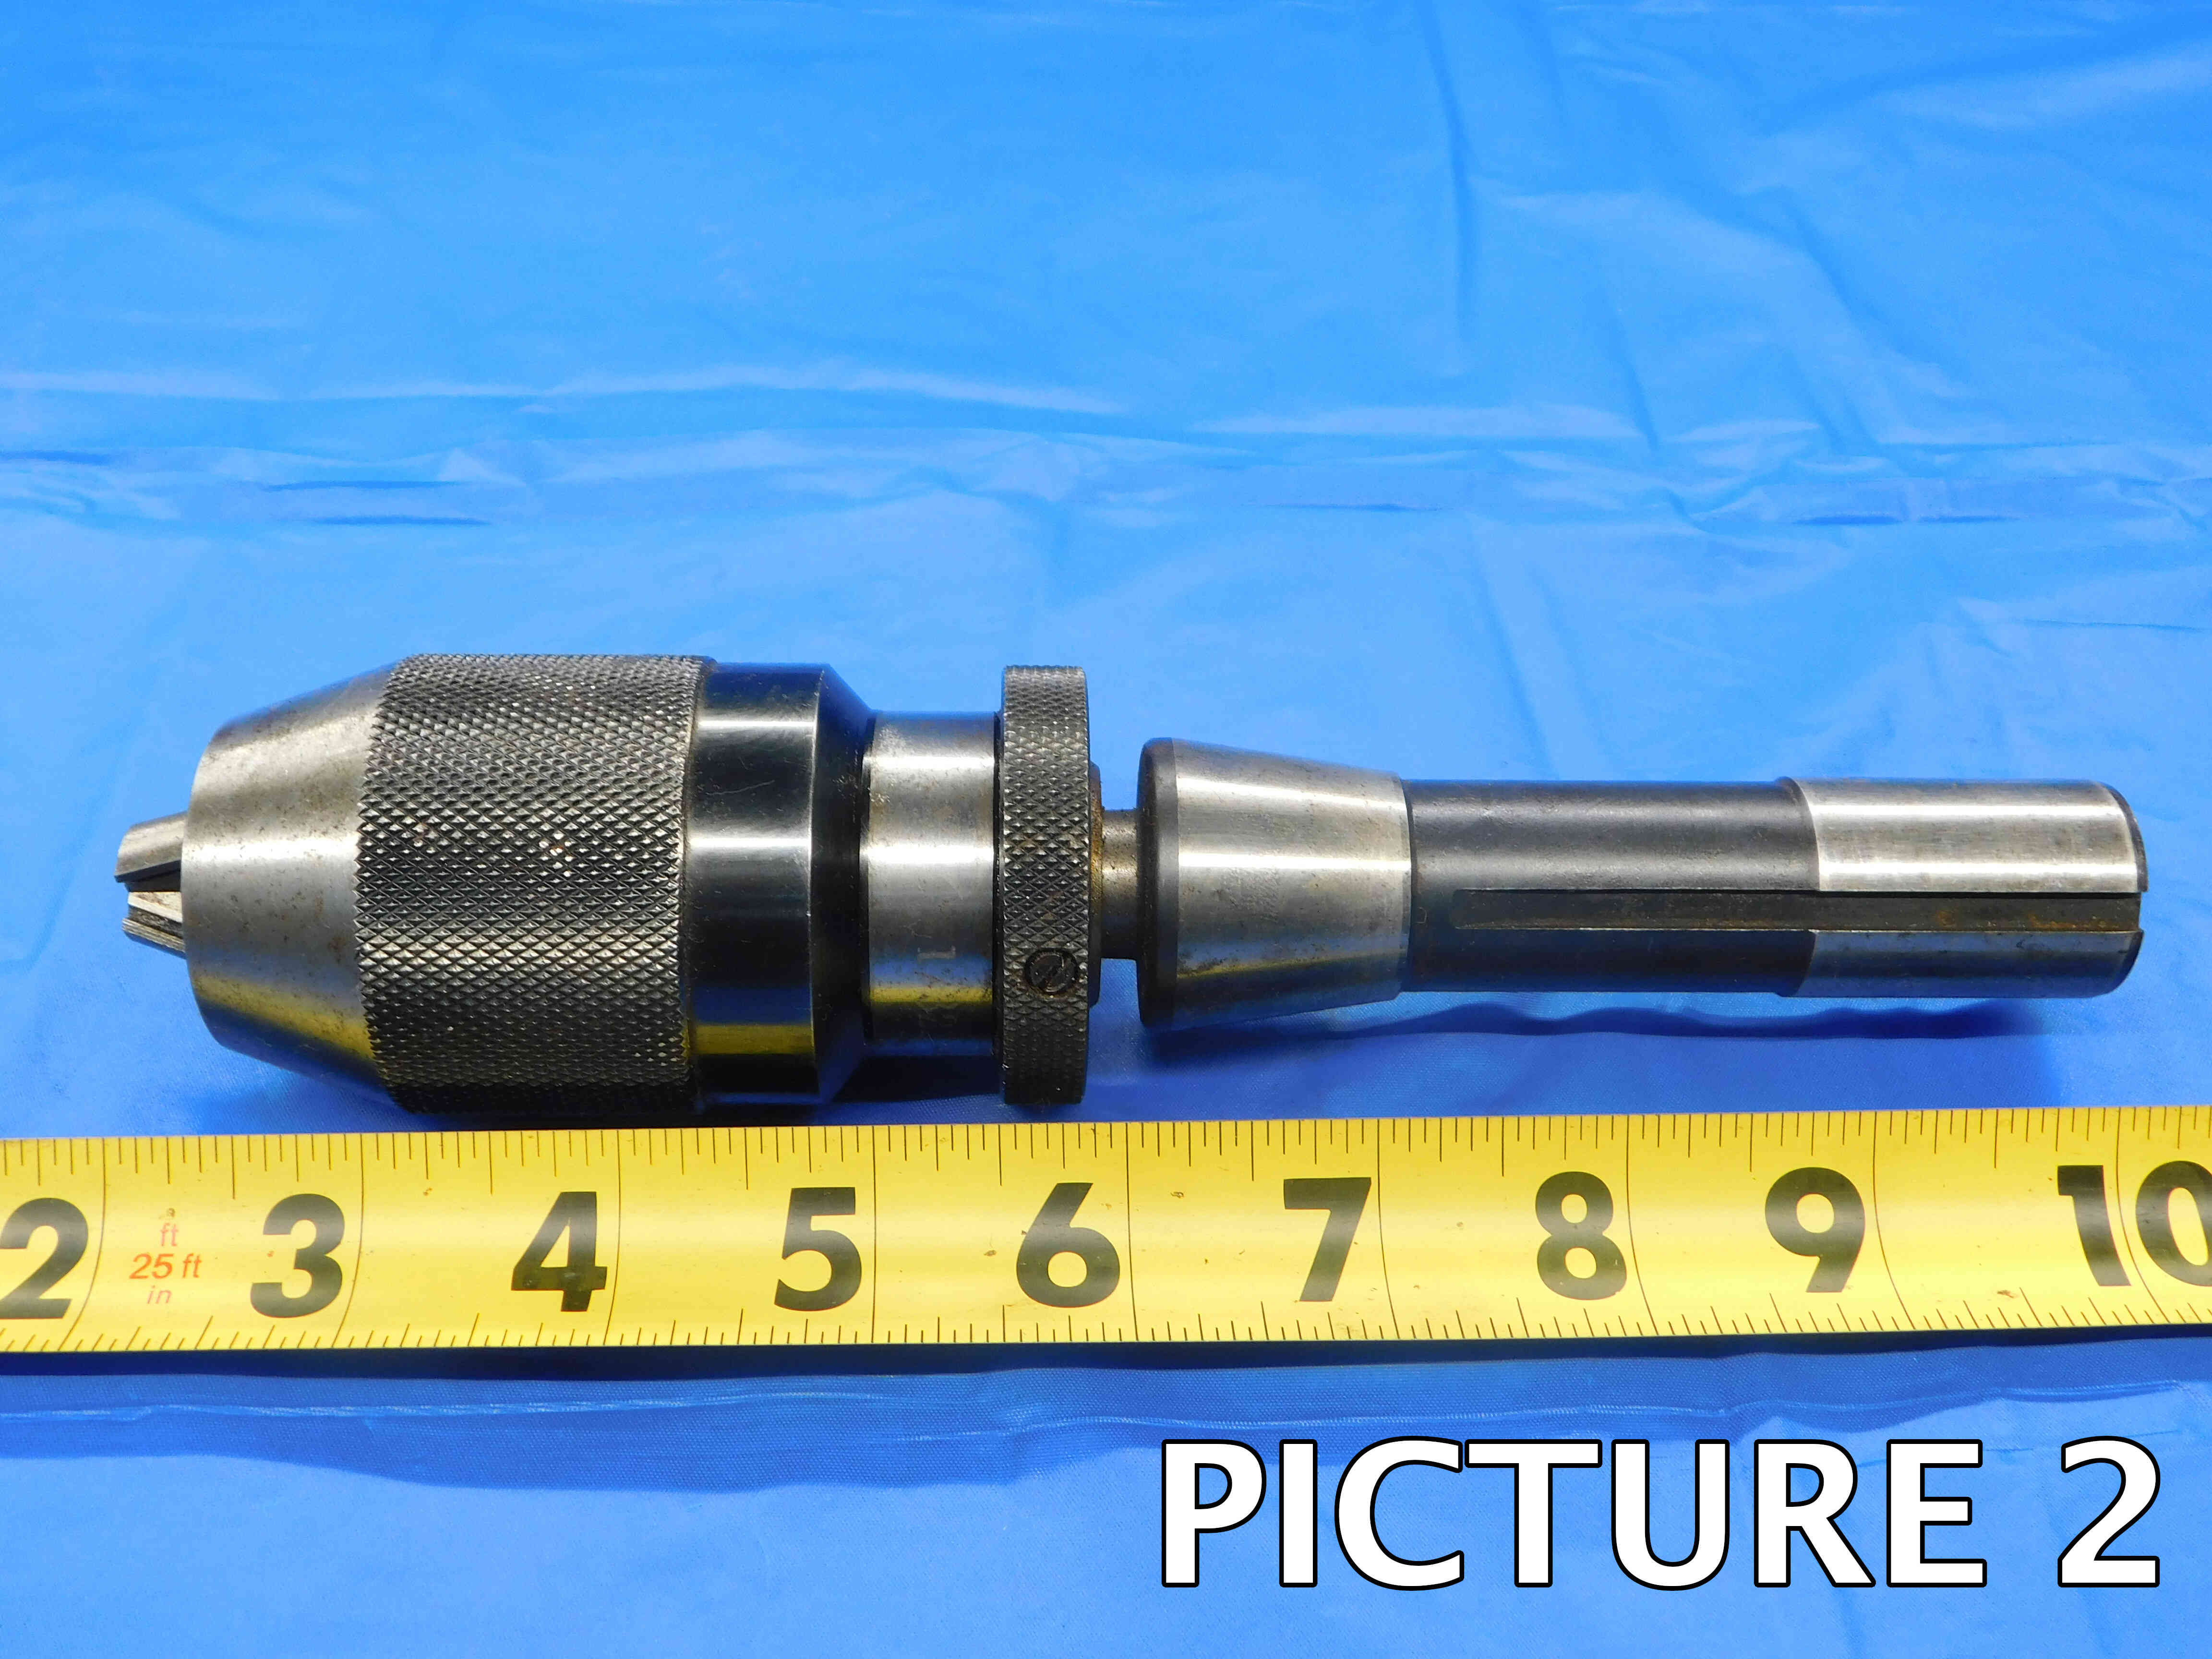
If the brand is not labeled, click the "Unlabeled" button to the right of the brand cell. Make sure this cell is not left blank, or the listing will not upload properly. Note: Items are often labeled with the country of origin (USA, China, Japan, Poland, etc). This should NOT be entered as the brand, and furthermore should not be included in the listing at all EXCEPT for USA which can be used as a filler.
Nearly all drill chucks will have labeling engraved upon the body. For the most common brand, Jacobs, this will often be a number, or a number followed by a letter. Some examples are: "No. 14N", "2A", "30B", etc. If there is no labeled part number, this can be left blank.
The capacity of a drill chuck is the range of shanks that it can hold with its jaws. For example, a 0 - 3/8" Capacity means that any drill bit with a shank 3/8" or less may be held by this drill chuck. Another example, 3/16 - 1/2" Capacity means it can hold any straight shank between 3/16 (.1875") & 1/2 (.5").
The capacity is nearly always labeled on the body right after the Size / Labeling. This may be in only inches, only metric, or in both. If both are labeled, please include both (for example: 0 - 1/2" 0 - 13mm)
Please see the below photo to understand how drill chucks are assembled:
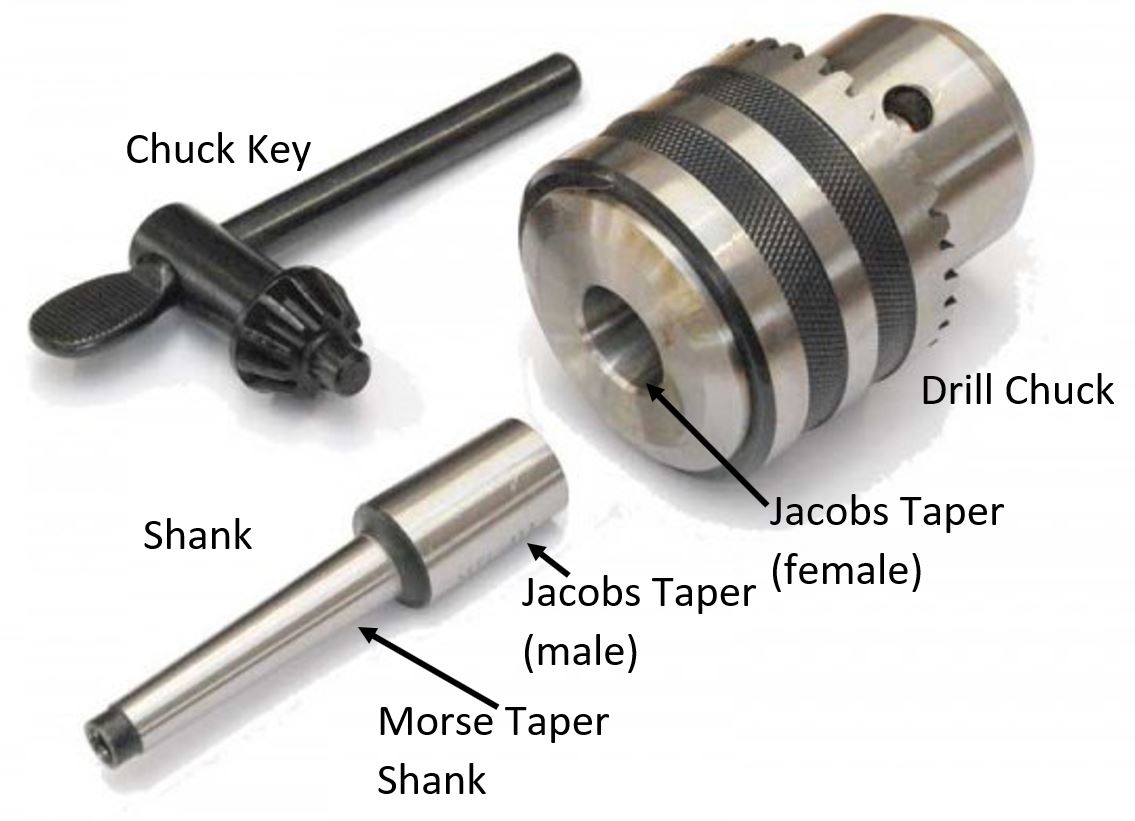
There are a variety of possibilities for the shank, including having none at all. The most common options are described below:
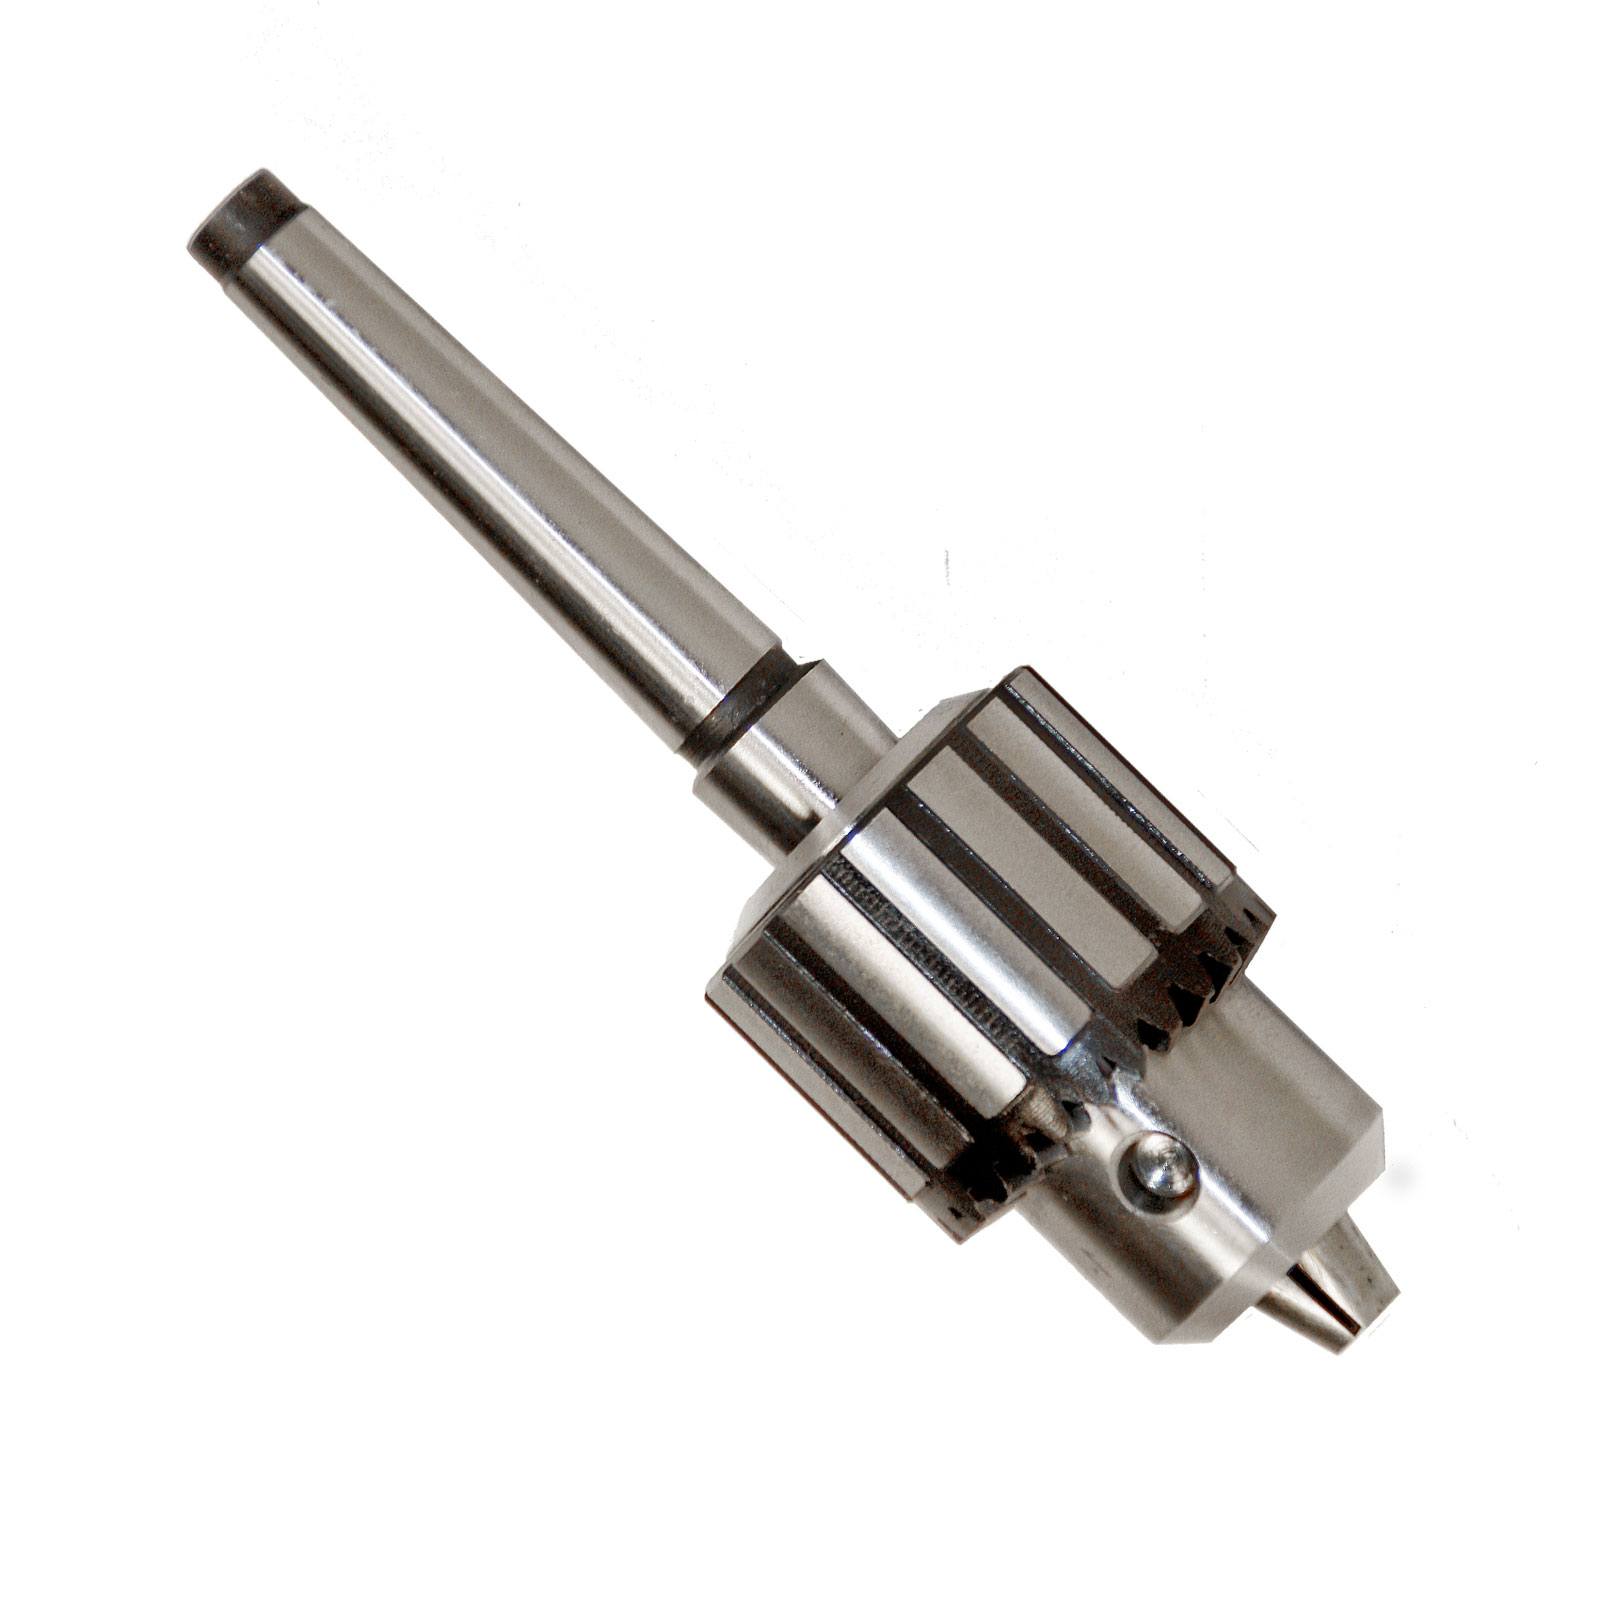
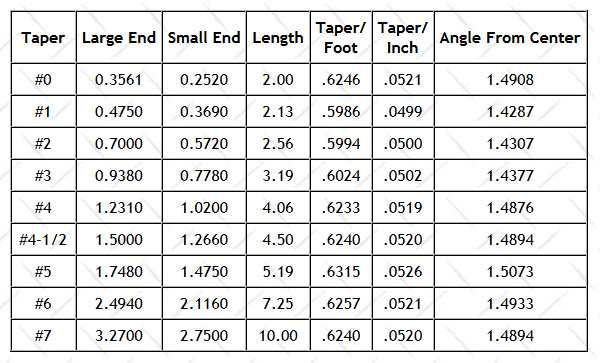
Morse Taper shanks, which are held by a Morse Taper Tool Holder, come in one of several specific sizes. You may use calipers to determine the Morse Taper size using the chart above, measuring at the Large End (largest diameter of the increasing tapered portion). The Morse Taper size can be entered either fully spelled out ("Morse Taper #3") or abbreviated as "MT[#]" (MT2, MT3, etc.).
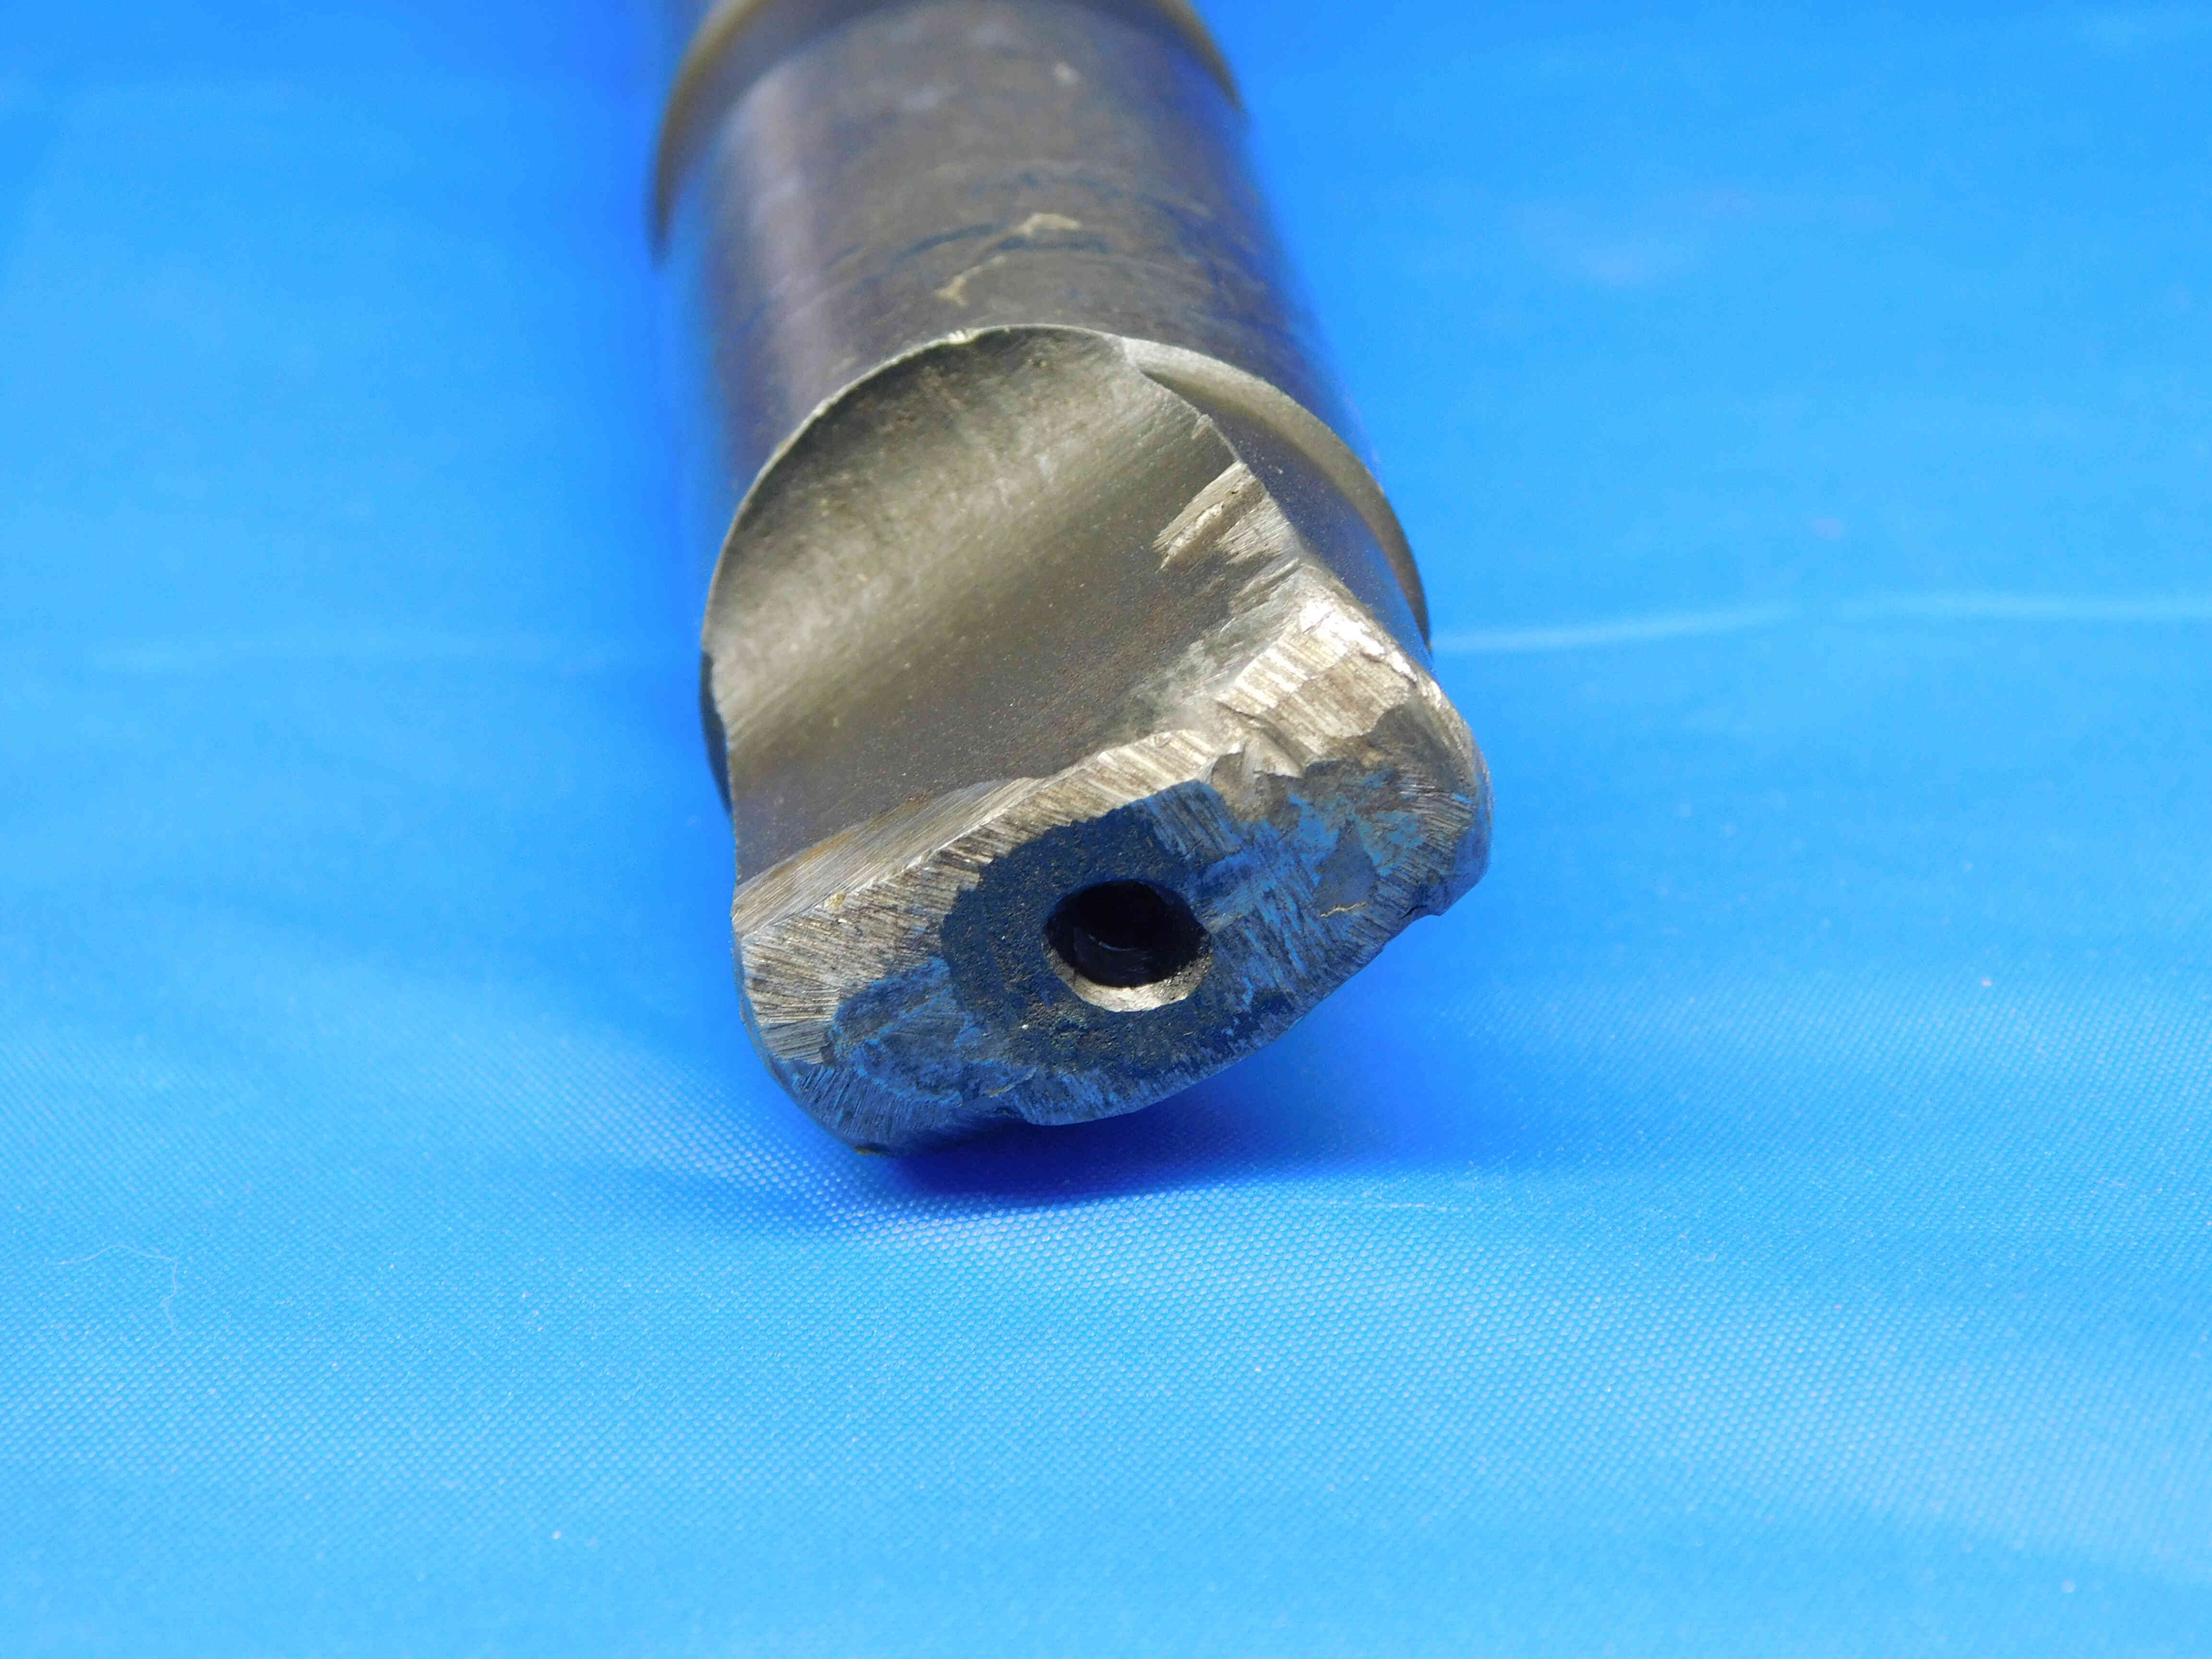
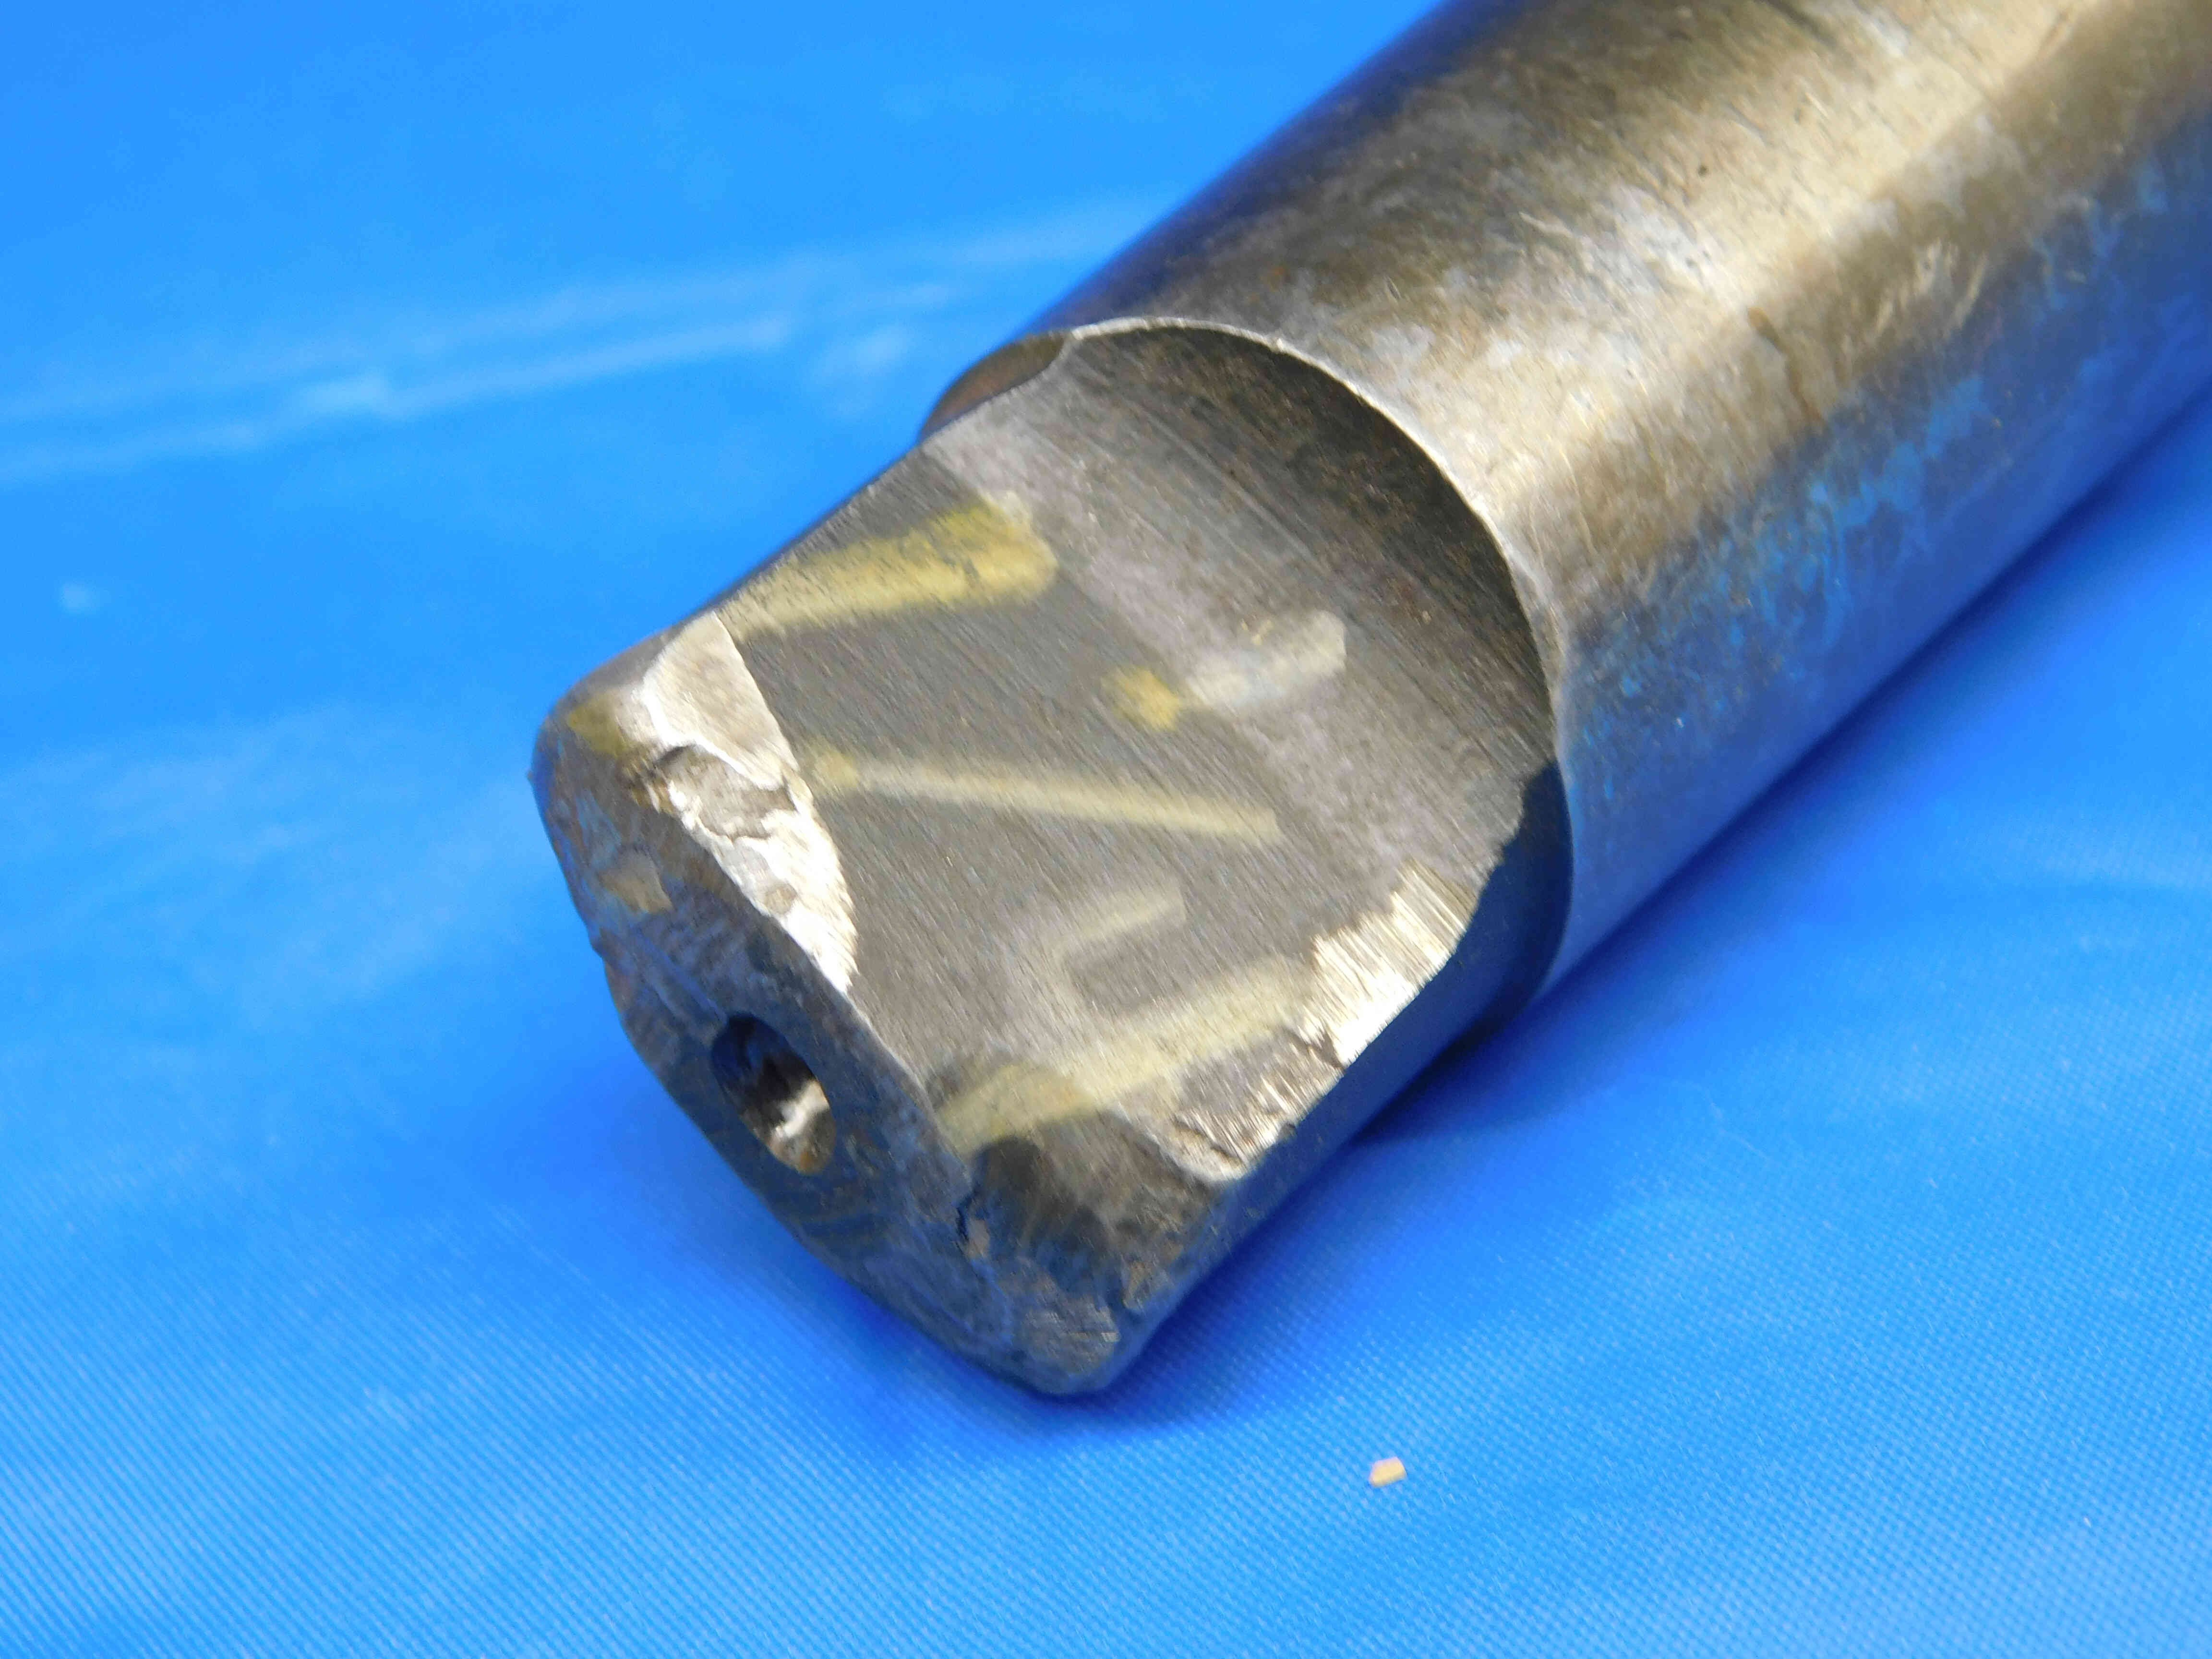
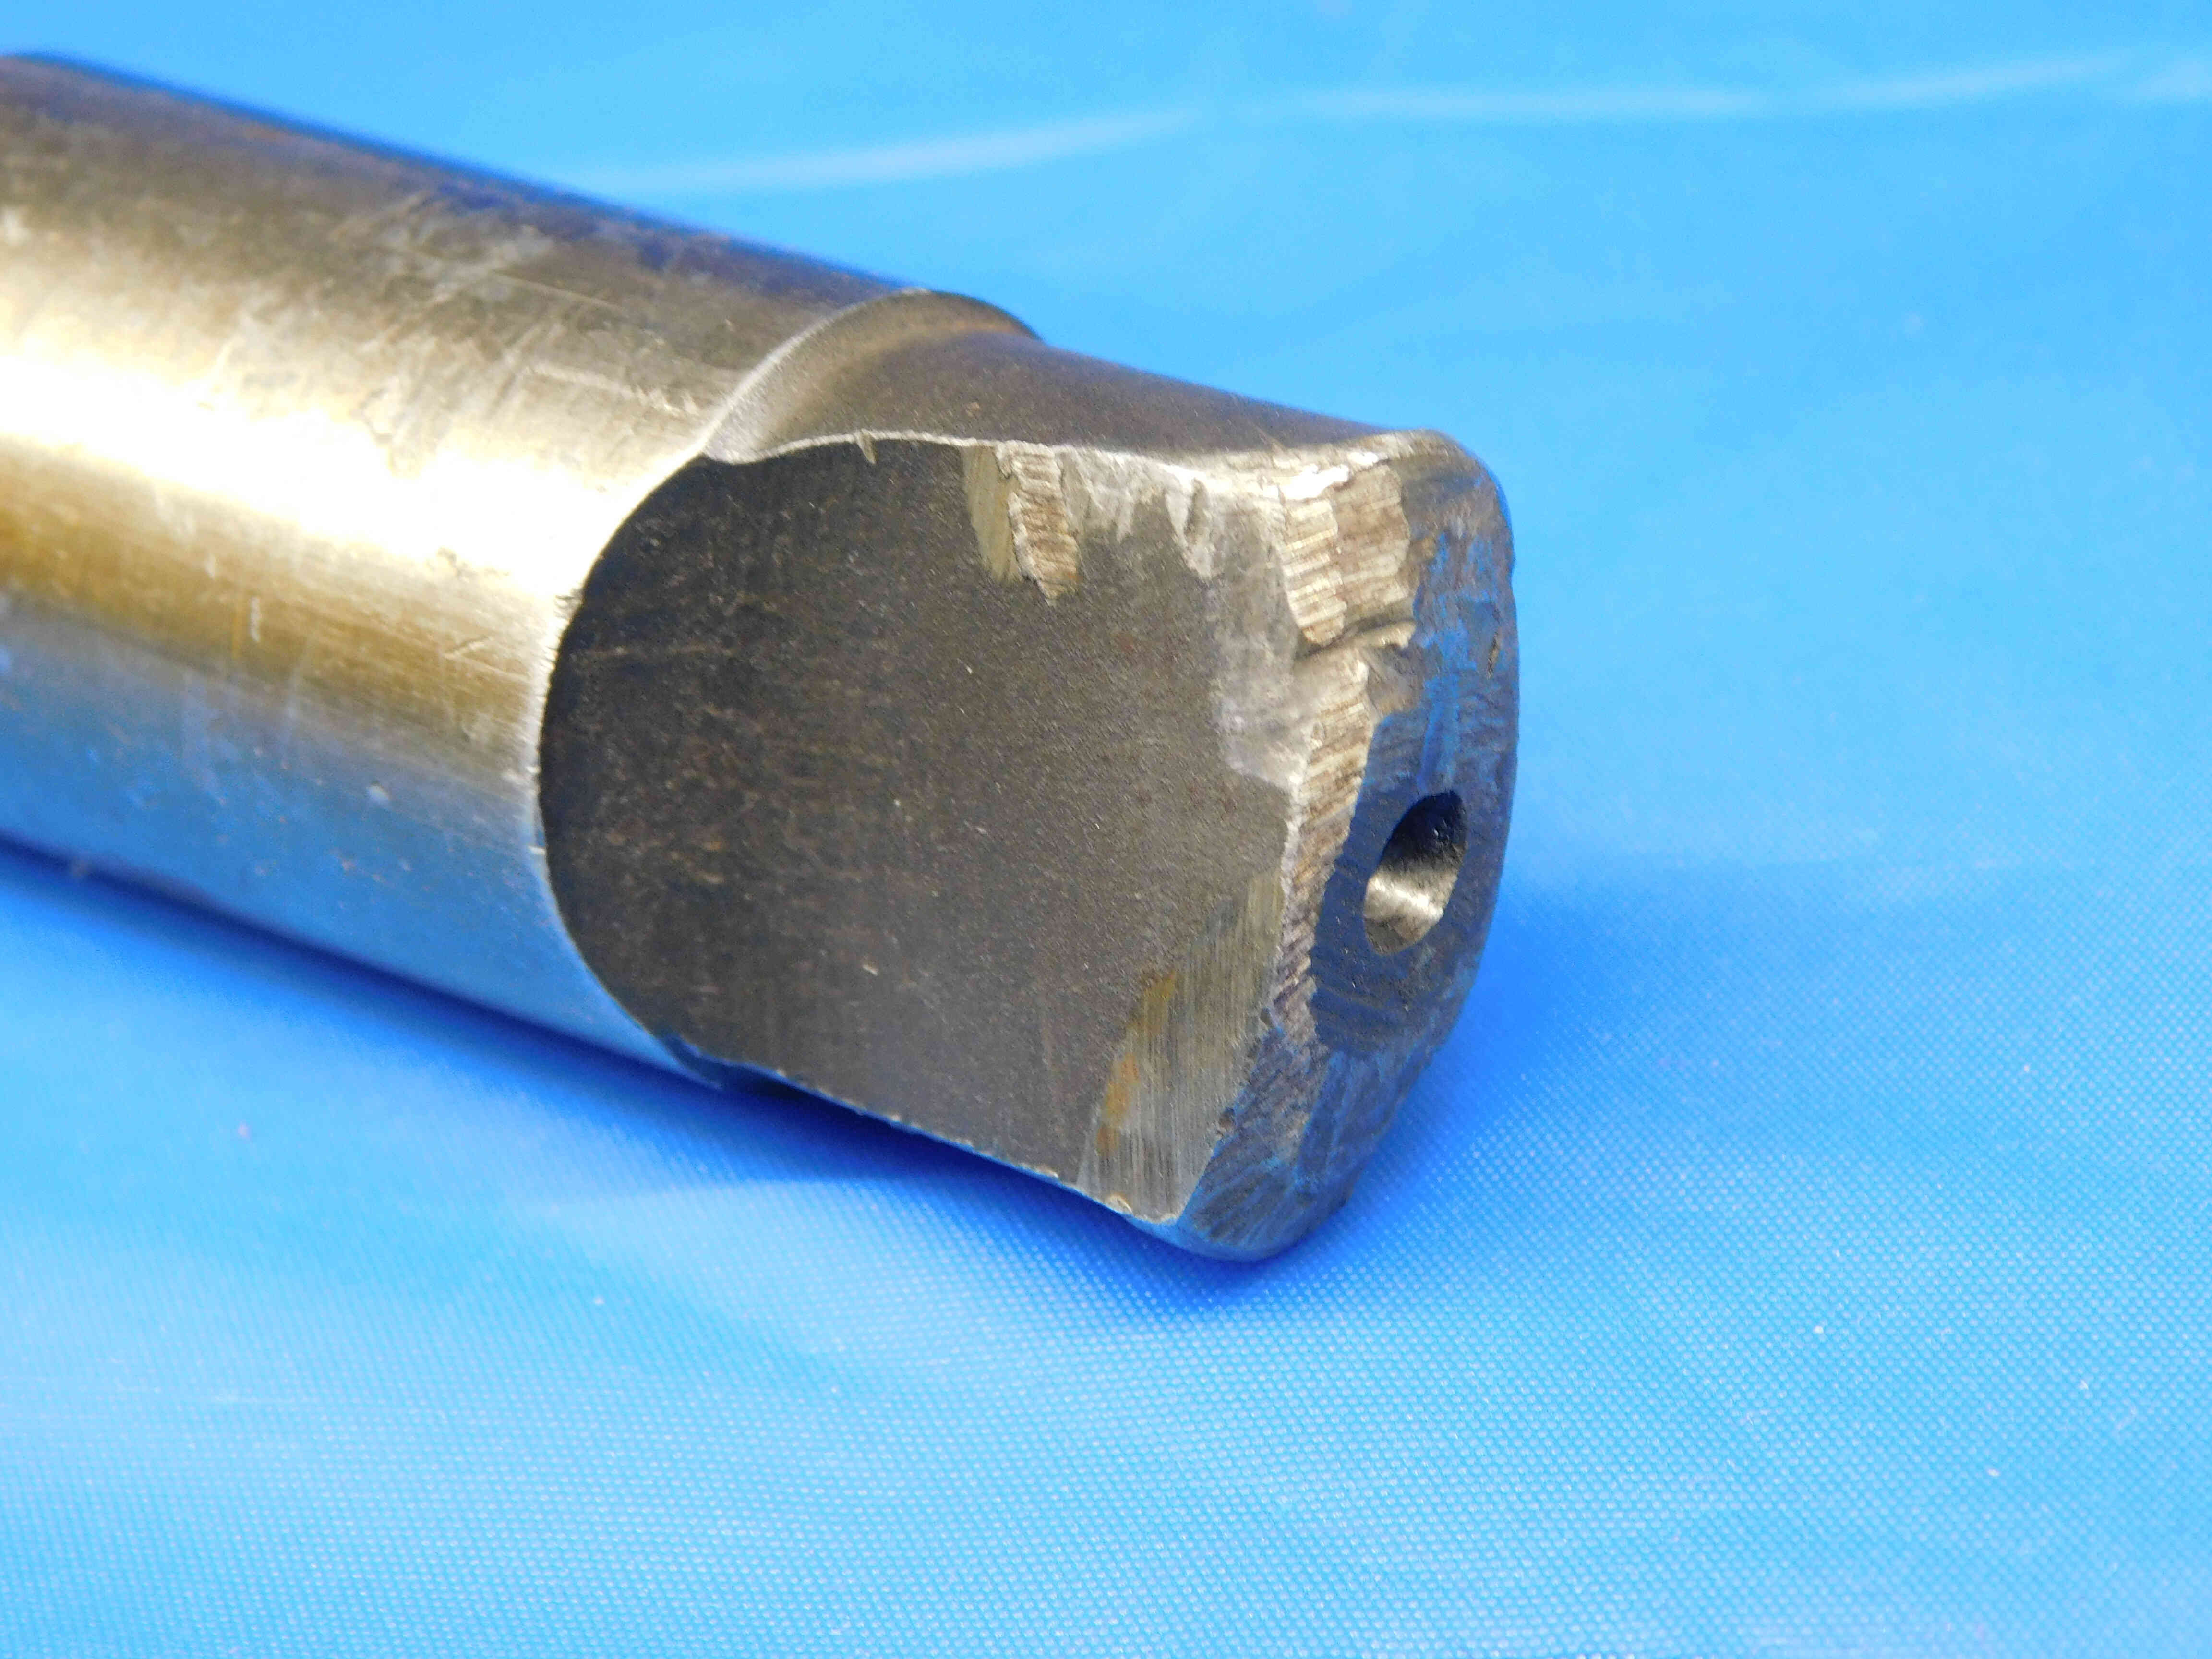
Always check for any damage or significant wear to the tang, which is the flat section at the end of the taper. Damage to the tang must always be pictured. See below for examples of what tang damage can look like:
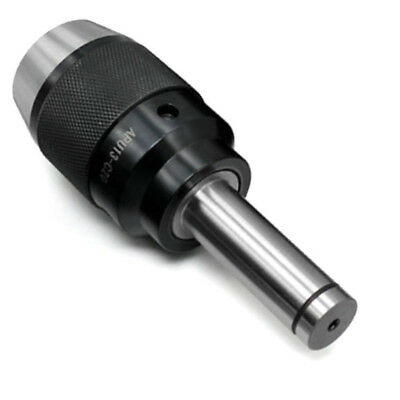
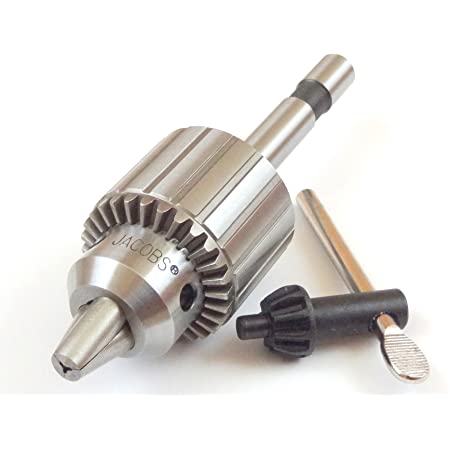
Drill chucks can also have shanks which are completely straight, which can be held by a variety of different machines and tool holder types. Straight shank diameters can be measured using calipers, and will usually be a common "on-size" such as 1/2", 3/4", 1", etc. This is a precise measurement, however, and should not be rounded more than .005" in either direction. If you are getting a strange "off-size" that is not close to any fraction, try converting it to millimeters, as it may be a metric size.
Note: When entering a whole-number inch size, always include the " sign. The " sign should not be included for any size including a fraction or decimal. So, for example: If a shank diameter is exactly one inch, it should be entered as 1" and not just 1. If the shank diameter is one and a half inches, it should be entered as 1 1/2 or 1.5 and not 1 1/2" or 1.5".
Metric size measurements should be entered with a lowercase "mm" (ex.: 16mm, 40mm).
Jacobs Taper (No Shank Present)
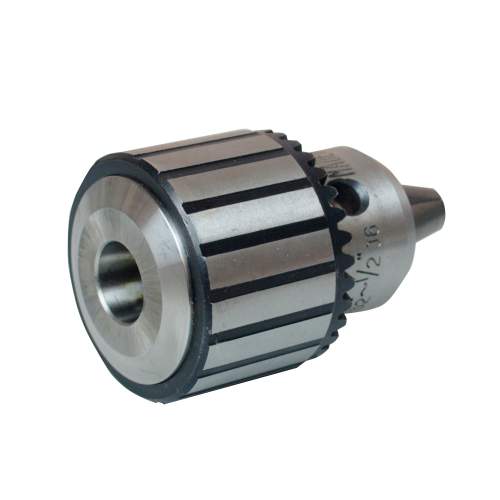
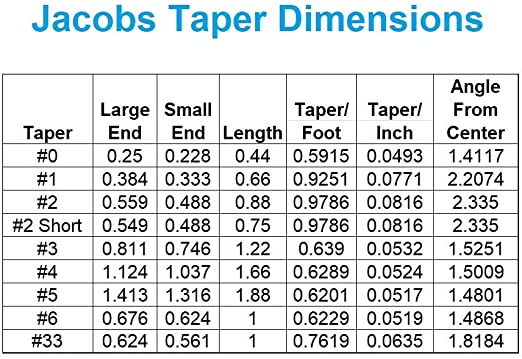
Many drill chucks will not have a shank attached. In this case, there will be an internal (female) Jacobs Taper at the back of the chuck that a shank can be inserted into. The Jacobs Taper size can be determined by measuring at the large end using calipers, and comparing to the chart above. The Jacobs Taper size can be entered either fully spelled out ("Jacobs Taper #3") or abbreviated as "JT[#]" (JT2, JT3, etc.).
While most drill chucks will be standard (meaning no "type" to enter in this cell), there are a couple options for special types:
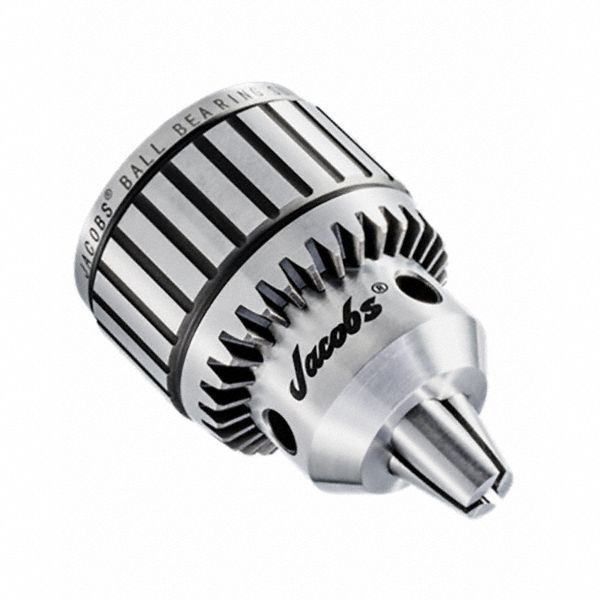
Jacobs has a line of "Super" Drill Chucks, also sometimes called "Ball Bearing Super Chucks". This will be labeled near the top of the sleeve as seen in the image above, and should always be included in the "type" section whenever it is present.
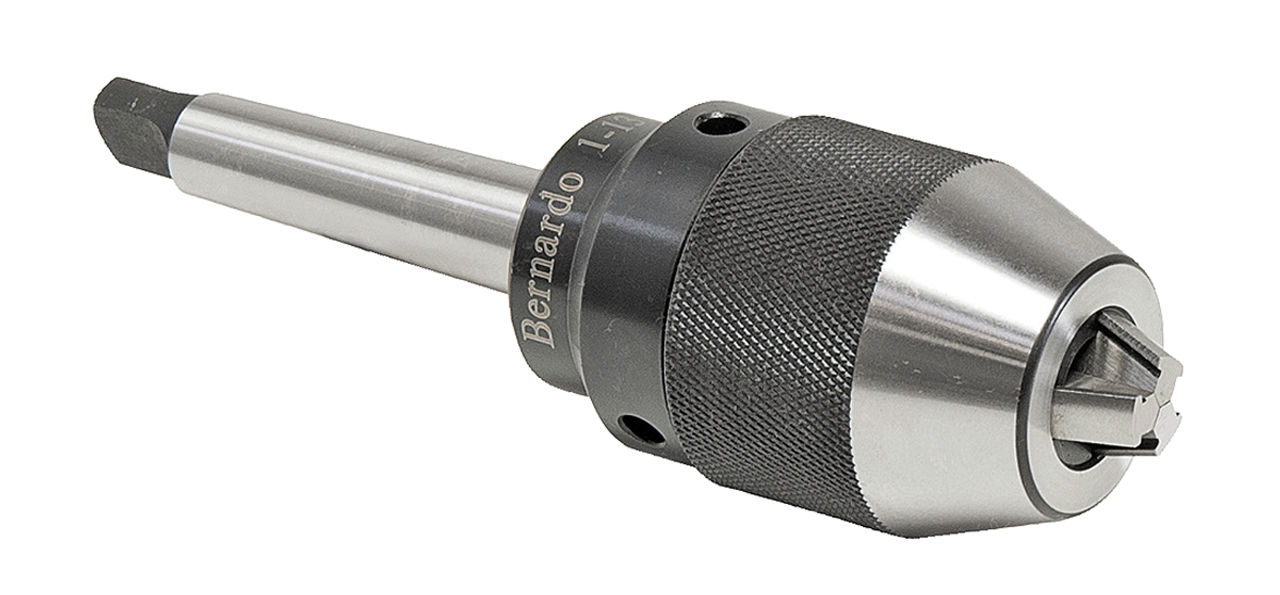
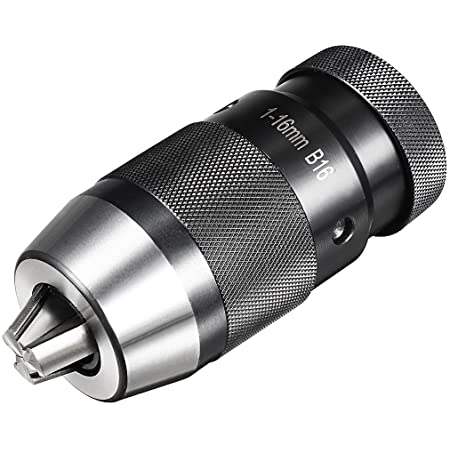
Keyless drill chucks do not have gear teeth and, as the name implies, do not use keys to open and close the jaws, instead being able to be turned by hand or with a wrench. These are more valuable than keyed chucks because they have an internal mechanism which tightens the jaws as the chuck rotates faster, allowing for more accurate turning.
The "Filler" section is used to add other relevant information to the title which is not covered by the other sections. Fillers can be a good way to increase a listing's visibility - we always want to include as much information as possible that we think a customer might be searching for in order to make sure that our listing is coming up in their search results.
There is not necessarily one right answer when it comes to fillers, and often it will be up to you to decide what should and should not be added as filler. Drill chucks will often have some extra space for fillers, so here are some suggestions for what to include:
-Secondary labeling or branding / product names
-"USA" or "USA Made" for any US Manufacturers (you may need quickly research a brand if you are not sure since this will not always be specifically labeled)
-Decimal equivalents for Capacity sizes
-The Capacity's metric equivalent can also be included as filler if it is only listed in inches (and vice-versa)
-If a drill chuck has a Jacobs Taper connection with an attached shank, the JT size should be included as filler (if you are able to measure it / it is labeled)
Note: Keep in mind that titles have a maximum limit of 80 characters.
Additional Specifications & Special Condition
The Additional Specifications section should be used for any secondary labeling or additional measurements that do not fit in the other sections of the listing. There is no character limit here so any relevant information that is not already covered should be included (within reason - we don't want to overload the listing with unnecessary information, so ask your trainer if you are not sure whether or not to include something in this section).
The Special Condition section should be used for any special notes about the item's condition such as damage or modification. Try to be specific when describing the condition, and reference pictures that point out the damage / modification if applicable. For example, "One of the jaws is chipped - see picture #4 for details." General wear and tear does not need to be mentioned, but anything that will affect the tool's usage should be included here. An important thing to check with drill chucks is whether or not it opens and closes easily by hand. This is very important to the usability of the chuck and should always be mentioned in the "special condition" of the listing.
Once all information is entered, click here for the next steps.
