*THIS PAGE IS STILL UNDER CONSTRUCTION*
Pictures, table of contents, and more items to be added in the future
The "Item" category is used for anything that does not fall under one of the other tooling categories. Unlike the other types, titles are not auto-generated and must be entered manually. Several of the more common "items" are described below, with examples of pictures and how to format the title.
***If you are listing several different items together as a lot, consider using the Tooling Lots category instead.
Common "Items"
(Click to jump to section):
For all other "Items", click here. (ADD LINK)
Adapters / Extensions (Modular, Solid End Mill, Face Mill, etc.)
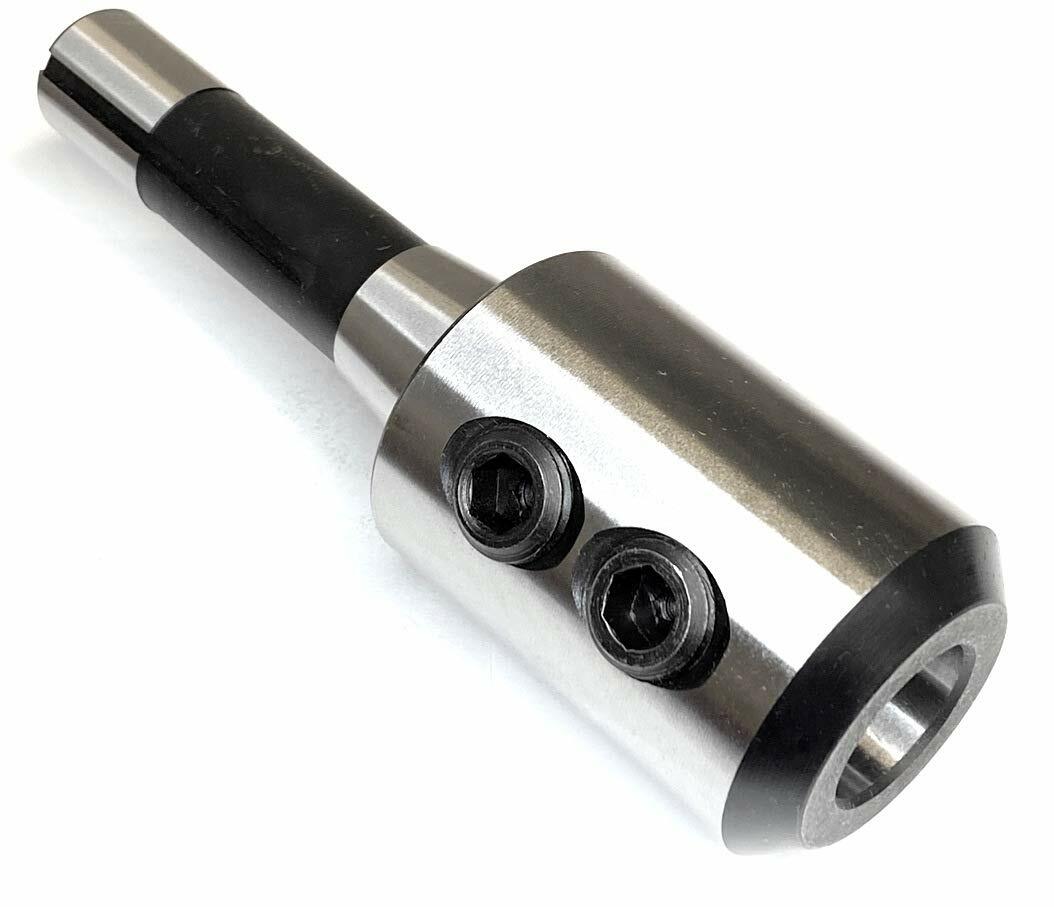
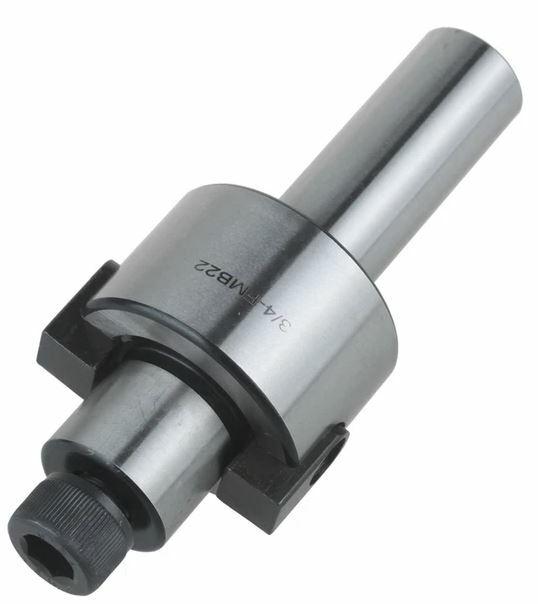
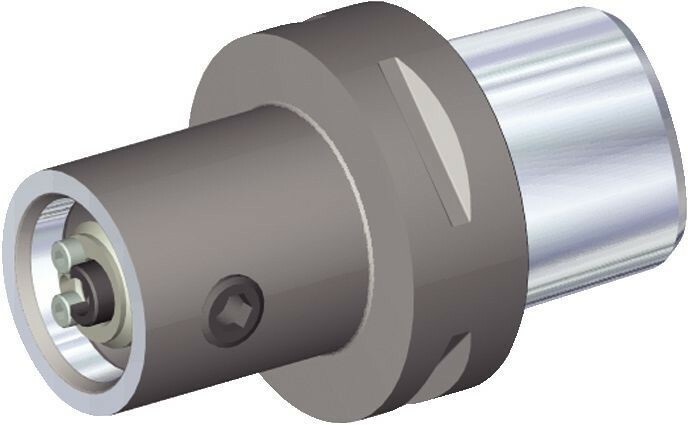
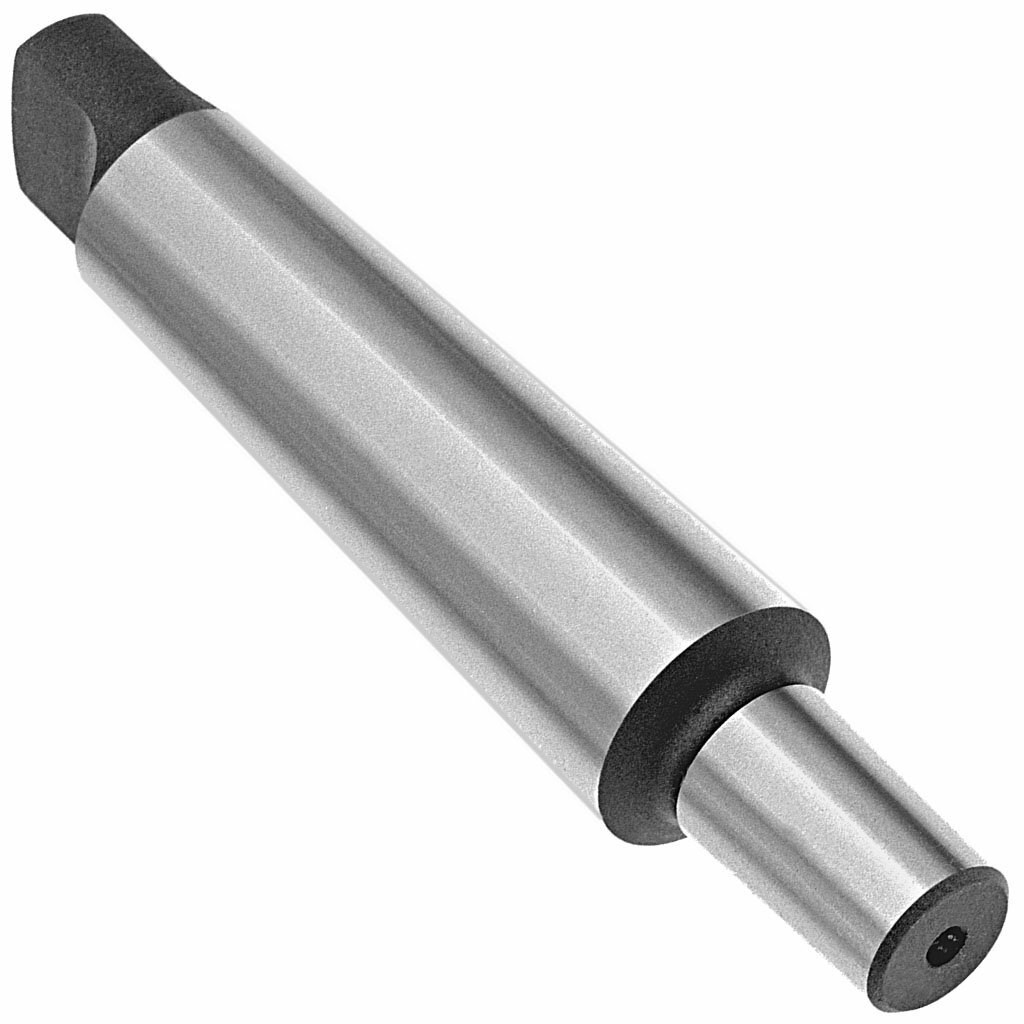
Tool holder adapters come in a variety of shapes and sizes - these can essentially be thought of as Taper Shank Tool Holders that don't have one of the taper shanks described on that FAQ page (CAT, BT, NMTB, etc.). Any of the Tool Holding Types described in the Taper Shank Tool Holder FAQ can potentially be found as one of these adapters. An extension specifically refers to any adapter where the male and female ends are the same connection type and size (typically this exists for modular connections only).
***Collet chucks (with straight, Morse Taper, or modular shanks) should always use the Collet Chuck Extension category
***You should use the Morse Taper Adapter category if:
- The inside & outside are both Morse Taper, OR
- The inside is Morse Taper and the outside is a straight diameter, OR
- The inside is a straight diameter and the outside is a Morse Taper
Pictures:
Adapters and extensions should follow the same picture format as most other tooling types:
1st Picture: A three-quarter angle shot with the working end (i.e., the female end of the end that a tool connects to) facing the camera. If there is any labeling visible, the item should be oriented so that the labeling is right-side-up
2nd Picture: A side-view with a tape measure at the bottom of the frame to provide scale
3rd Picture: A close-up of the working end. Face mill and stub arbor nuts and screws should be removed for this picture.
4th Picture: A close-up of the labeling (if there is any).
Additional Pictures: Any damage/modifications must be pictured. Use a pen to point to the affected area. If a straight shank has any flat sections on it, they must also be pictured (they should also be visible in the first and second pictures if possible).
Refer to the examples below:
PICTURES GO HERE
Listing:
Adapters and extensions will follow a relatively simple title format:
(Brand)(Part #)[Female End / Connection] X [Male End / Shank][Tool Holding Type]("Tool Holder Adapter" OR "Tool Holder Extension")[Other Info]
- Brand and Part # are both optional; not every item will have these
- Other Info that you will want to include will most commonly be:
- Decimal equivalents for important fractional sizes (for I.D.'s, shank diameters, pilot O.D.'s, etc.)
- MT / JT abbreviations for any Morse Taper or Jacobs Taper sizes (MT1, JT3, etc.)
- Projection Length (primarily for extensions, but can be included in adapter titles if there is enough space):
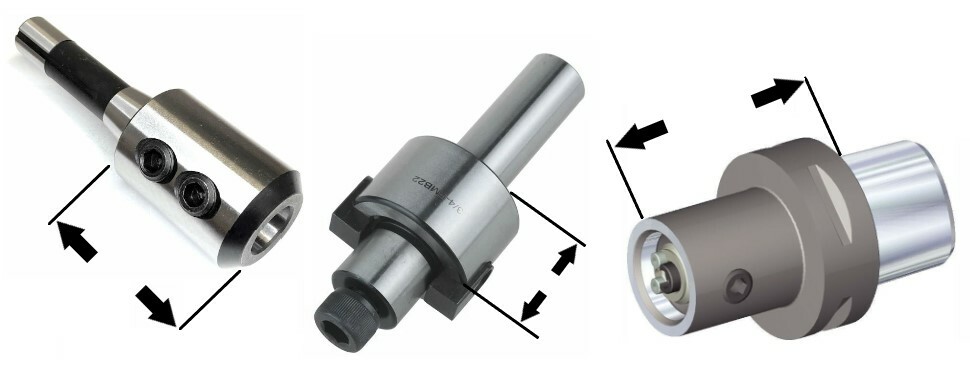
- Projection refers to the distance that an adapter or extension projects out from the tool holder it is inserted into. It is measured from the point where the shank ends to the point where the tool will be held/attached. For many adapters this will simply go all the way to the end of the adapter, with one of the more notable exceptions being face mill adapters (the second example above), which only measure projection up to the base of the pilot, NOT all the way to the screw. Refer to the Taper Shank Tool Holder FAQ for more information about how projection is measured on different tool holding types.
The Brand cell must always be filled out - if the item is unlabeled, click the "Unlabeled" button.
The Size/Labeling cell must also be filled out. Include the part number (if there is one), the male and female sizes/types, and any other important information that you might not have been able to fit in the title. There is no character limit for this cell.
Listing Examples:
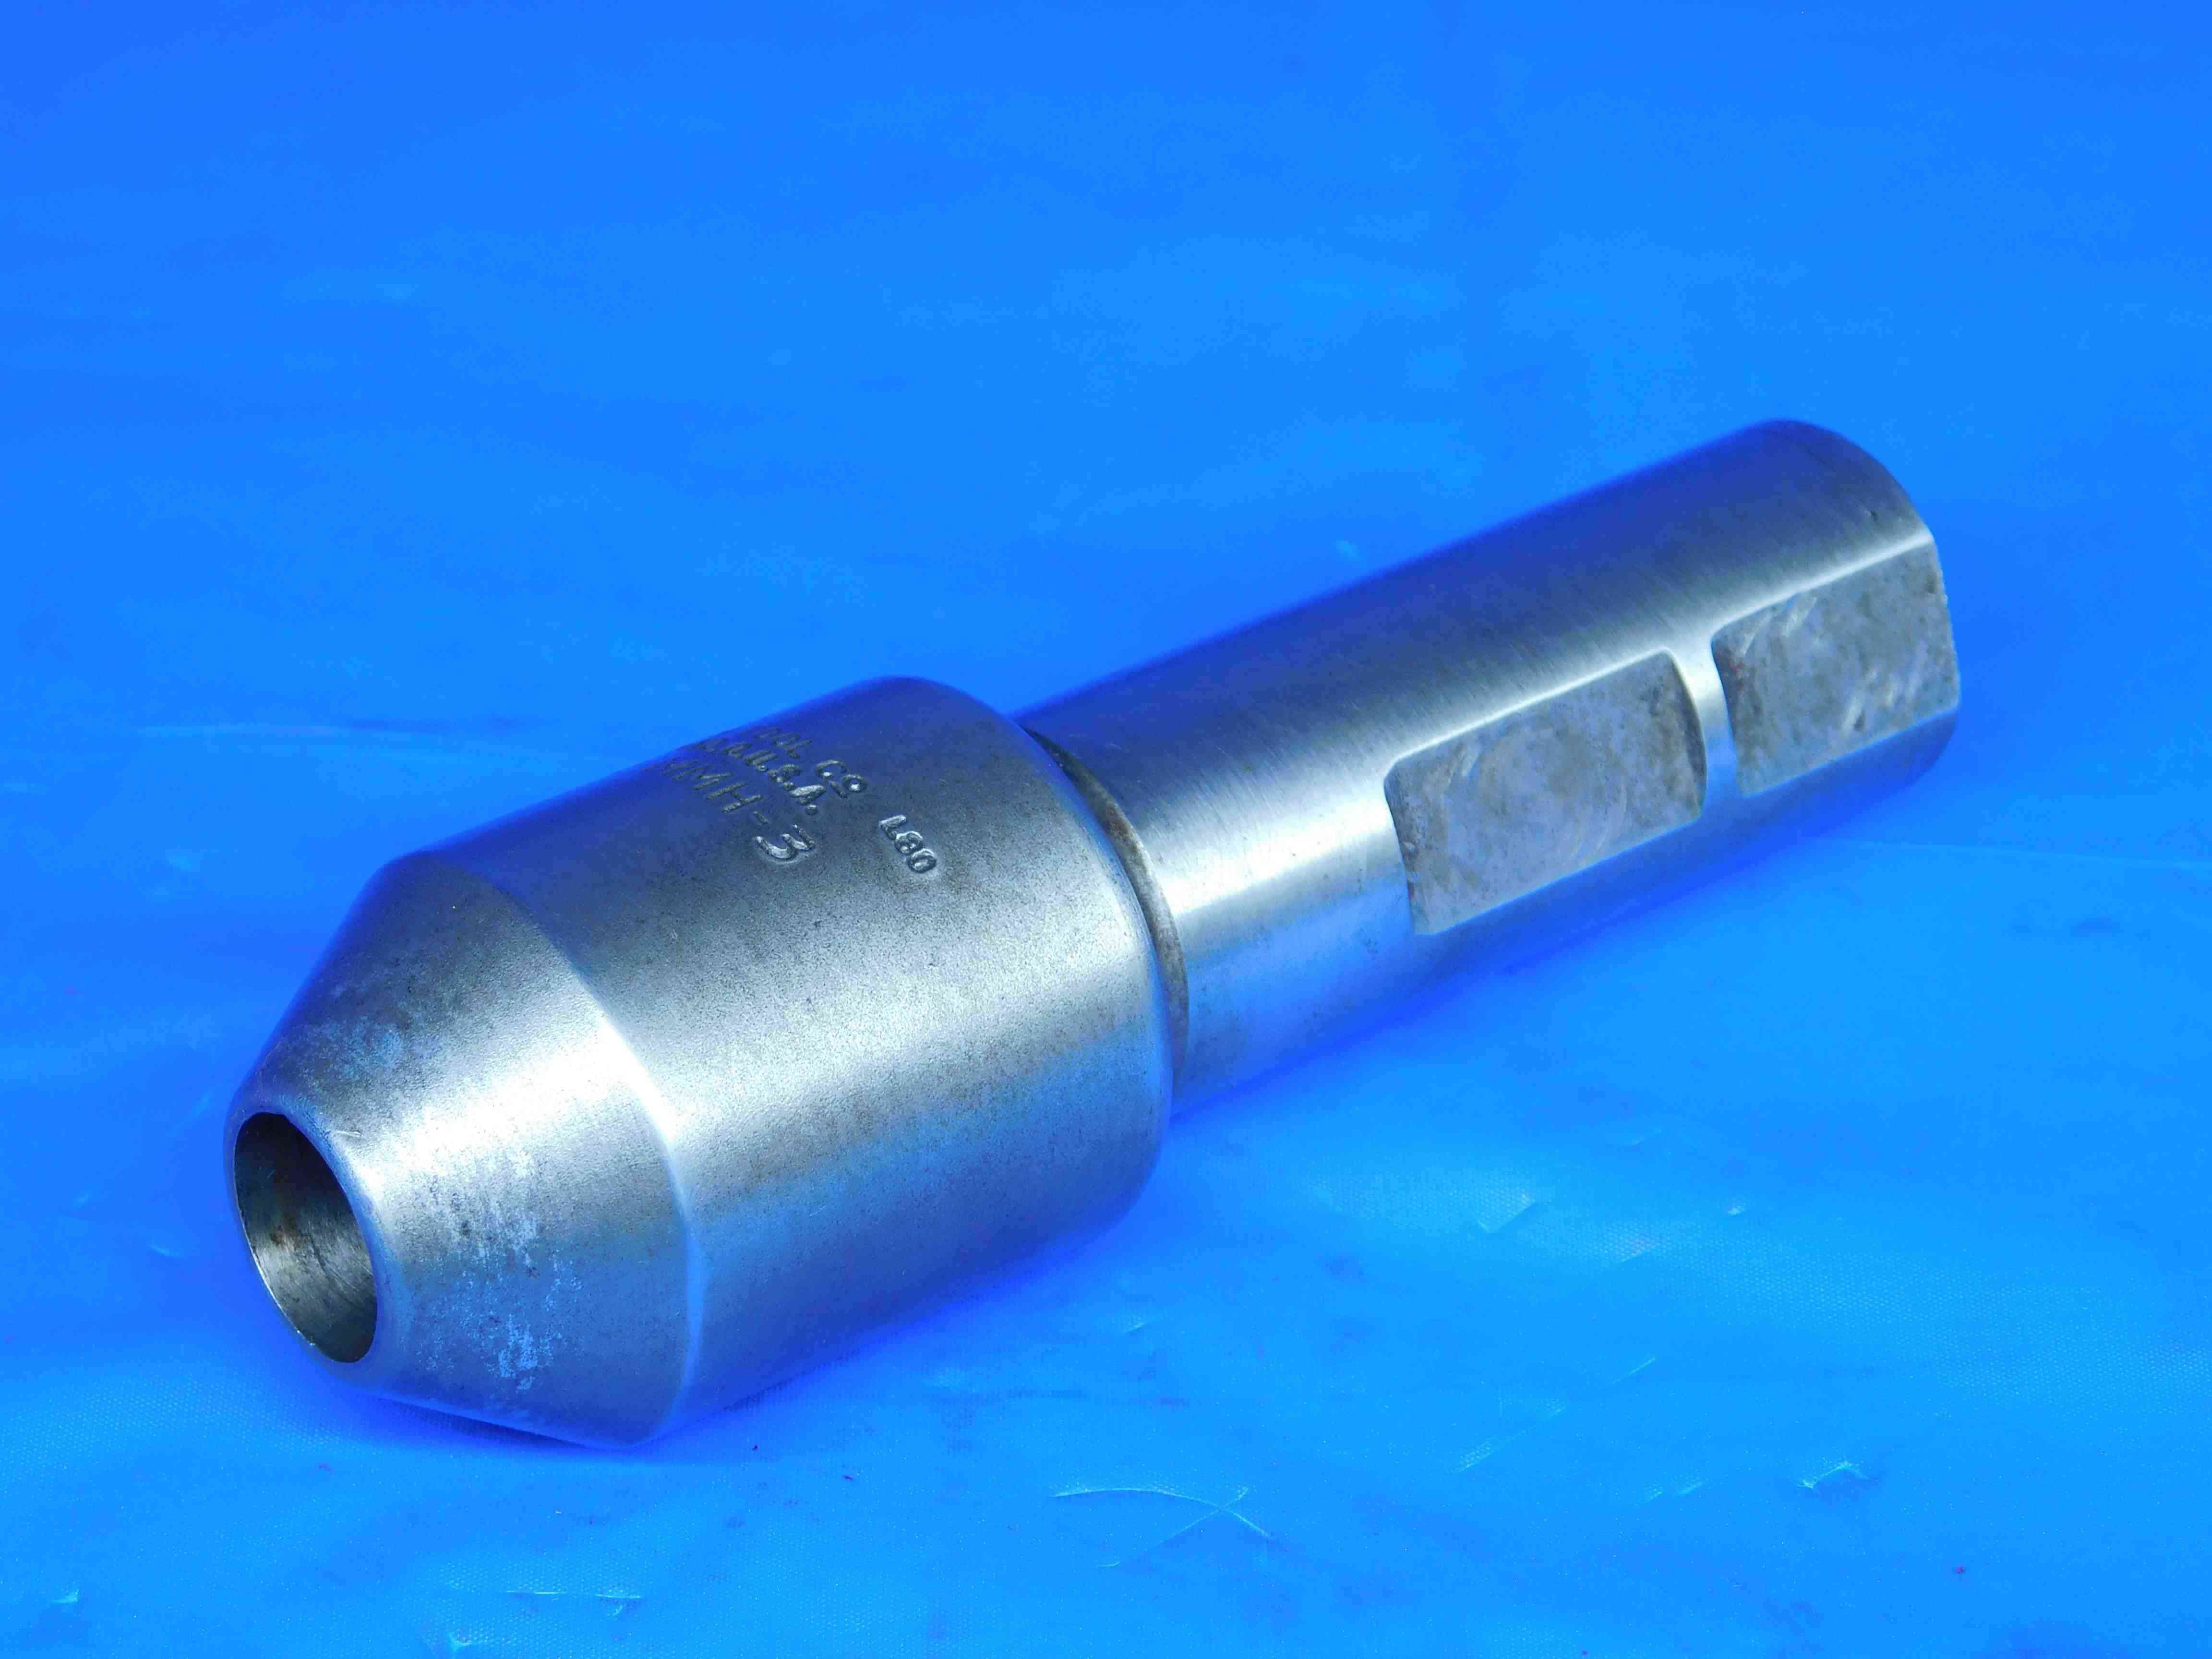

This is a very standard solid end mill adapter listing. Decimal equivalents of the I.D. and shank diameter are included at the end of the title. The projection could not be fit in the title, but is included in the Size/Labeling section.
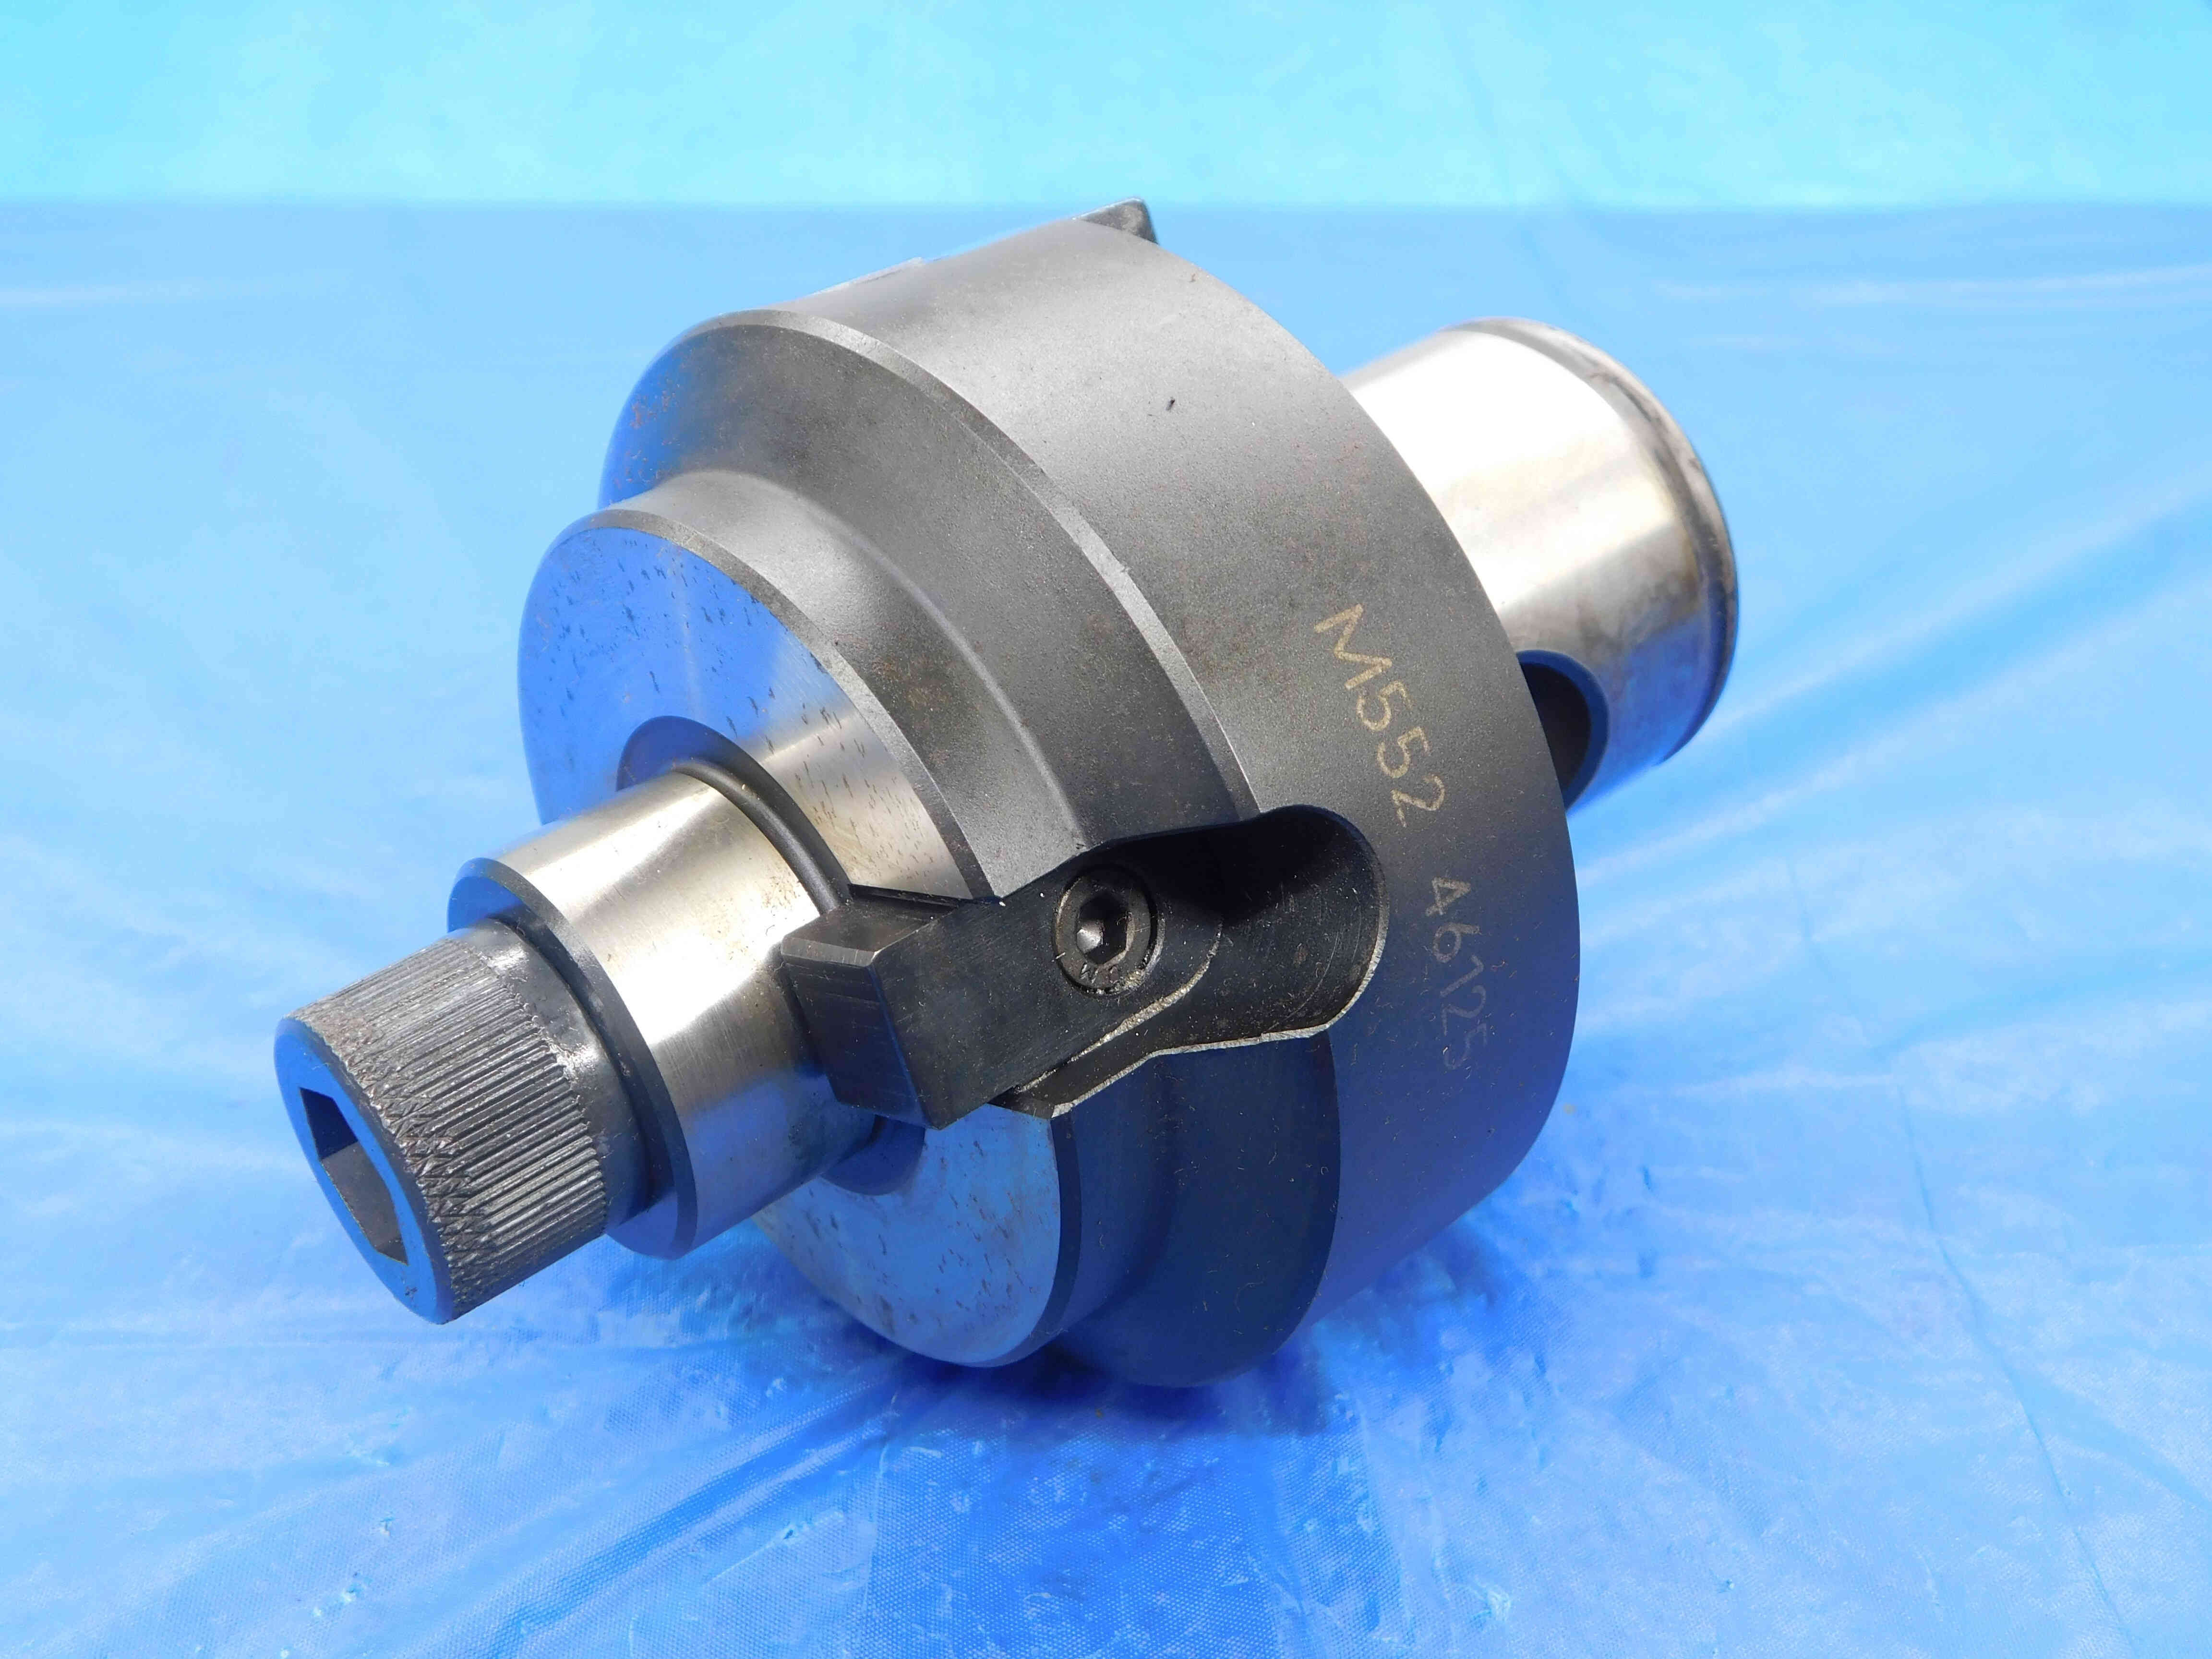

Face mill adapters should always include both the pilot diameter and the key width. In this case, the shank is a modular connection, so the word MODULAR is included. The decimal equivalent for the pilot O.D. is included at the end of the title. The decimal for the key width can also be included if there is enough space, but is not as important. Like the previous example, the projection could not be fit in the title, but is included in the Size/Labeling section.
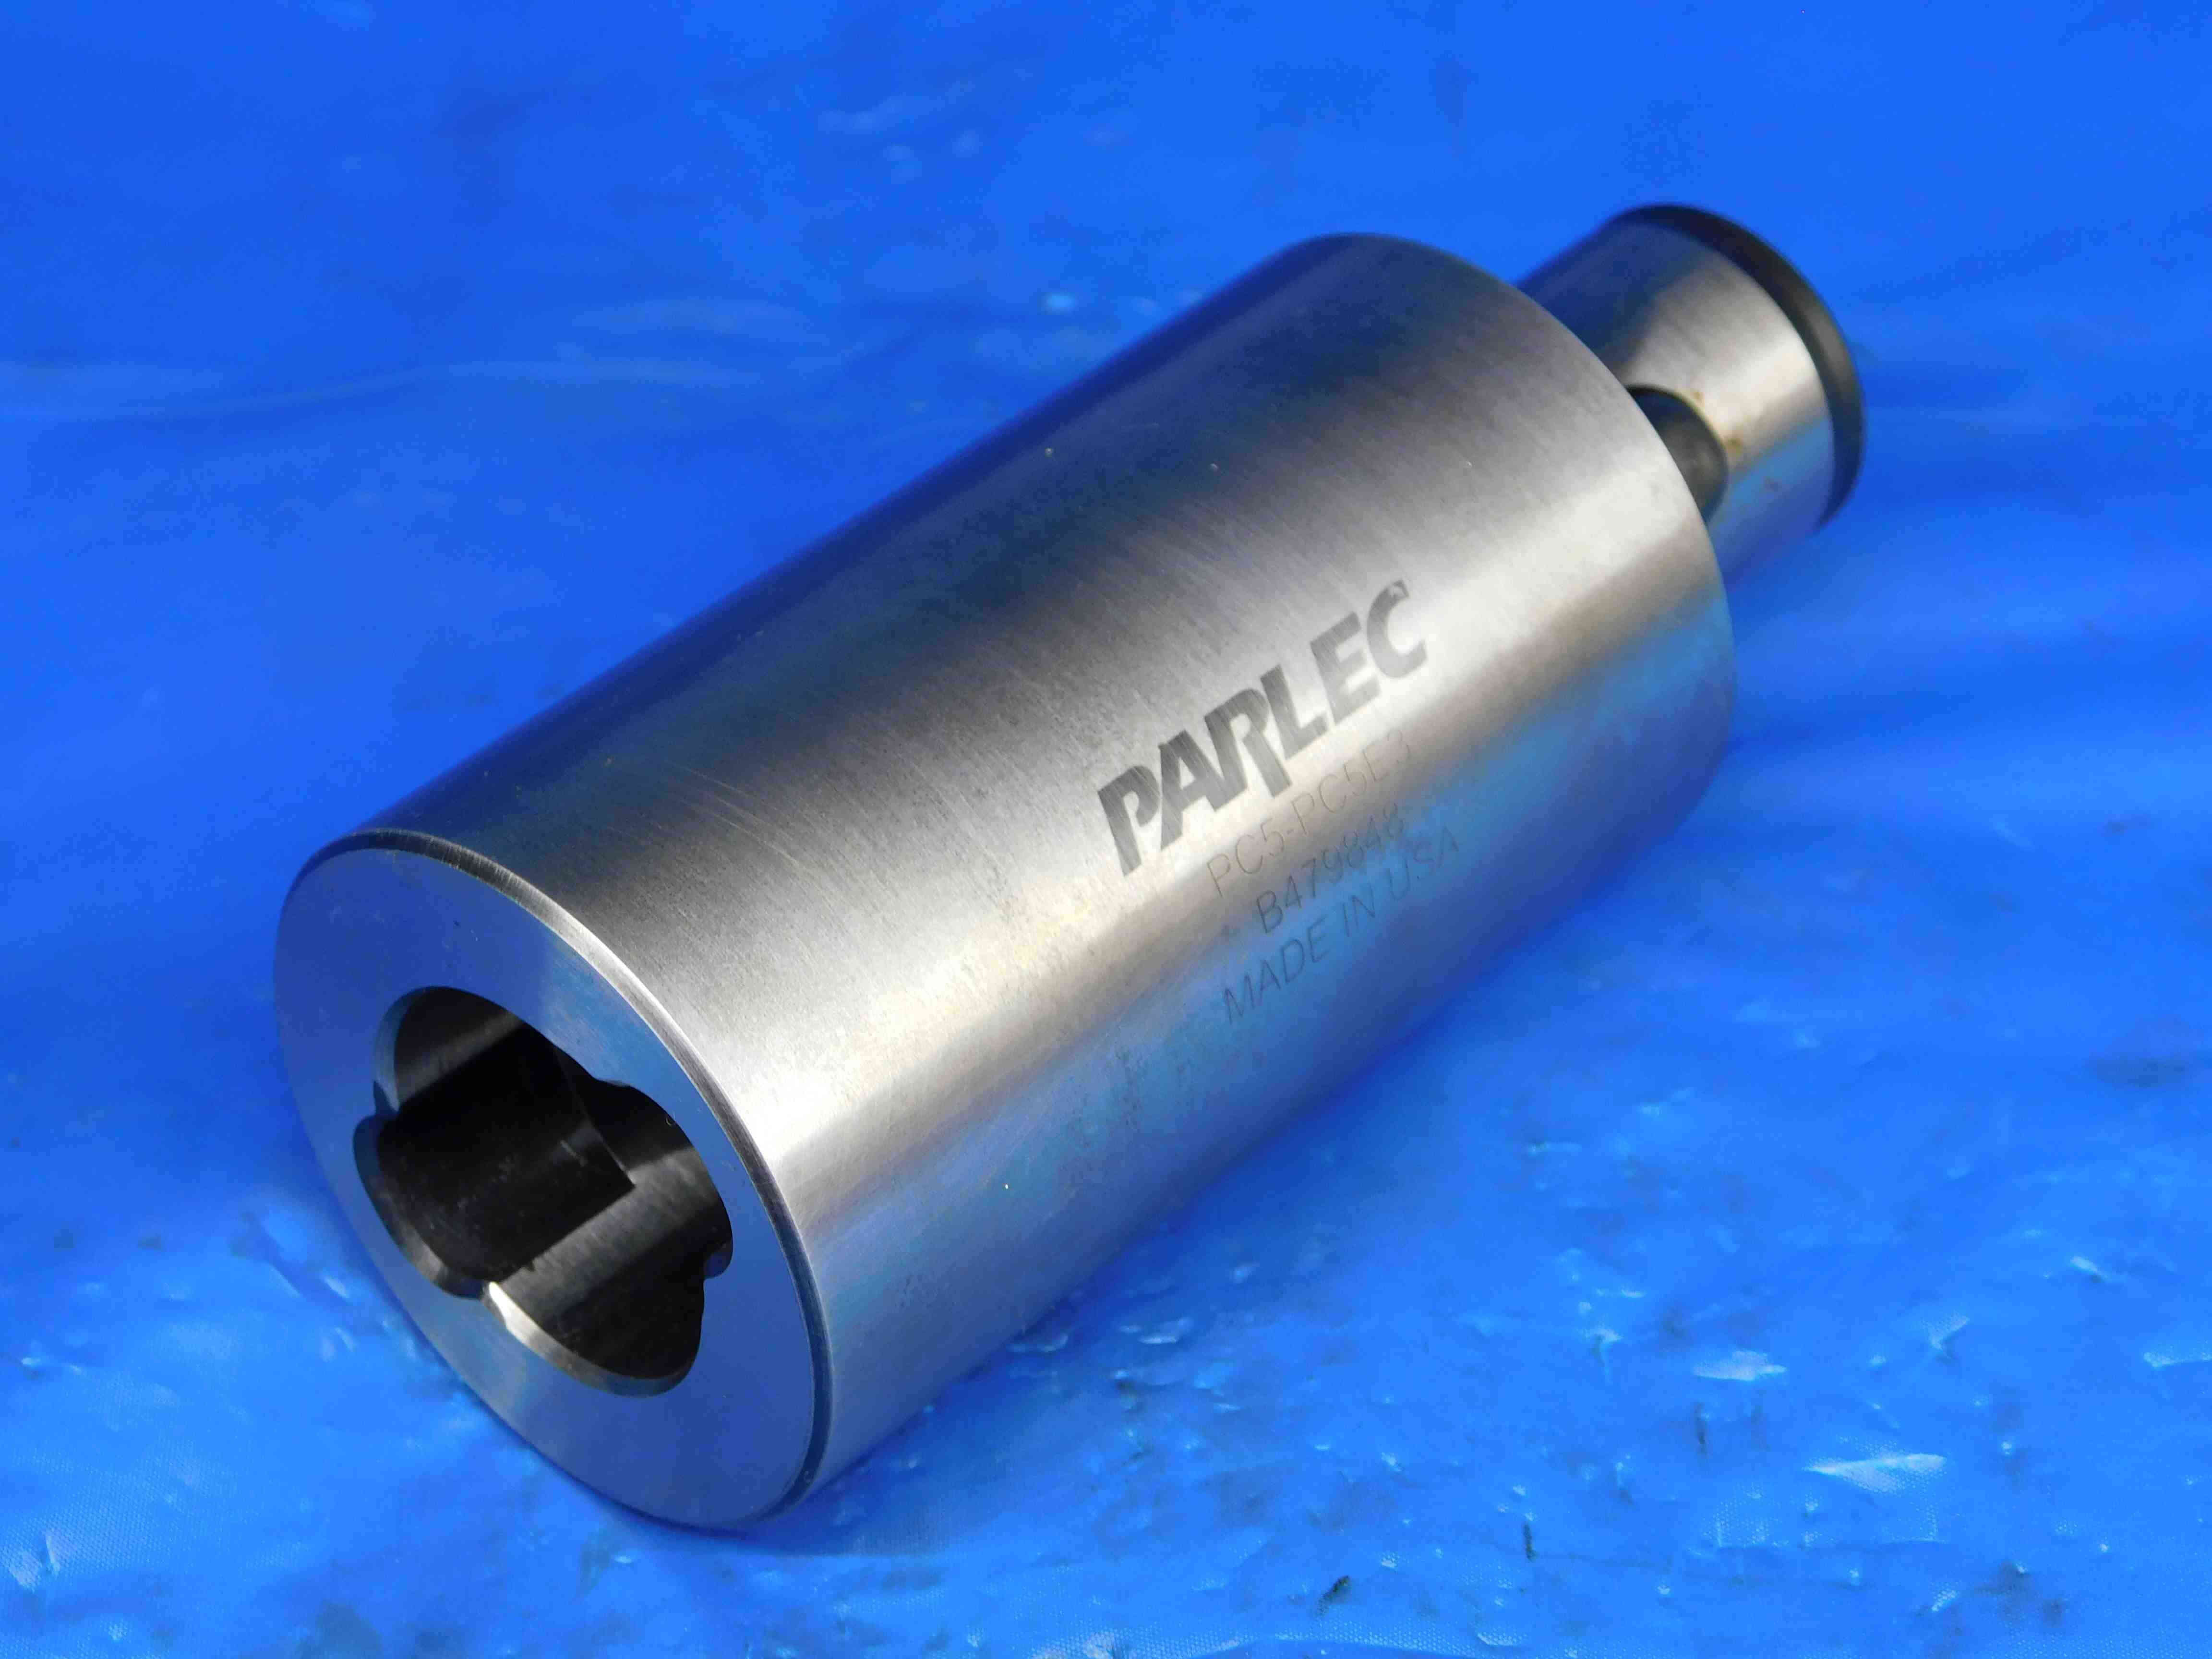

For extensions it is not necessary to specify both the male end and female end sizes since "extension" implies that they are the same. The word MODULAR should always be included for extensions featuring modular connection types. The projection is included in the title, as well as MADE IN USA (which is stamped on the item itself) since there is extra space.
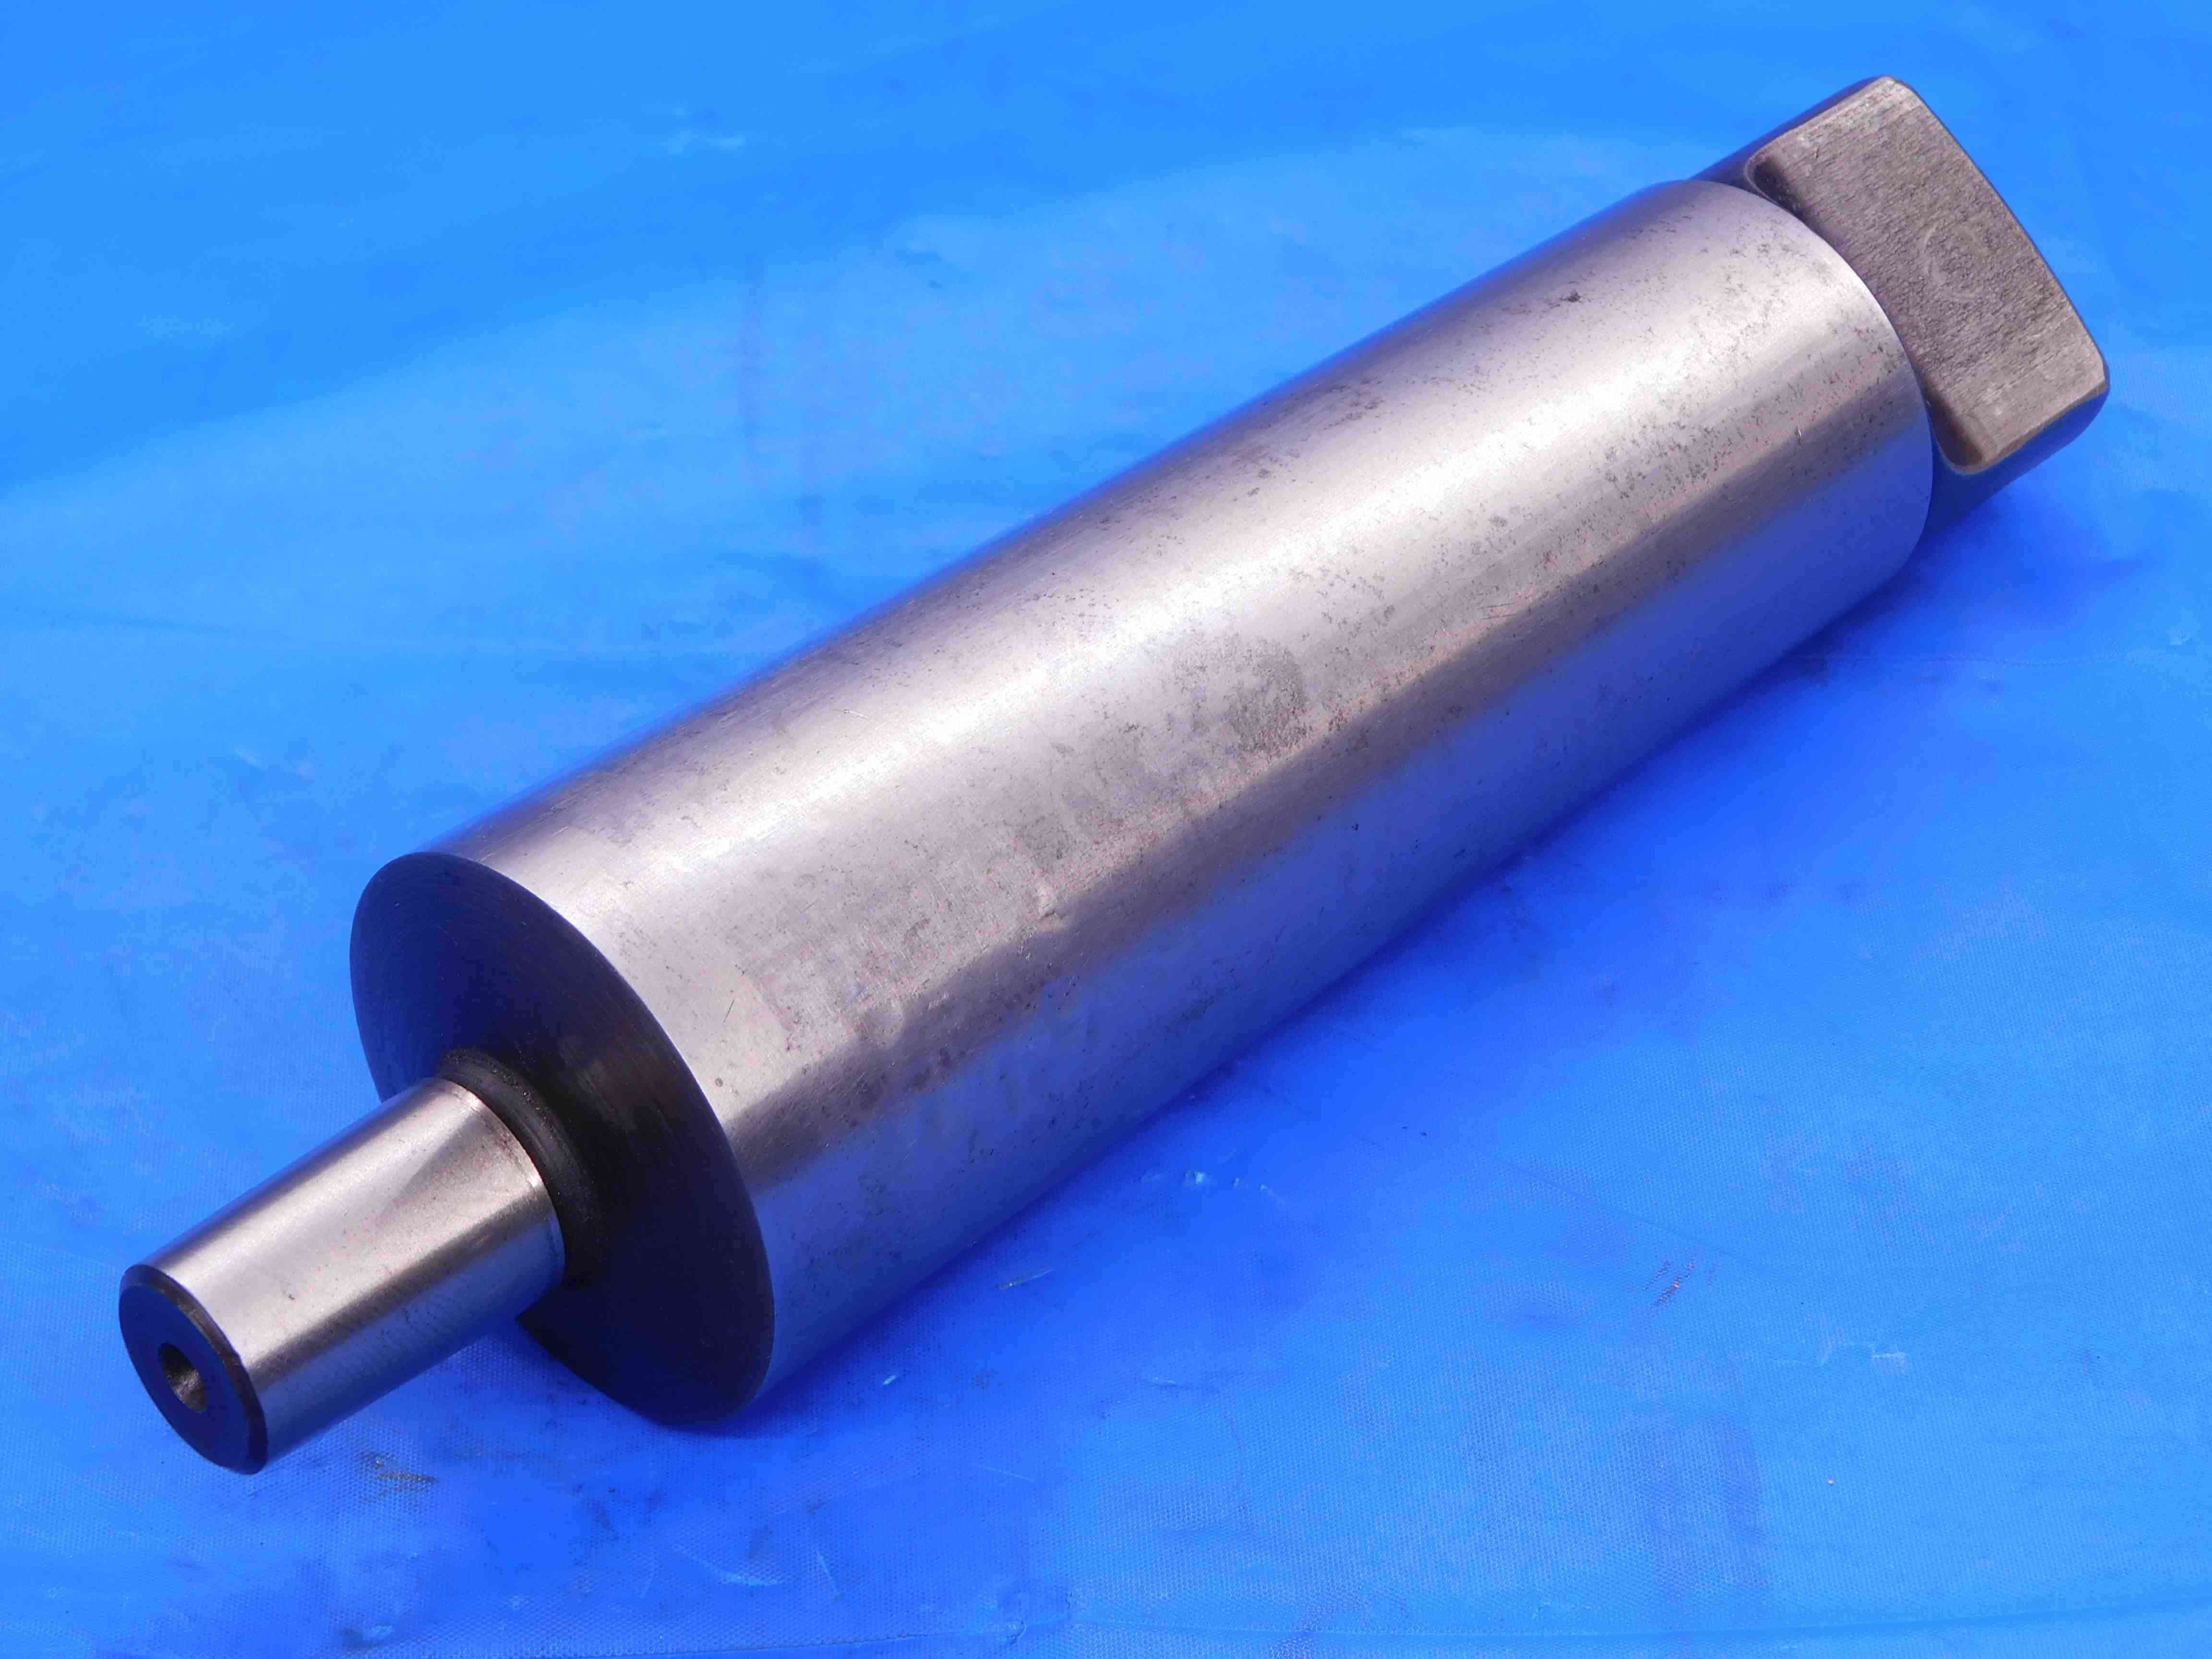

Jacobs taper adapters are often referred to as drill chuck arbors, since that is primarily what they are used for. In this case, since there is no labeled brand or part number, we're able to fit TOOL HOLDER ADAPTER in the title as well. The Jacobs taper is treated as the "female" end (although it is actually a male connection) and listed first in the title.
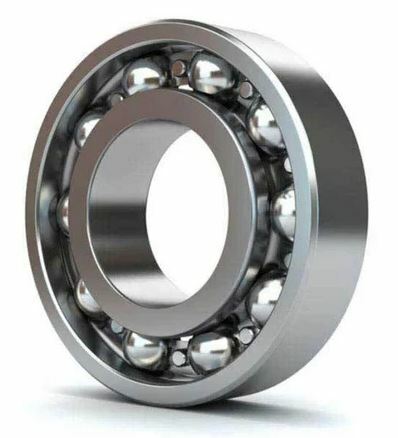
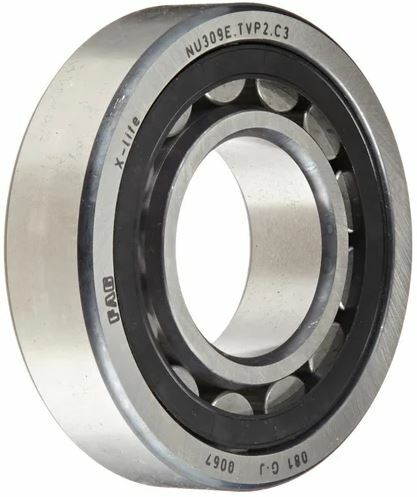
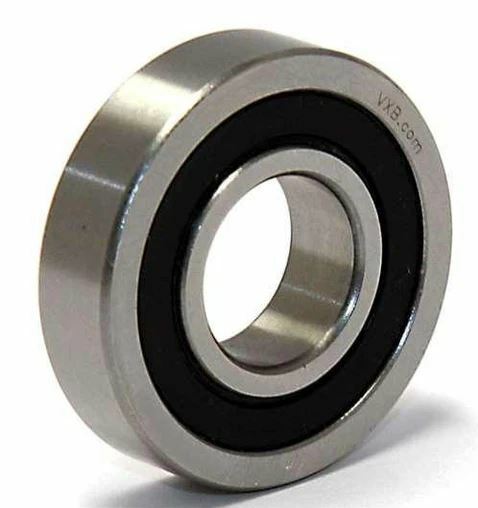
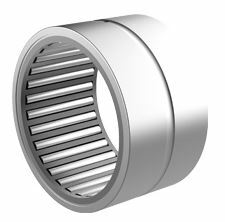
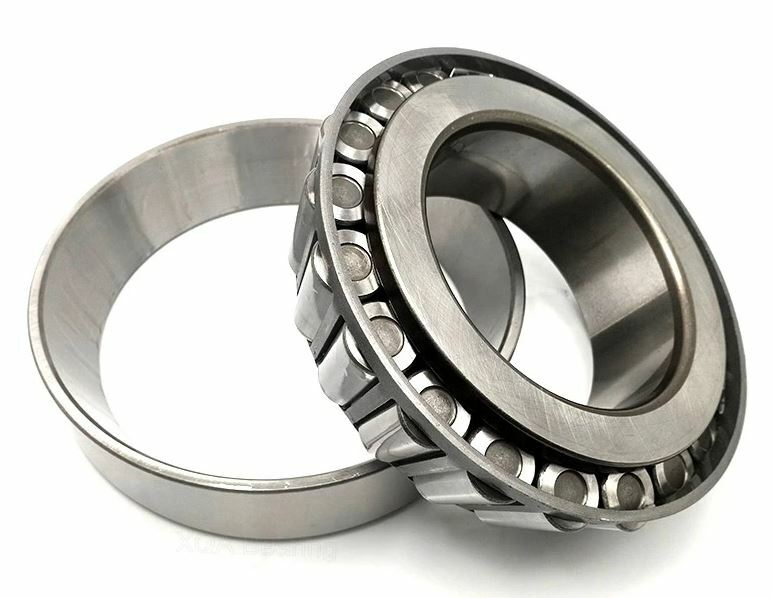
Roller Bearings come in a variety of types. The most common ones we see are:
Ball (1st image above): A bearing with spherical ball rollers. They can be single row or double row. Can sometimes be sealed such as in the 3rd image above - in this case we are often reliant on searching part numbers to determine the type since the rollers are not visible.
Cylindrical (2nd image above) - A bearing with cylindrical rollers which are flat on the ends. Like ball bearings, they can also sometimes be sealed.
Needle (4th image above) - A cylindrical bearing with longer, thinner rollers. They are sometimes sold without the outer cup (called a "race") that houses them.
Tapered (5th image above) - A cylindrical bearing featuring tapered rollers. Like needle bearings, they are sometimes sold without the outer race.
Roller Bearings are most commonly sold new. If the bearing is sealed in a plastic bag, do not remove it. They will often be coated in a lubricant that should be gently wiped off the outside of the bearing (but NOT the rollers - these need to stay lubricated in order to function properly!). Make sure your picture station is clean before taking pictures - any dust or dirt that gets inside the bearing can have a major impact on how well it functions.
Pictures:
Pictures for roller bearings will be a little different from most common item types, skipping the usual "3-D" and working end shots:
1st Picture: Lay the bearing flat with a tape measure at the bottom of the frame to provide scale. Any labeling on the bearing should be visible in this shot, with the bearing orienting so that the main part number is right-side-up. Any packaging should be included in this shot as well.
2nd Picture: A close-up shot of the labeling. Bearings will sometimes have labeling in several different places, so take multiple shots if needed.
Refer to the examples below:
PICTURES GO HERE
Listing:
Roller bearings will generally all follow the same title format:
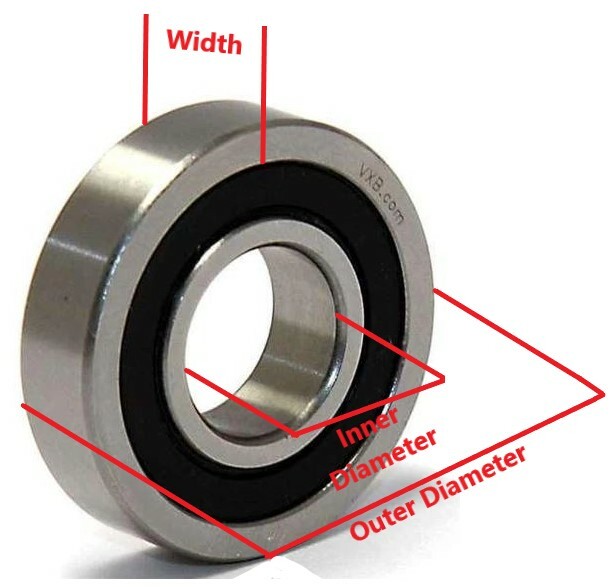
(Brand)(Part#)(Type)("Roller Bearing")(Inner Diameter)(Outer Diameter)(Width)[Other Info/Filler]
- Not every bearing will have a labeled brand or part #, however any bearing that DOES have a part number should ALWAYS have it included in the title, as this is one of the most common ways that a customer will be searching for it
- There are types other than the ones described above, which you may find from packaging or by searching the part number online and finding a manufacturer/retailer information page. If a bearing does not seem to match any of the types in this FAQ, and there are no other clues as to what it is, you can skip the type and simply say "Roller Bearing"
- Measurements:
- Can be inch or metric, be sure to check both if you are getting an odd size. It is possible to find bearings that combine both inch and metric (such as inch I.D. and O.D., but metric width).
- For tapered bearings, the I.D. and O.D. are measured at the large end of the taper.
- Other Info that you may want to include:
- Secondary labeling, if there is any
- "USA" or "USA MADE" if it is a US brand
- Decimal equivalents for any fractional sizes in the I.D., O.D., and width measurements
The Brand cell must always be filled out - if the item is unlabeled, click the "Unlabeled" button.
The Size/Labeling cell must also be filled out. Include the part number (if there is one), the I.D., O.D., and width measurements, and any other important information that you might not have been able to fit in the title. There is no character limit for this cell.
Listing Examples:
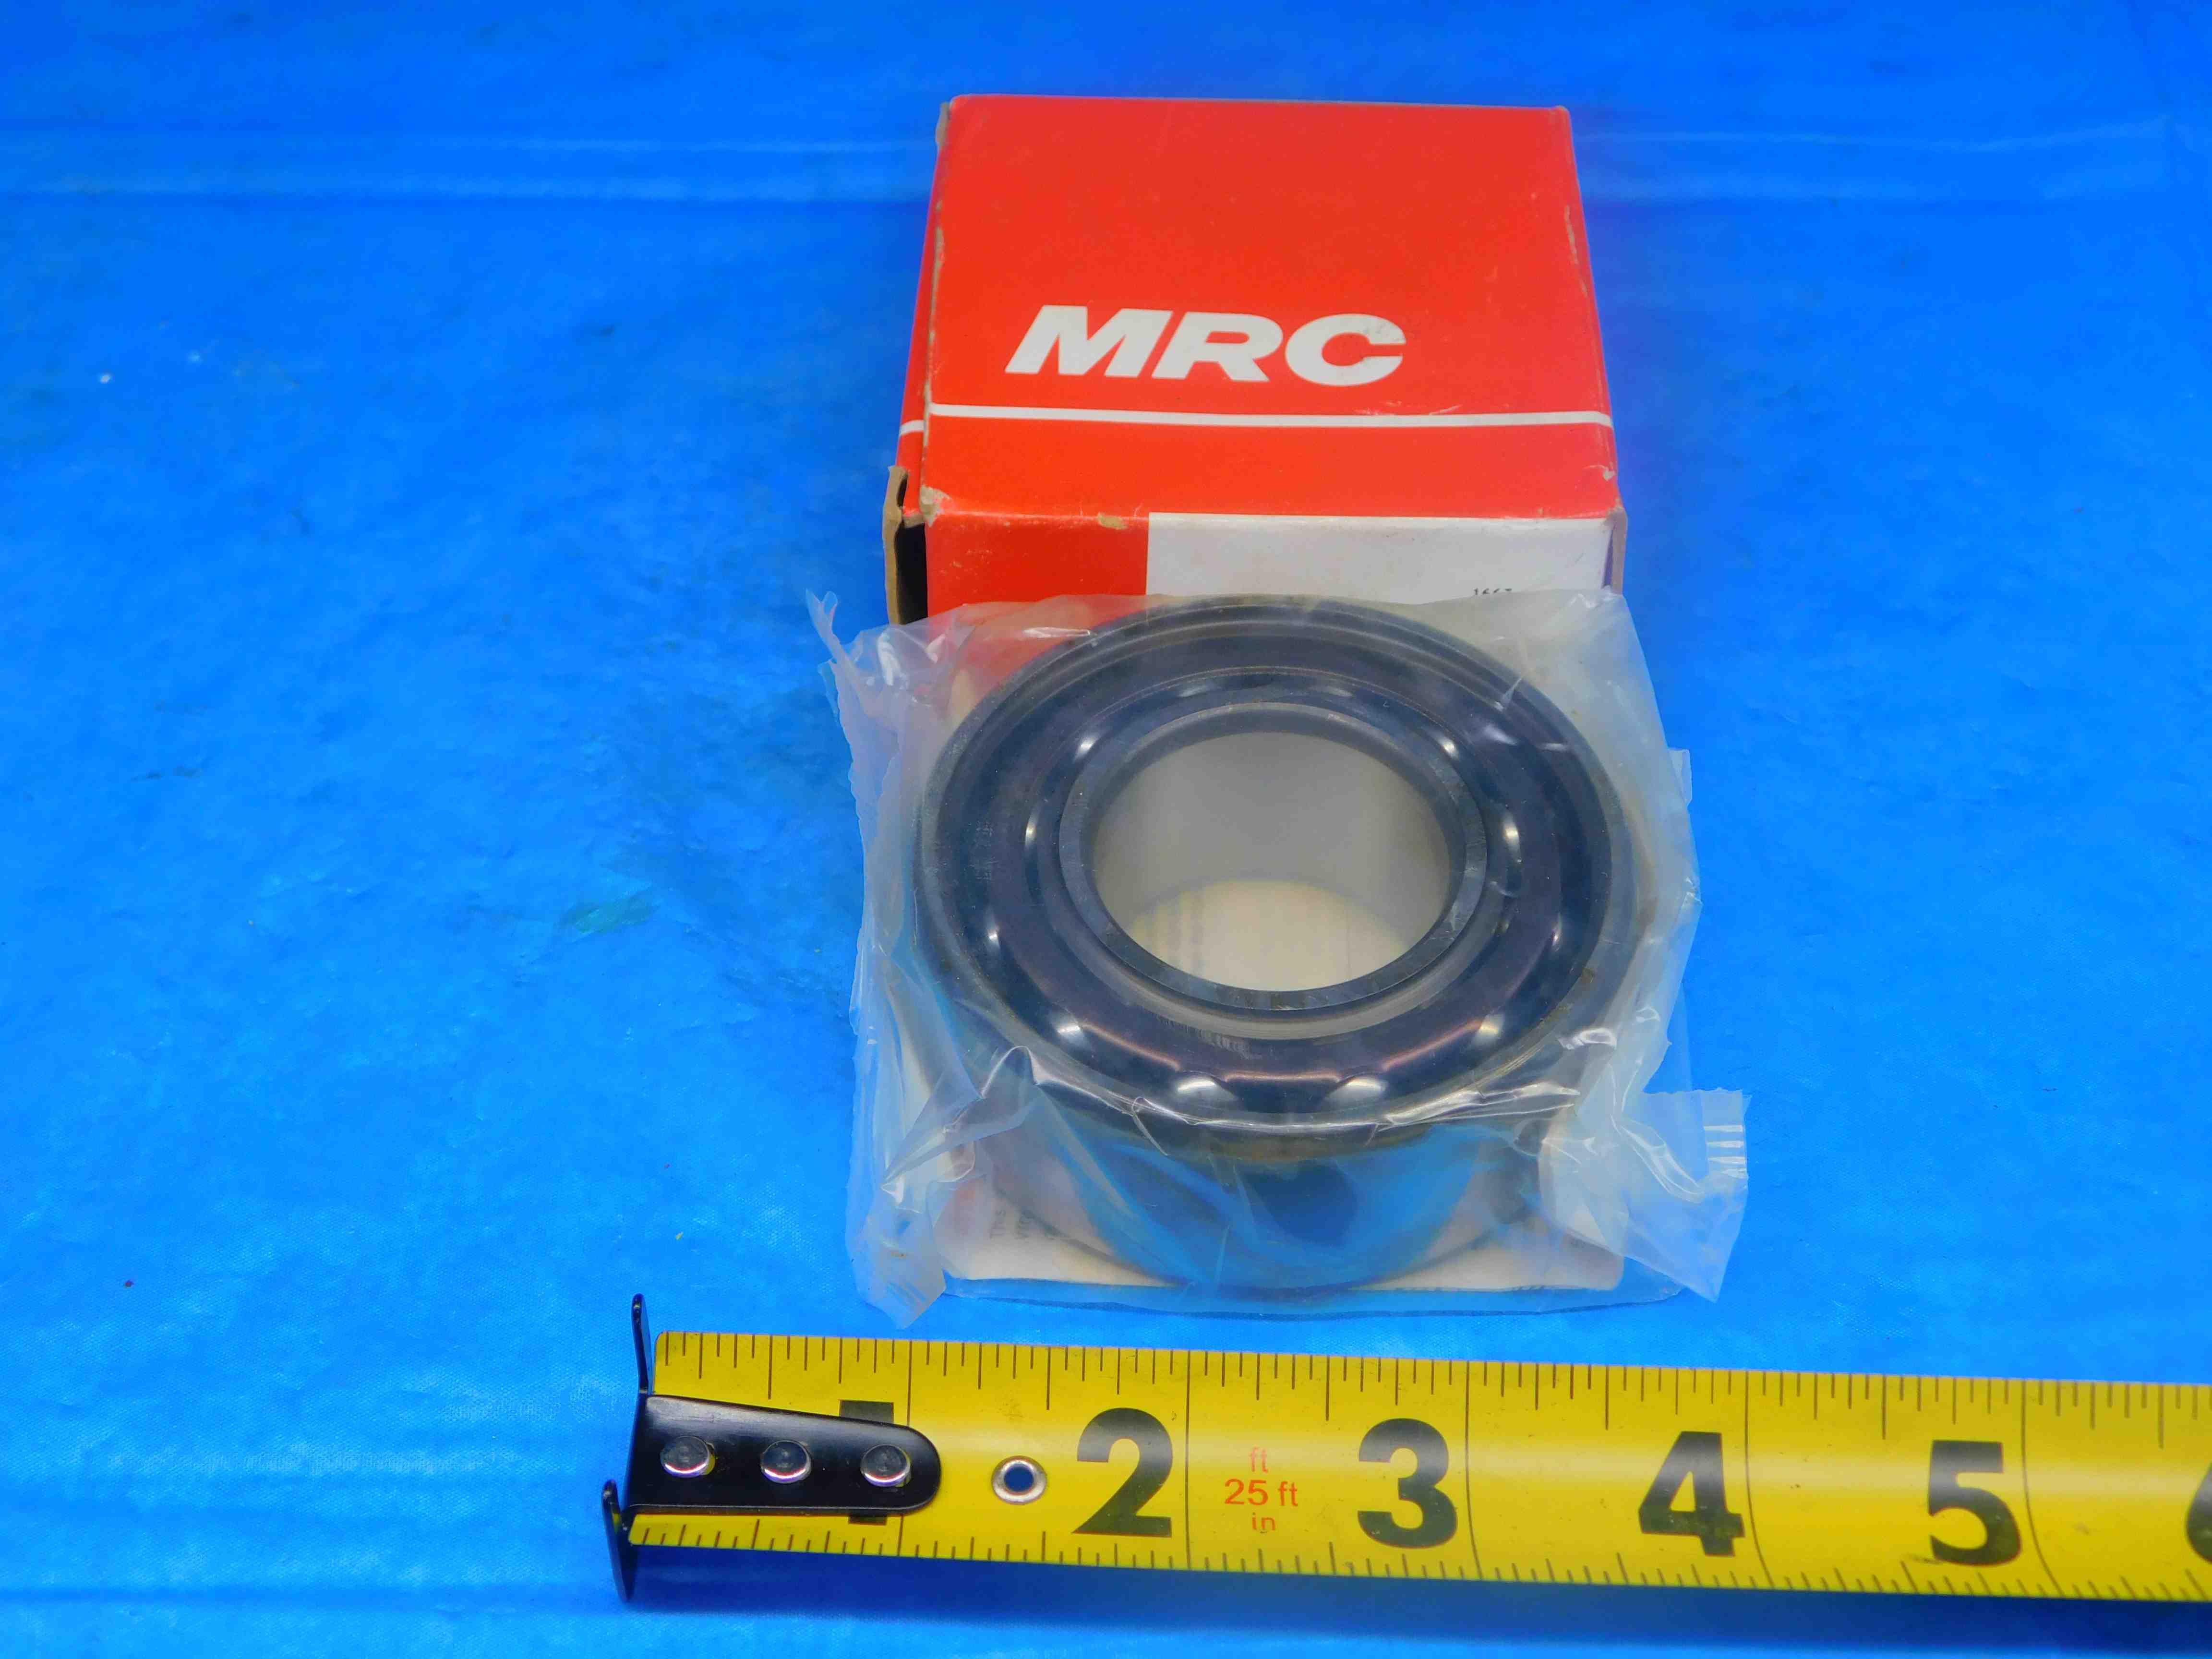

This is a pretty standard bearing listing. The "Size/Labeling" includes some additional labeling which did not fit in the title.
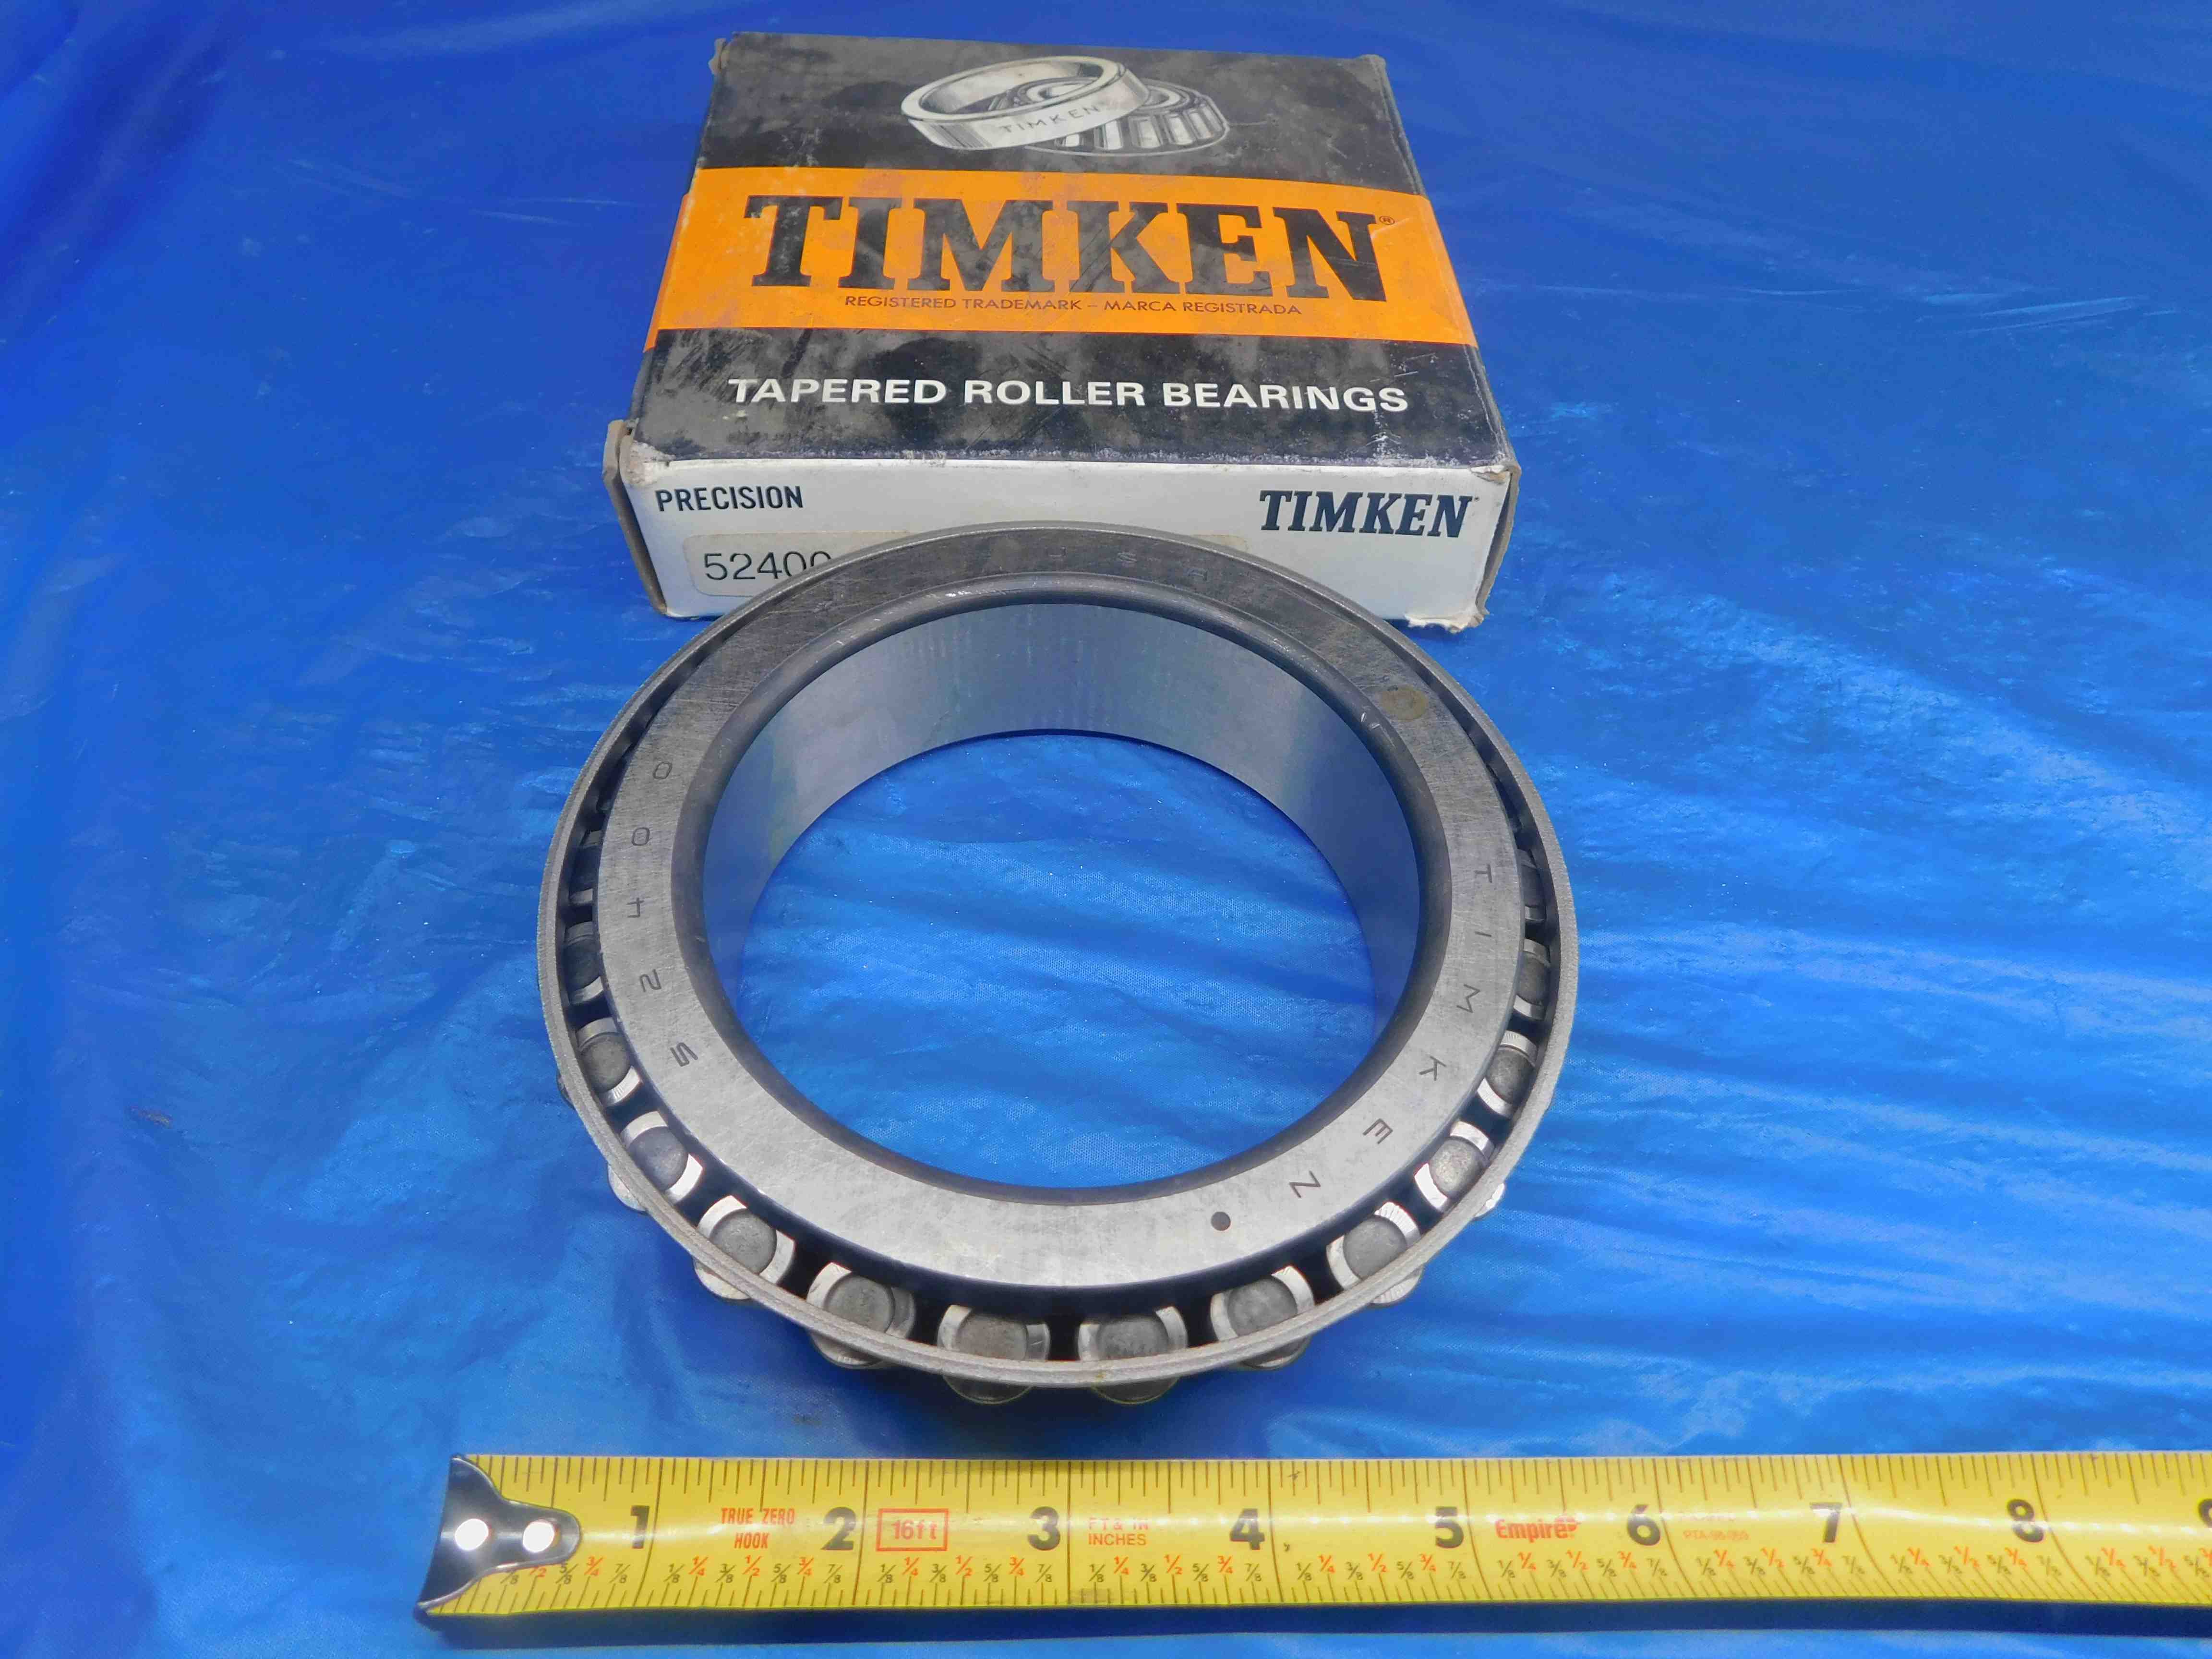

In this example, there was some remaining title space so we added "4.0" as a decimal equivalent for the 4" inner diameter. In general, the order in which you should add decimal filler is the same as the order we list the measurements (I.D., O.D., Width).
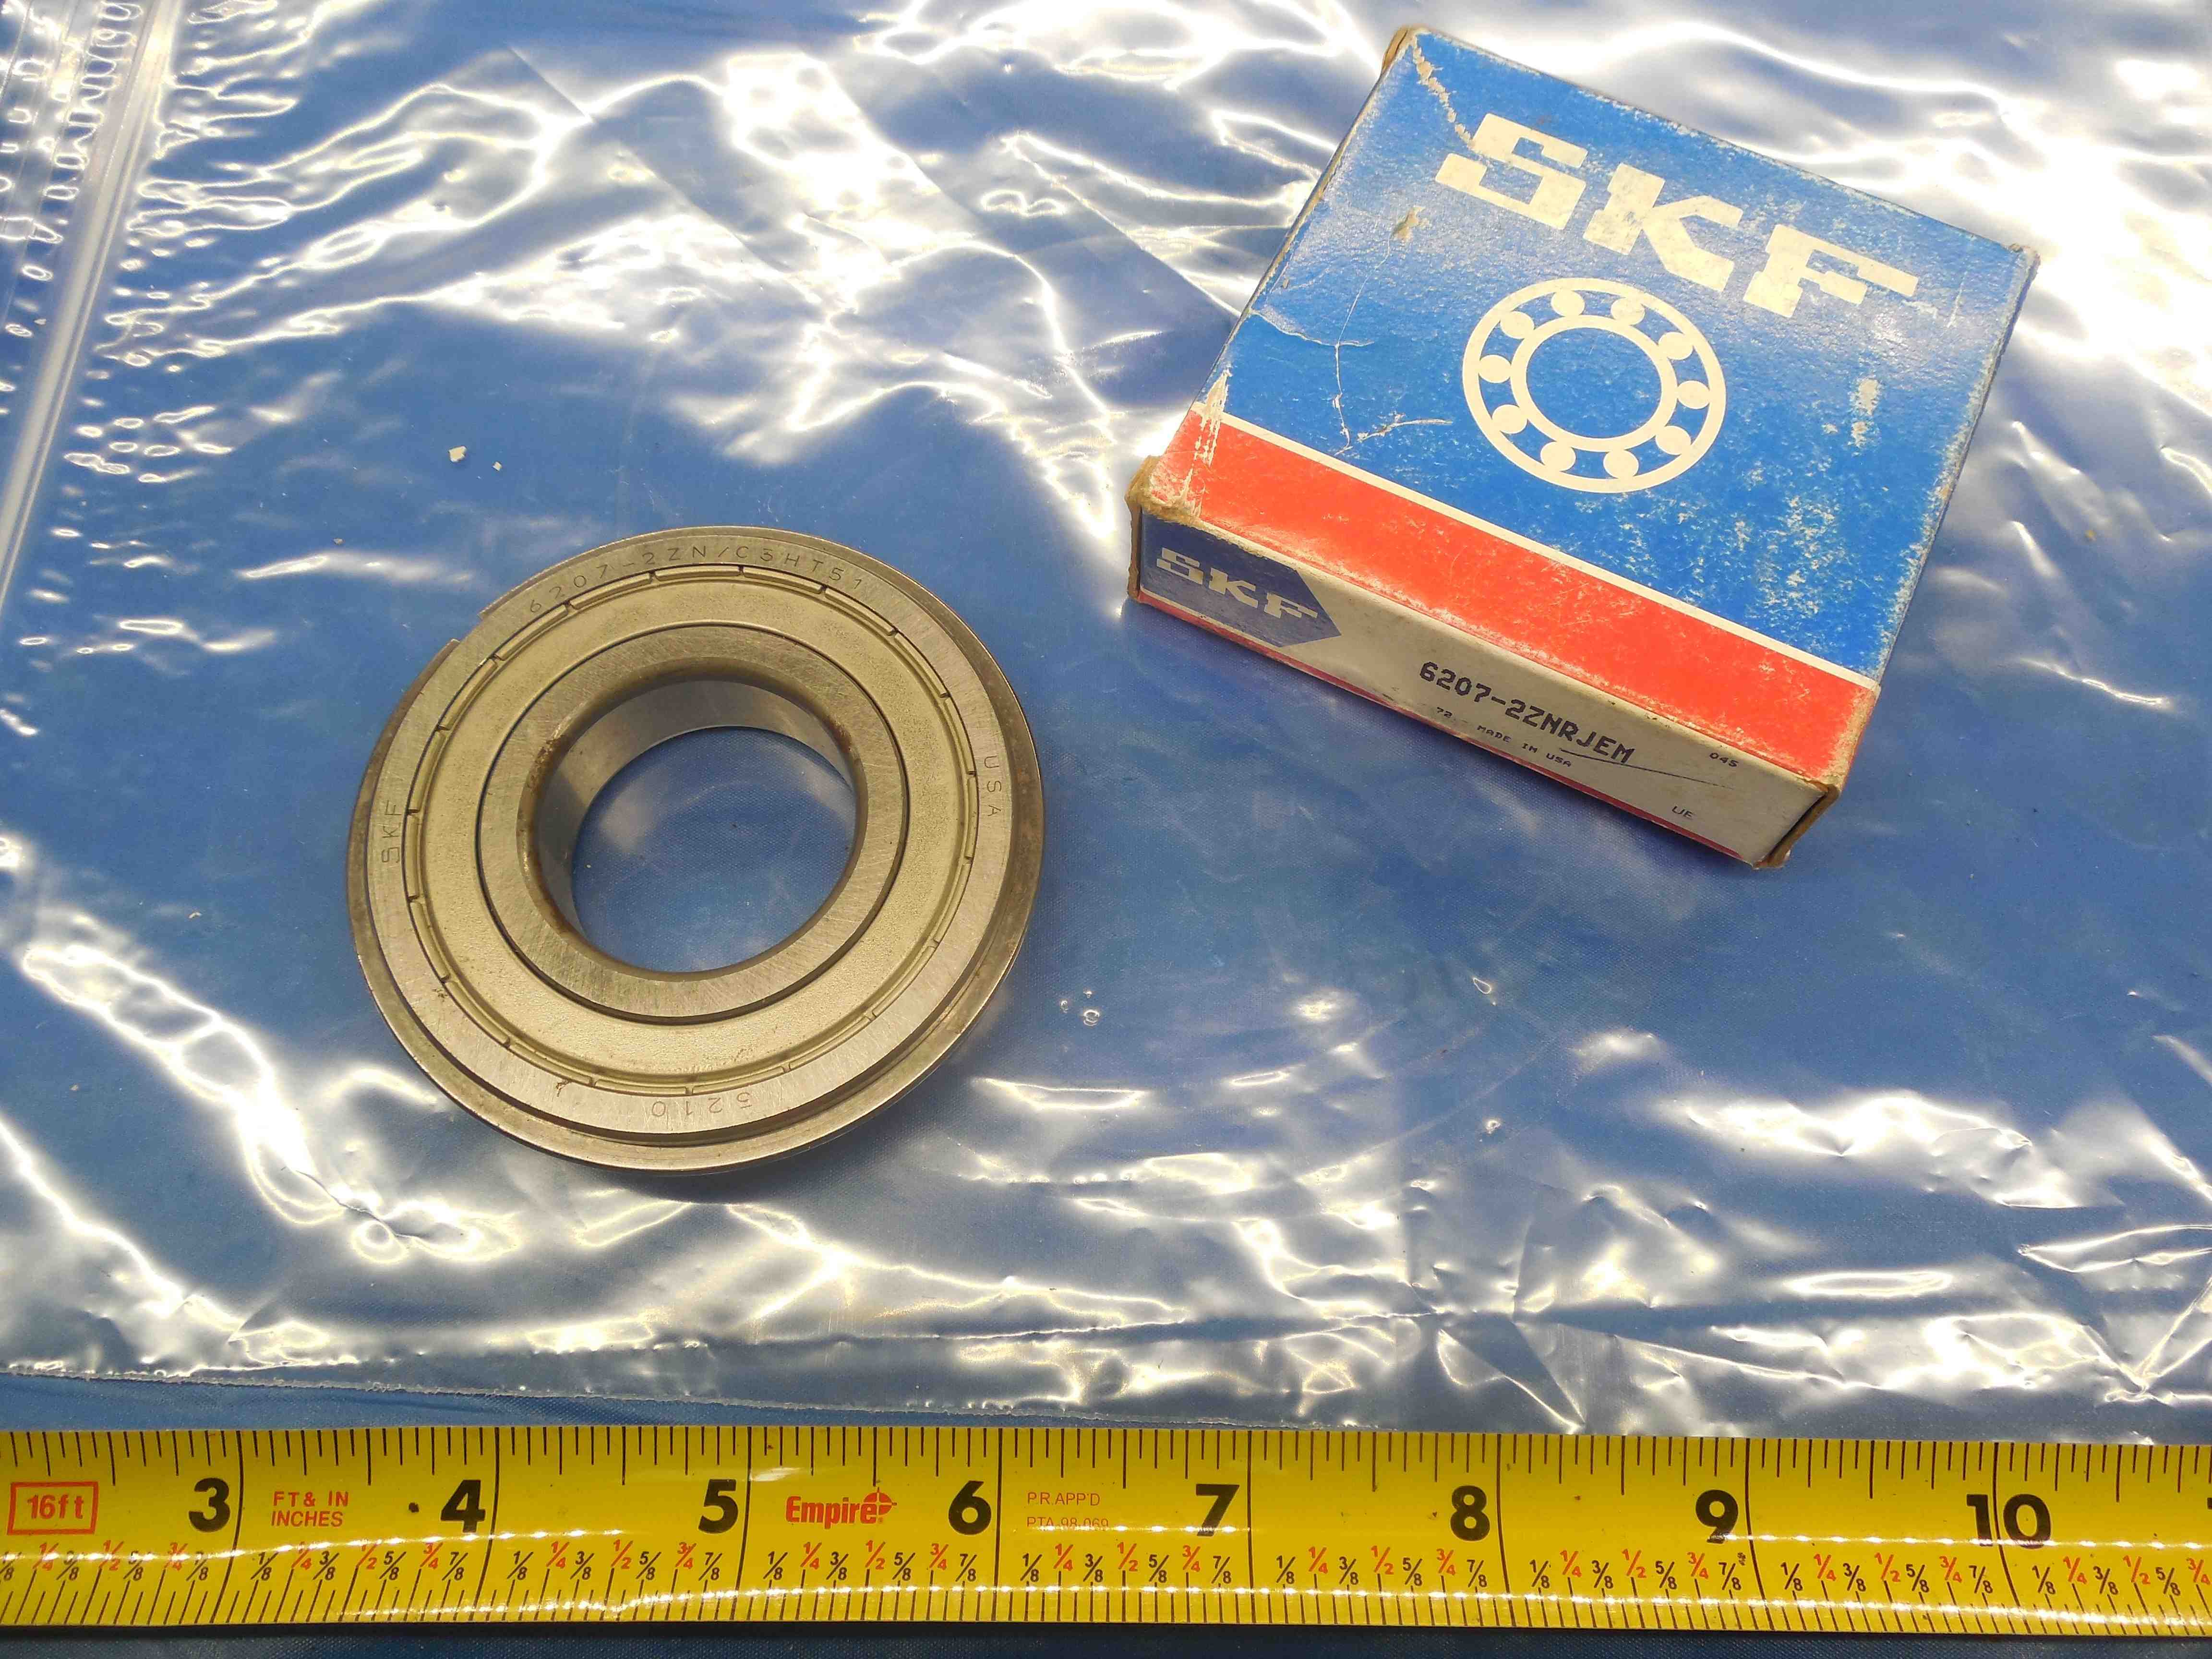

The "Deep Groove" description came from searching the part number on SKF's website. Because the title was running out of space, we took out "I.D.", "O.D." and "Width" from the measurements - bearings are typically advertised with the dimensions listed in this order, so customers will likely still understand what the numbers refer to. We spell it out more clearly in the "Size/Labeling" as well. Additionally, this bearing has two different part numbers - one labeled on the packaging, and one labeled on the bearing itself. We went with the one on the packaging for the main part # used in the title, since it seems to be the one that is more commonly used based on doing a Google search for both and seeing what kind of results we got for each.
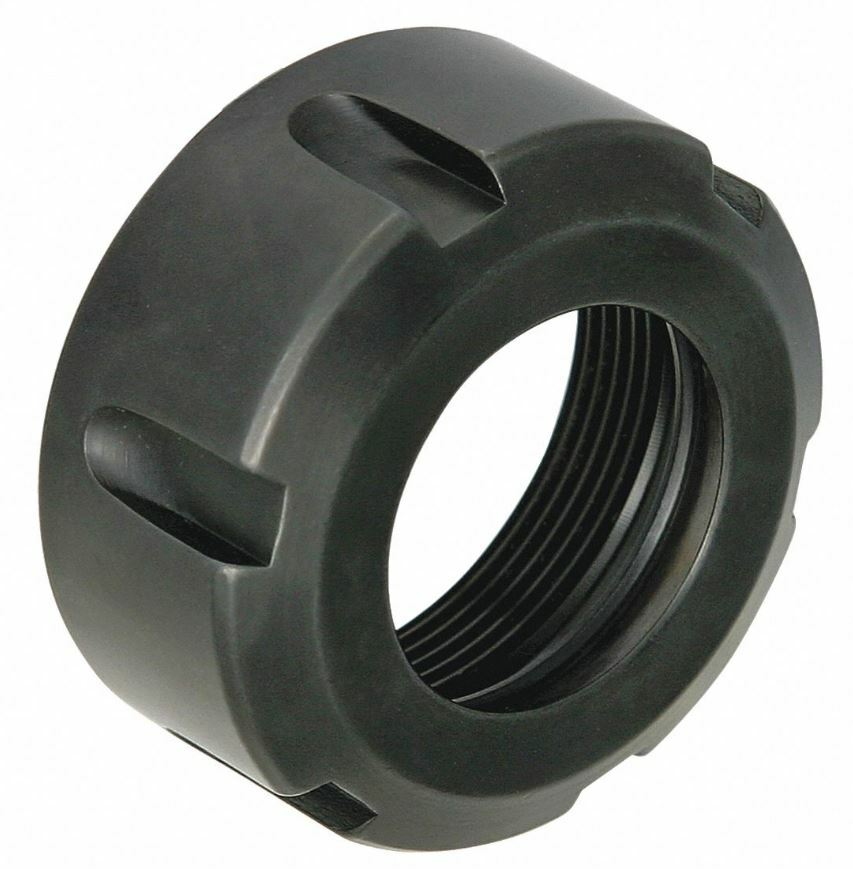
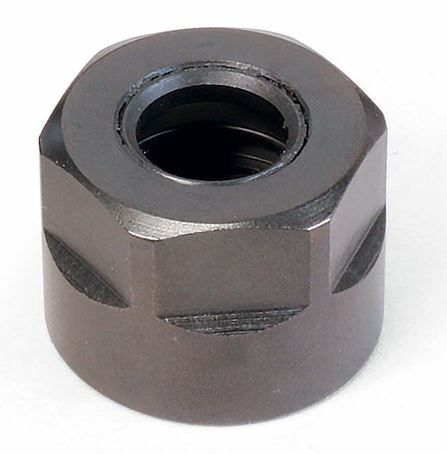
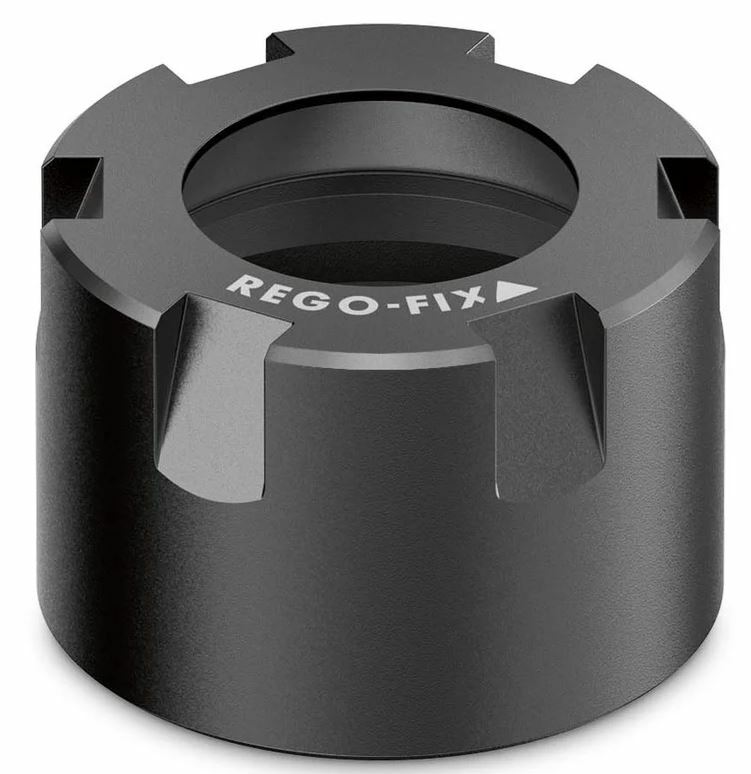
Collet nuts are fairly simple to list. They come in two different varieties - Round and Hex. The style determines what type of wrench is used to tighten and loosen the nut. Round nuts, such as the first and third images above, will have slots which may extend the entire length of the nut, or may only be present near the top. Hex nuts, such as the second image above, will often be round at the base but hexagonal at the top.
You will need to know what type of collet the nut is for in order to list it properly - refer to the Collet FAQ for more information about collets, and contact your supervisor if you need help identifying a collet type.
Picturing:
Picturing collet nuts is very simple, and nearly every collet nut will follow this format:
1st Picture: Lay the nut flat, with a tape measure at the bottom of the frame to provide scale. If there is any labeling on the face of the nut, it should be oriented so that it is right-side-up.
2nd Picture: This will be exactly the same as the first picture, except the nut is flipped upside-down so you can see the threads.
3rd Picture: A close-up of the labeling, if there is any. Many collet nuts are unlabeled, so you will frequently need to take only the two previous pictures.
Additional Pictures: If there is any damage/modification, it must be clearly pictured. Use a pen to point to the affected area.
Refer to the examples below:
PICTURES GO HERE
Listing:
Collet nuts will generally adhere to the following title format:
(Brand)(Part #)(Round or Hex)(Collet Type)("Collet Nut")[Other Info/Filler]
- Brand and Part # are optional - many collet nuts will not be labeled with either
- Refer to the Collet FAQ for information about how collet types are described
- Other Info that you may want to include:
- Collet types are typically described with no spaces (e.g., TG100 vs. TG 100), but it also useful to include the "with space" version at the end of the title since a customer could search for it that way
- "Locknut" and "Chuck" can be useful filler terms to include
- If you know the brand and it is a US manufacturer, include "USA" or "USA MADE" in the title
The Brand cell must always be filled out - if the item is unlabeled, click the "Unlabeled" button.
The Size/Labeling cell must also be filled out. For collet nuts this will typically just consist of the part number (if there is one) and the type of collet that the nut is used for. There is no character limit for this section so feel free to include any other information you think may be important.
Listing Examples:
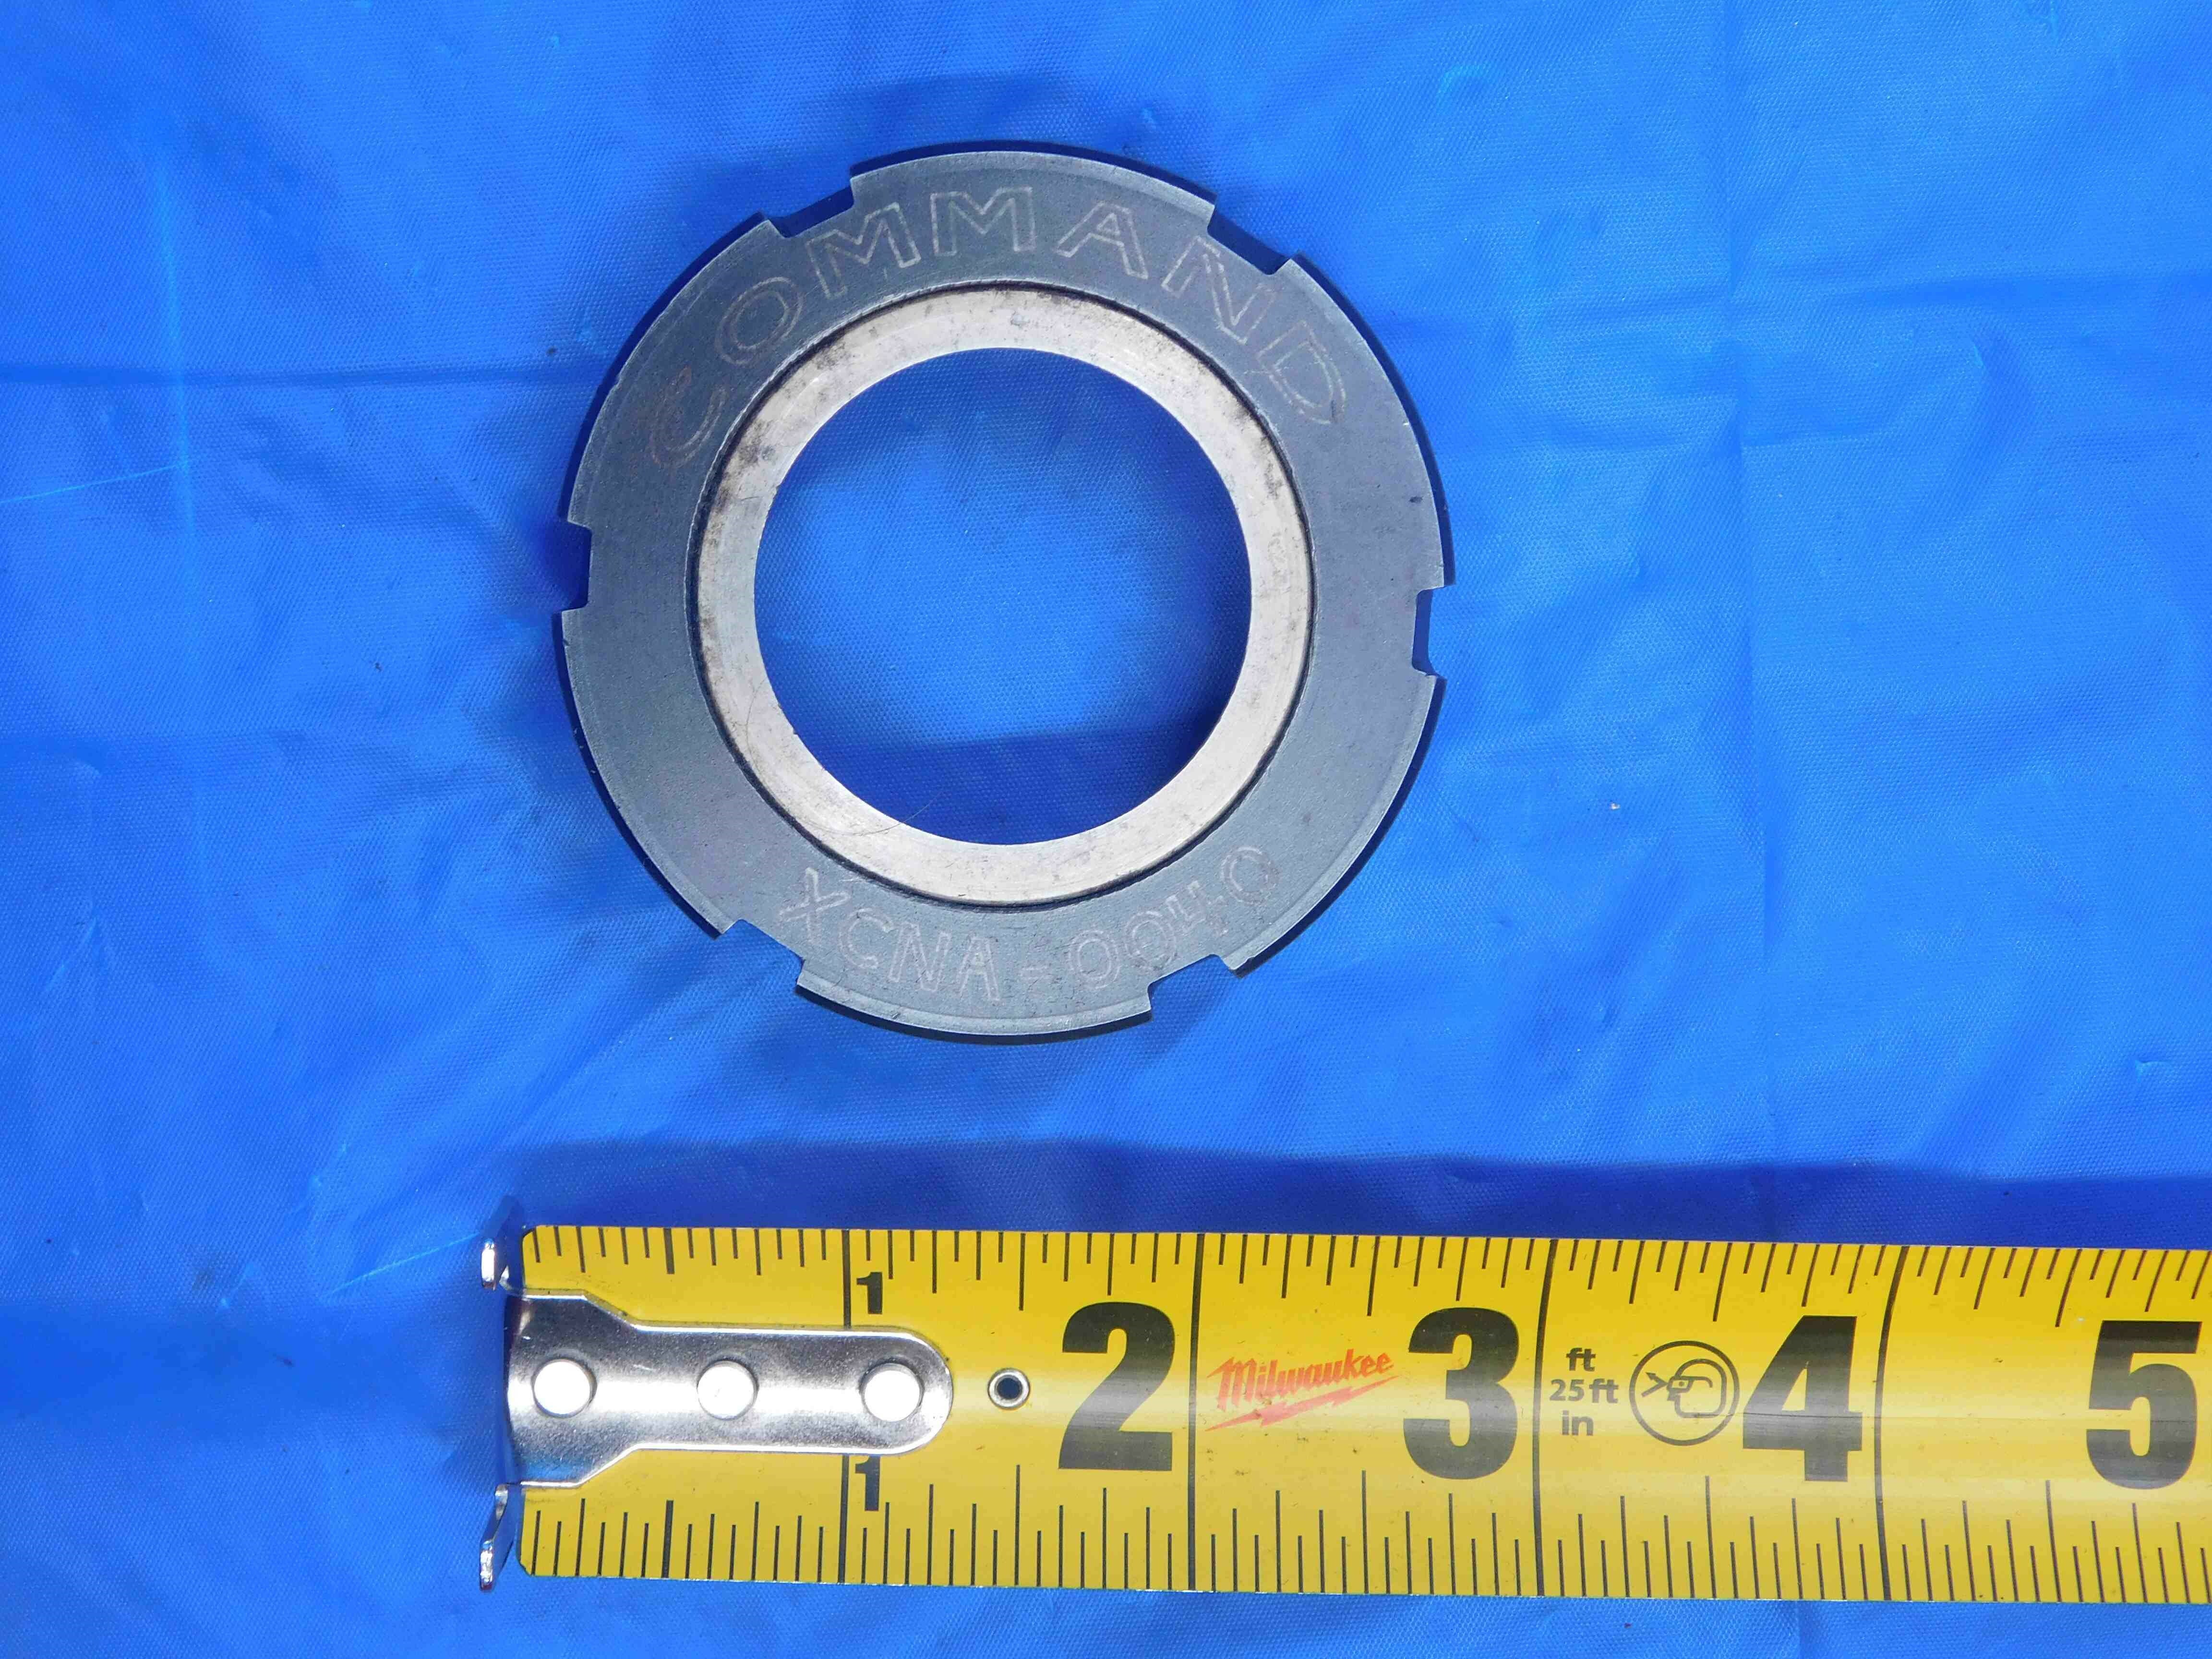

This is a standard collet nut listing which follows the format outlined above.
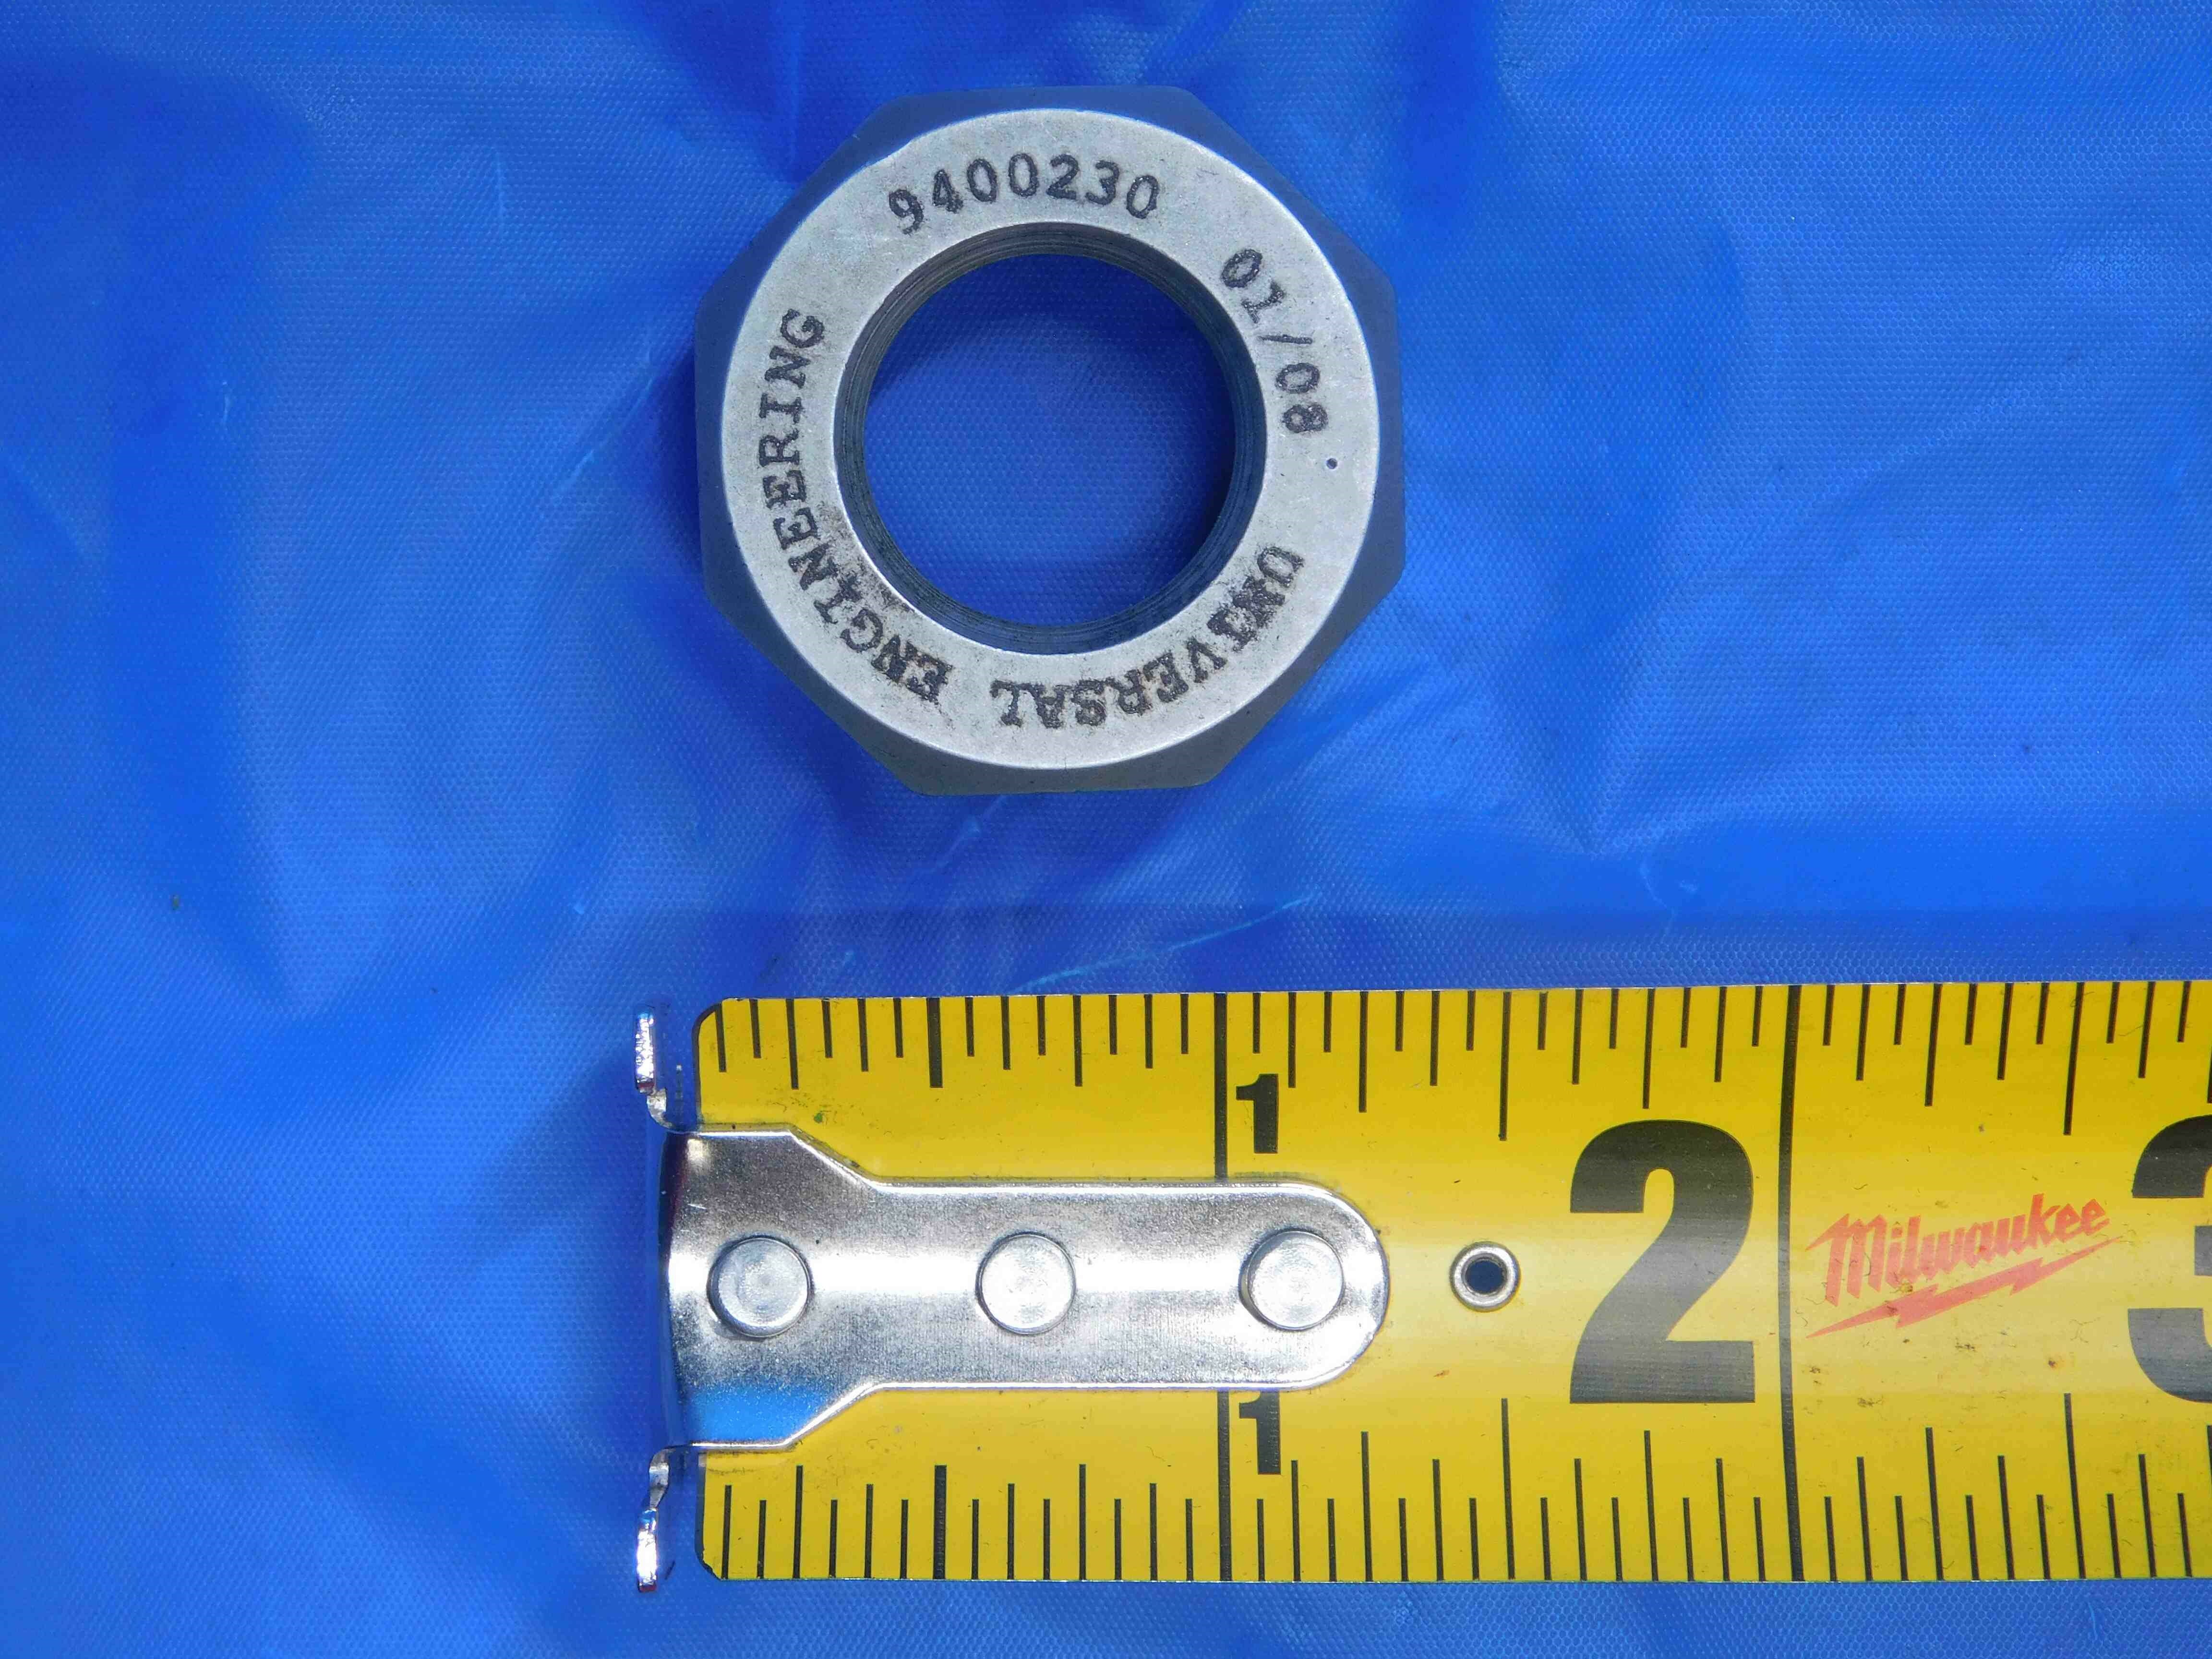

Another standard listing. Note that Acura-Flex collet nuts should include both "ACURA-FLEX" as well as the AF size (in this case, AF50).
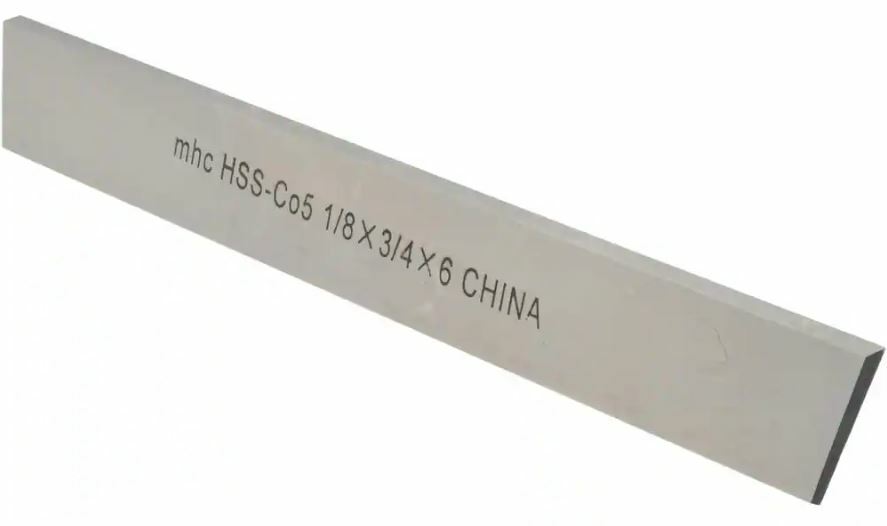
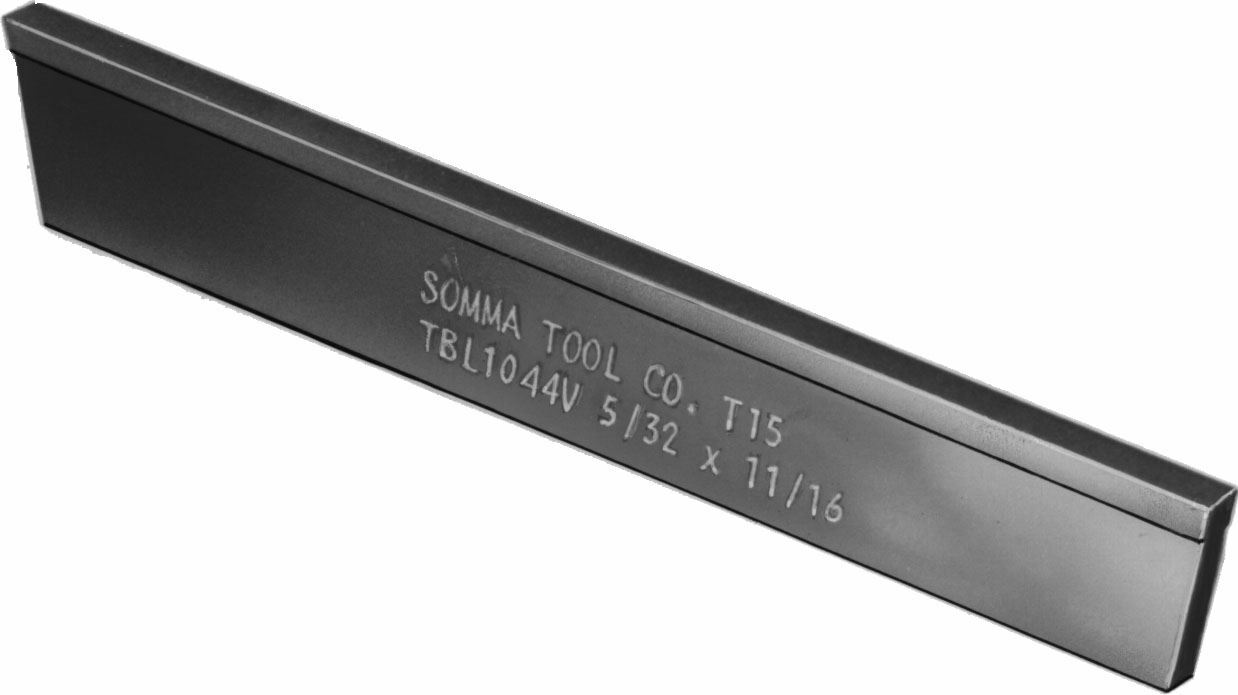
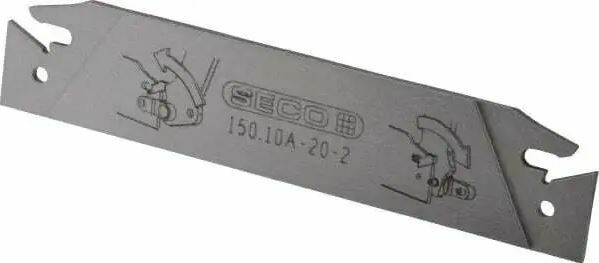
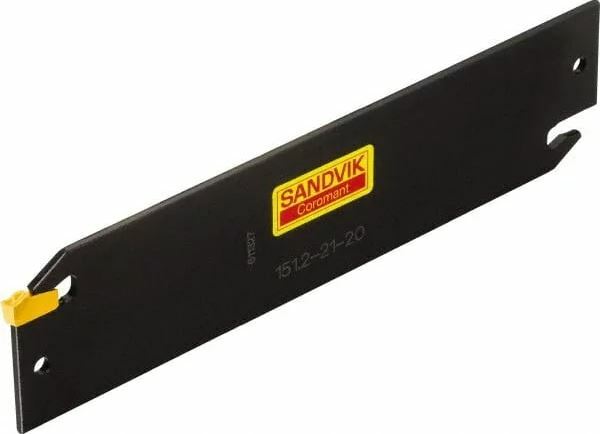
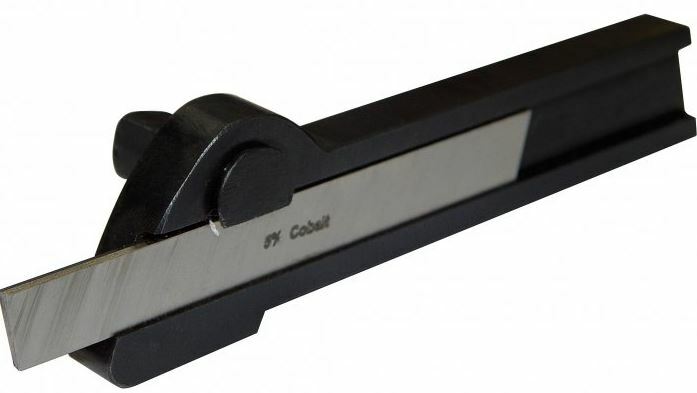
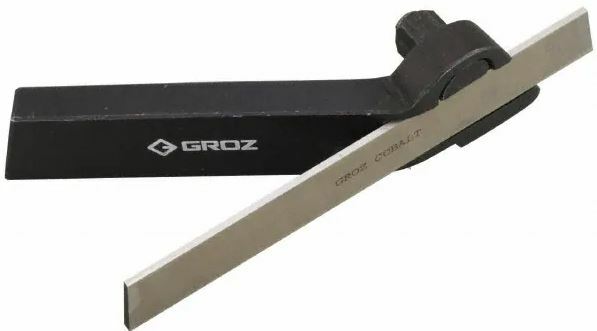
Cutoff Blades (which are often also spelled "Cut Off Blades", with a space between "Cut" & "Off") are used primarily for parting and grooving applications. They can be Indexable, meaning they use replaceable inserts such as the third and fourth images above, or Non-Indexable such as the first and second images.
Indexable blades are typically (but not always) double-ended, so they can continue to be used if one of the insert pockets is damaged or worn down. They will often be labeled with a part number, and searching this part number online may lead you to a manufacturer's webpage where you can find information about the specific inserts the blade uses.
Non-Indexable blades are often made of either High Speed Steel (HSS) or Cobalt, and are sometimes Carbide-Tipped. Some blades will have a cutting edge which is wider than the body of the blade, such as the second image shown above. These are referred to as "T-Type" or "T-Shaped" due to the fact that they look like the letter "T" when viewed from the side.
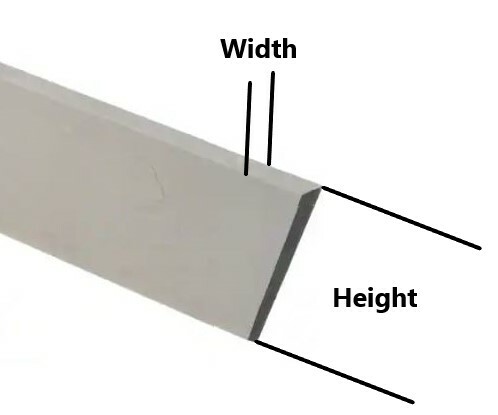
The most important measurements on a cut off blade are the Width and Height, shown below:
Picturing:
Cutoff blades should mostly follow the same picture format as most other tooling types:
1st Picture: A three-quarter angle shot with one of the working ends facing the camera. If one side has damage, this should be the side facing the camera. If both sides have damage, choose whichever side is more damaged. If there is labeling, the blade should be oriented so that the labeling is right-side-up.
2nd Picture: A side-view with a tape measure at the bottom of the frame to provide scale
3rd & 4th Pictures: A close-up of the working ends / insert pockets. Both ends should be always be pictured.
5th Picture: A close-up of the labeling (if there is any).
Additional Pictures: Any damage/modifications must be pictured. Use a pen to point to the affected area.
Refer to the examples below:
PICTURES GO HERE
Listing:
Cutoff blades will generally adhere to the following title format:
(Brand)(Part #)[Width] X [Height](Material)("Indexable" or "Non-Indexable")["Cutoff Blade"][Other Info/Filler]
Brand and Part # are optional - some blades may not be labeled with either
Width and Height can be measured in either inches or millimeters. It is not uncommon for cutoff blades to mix units - i.e., you might have a blade with a width of 3mm and a height of 1/2". These measurements should typically be "normal" sizes, so if you are getting a strange inch size try measuring it in mm (and vice-versa). Note that the width can sometimes be inch sizes as small as x/32 fractions.
Material applies to non-indexable blades only. Most commonly the material will be HSS, Cobalt, or Carbide. If you are not sure what the material is, it can be left out.
"Non-Indexable" is optional and can be left out if needed to make space in the title for other information. Indexable blades should always have the word "Indexable" included in the title.
Other Info that you may want to include will typically be:
- "T-Type" or "T-Shaped", if applicable
- "Carbide Tipped", if applicable
- Part number(s) for the inserts used by an indexable blade, if you are able to find this information
- Decimal equivalents for fractional width/height sizes, to aid in searchability. Round to four decimal places if necessary (ex., if the width is 3/32", use .0938 as the decimal rather than .09375)
- "Parting", "Grooving", "Lathe" and "Cut Off" (with a space) are all useful additional search terms to include
- The length of the blade can also be included, but it is generally much less important than the width and height so this is generally something you should only include if there is still space after adding all other possible information
The Brand cell must always be filled out - if the item is unlabeled, click the "Unlabeled" button.
The Size/Labeling cell must also be filled out. For cutoff blades you should include any labeling followed by the dimensions of the blade, and then any other pertinent information such as insert part numbers. There is no character limit for this section.
Listing Examples:
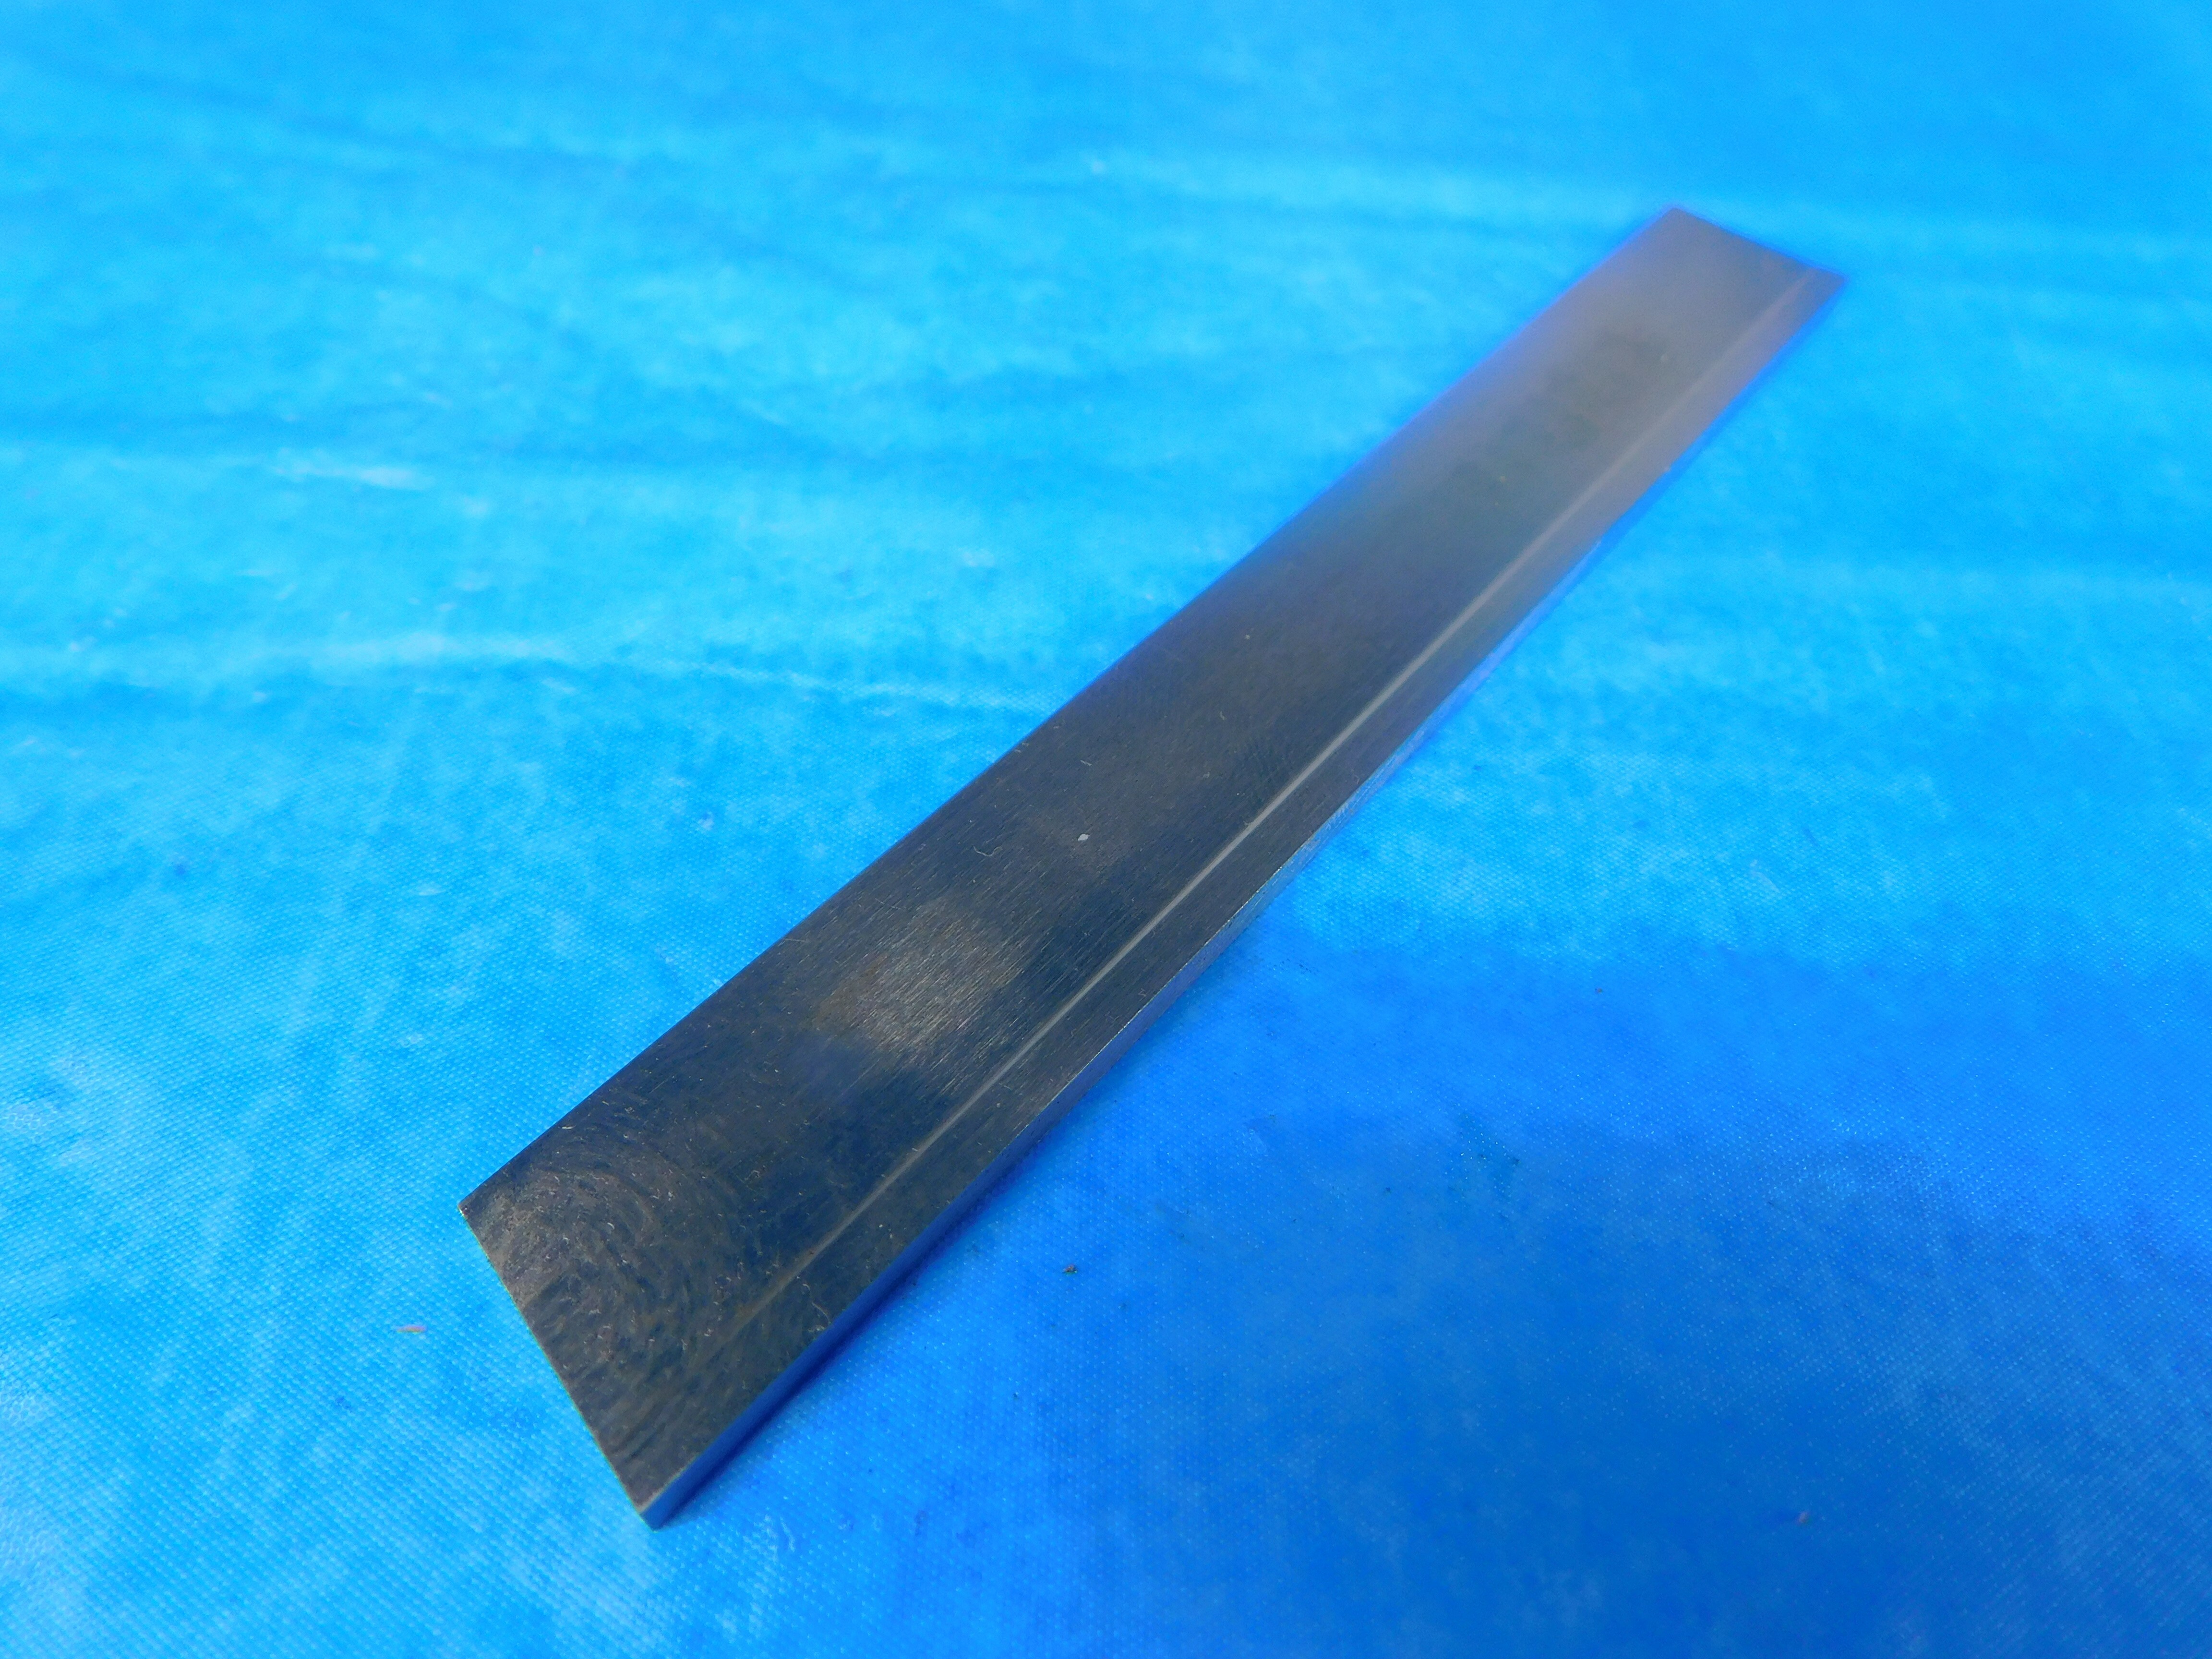

This listing leaves out "Non-Indexable" to make space for other information. "T-Type", decimal equivalents for the width and height, and "Parting" and "Grooving" are included as additional information / search terms. The blade length is included in Size/Labeling along with the width and height.
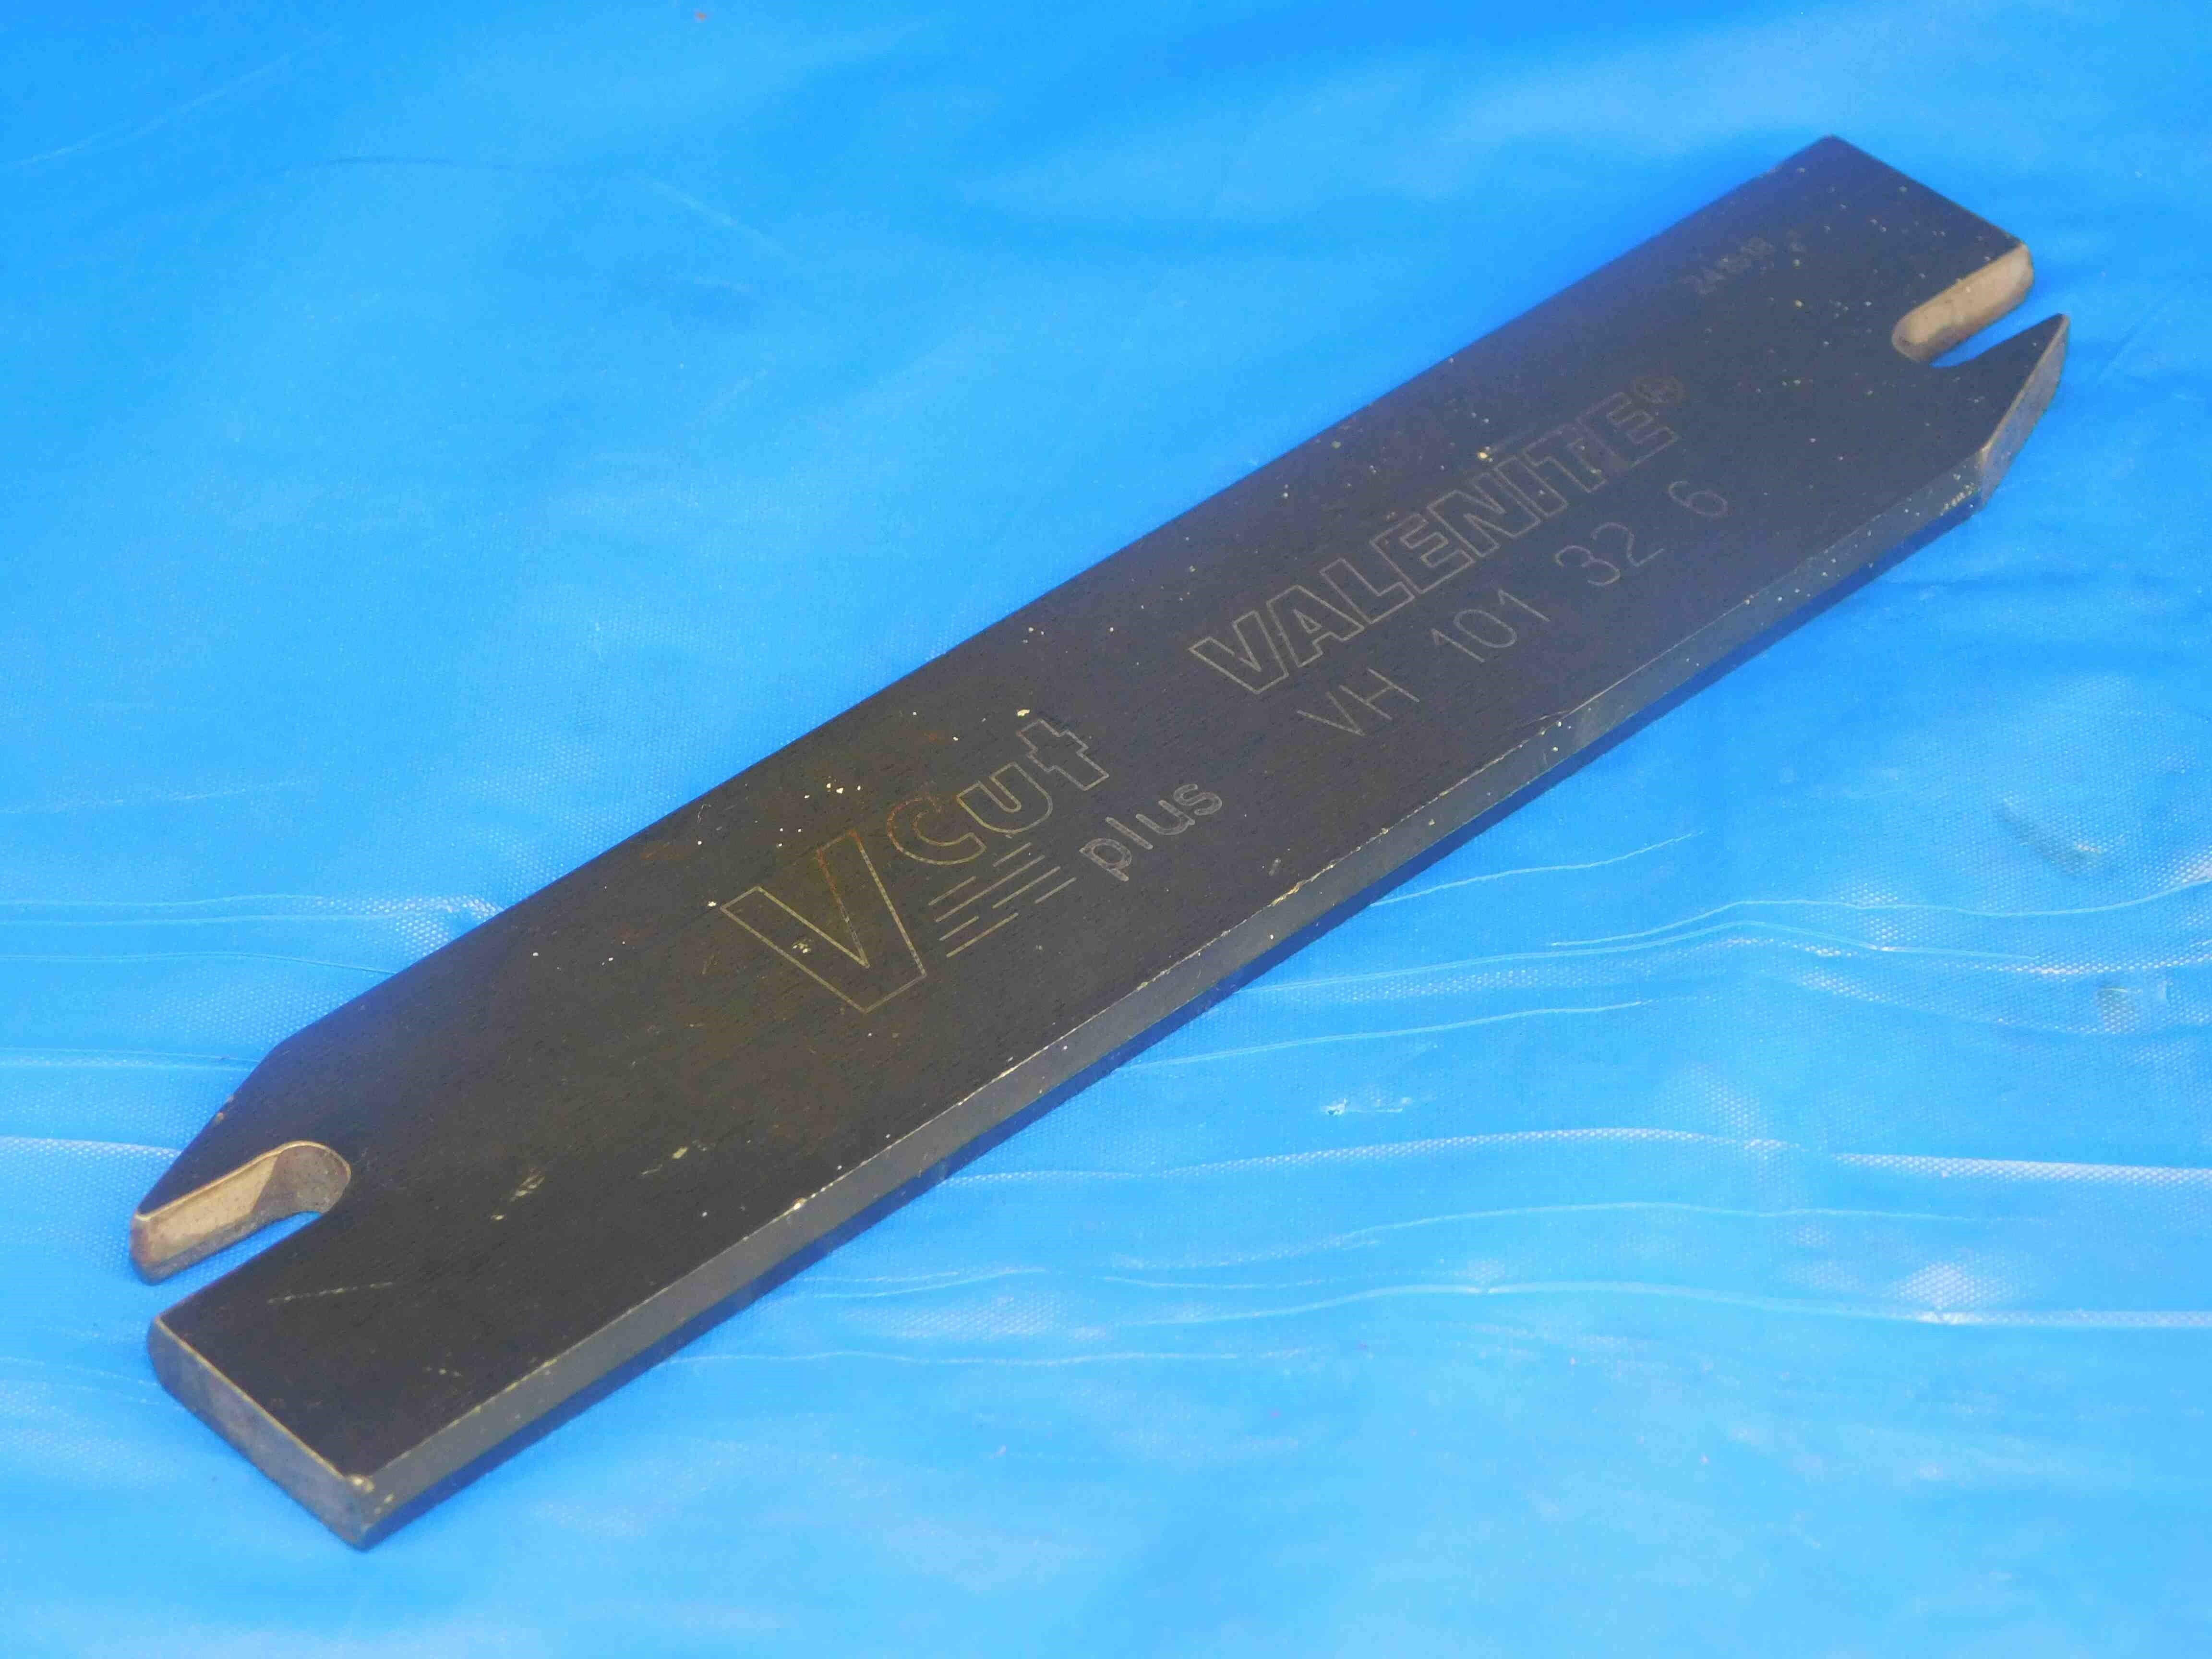

"V-Cut Plus", which is labeled on the blade, is included as additional information along with the type of inserts this indexable blade uses. The inserts are also specified in the Size/Labeling section.
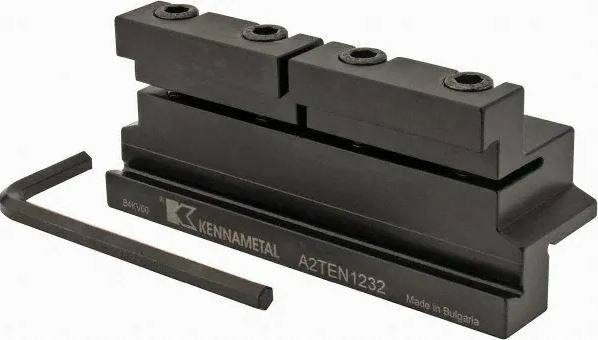
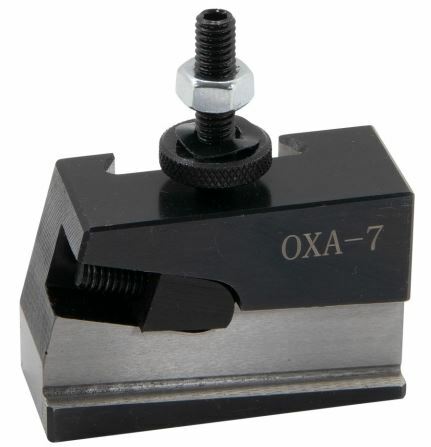
Cutoff Blade Holders can come in a variety of styles and appearances:
The first image above is a Block-Style blade holder. The blade is inserted into the slot at the front of the block, and then clamped into place by tightening the bolts at the top. The holder is mounted onto a lathe using the square (or rectangular) shank at the back of the block.
The second image above is a Quick Change blade holder. These use a similar mechanism to hold the blade, and are easily mounted onto a quick-change tool post using the dovetail connection on the back.
The third and fourth images above do not have a specific type name, but they are similar in appearance to Turning Tool Holders having longer rectangular shanks with a head at one end. They can either be Neutral, meaning the blade is held parallel to the shank, or Offset, meaning the blade is held at an angle.
The most important measurements are the Width and Height of the blade they can hold as well as the shank dimensions.
The blade slot dimensions can often be tricky to measure accurately, so if the holder has a labeled part number it is recommended to try searching the part number online to see if you can find a manufacturer or distributor's webpage which lists the dimensions. Otherwise, try to measure the blade dimensions as accurately as you can using calipers. For block-type holders, you will want to loosen the bolts most of the way using an Allen wrench to get a more accurate height measurement. Blades will almost always be common fractional (down to x/32) or metric sizes, so check both inches and millimeters, and it is okay to round if your measurement is very close (<.005" or .2mm) to a fraction or round metric number.
For quick-change holders, there will often be labeling which tells you what type of tool post it can be used with (the one shown above is compatible with 0XA tool posts). If there is no labeling, or if the labeling does not indicate what kind of post it is compatible with, you should measure the dovetail slot at the widest point as well as the dovetail angle and include this information in the Size/Labeling section of the listing.
Picturing:
Cutoff blade holders should mostly follow the same picture format as most other tooling types:
1st Picture: A three-quarter angle shot with the working end facing the camera. Note: Block-type holders are reversible, so either end can be considered the working end. If there is labeling, the holder should be oriented so that the labeling is right-side-up.
2nd Picture: A side-view with a tape measure at the bottom of the frame to provide scale
3rd Picture: A close-up of the labeling (if there is any).
Additional Pictures: Any damage/modifications must be pictured. Use a pen to point to the affected area.
Refer to the examples below:
PICTURES GO HERE
Listing:
Cutoff blade holders will generally adhere to the following title format:
(Brand)(Part #)[Blade Width] X [Blade Height](Type)["Cutoff Blade Holder"](Shank Size)[Other Info/Filler]
Brand and Part # are optional; not all blade holders will have this information labeled.
Width and Height can be measured in either inches or millimeters. It is not uncommon for cutoff blades to mix units - i.e., you might have a blade with a width of 3mm and a height of 1/2". These measurements should typically be "normal" sizes, so if you are getting a strange inch size try measuring it in mm (and vice-versa). Note that the width can sometimes be inch sizes as small as x/32 fractions.
The Shank Size, like the width and height, can be in either inches or millimeters. Block-type holders often have square shanks, which can be notated as (for example) "1/2 SQUARE SHANK". If the shank is not square, include both the length and width using an "X" (such as "1/2 X 3/4 SHANK").
Other Info that you may want to include:
- Decimal equivalents for fractional width, height, and shank measurements, to help increase searchability. Round to four decimal places if necessary (ex., if the width is 3/32", use .0938 as the decimal rather than .09375)
- "Parting", "Grooving", "Lathe" and "Cut Off" (with a space) are all useful additional search terms to include
- The length of the blade can also be included, but it is generally much less important than the width and height so this is generally something you should only include if there is still space after adding all other possible information
Listing Examples:
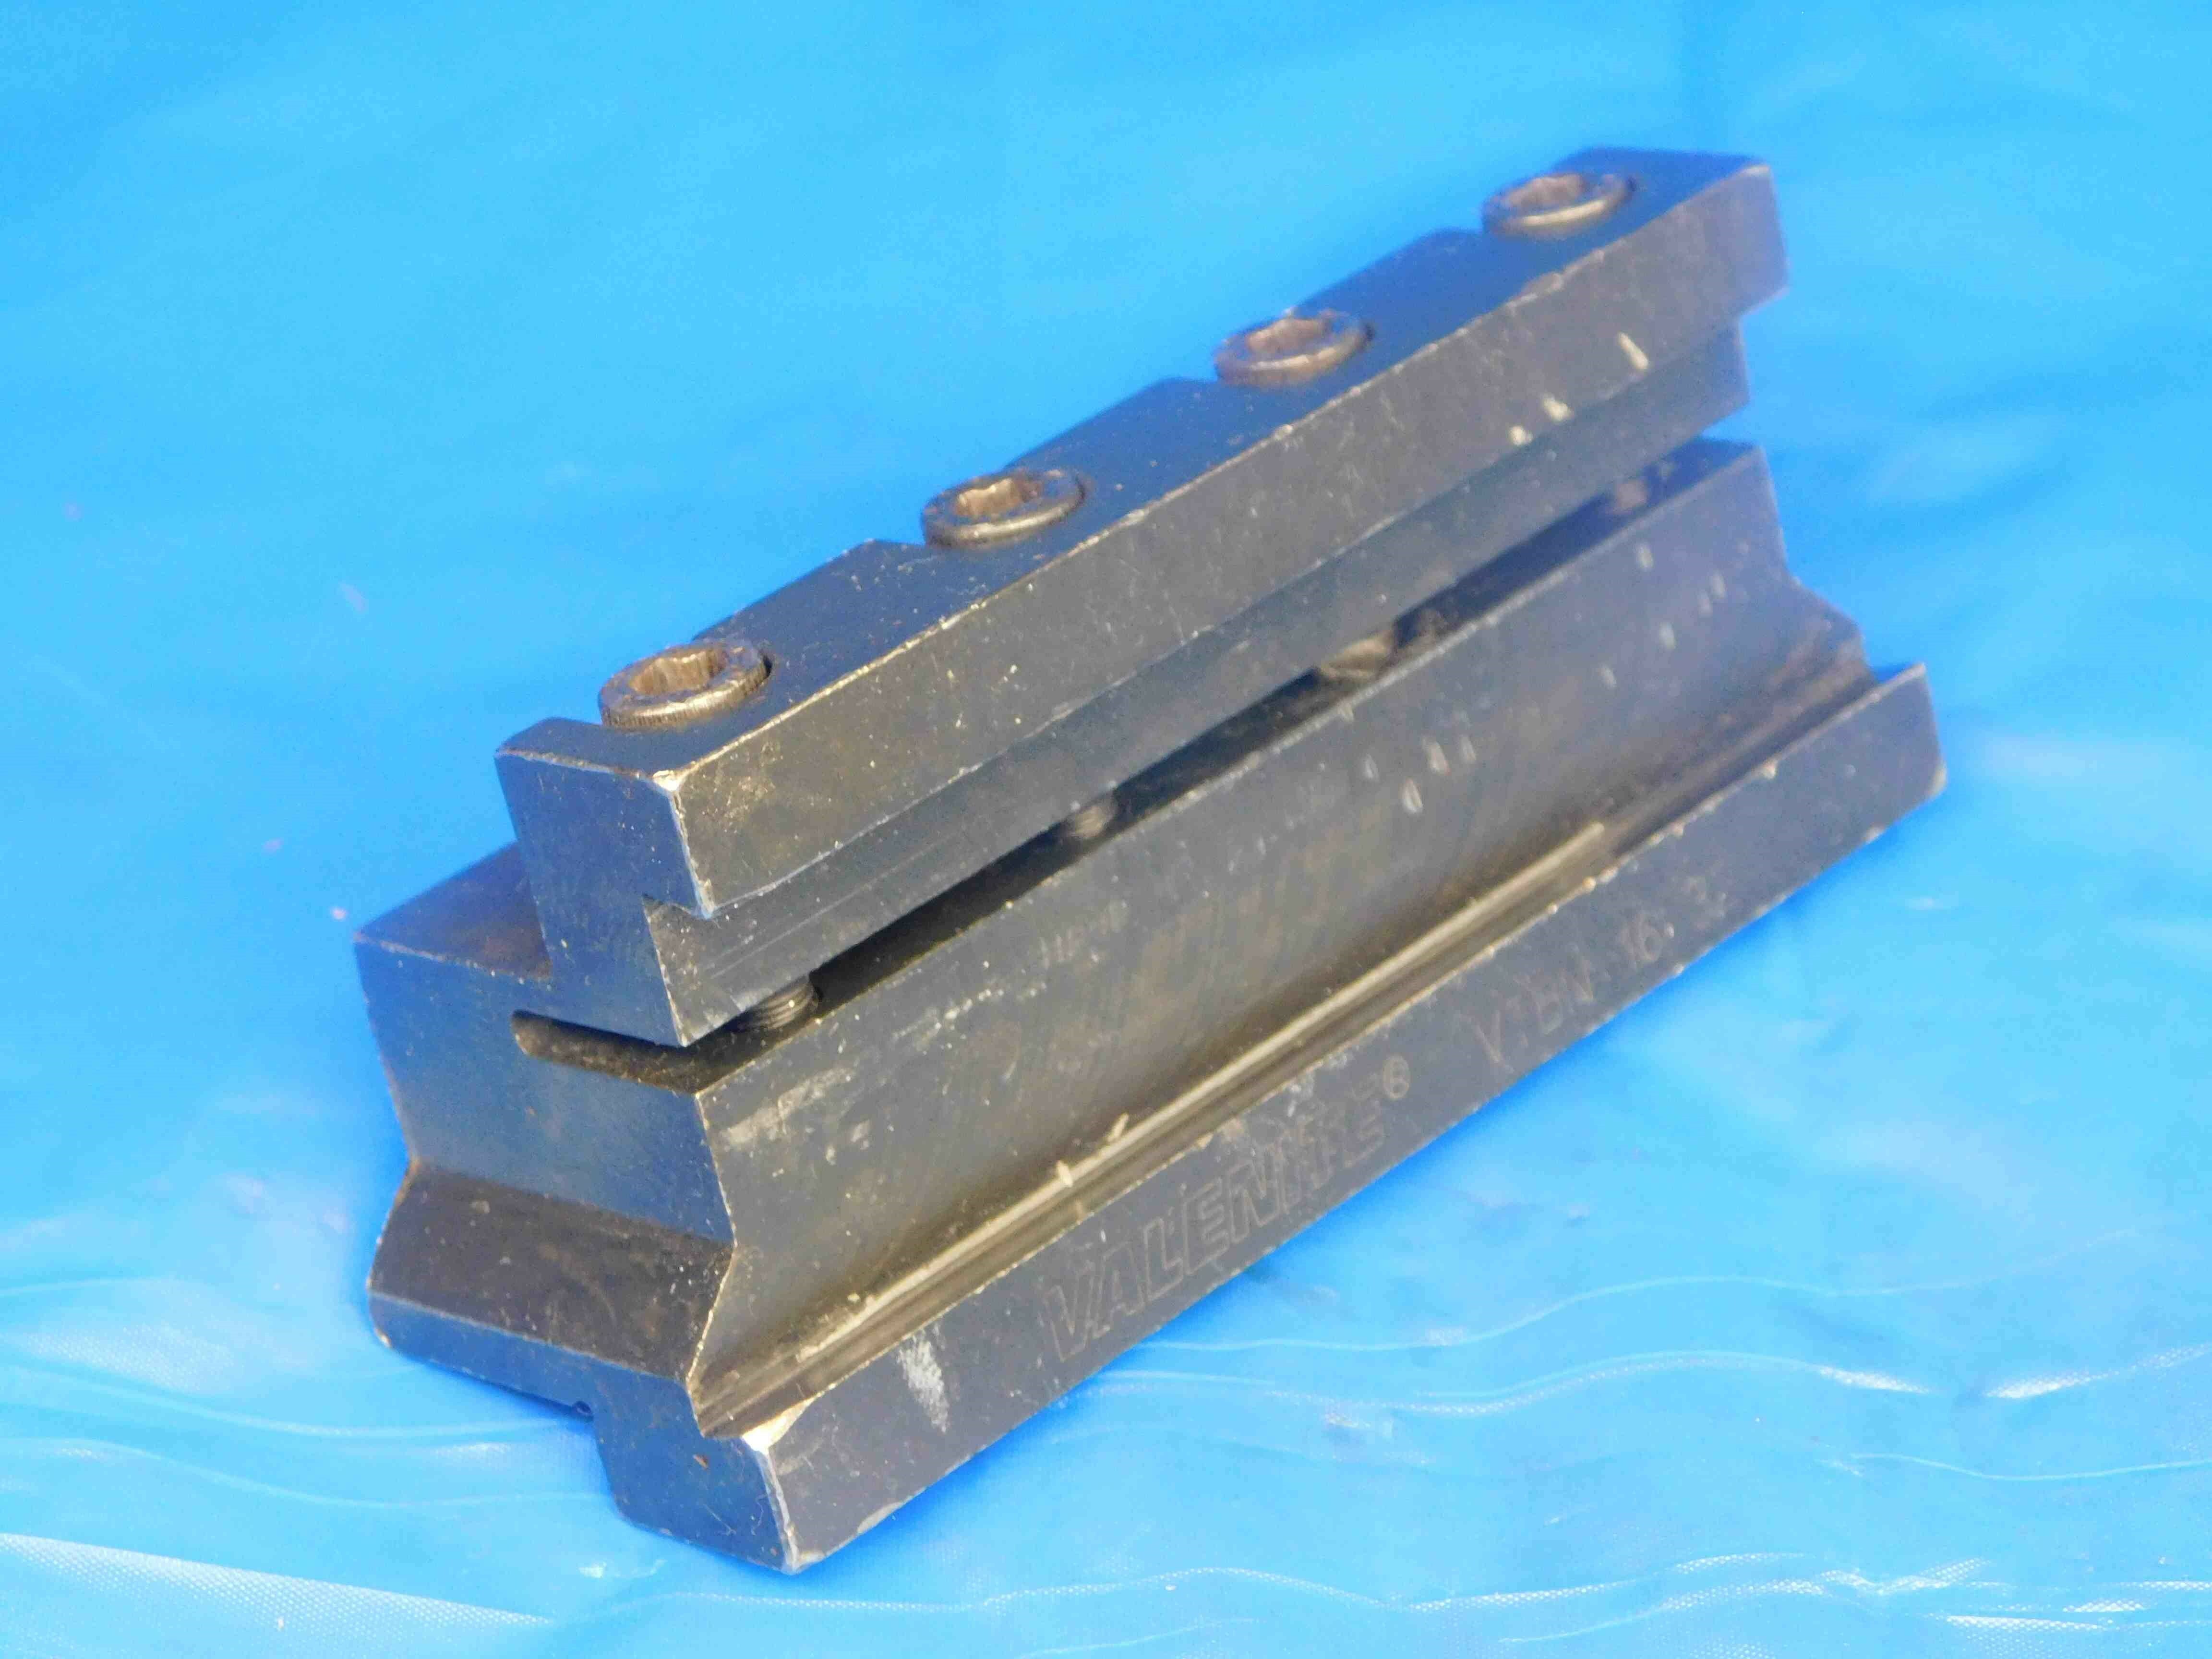

This is a standard listing following the title format outlined above. The only additional information added at the end is "1.0" as a decimal equivalent for 1". The Size/Labeling gives the full labeling including "V-CUT PLUS" and the blade and shank dimensions.
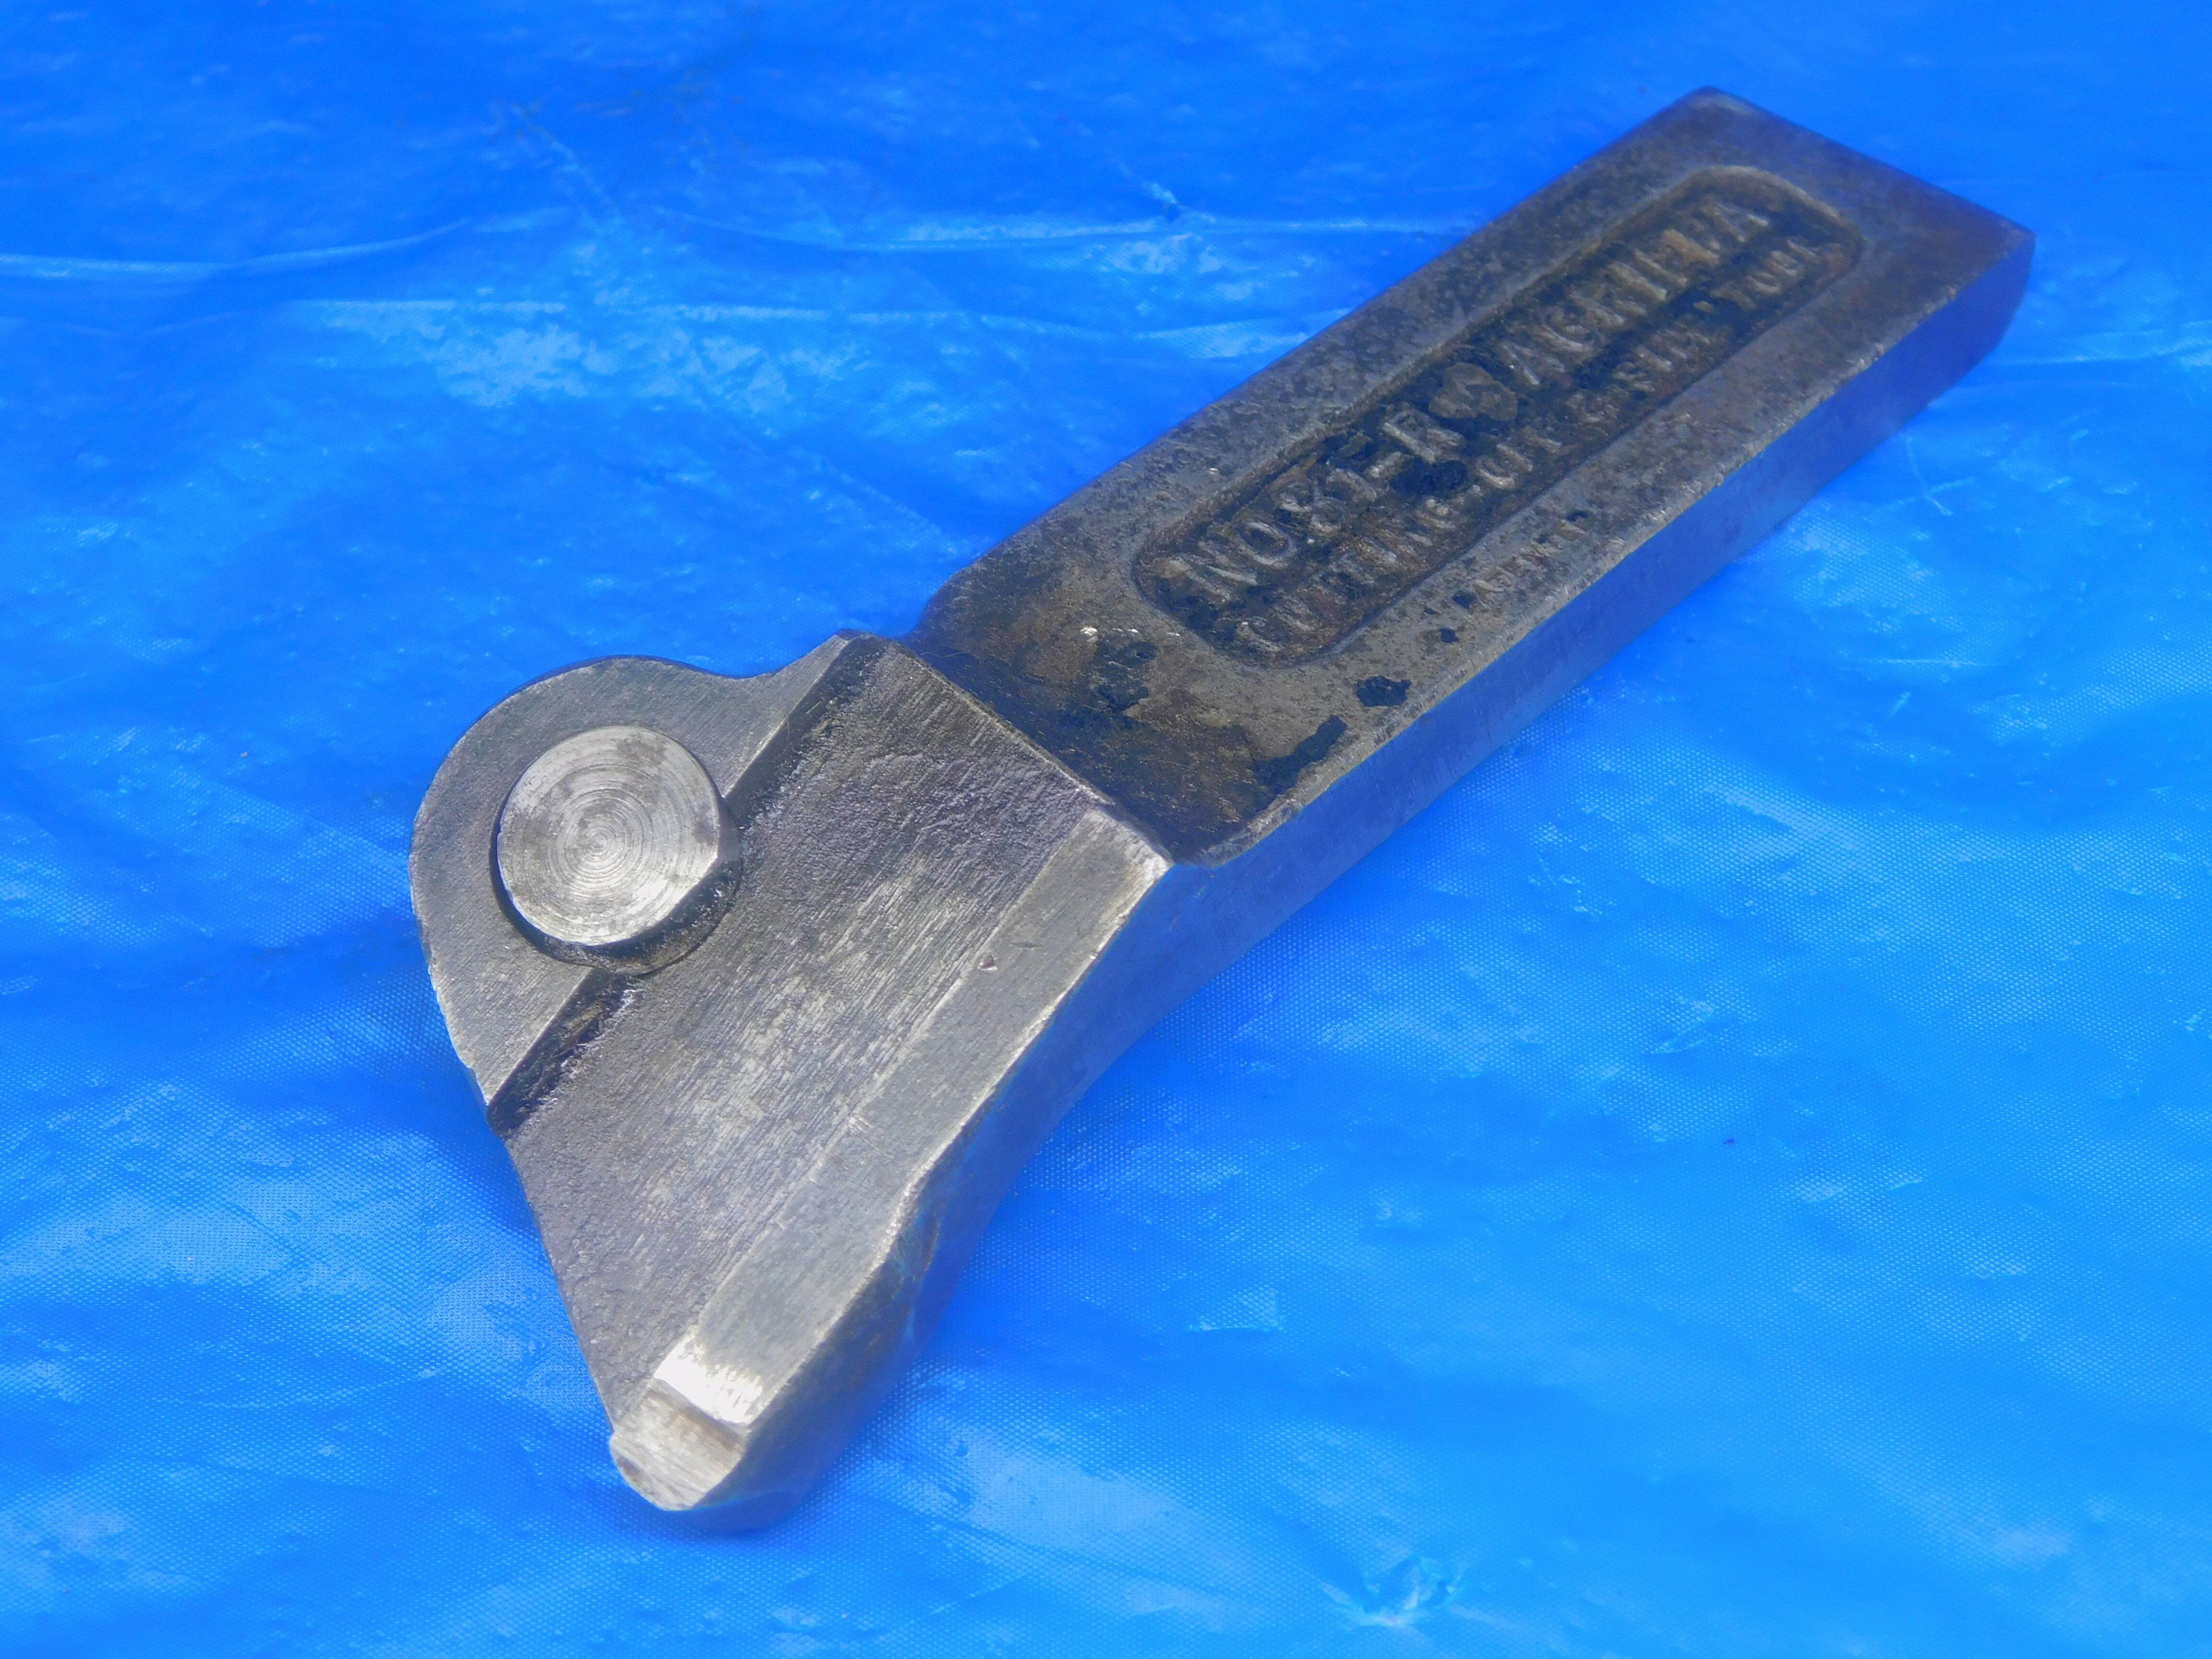

Another pretty standard listing - this one includes "USA MADE" at the end, which is useful to add to titles when applicable since many machinists prefer to use tools from US manufacturers whenever possible.
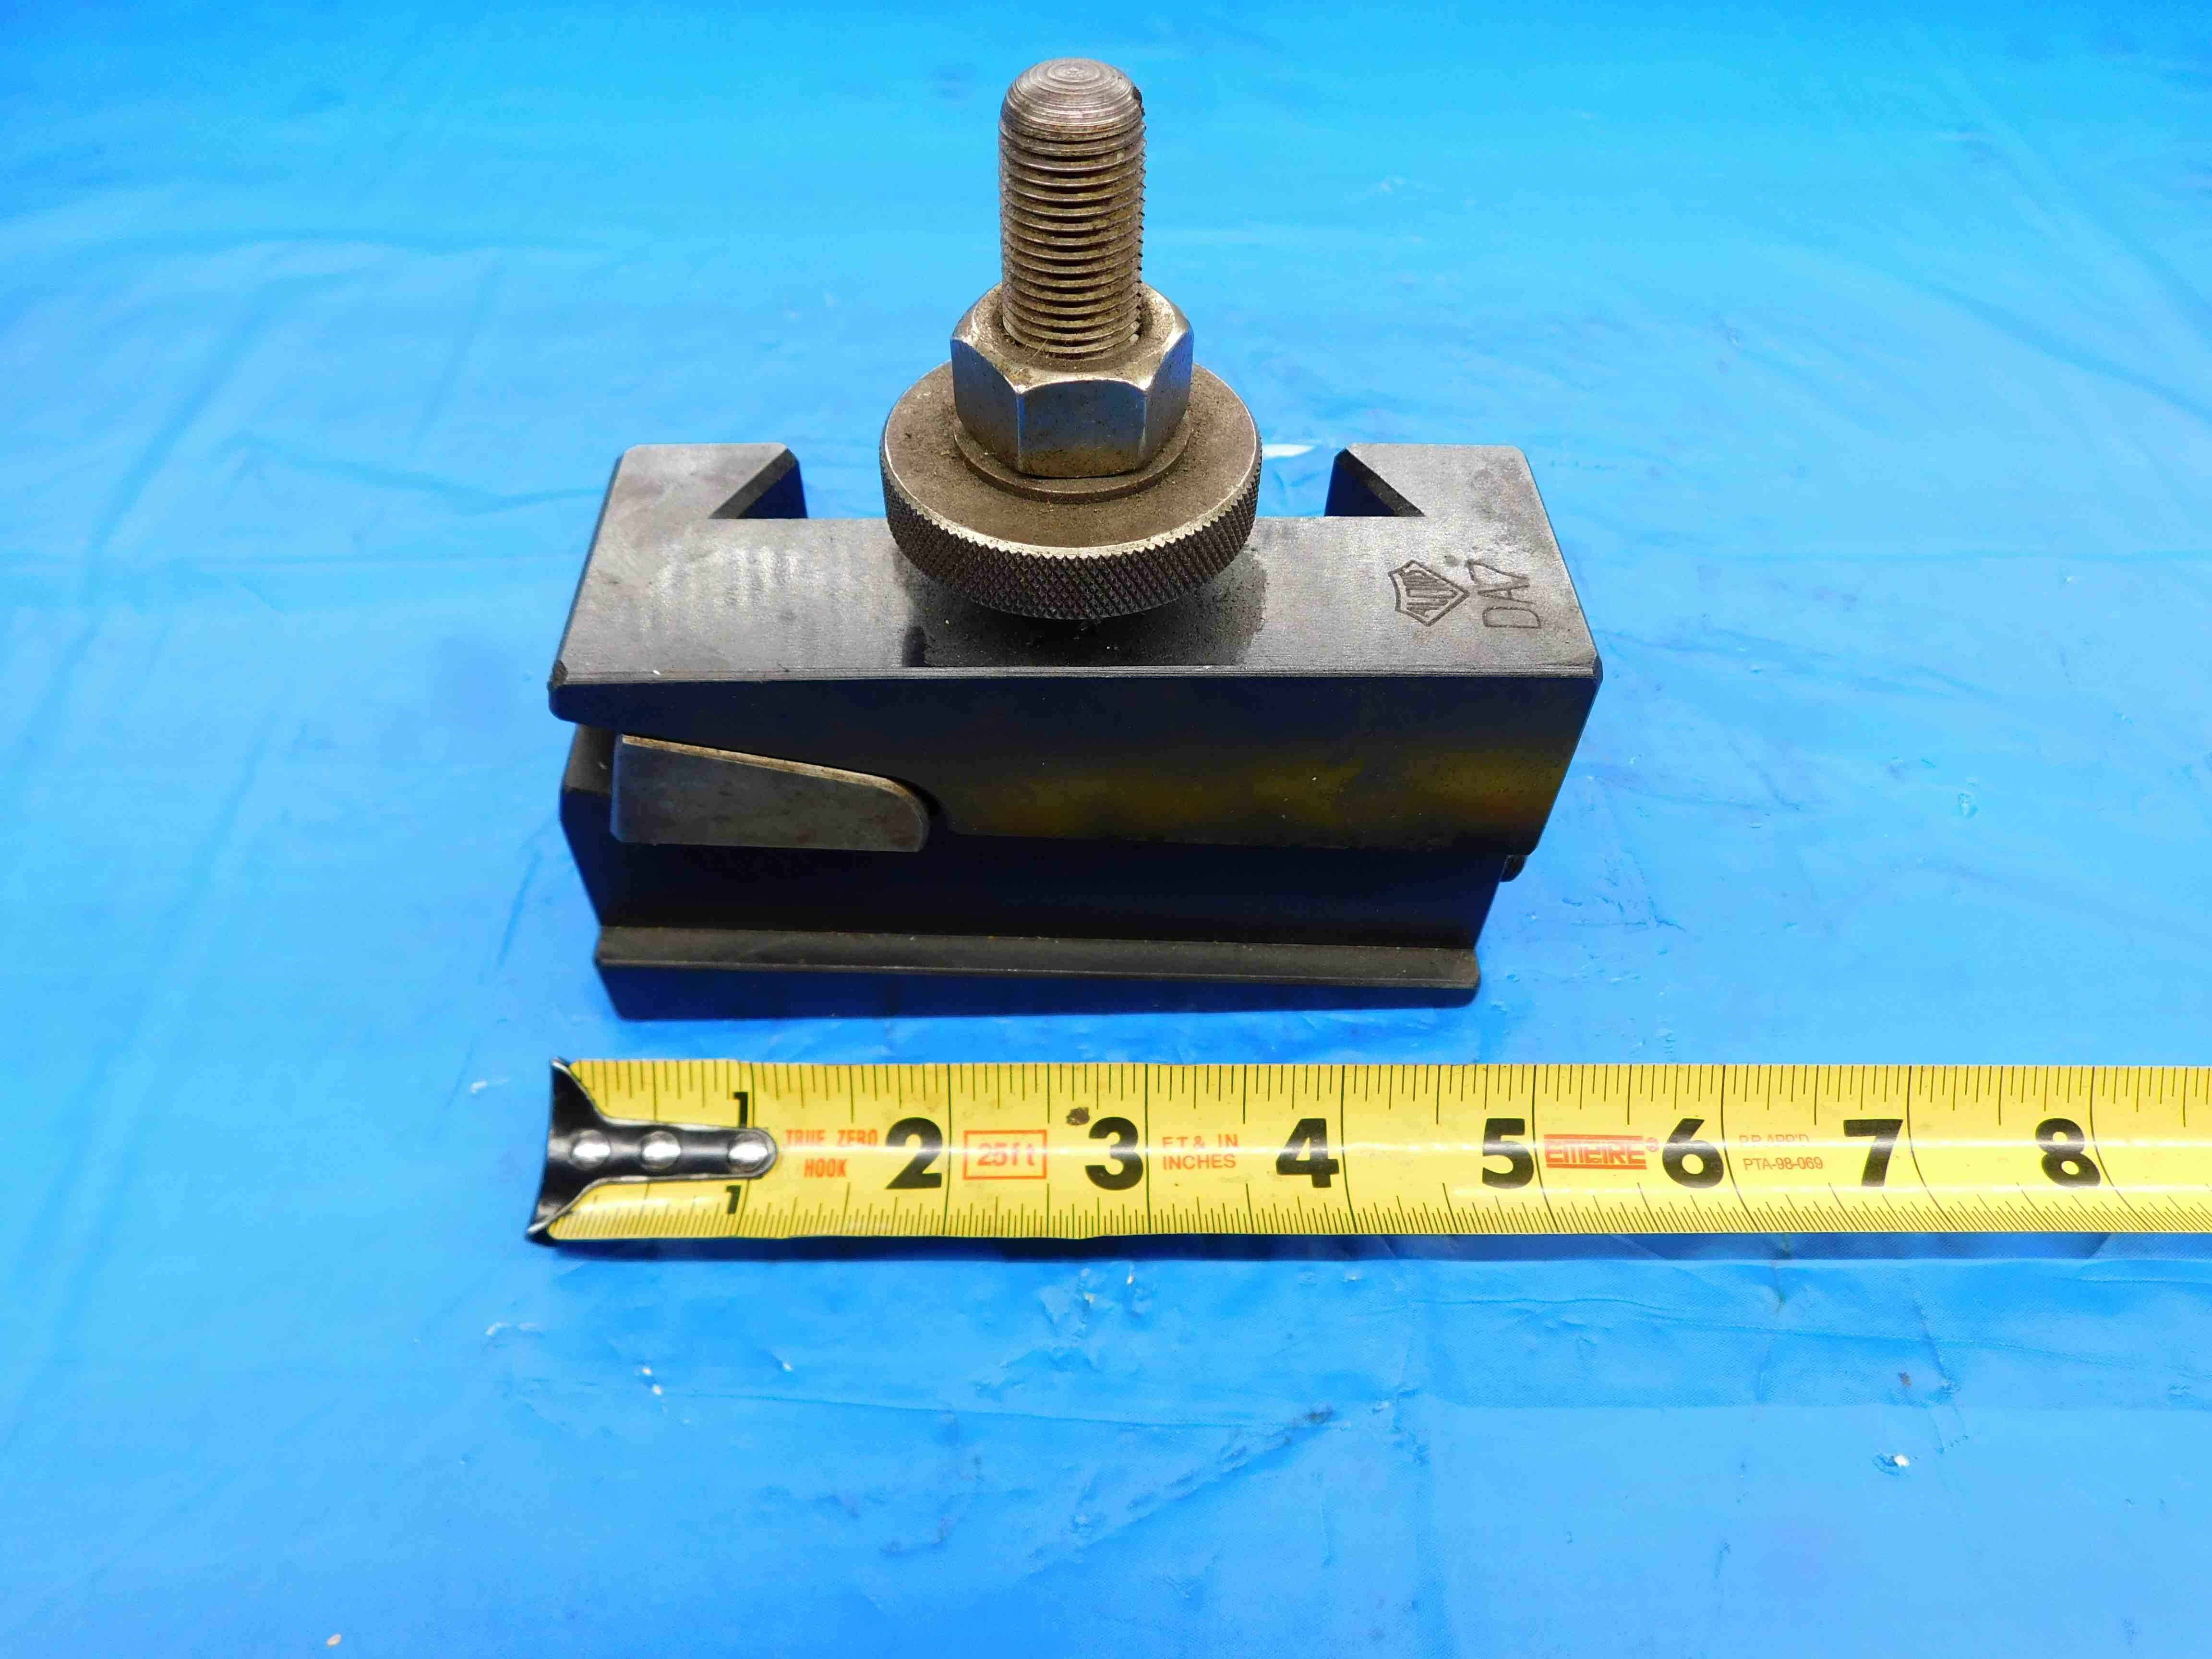

A Google search led us to the fact that this is used with DA series tool posts, so we include this information in the title. If we weren't able to find this info, we would instead fill out the title with other search terms such as "LATHE", "PARTING", etc., and then include the dovetail connection measurements in the Size/Labeling (for example, it might look something like "DOVETAIL CONNECTION IS 45 DEGREES AND MEASURES ABOUT 4.738" AT THE WIDEST POINT").
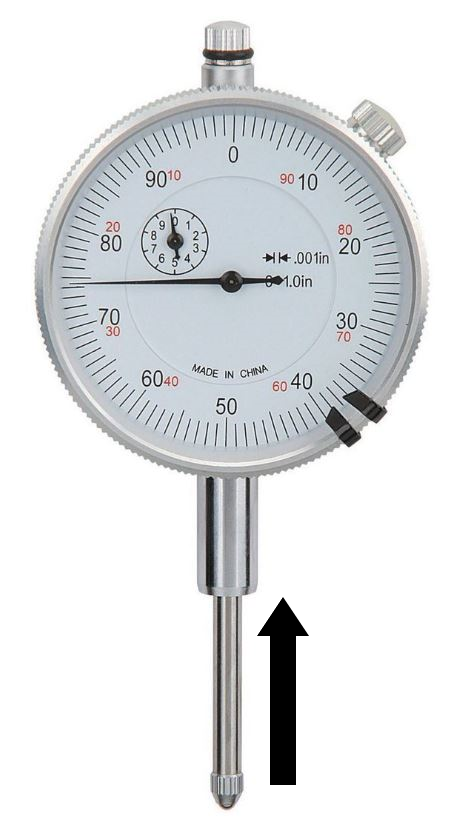
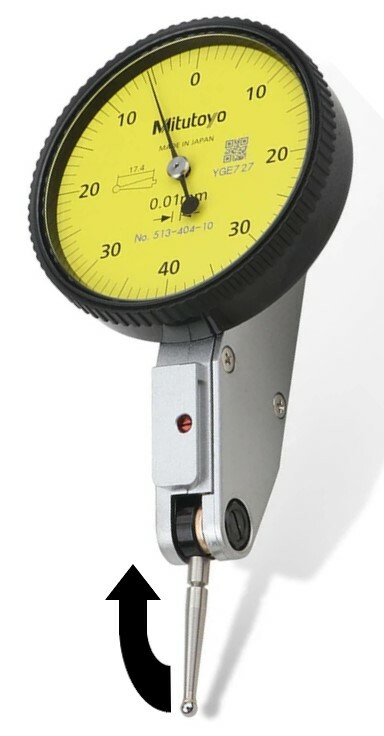
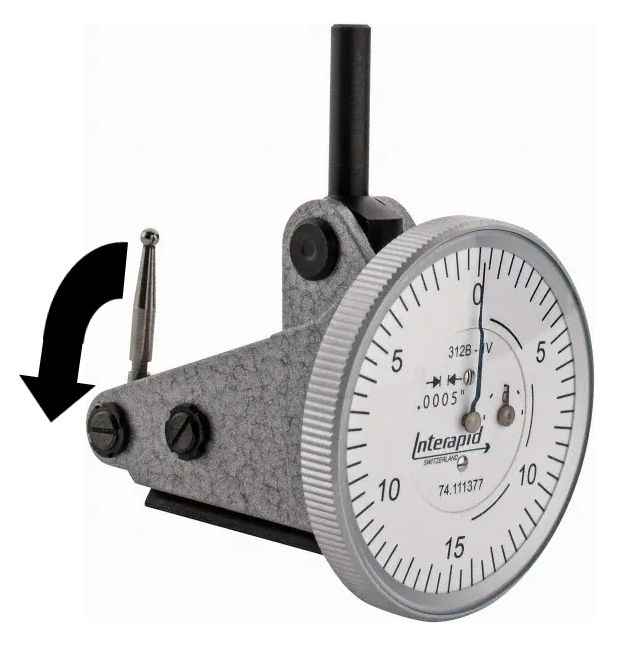
Dial indicators are used for precise measurements or comparisons of various surfaces. They are most commonly used to check the flatness of a surface, the parallelism of rods or bars, and the concentricity of round objects. They are typically mounted on a stand or fixed into various instruments such as depth gages and bore gages (described in another section of this FAQ).
There are two main types of dial indicators:
- Dial Drop Indicators (first image above) have a straight plunger which moves vertically as it passes over variations on a surface. The needle(s) on the face of the dial travel along with the plunger in order to precisely measure these variations.
- Dial Test Indicators (second and third images above), meanwhile, use a lever which travels at an angle as it passes over a surface. These tend to be used more for checking the overall consistency of a surface, as opposed to drop indicators which are used more for comparing specific points on a surface. Test indicators can be either Horizontal (second image above) or Vertical (third image above) - as the names imply, horizontal indicators are used to test horizontal surfaces, and vertical indicators are used to test vertical surfaces.
The other important aspects of a dial indicator are:
Dial Reading - This is the range of numbers shown on the dial face. For most drop indicators this is simply expressed as a range from 0 to the maximum reading. For the drop indicator shown above, the reading would be 0-100 (the largest number is 90, but when it makes a full revolution back to 0, that would be 100). For test indicators (and some drop indicators), the reading typically goes from 0, to a maximum reading which is directly across the face from 0, and then back to 0. Using the two test indicators pictured above as examples, the first has a reading of 0-40-0, and the second has a reading of 0-15-0.
Graduation - This refers to the distance represented by each line on the indicator face. This will be a very small number and can be labeled in inches, millimeters, or both.
See the image below:
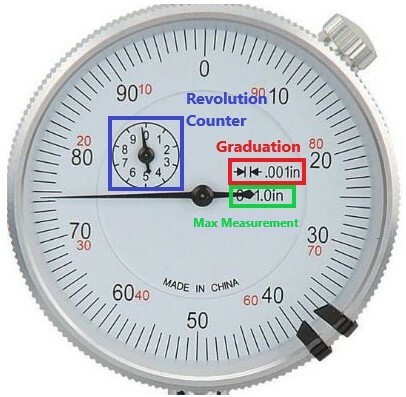
In this example the graduation is .001", meaning the needle will move one line for each .001" that the plunger travels. This means that the "10" on the face is actually .01" (because .001 x 10 = .01), 20 is .02", 30 is .03" and so on up to a full revolution of .1" (.001 x 100).
Many drop indicators will have a Revolution Counter which tracks how many full revolutions the dial makes. This one goes up to 10 full revolutions, meaning the maximum measurement that can be taken by this indicator is 1".
In this example, the max measurement is labeled on the dial face, but this will not always be the case. If the max measurement is not labeled, it can be determined by multiplying the graduation x the max dial reading x the total number of revolutions (using this example: .001 x 100 x 10 = 1). If there is not a revolution counter, you can simply count the number of full revolutions as you slowly press in the plunger until it stops.
For test indicators (both horizontal and vertical), the max. measurement calculation is mostly the same except that you will multiply the max reading by two before doing the rest of the calculation. So for example, let's say we have a 0-15-0 test indicator with a graduation of .0005" and maximum of 2 full revolutions. We start by multiplying the max reading (15) by two, which becomes 30. Then we simply do the same calculation: .0005 (graduation) x 30 (max reading) x 2 (max revolutions) = .03" max measurement.
If a test indicator does not have a revolution counter, you will need to count the revolutions as you slowly push the lever from one end of its range of movement all the way to the other end.
Picturing:
Most dial indicators will adhere to the following picture format:
1st Picture: Lay the indicator down flat, face up. It should be oriented so that any labeling / text on the face is right-side-up. A tape measure is placed at the bottom of the frame to provide scale. If there is any packaging, include it in this picture. Note: Some dial indicators will have lugs on the back which prevent them from being laid down flat. In these cases, you should instead lean the indicator on its side as shown in example (#) below.
2nd Picture: A close-up of the dial face.
3rd Picture: A picture of the backside of the indicator, laying down flat like in the first picture.
Additional Pictures: Any damage / modifications must always be pictured. Use a pen to point to the affected area(s).
Refer to the examples below:
PICTURES GO HERE
Listing:
Dial indicators will generally adhere to the following title format:
[Brand][Part #](Type + "Dial Indicator")[Max Measurement][Dial Reading][Graduation][Other Info/Filler]
Brand and Part # are optional; not all indicators will have these.
The Type (along with the words "Dial Indicator") should be formatted as one of the following:
- Dial Drop Indicator
- Horizontal Dial Test Indicator
- Vertical Dial Test Indicator
- Other: If it is not a standard drop or test indicator, try to find more information about it and use your best judgement for how to describe the type. It is also acceptable to simply say "Dial Indicator" if you are not sure.
The Max Measurement can be described using just the word "Max" (such as: 1" MAX)
The Dial Reading should be formatted without spaces (examples: 0-100; 0-15-0)
The Graduation should include either the " sign (for inches) or mm (for millimeters), such as .0005" or .01mm. "Graduation" can be abbreviated as "Grad" if needed.
Other Info that you may want to include:
- The outer diameter of the face, which can be measured with calipers
- Specific terms you see labeled on the dial face such as "Full Jeweled" or "Shockproof"
- Decimal equivalents for fractional sizes (for example, 1.0 if the listed max measurement is 1")
- "USA" or "USA Made", if applicable
Listing Examples:
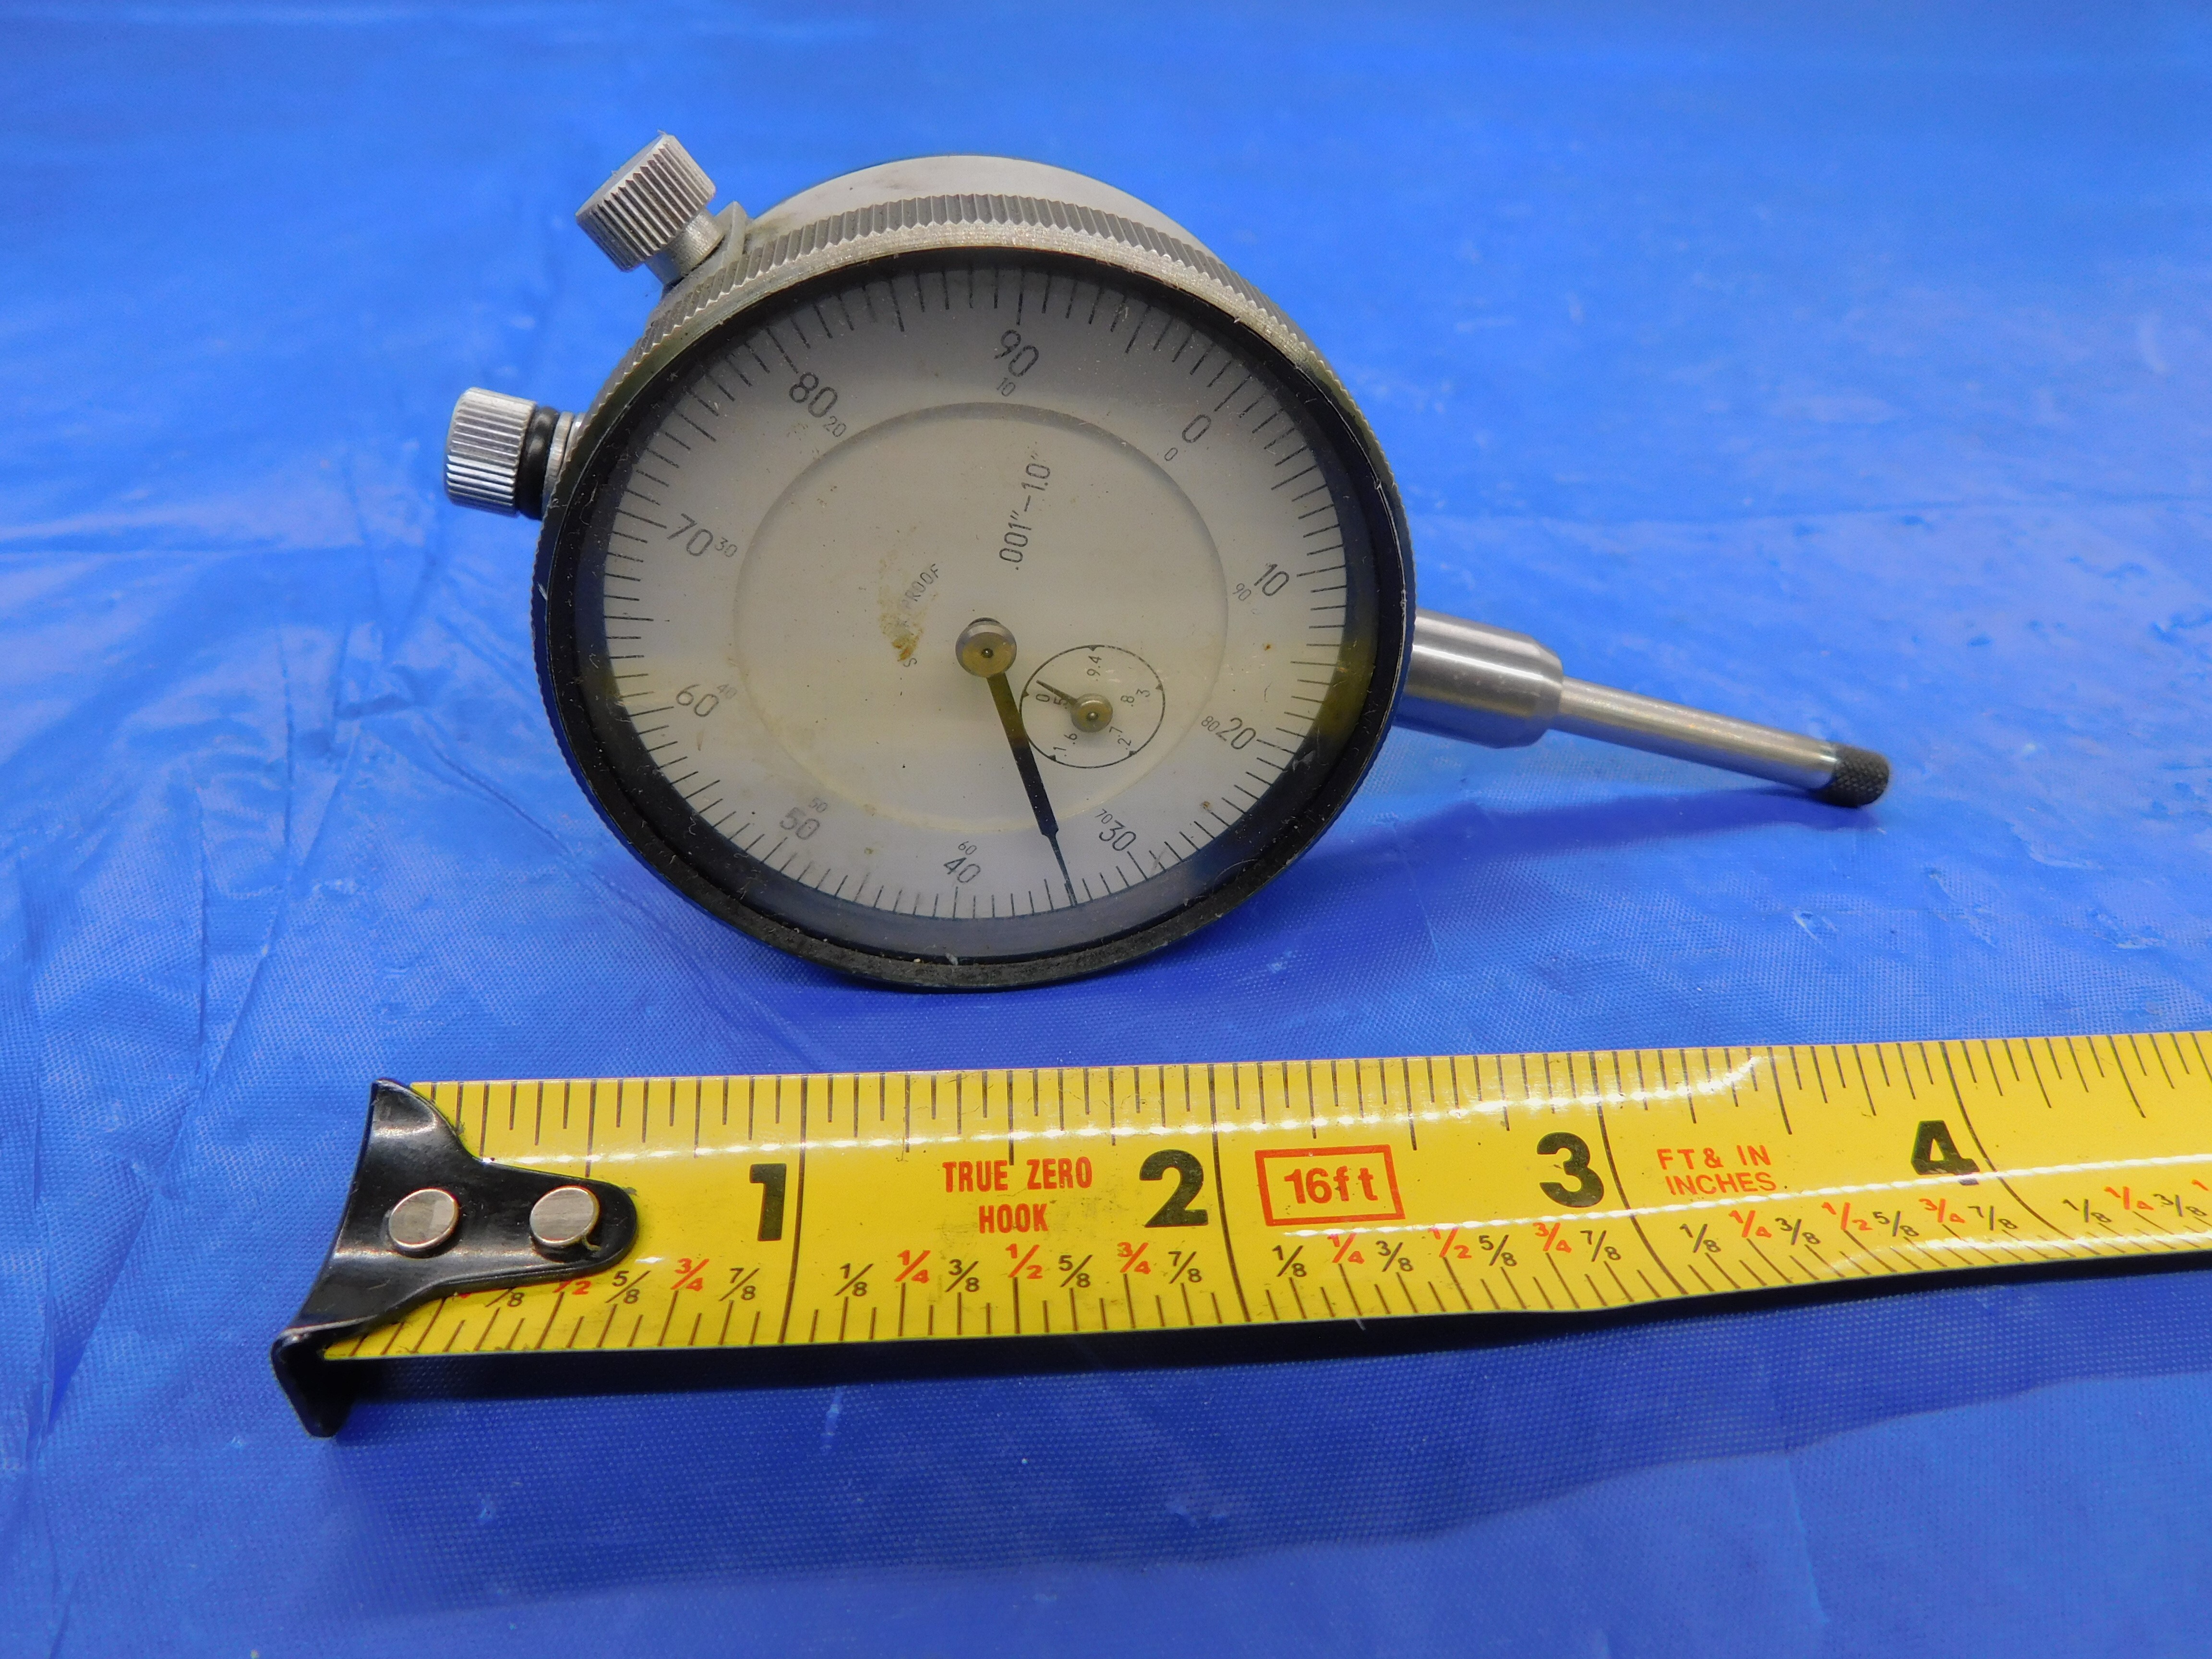

In this listing we had extra title space due to the lack of brand and part number, so we added "SHOCKPROOF" (which is labeled on the dial face) as well as "1.0" as a decimal equivalent for the 1" max measurement. The "Size/Labeling" lists all of the important details from the title along with the face diameter, and also notes that there is a lug on the bag of the dial (which would be shown in the listing's 3rd picture).
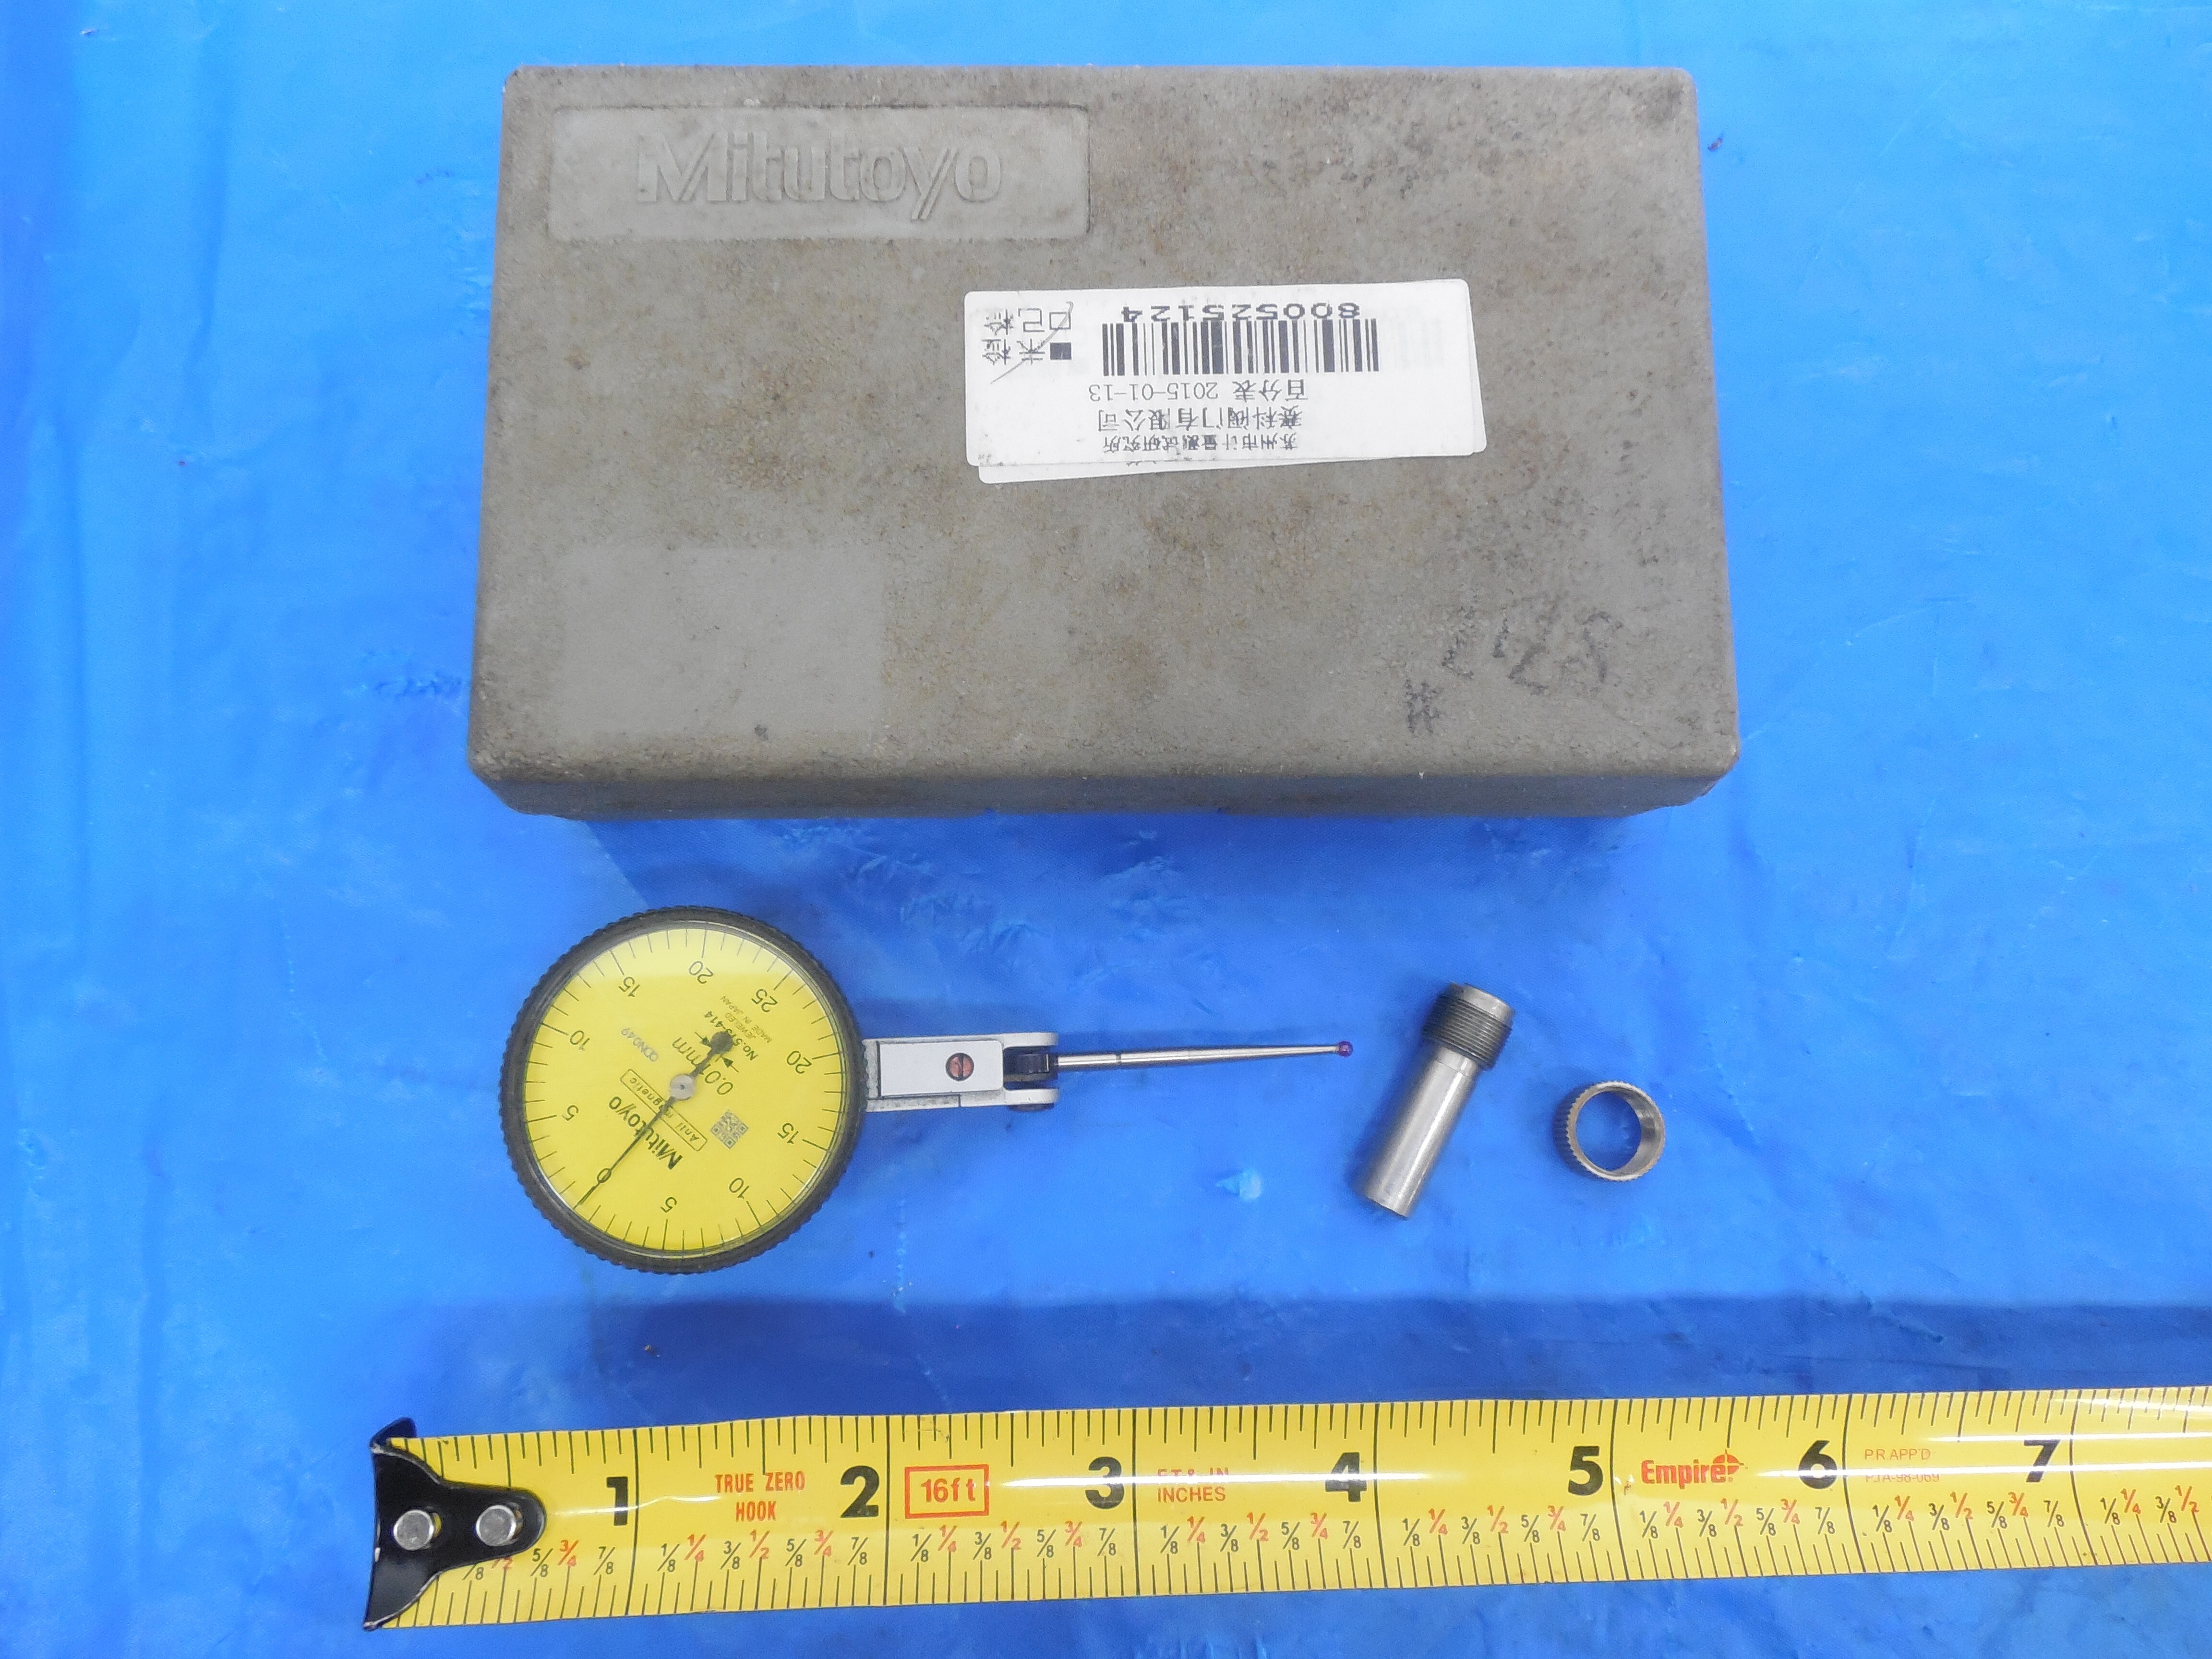

In order to keep the title under 80 characters, "DIAL READING" has been removed and "GRADUATION" has been abbreviated to "GRAD". The full details are listed in "Size/Labeling" along with the face diameter.
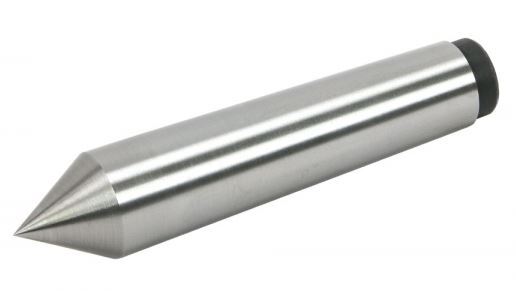
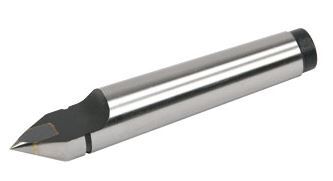
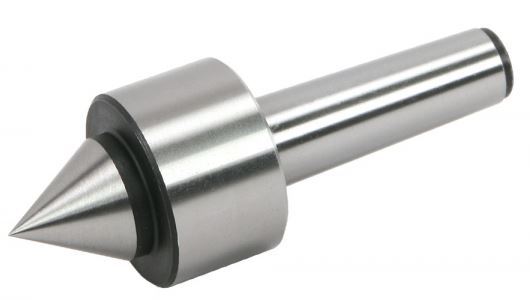
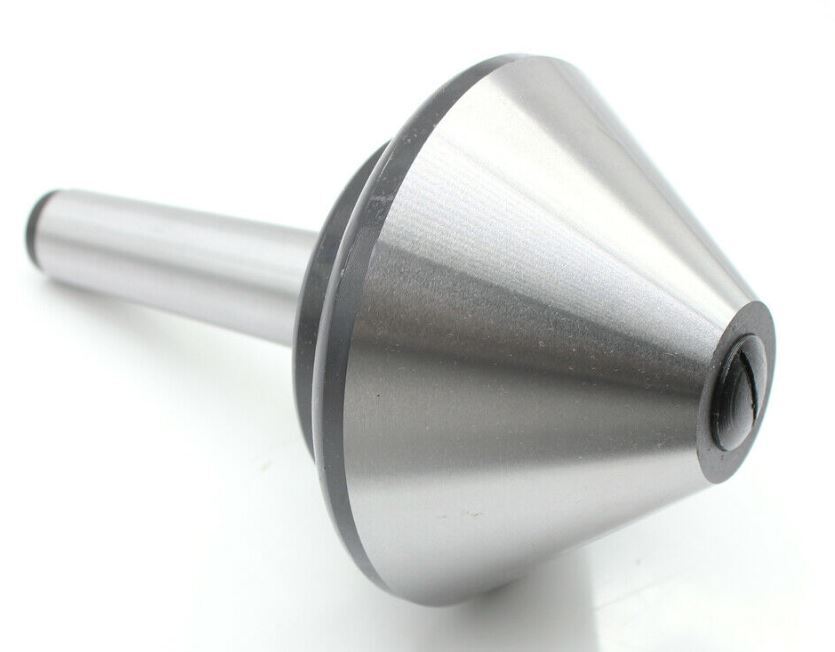
Lathe Centers are used to stabilize a workpiece on a lathe, ensuring that it rotates uniformly. They have tapered shanks which are most commonly Morse Tapers (but can also be other taper types such as Brown & Sharpe), but notably do not have tangs at the end like you would see on a Morse Taper drill bit, for example.
There are two main types of lathe centers, dead centers and live centers. Dead centers (first two images above) are one solid piece which does not rotate along with the workpiece. Live centers (3rd &4th images above), have free-floating heads which rotate along with the workpiece while the shank remains stationary. There will typically be a large collar which houses the bearings that allow the head to move.
Centers (both live and dead) can be either full (1st and 3rd images above) or half (2nd image above). This simply refers to whether there is a full or half cone at the tip.
Another sub-type is the bull nose center (4th image above), which has a wide, tapered head, often (but not always) with a flat tip. These are mainly used in pipe work and hold a workpiece with an internal bore from the inside.
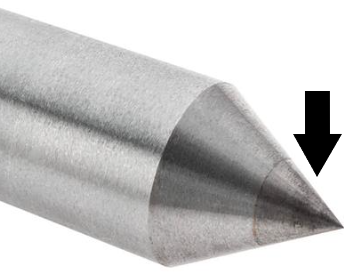
Centers are most commonly made out of steel (tool steel - not HSS), but can also be solid carbide or carbide-tipped. Carbide tips should be easy to identify by sight, as there will be a noticeable color difference between the carbide and the steel. See below for an example:
Picturing:
Lathe centers will generally follow the same picture format as most other tooling types:
1st Picture: A three-quarter angle shot with the working end facing the camera.
2nd Picture: A side-view with a tape measure at the bottom of the frame to provide scale.
3rd Picture: A head-on shot of the working end.
4th Picture: A close-up of the labeling (if there is any).
Additional Pictures: Any damage/modifications must be pictured. Use a pen to point to the affected area.
Refer to the examples below:
PICTURES GO HERE
Listing:
Lathe centers will generally adhere to the following title format:
[Brand][Part #][Material]["Half" or "Full"]["Live" or "Dead"](Sub-Type)["Lathe Center"][Taper][Other Info / Filler]
Brand and Part # are optional - not every center will have these
Material will typically be either Steel (NOT high speed) or Solid Carbide
Sub-Types include Carbide Tipped, Bull Nose, and any other specific terms you might find from searching a part #
The Taper should ideally be both fully spelled out (i.e., "Morse Taper #4") and abbreviated (i.e., "MT4"). If the title is over 80 characters, use the abbreviation only.
There is generally not much Other Info for lathe centers, but if there is anything else that you think should be included in the title, add it at the end.
Listing Examples:
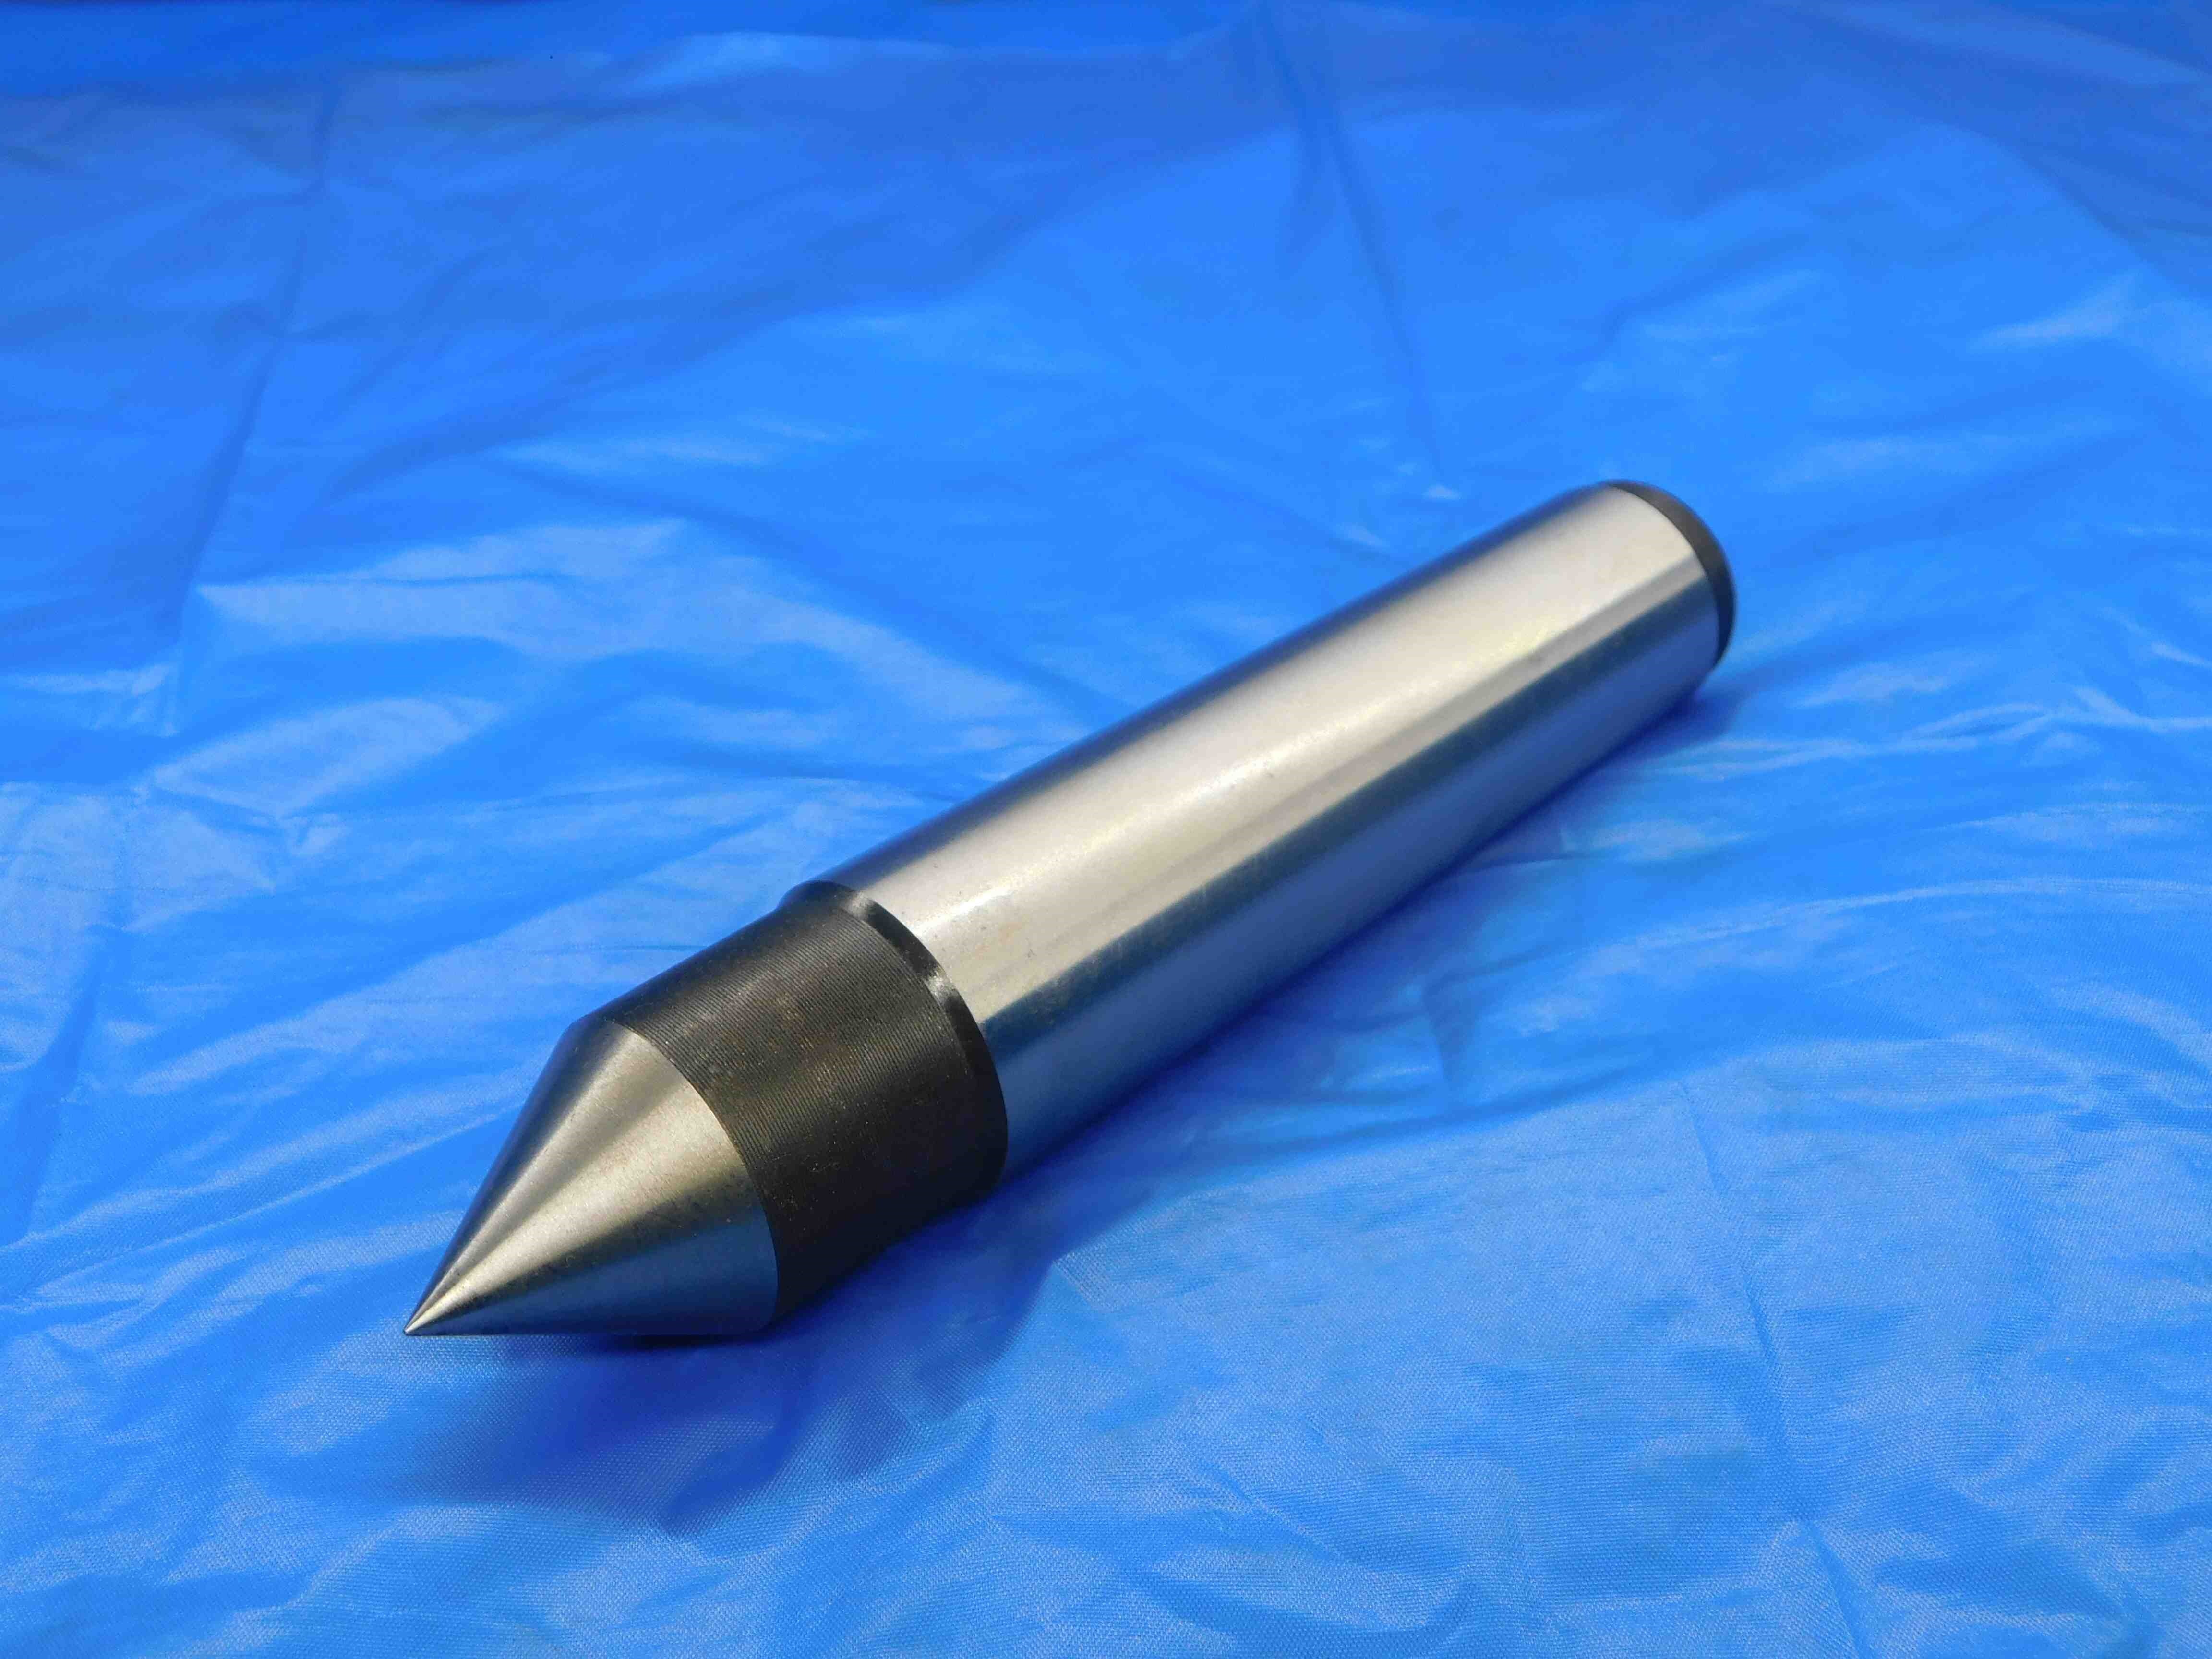

This listing is pretty straightforward. Because there is no labeled brand or part number and no additional subtype, there is plenty of room at the end of the title for filler. In this case we went with the general terms "MACHINIST TOOLING GRINDING".
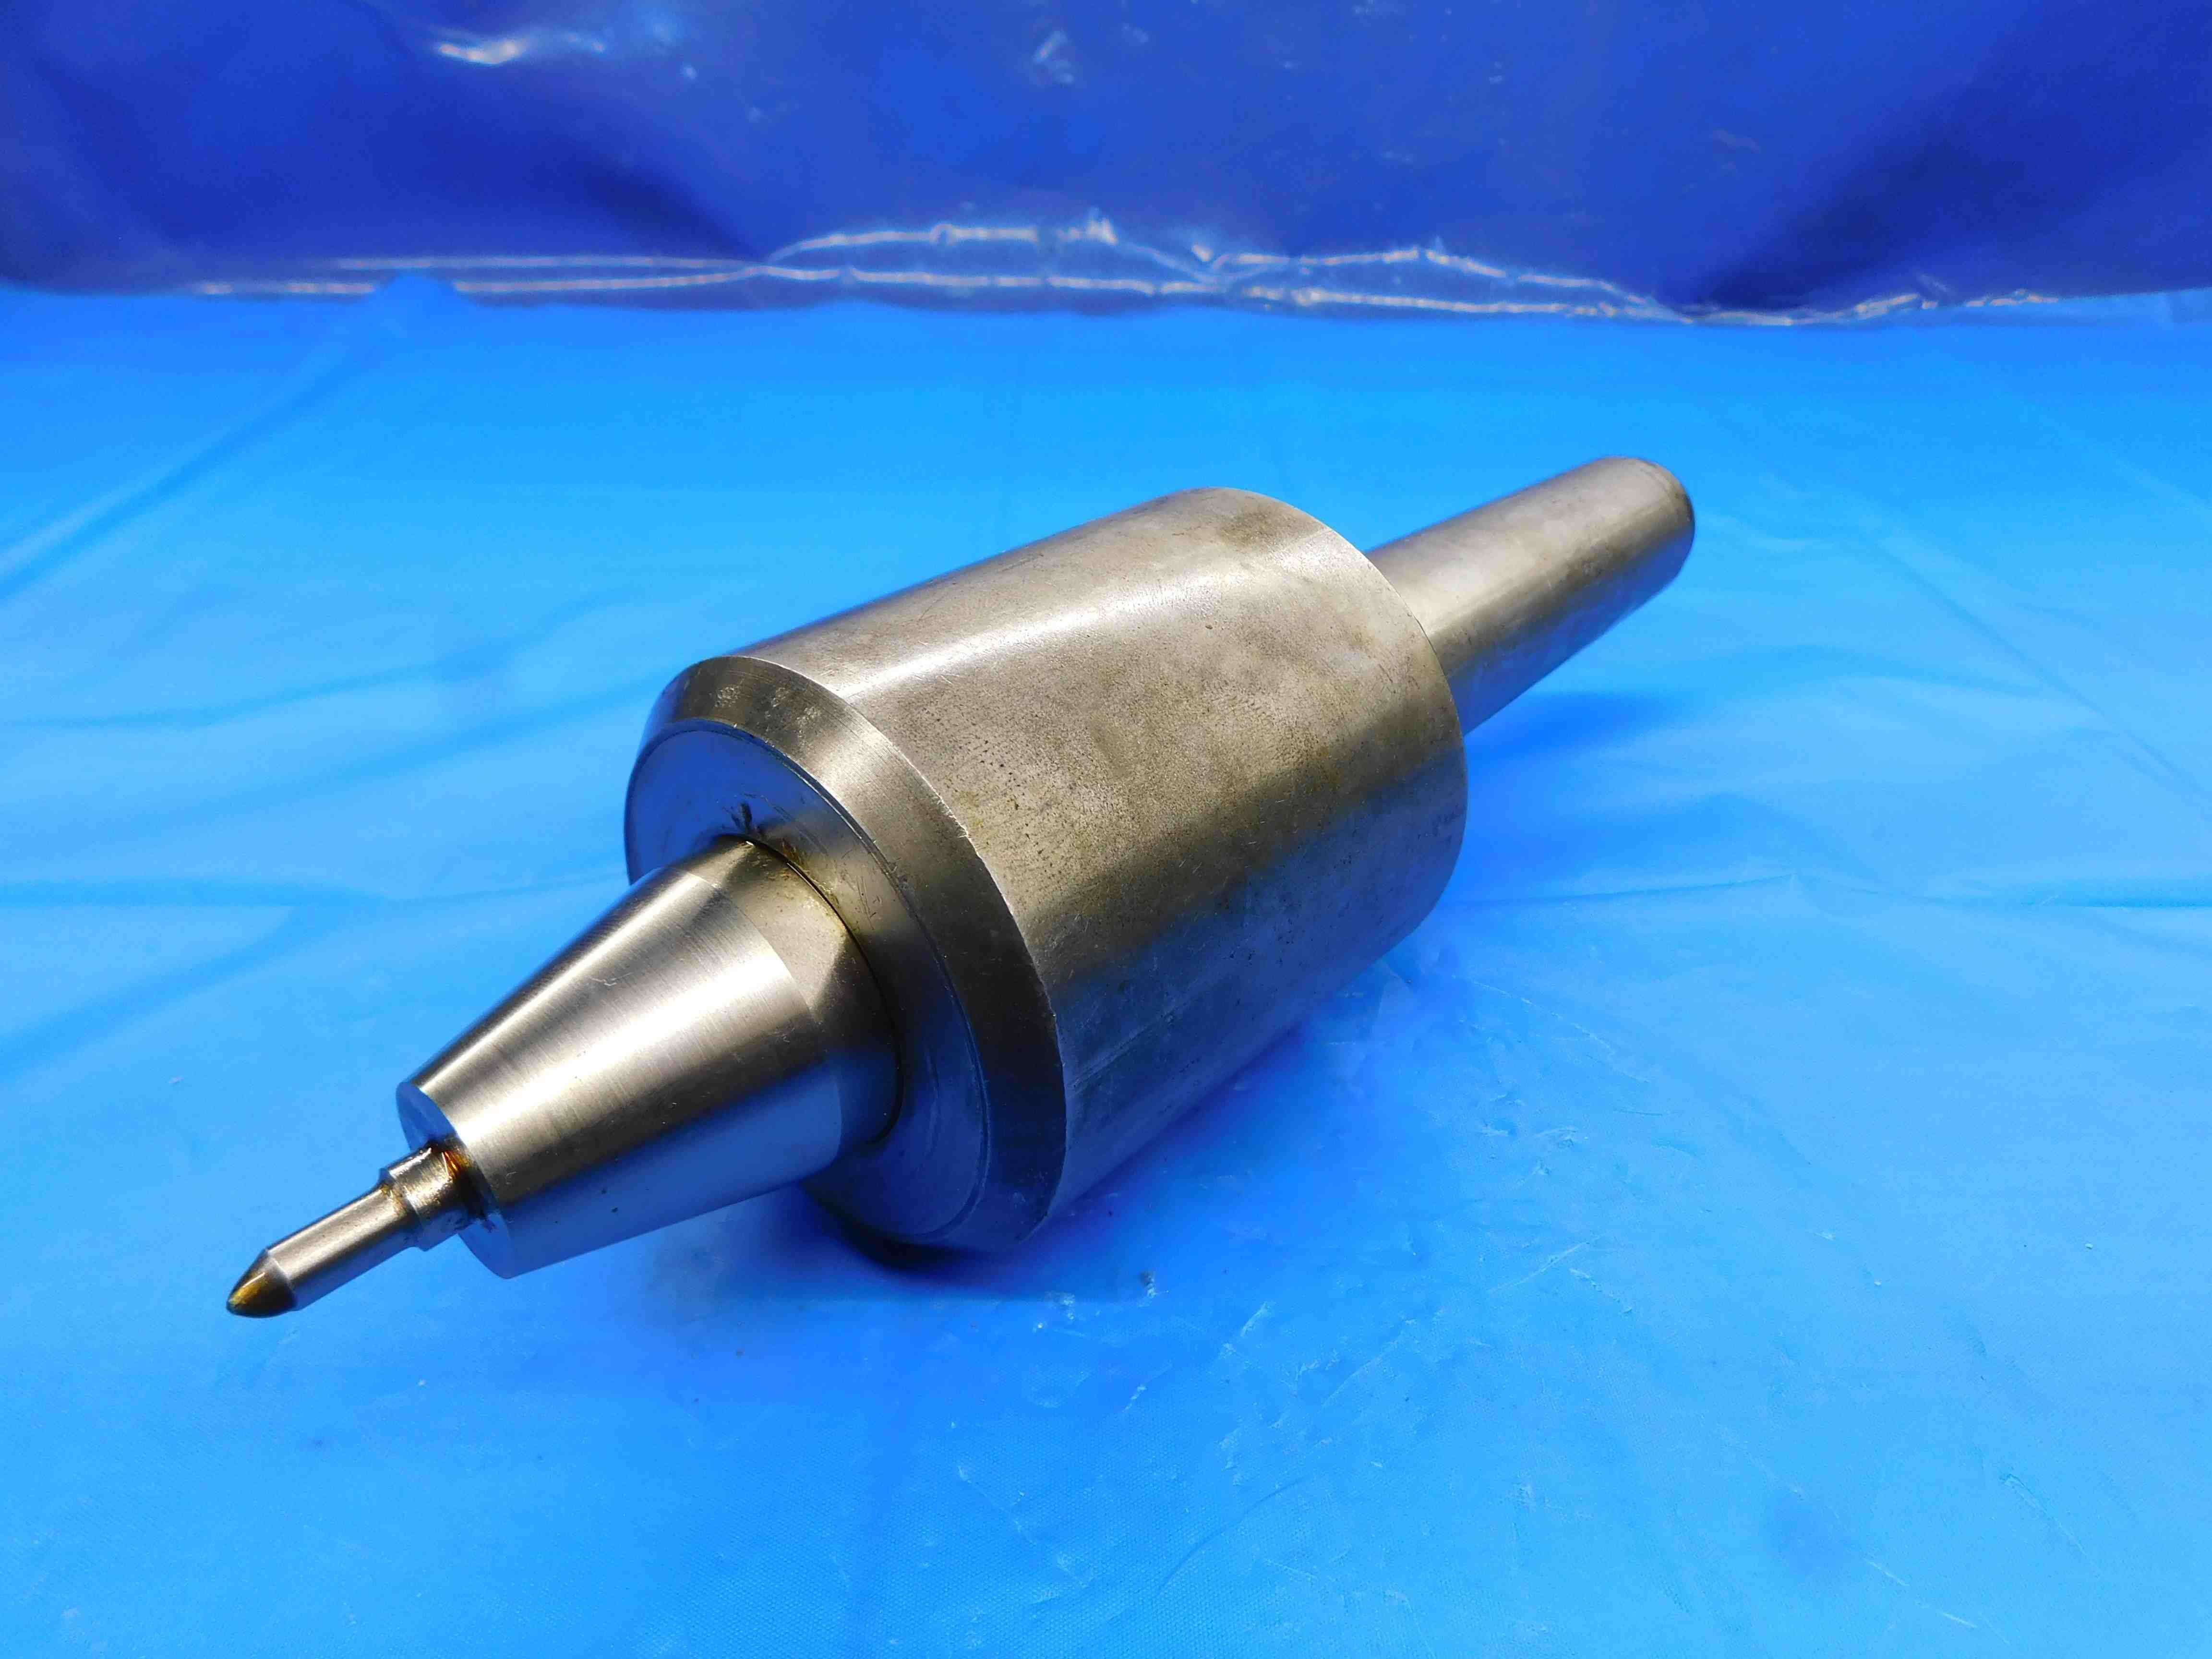

Another fairly standard listing; this one is branded and we got the subtype "TRI-BEARING" from the labeling.
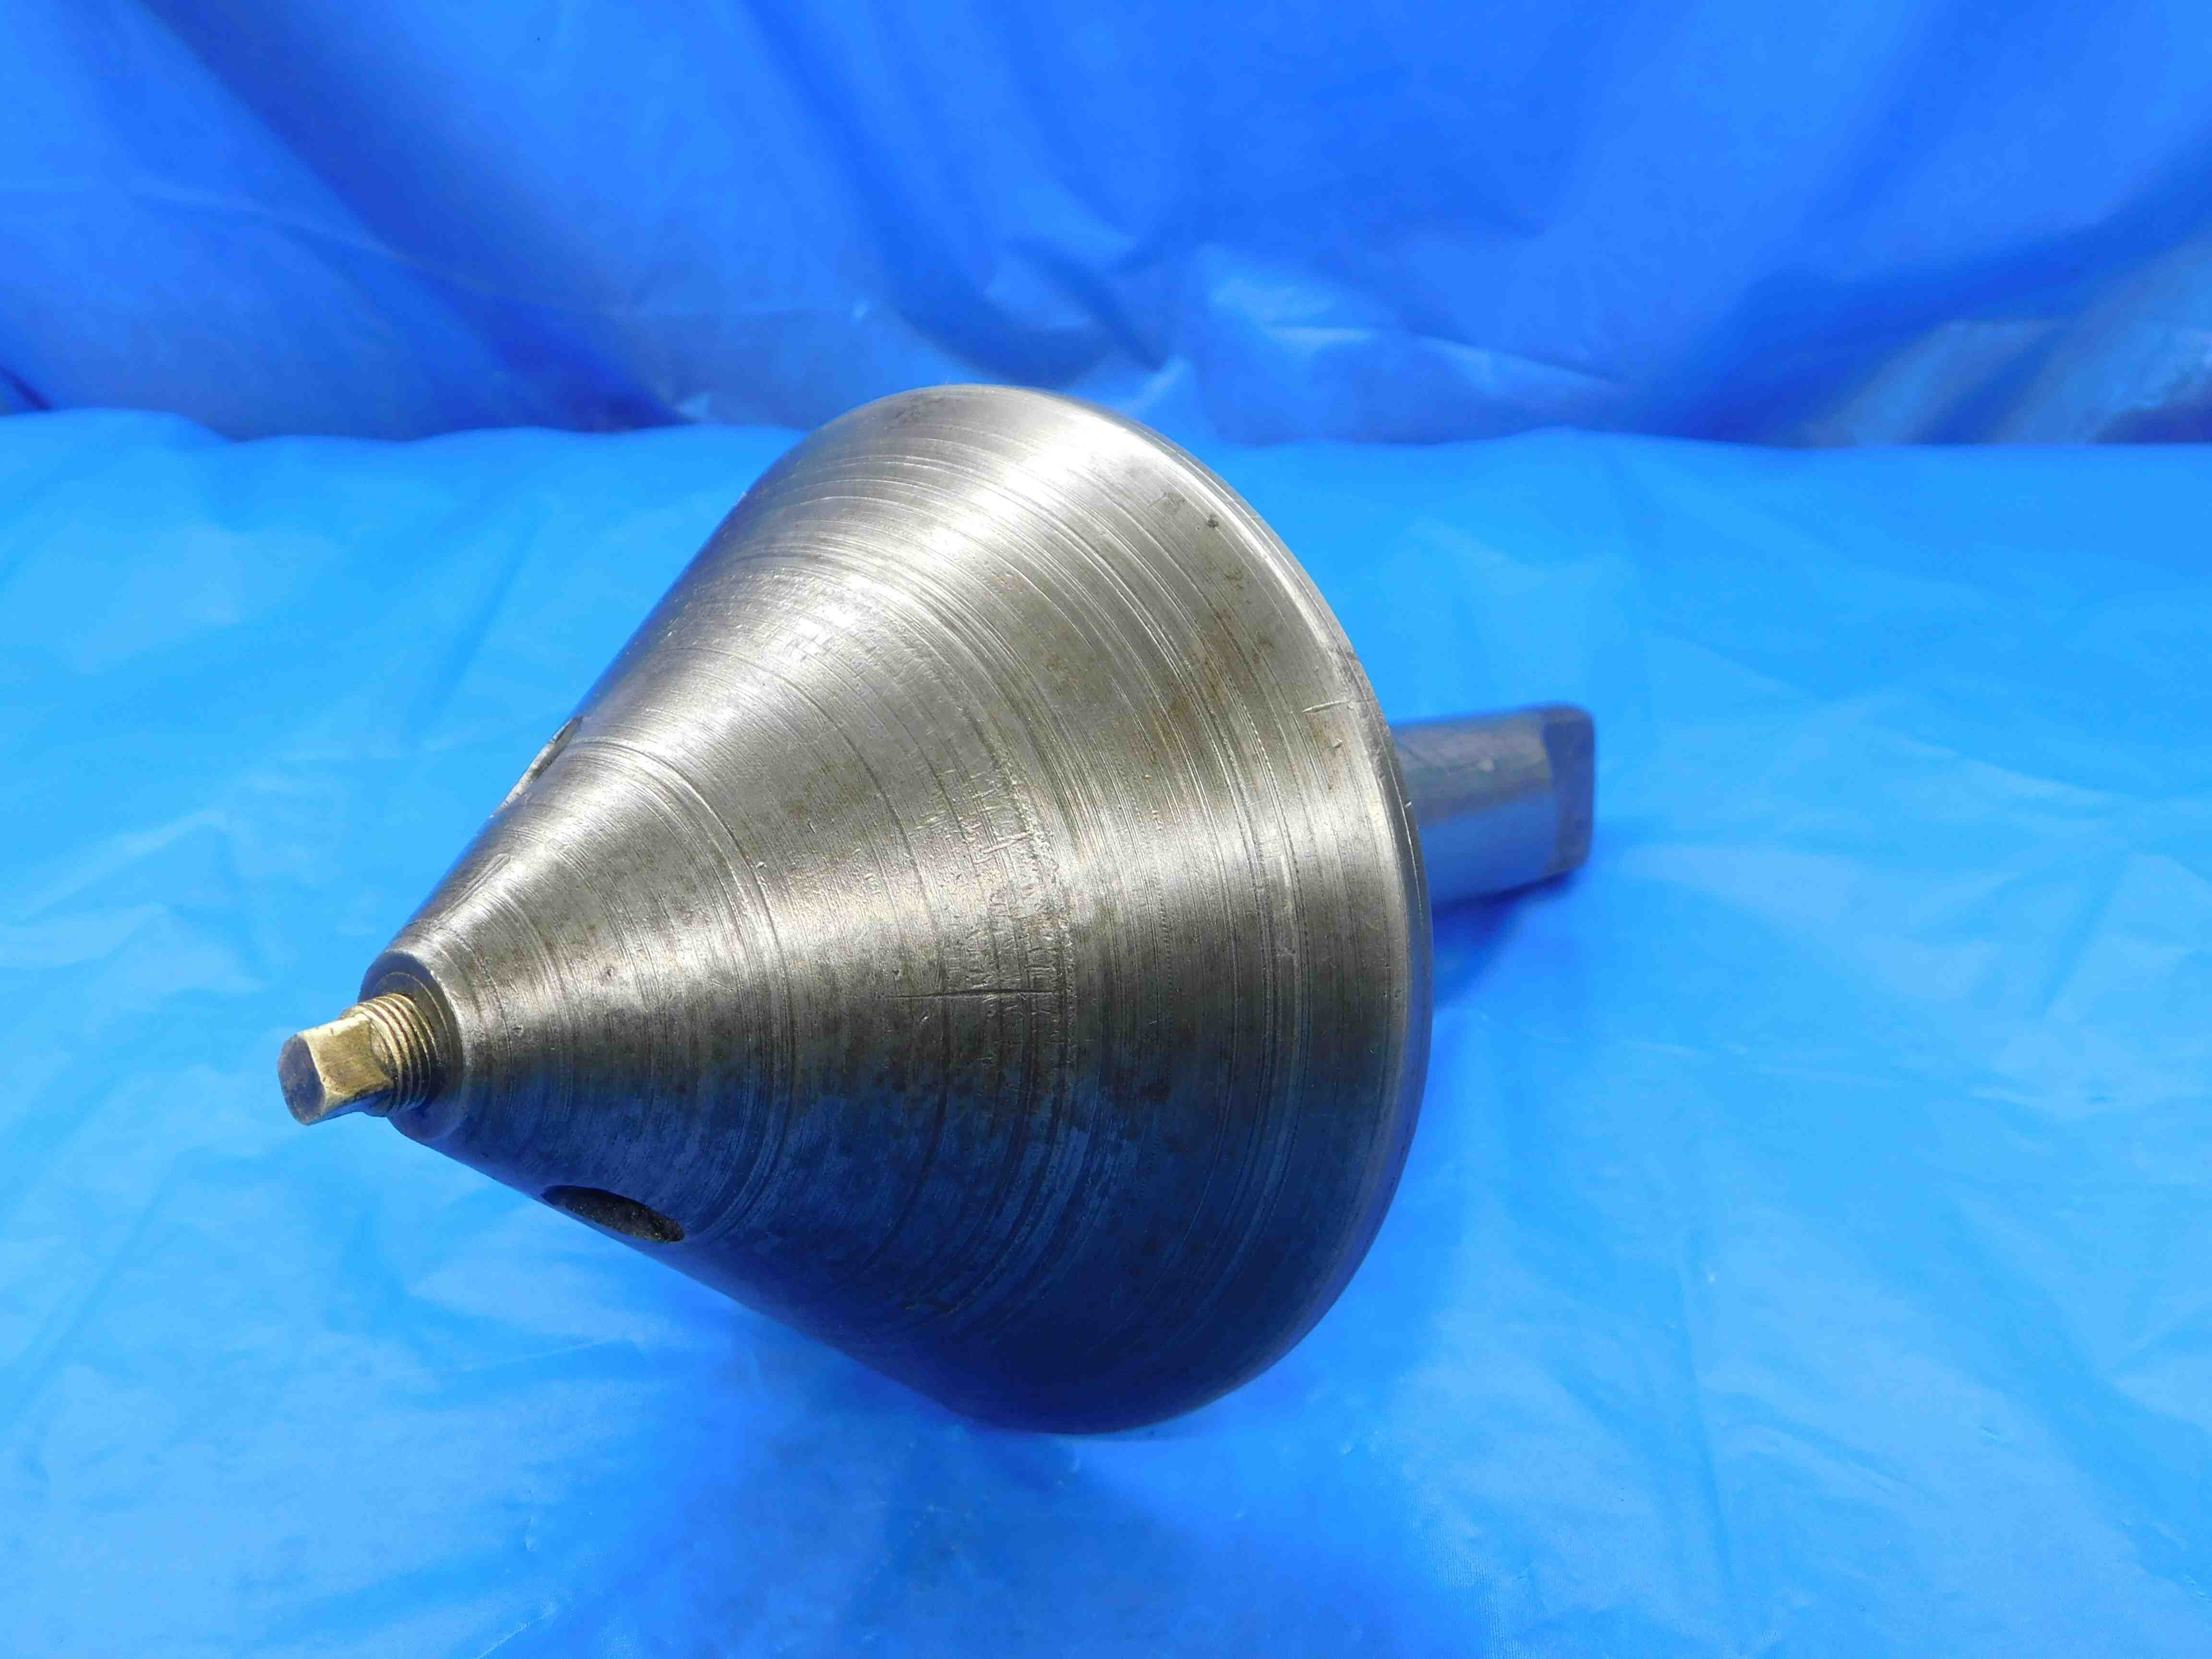

For this listing we did not specify full vs. half since the distinction doesn't really apply to bull nose centers with flat tips. Since there was extra title space, we also included the large end O.D. of the head (which is generally more useful than the small end, if you can't fit both). Both the small and large end measurements are included in Size/Labeling.
