Not all drill bits are suitable for listing individually. Any drill bit that falls under the following categories should be set aside to be sold as part of a multi-piece set / lot:
Used HSS or cobalt straight shank drill bits under 1" diameter
New HSS or cobalt straight shank drill bits under 1/2" diameter
Used carbide straight shank drill bits under 1/2" diameter
New carbide straight shank drill bits under 1/4" diameter
HSS Center Drills
Possible Exceptions (Confirm with your trainer on a case-by-case basis):
- Extra Length drill bits are often okay to list at smaller diameters than those listed above
- Drill bits that fall under the categories above may be okay to list individually if we have multiple stock (items must be identical)
Damage to look out for:
Drill Tip / Cutting Edge Damage
Major Damage:
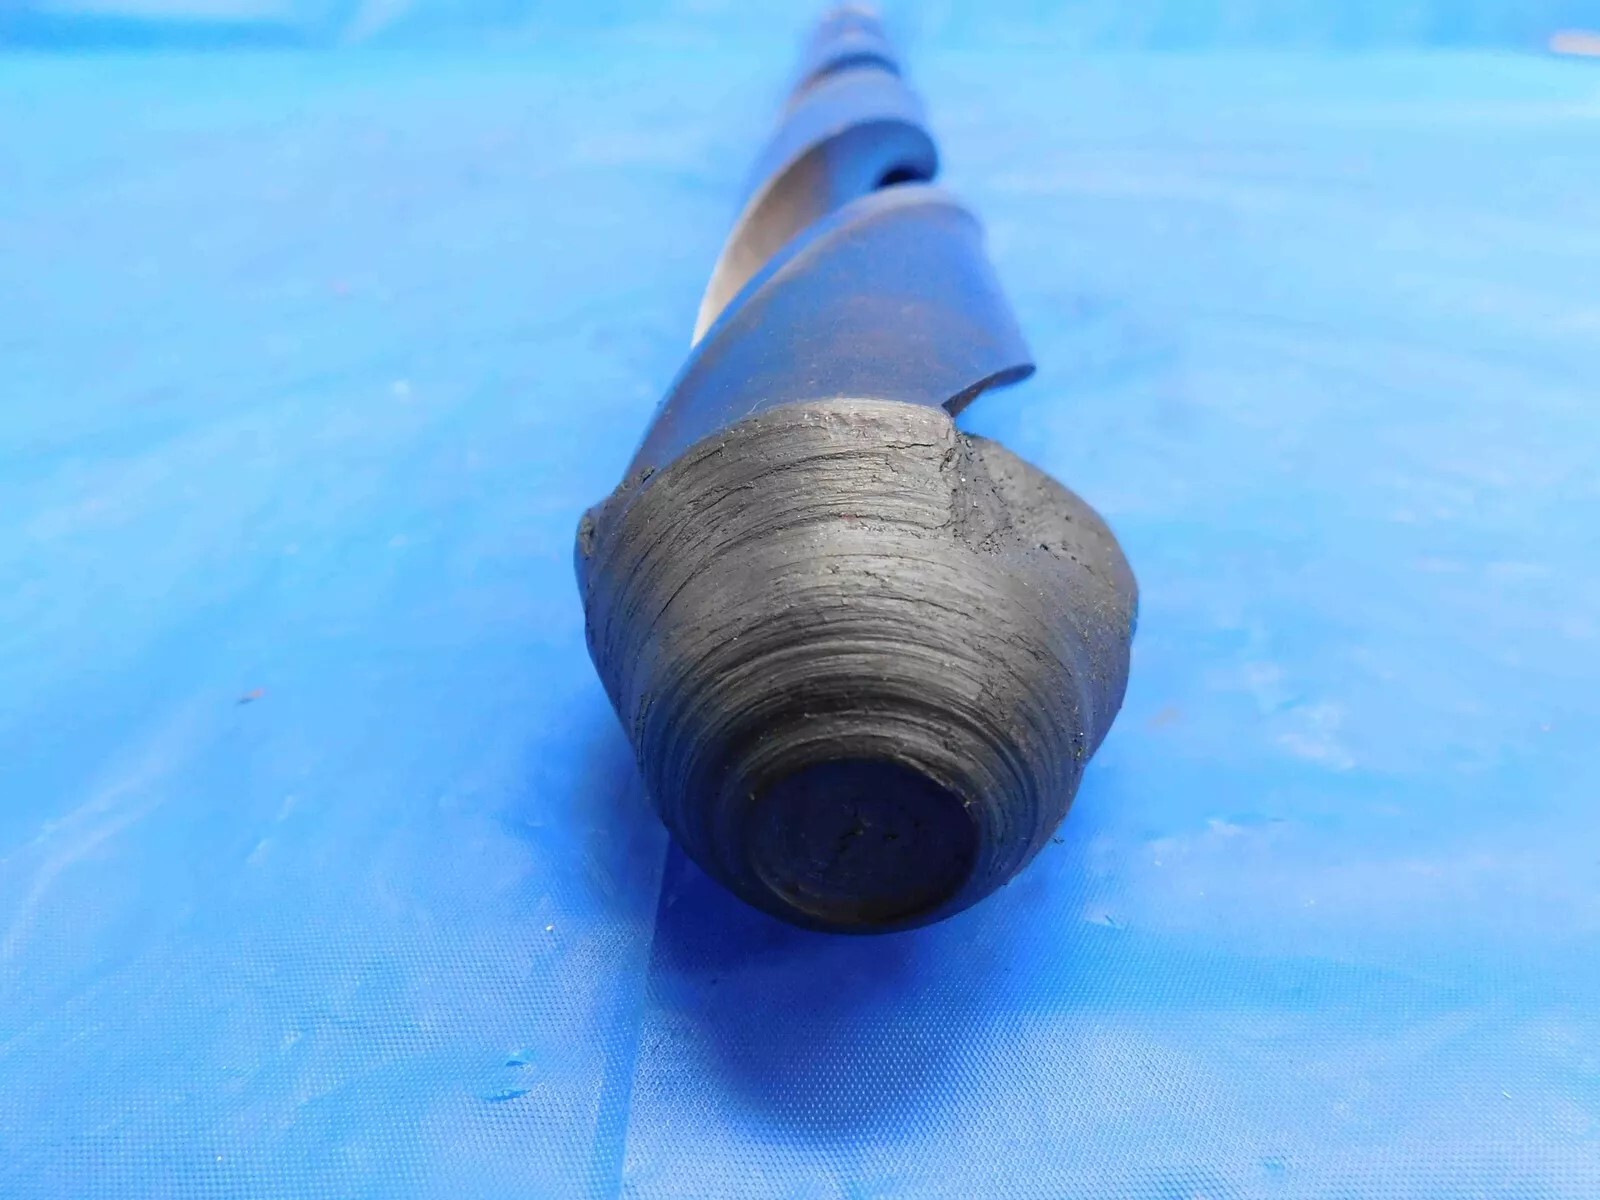
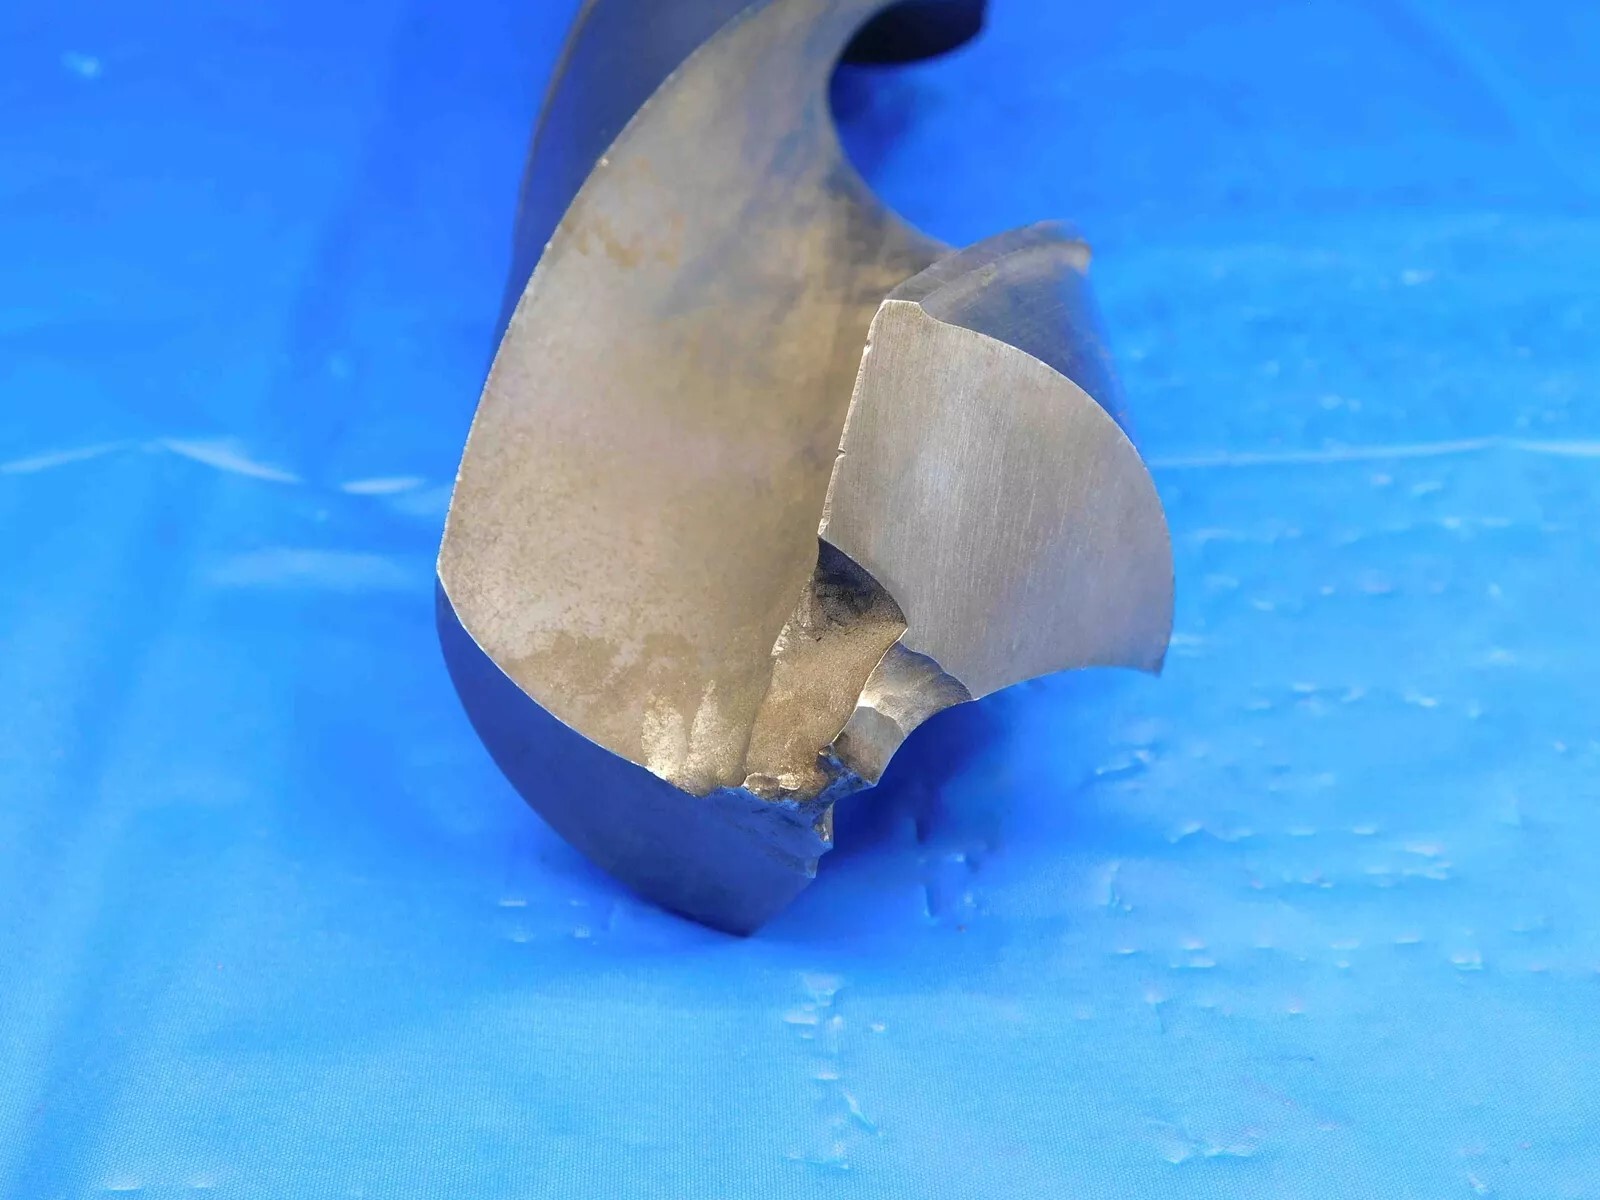
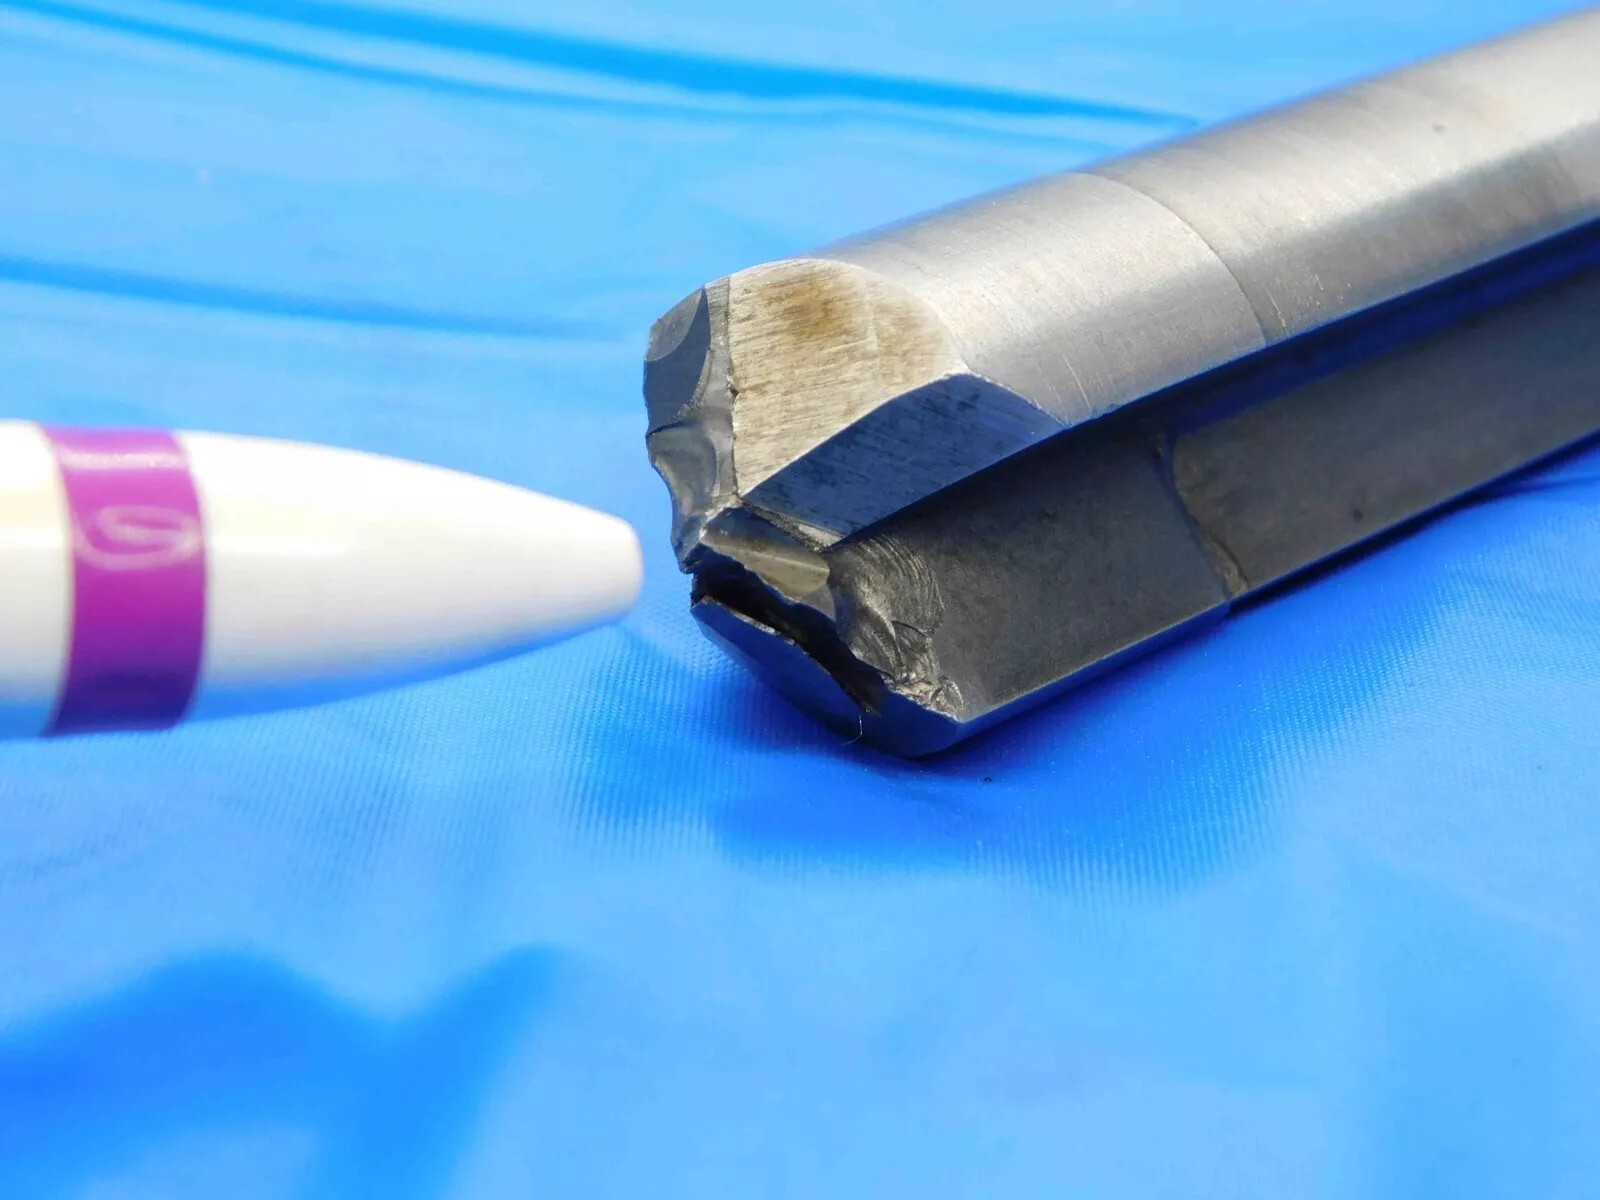
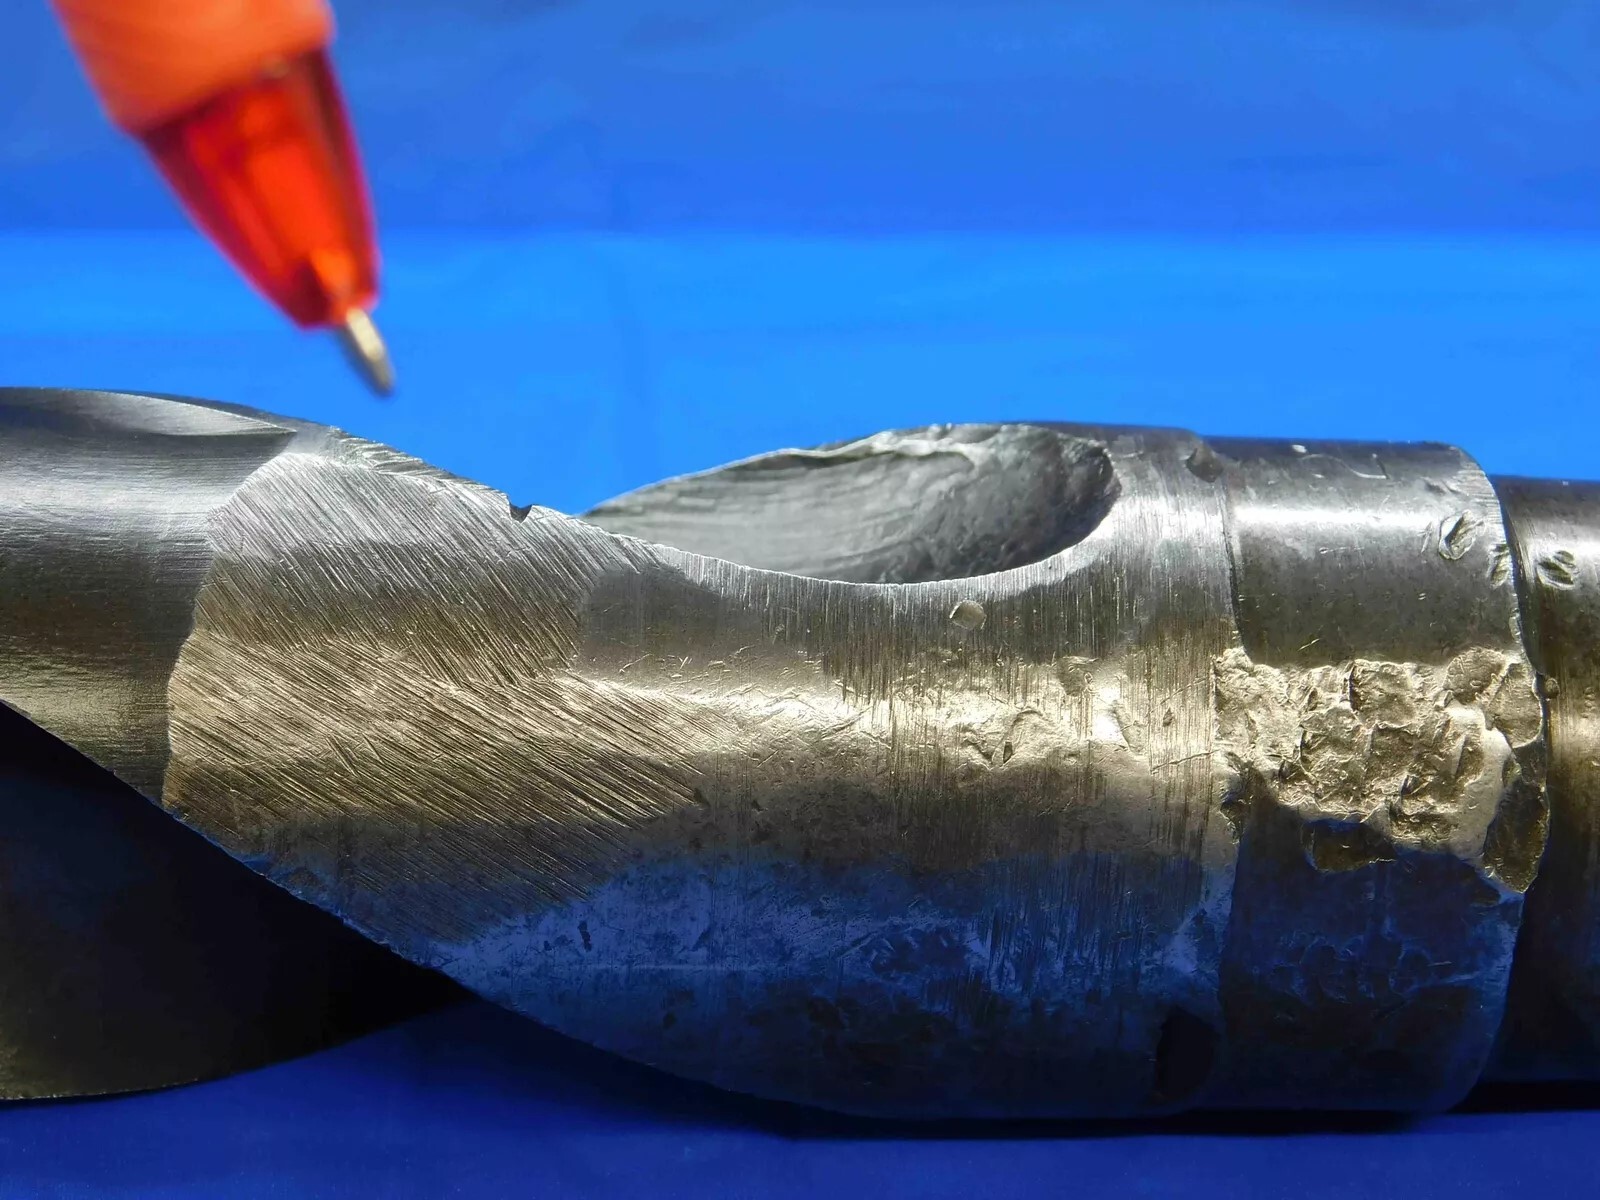
Major chips / damage to the tip or cutting edges of the drill will typically disqualify it from being listed. A particularly large drill bit (>2" O.D.) might still be listed in this condition at a budget price, since re-grinding a damaged tool may be a better option for some customers than buying an expensive new one, but this should be confirmed with your trainer. See below for examples of what would be considered major damage:
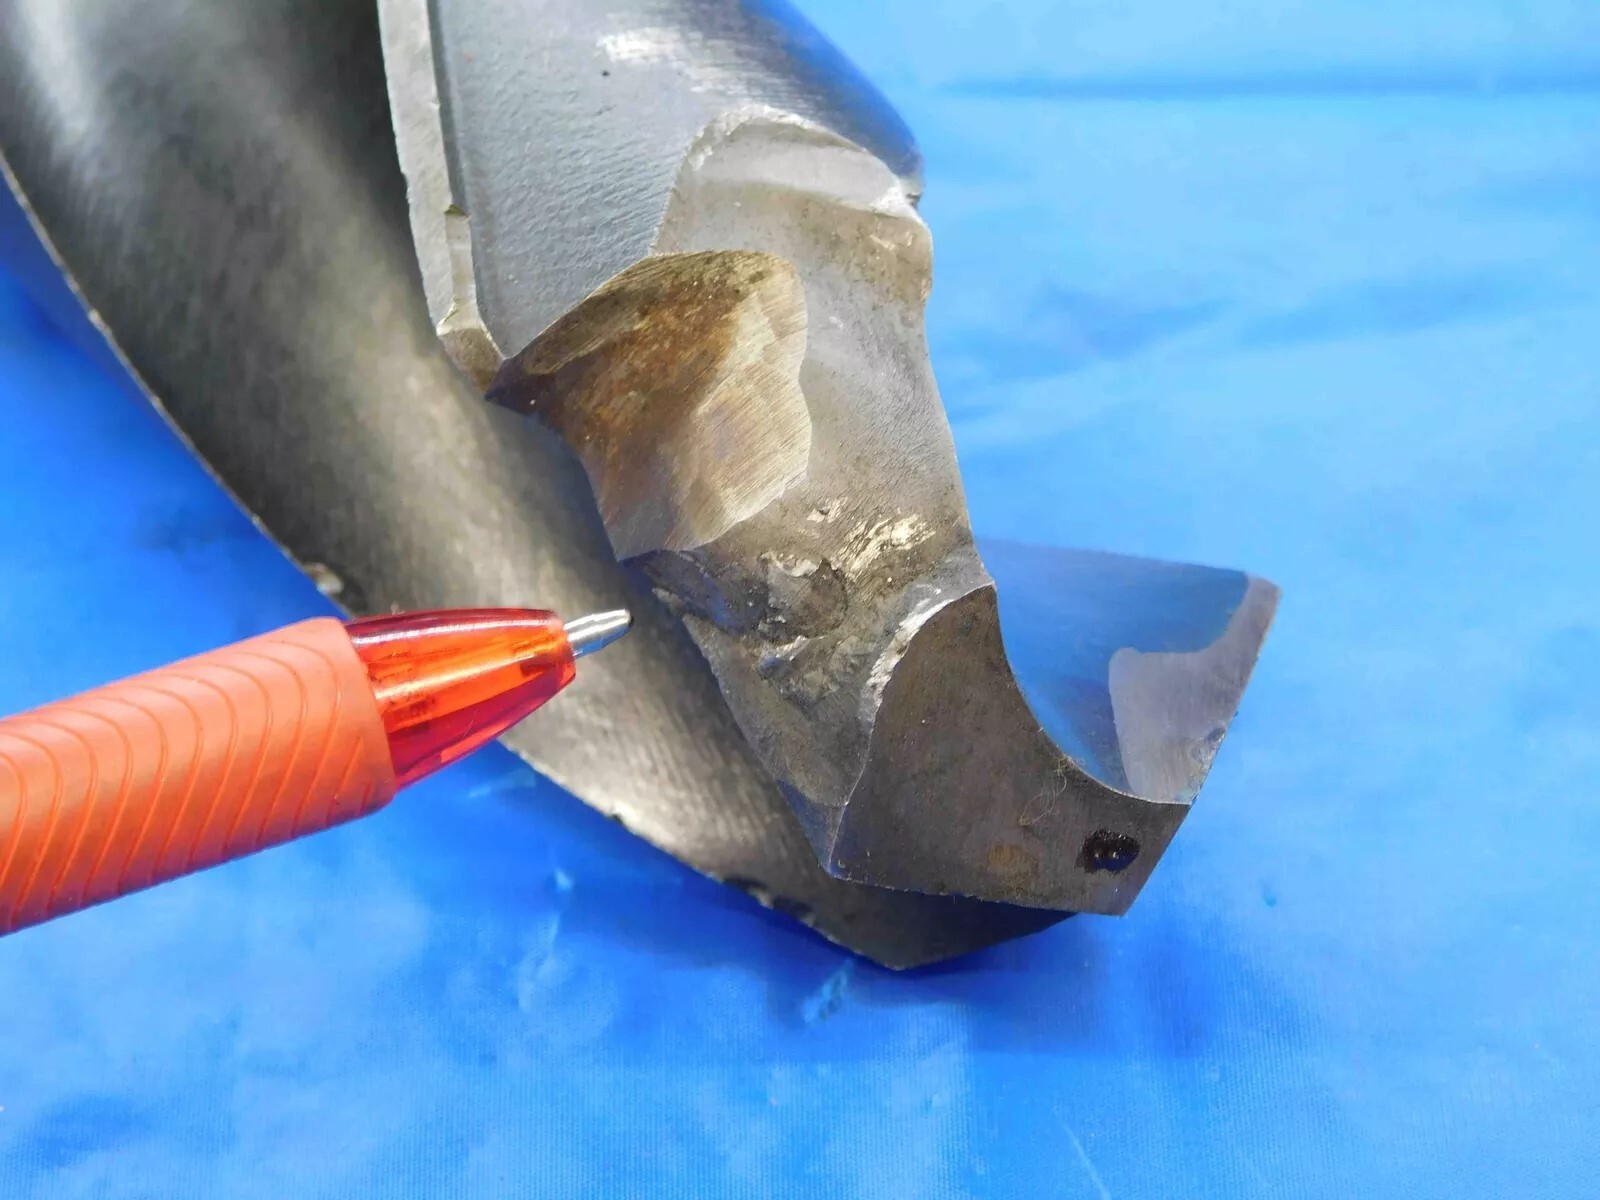
Minor Damage:
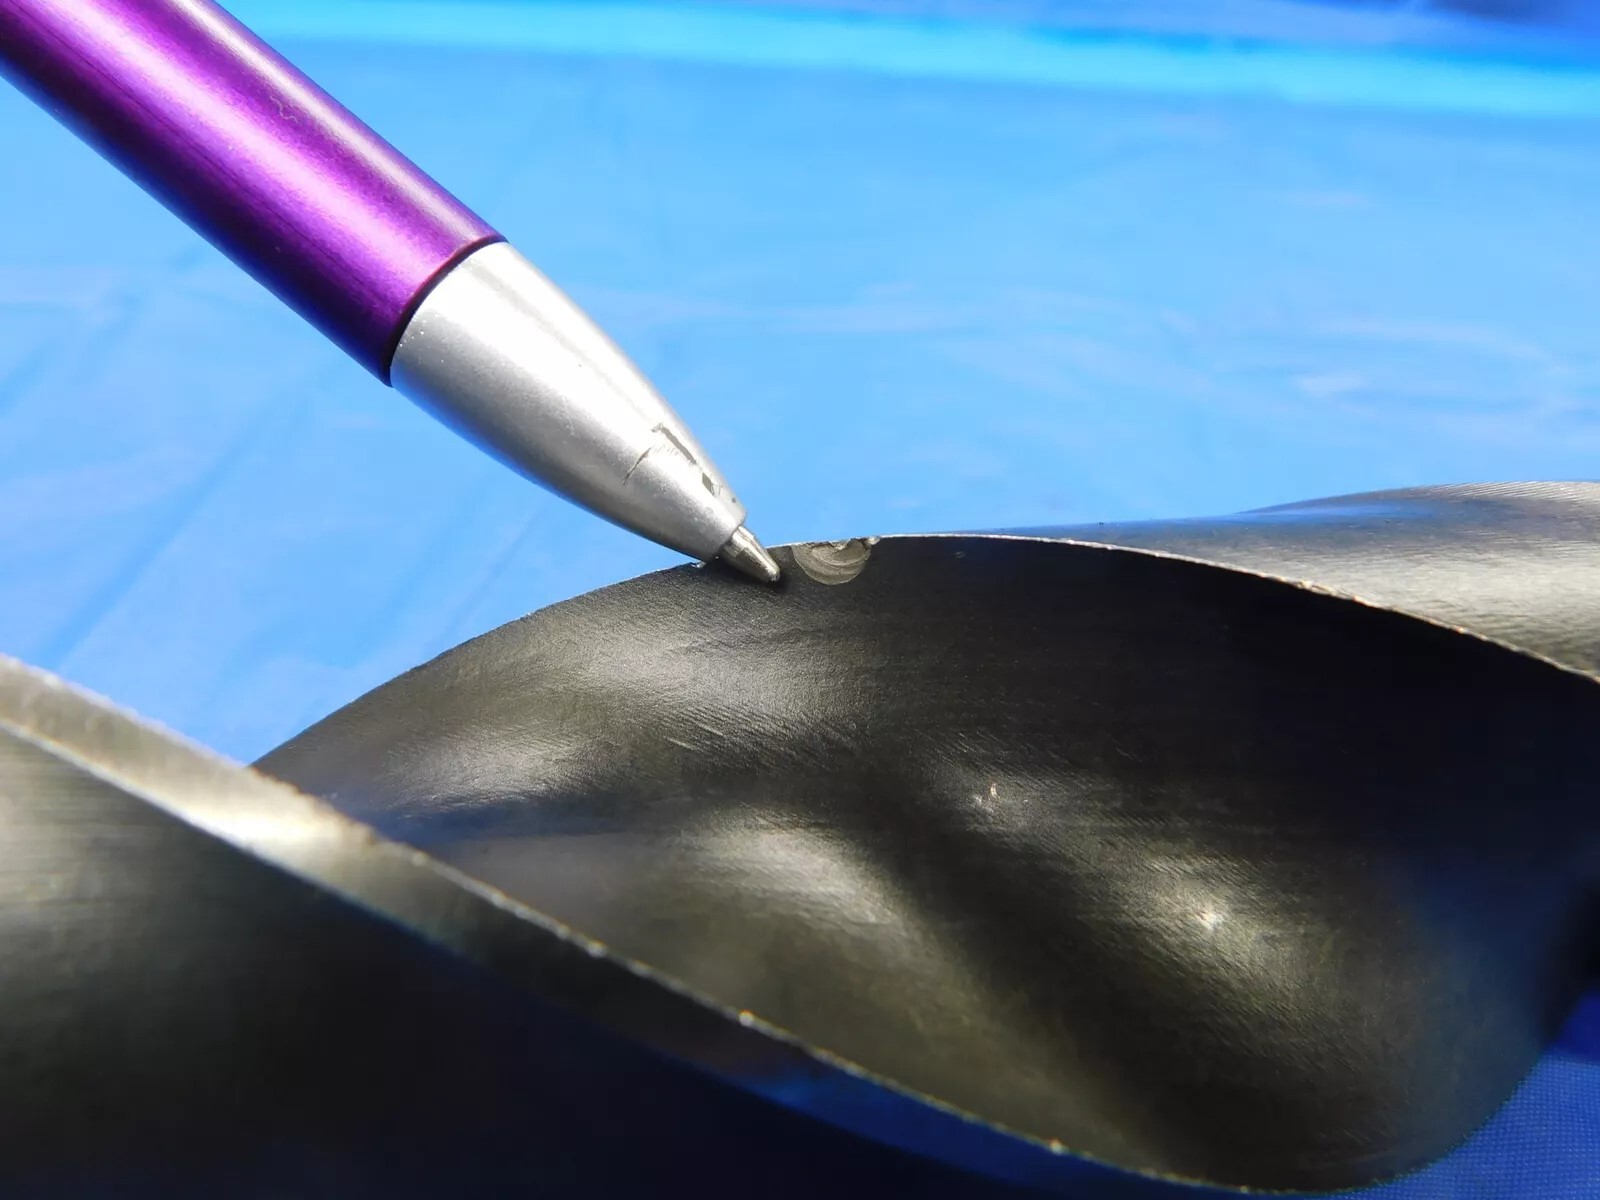
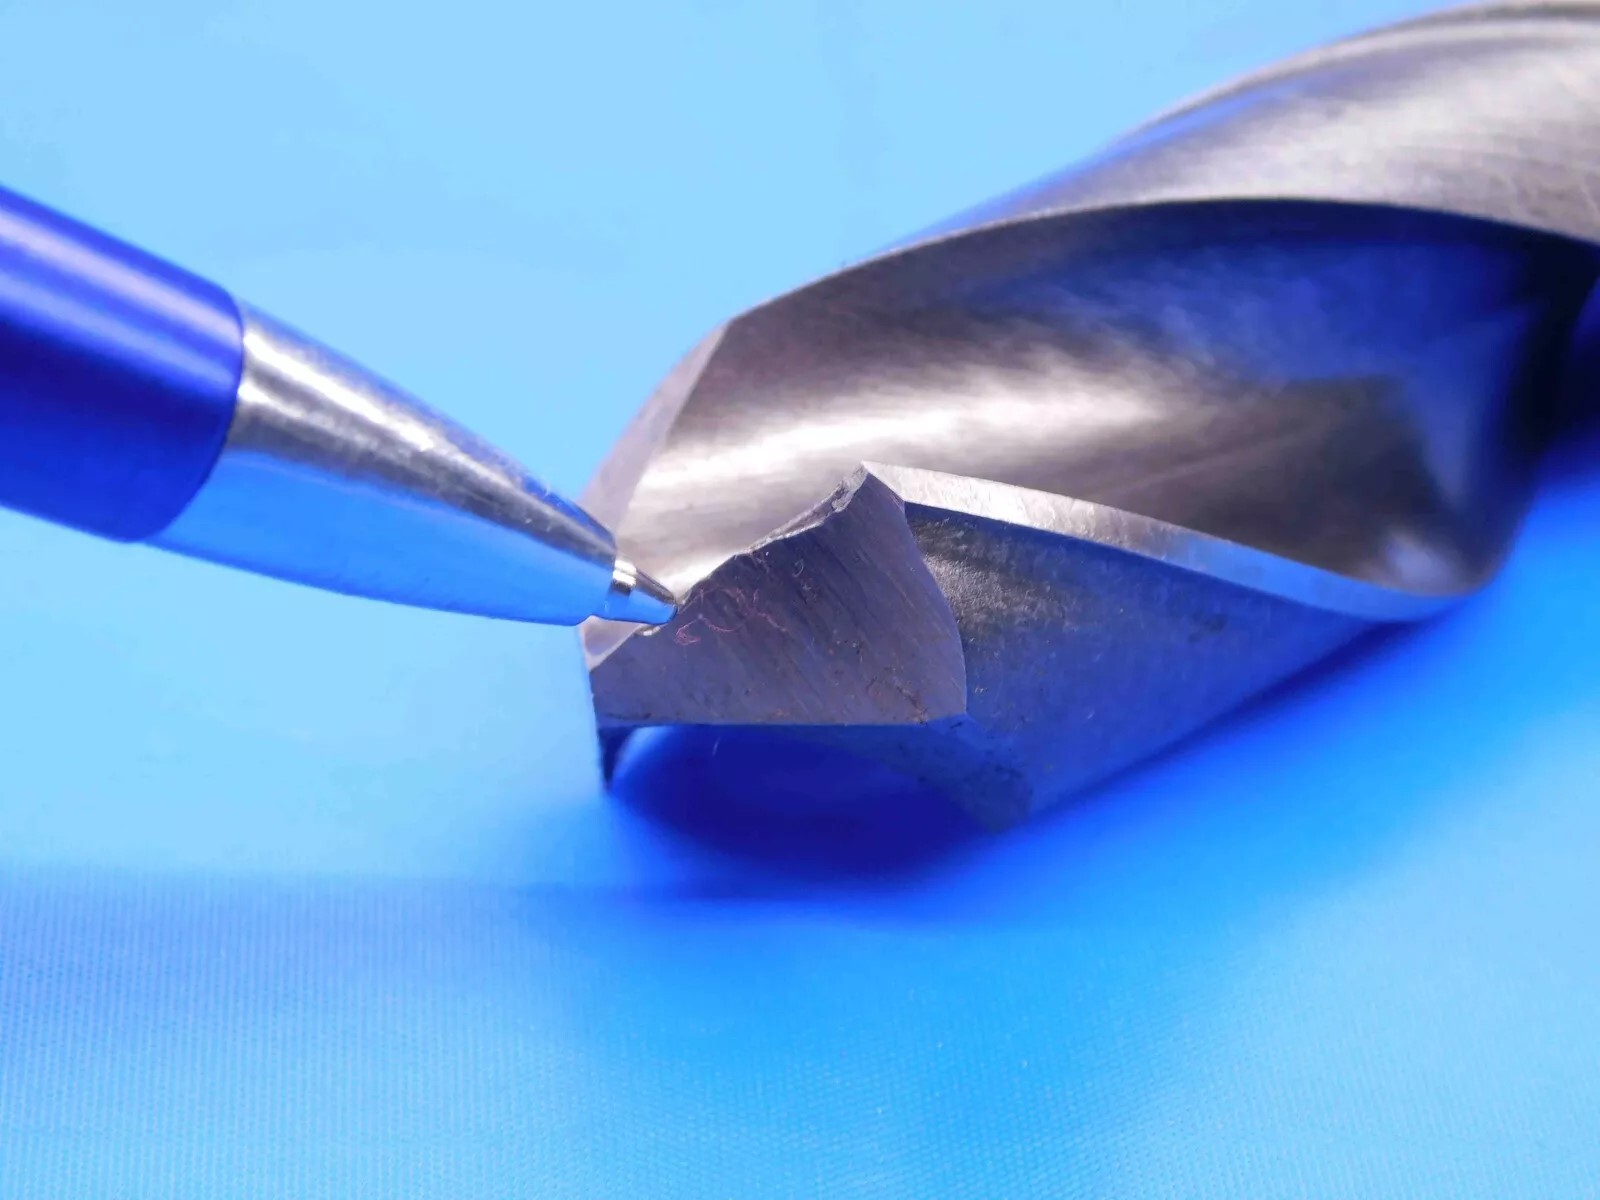
Smaller chips / wear, especially near the bottom of the flutes, or damage to the flutes or land that does not touch a cutting edge, is typically okay since it will not have as big of an impact on the use of the tool. This damage must always be clearly pictured though, and should be taken into consideration when choosing the condition of the listing. See below for examples of drill bits that are okay to list:
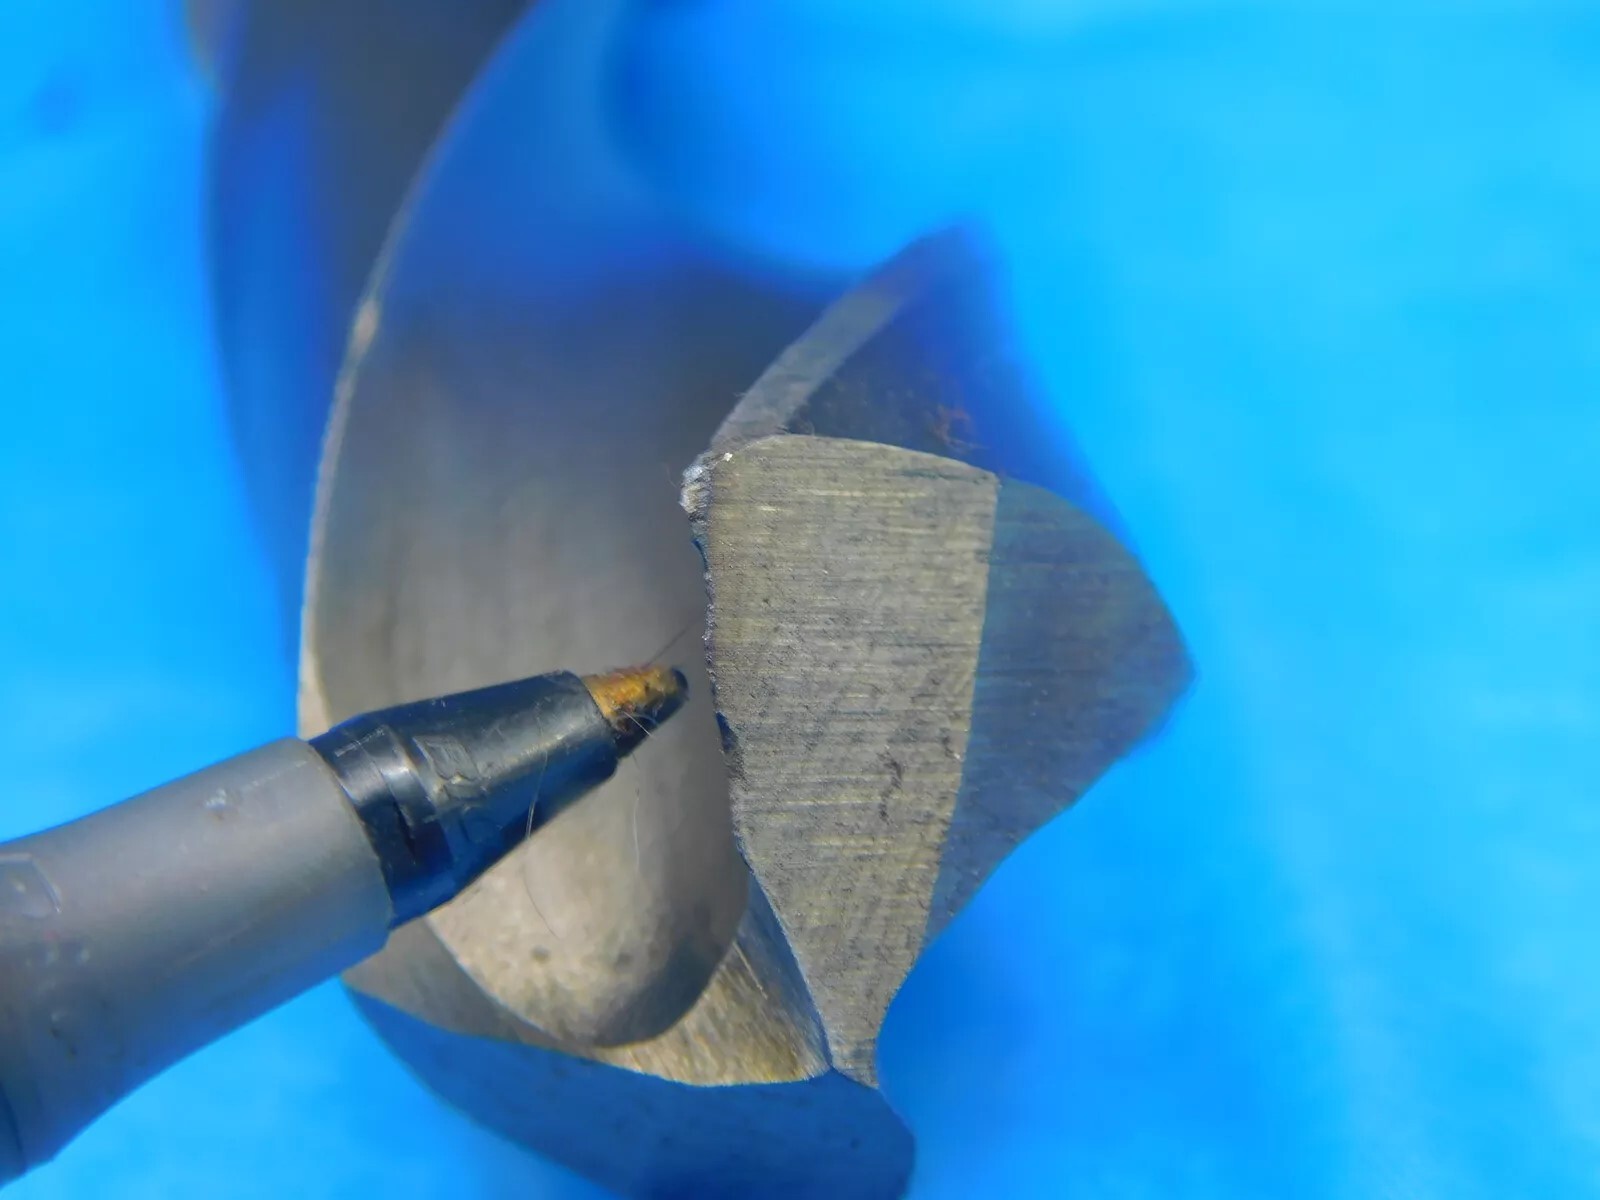
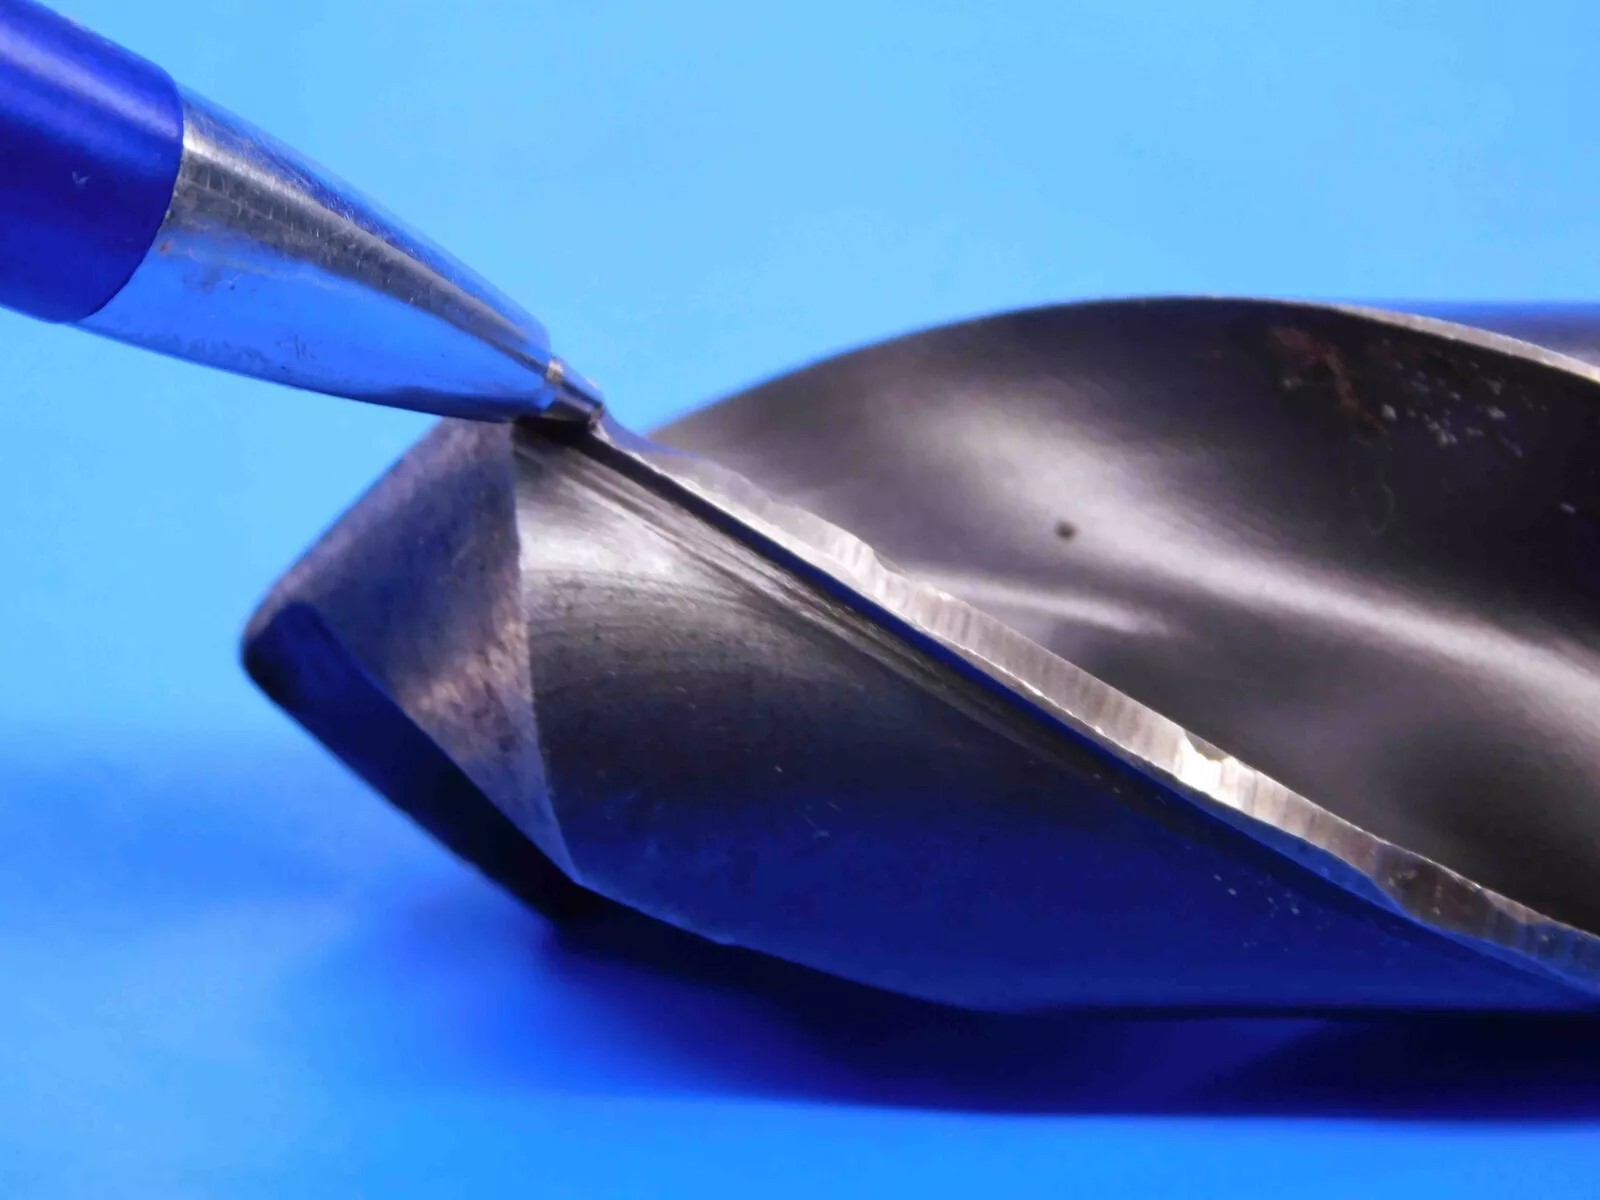
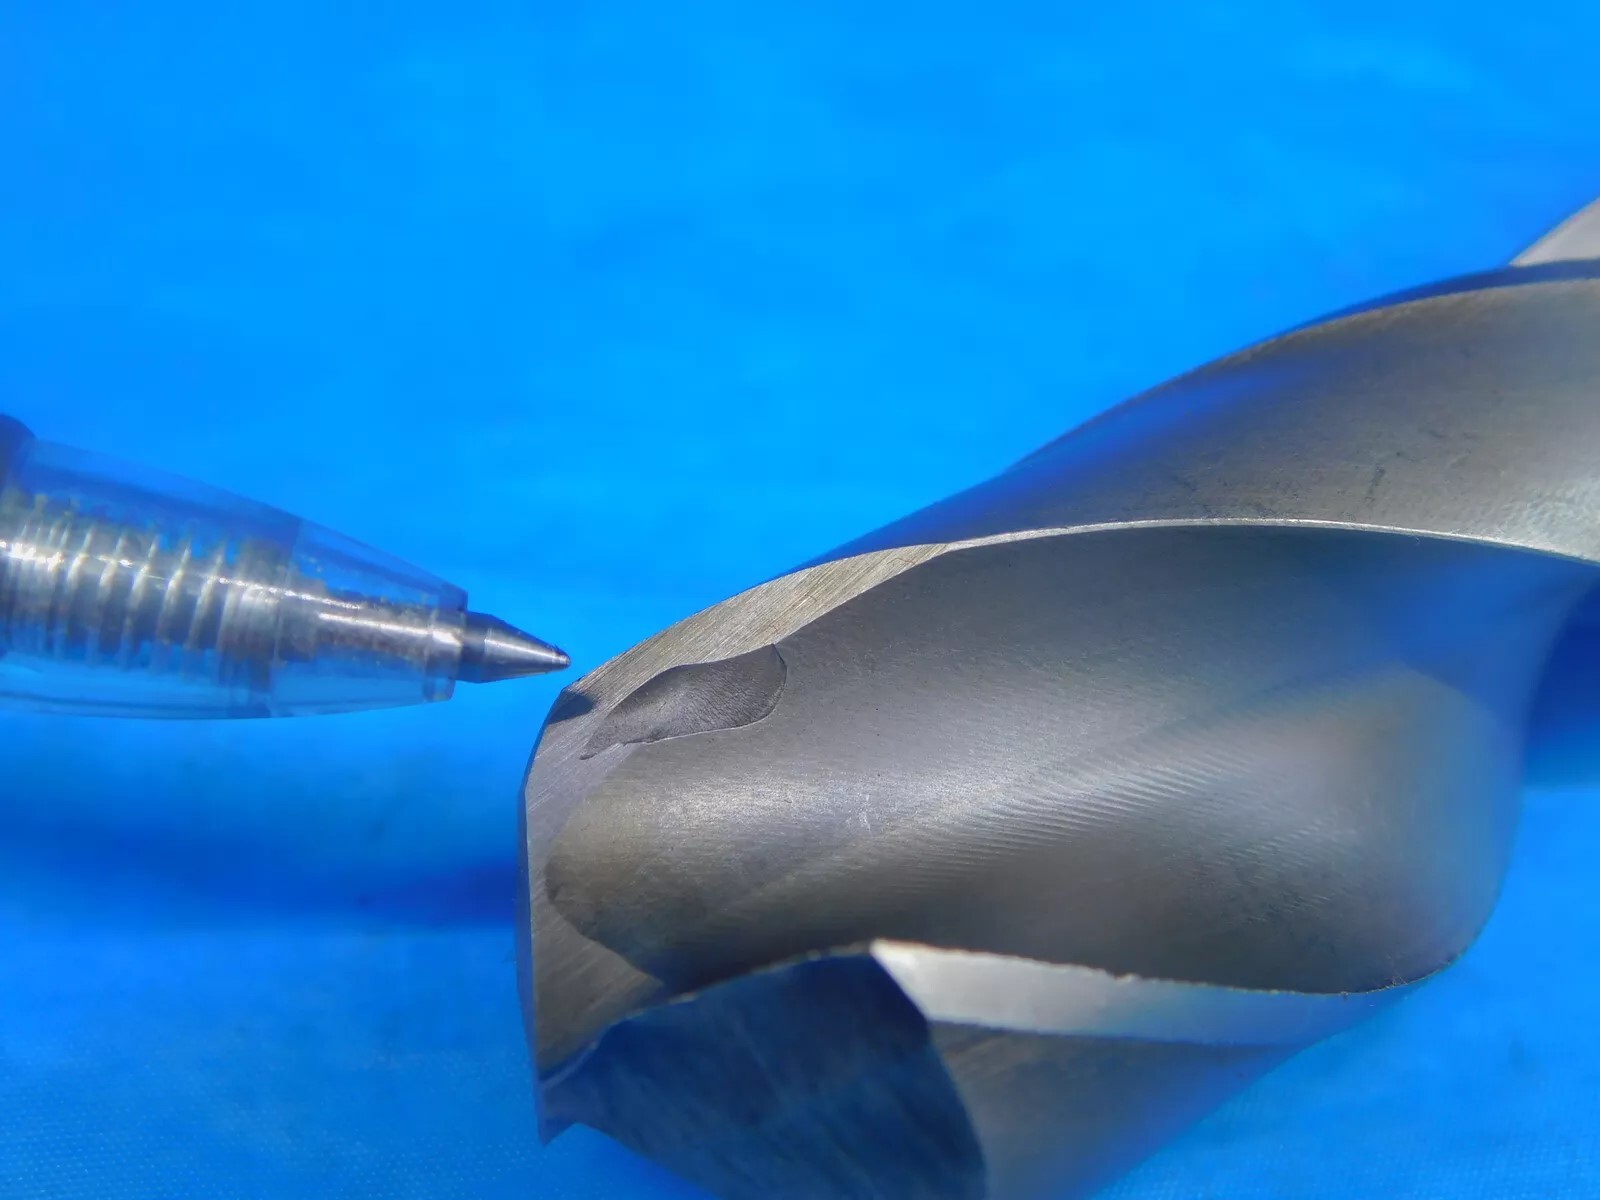
Morse Taper Shanks
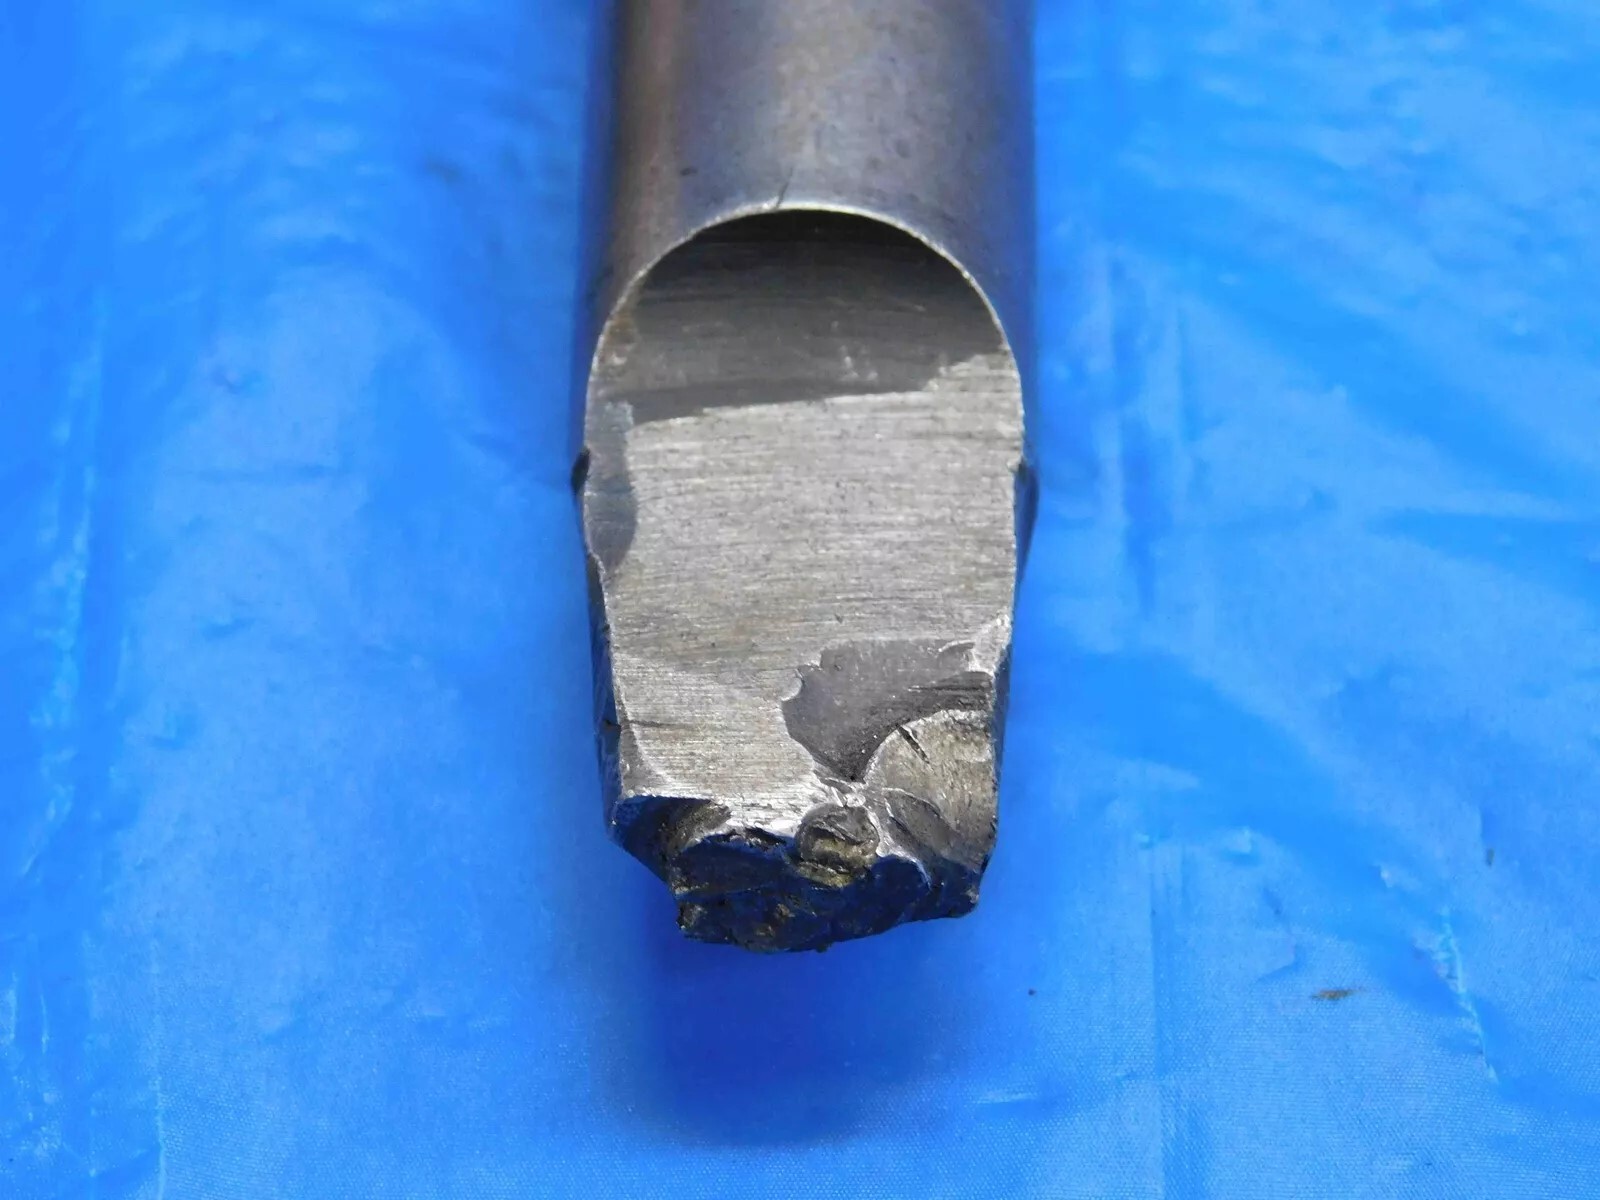
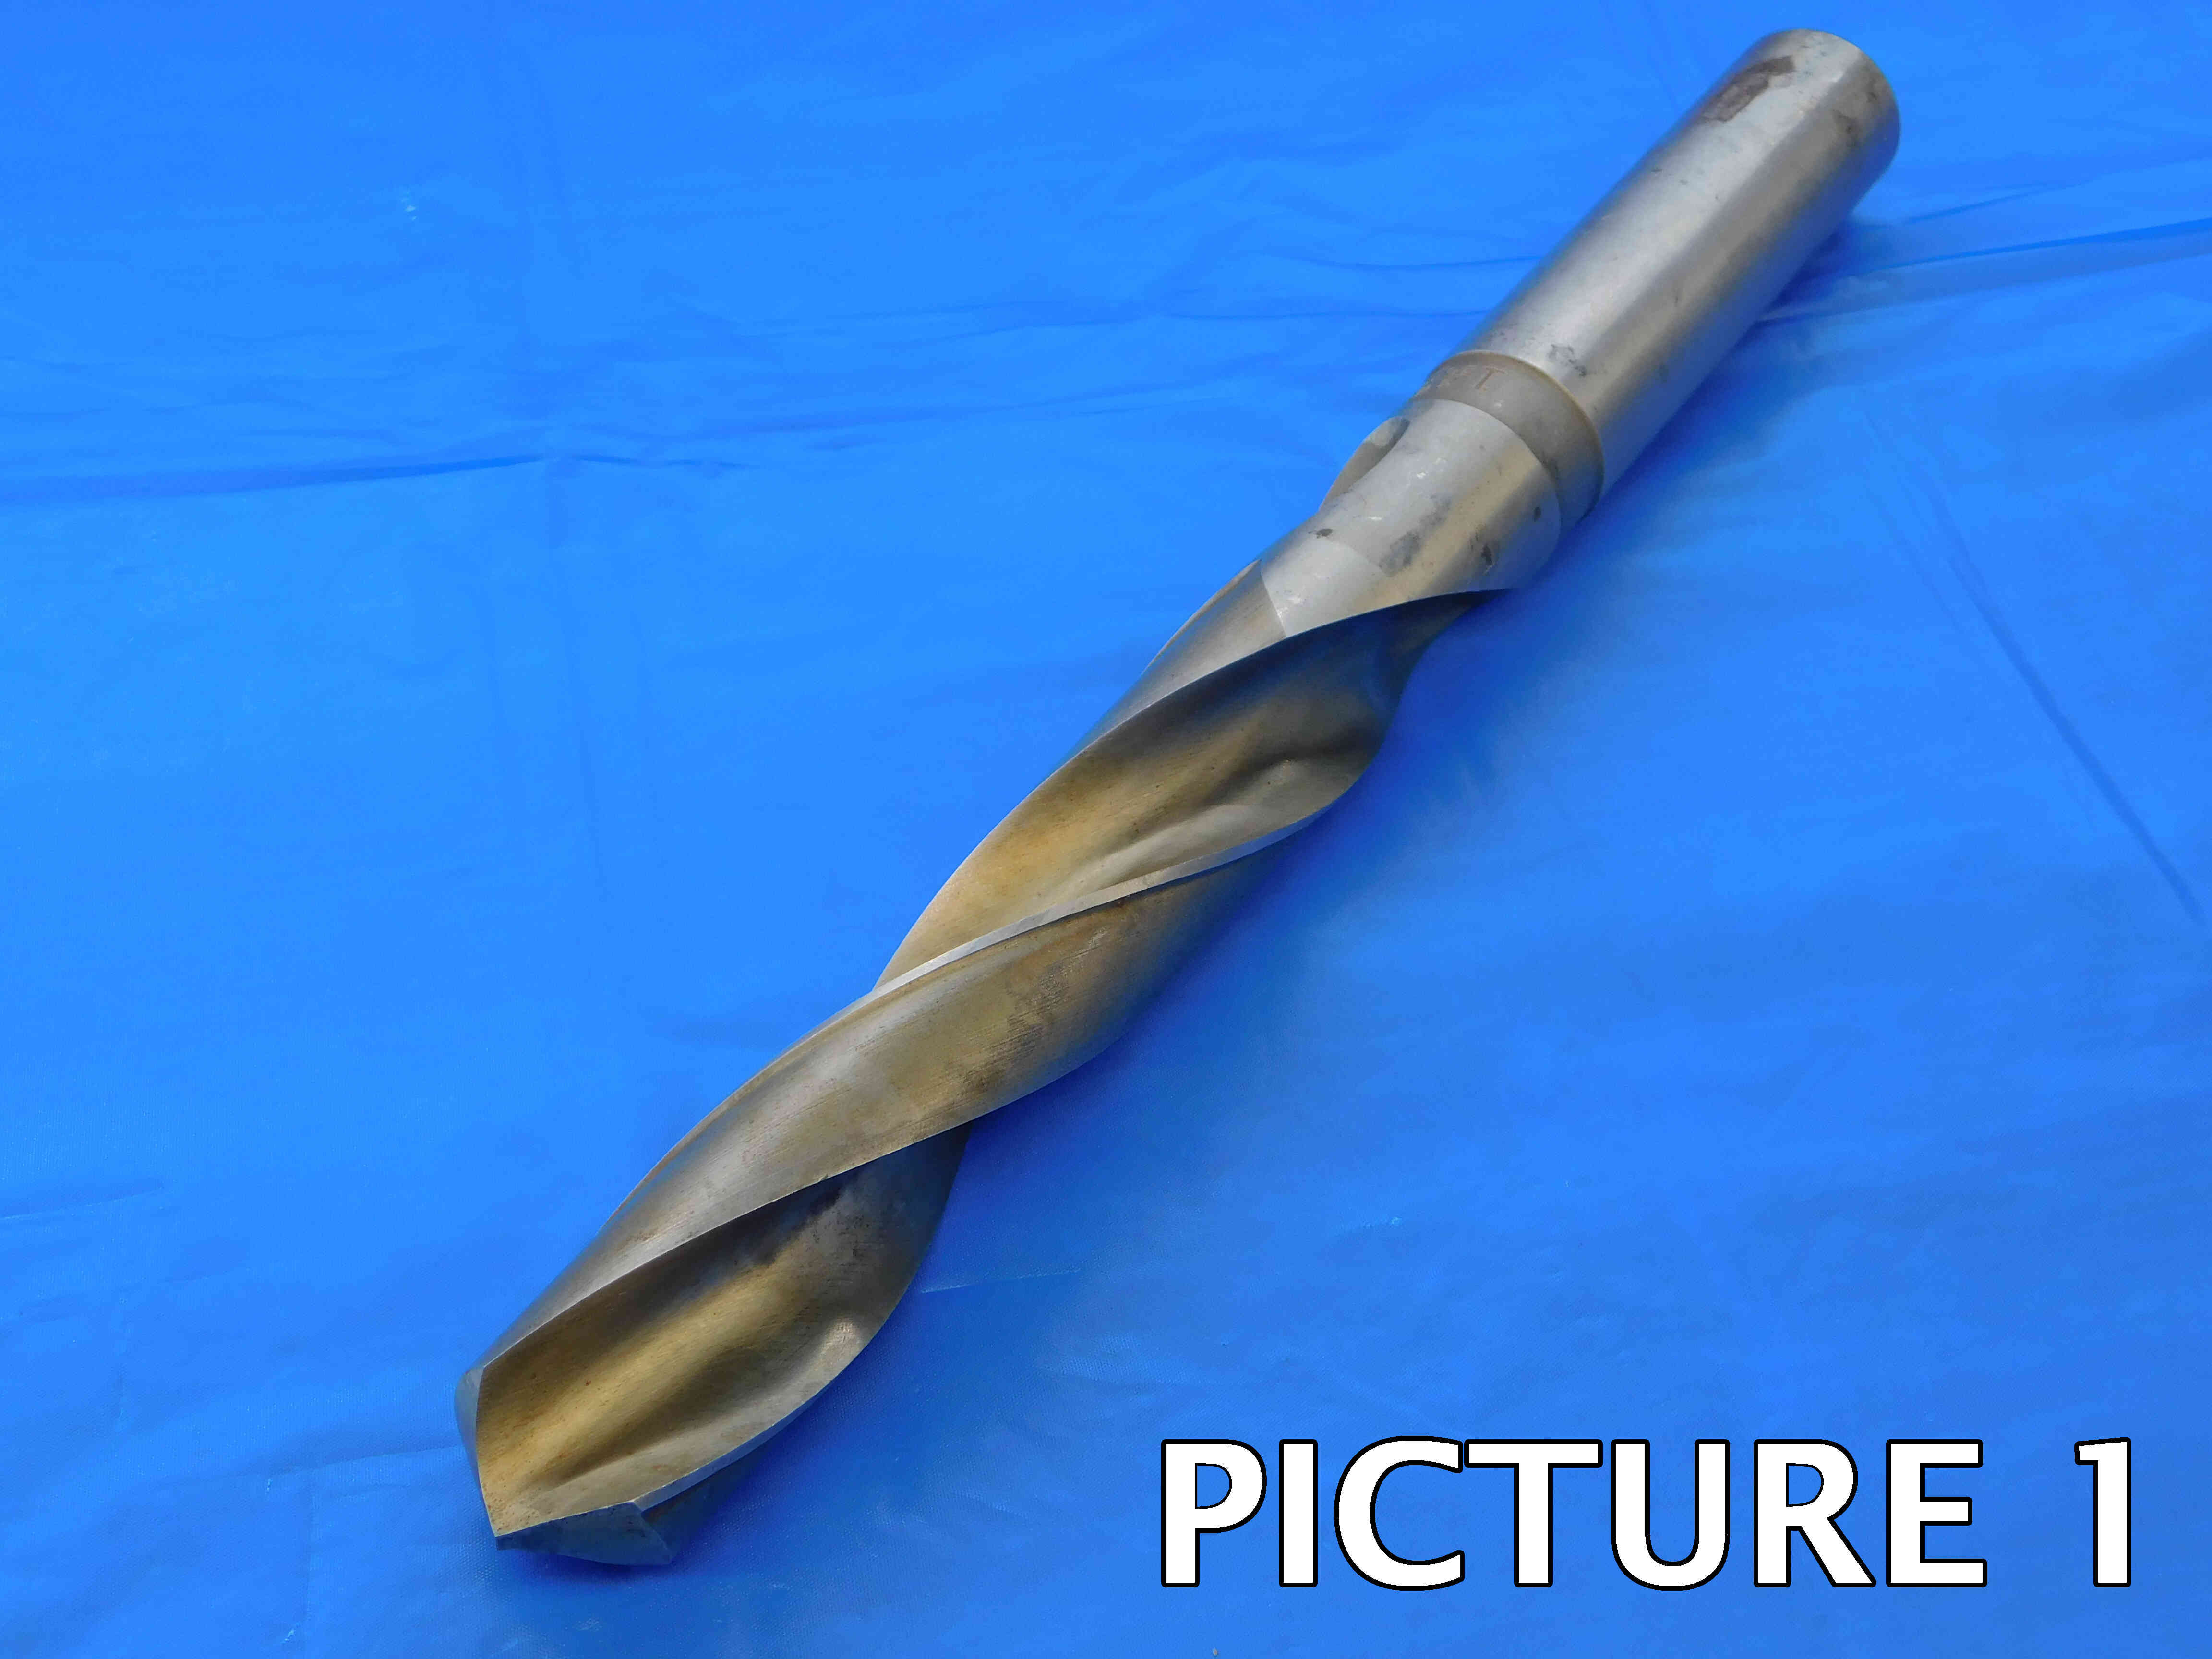
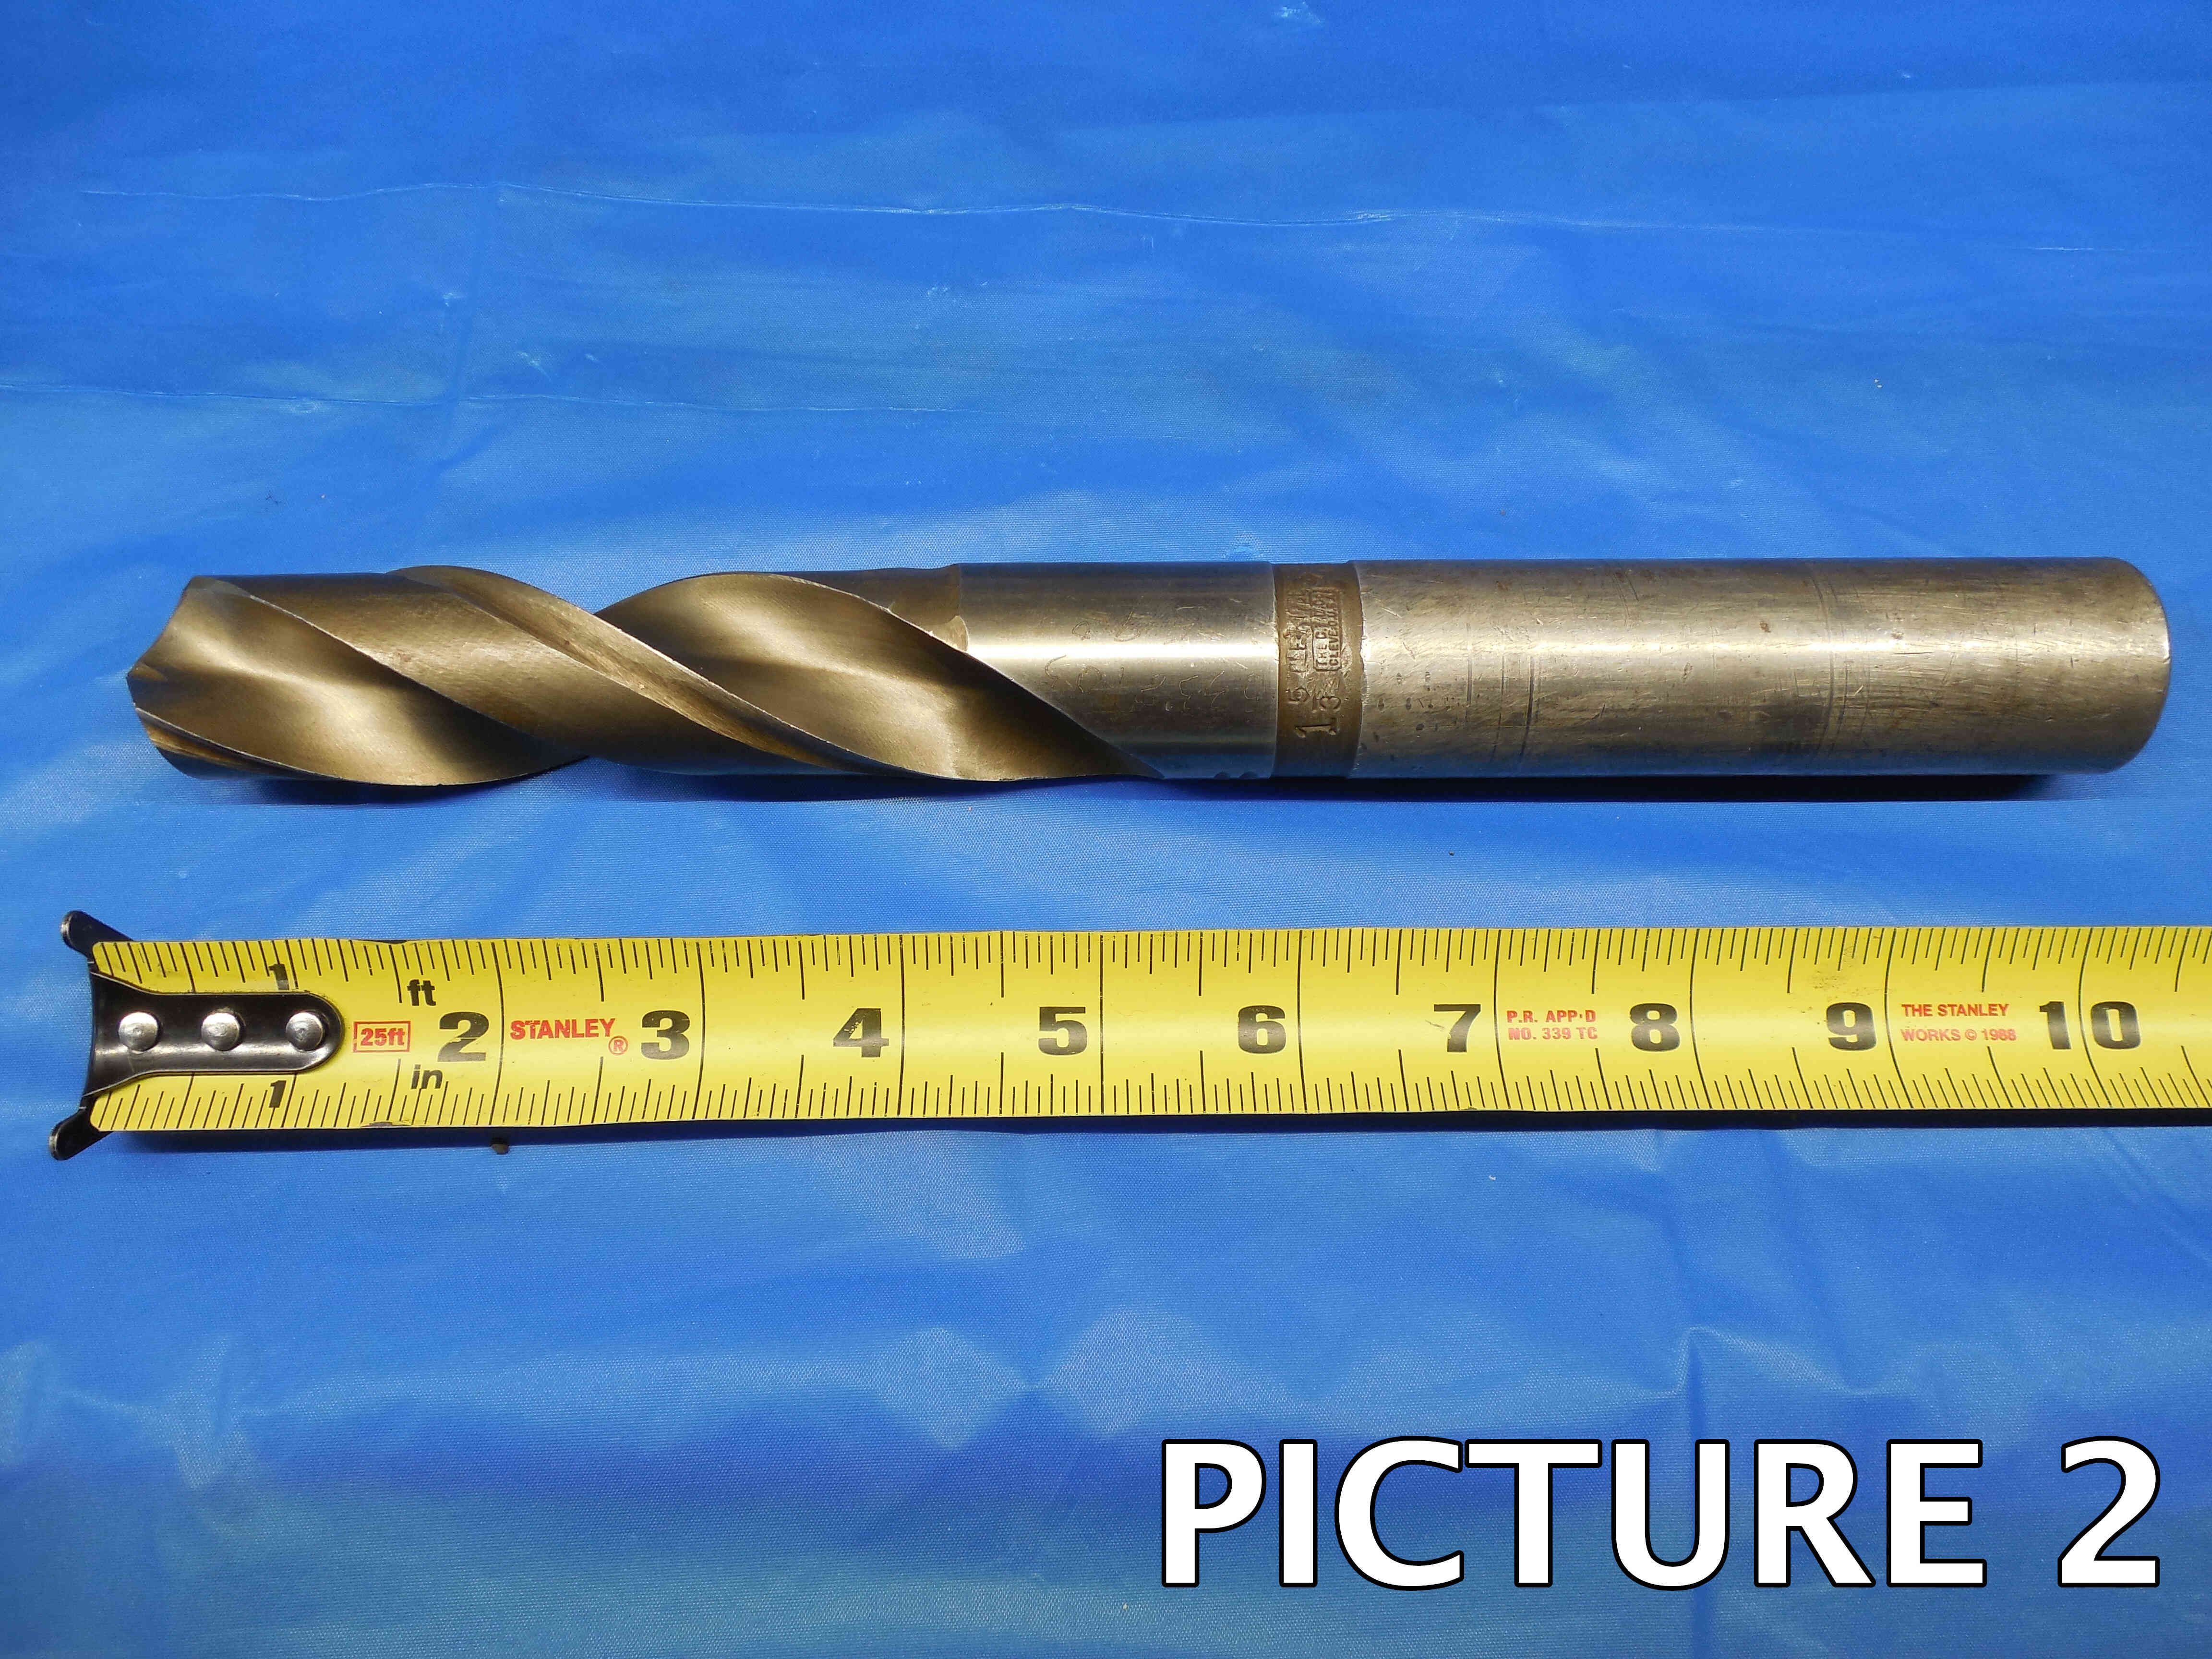
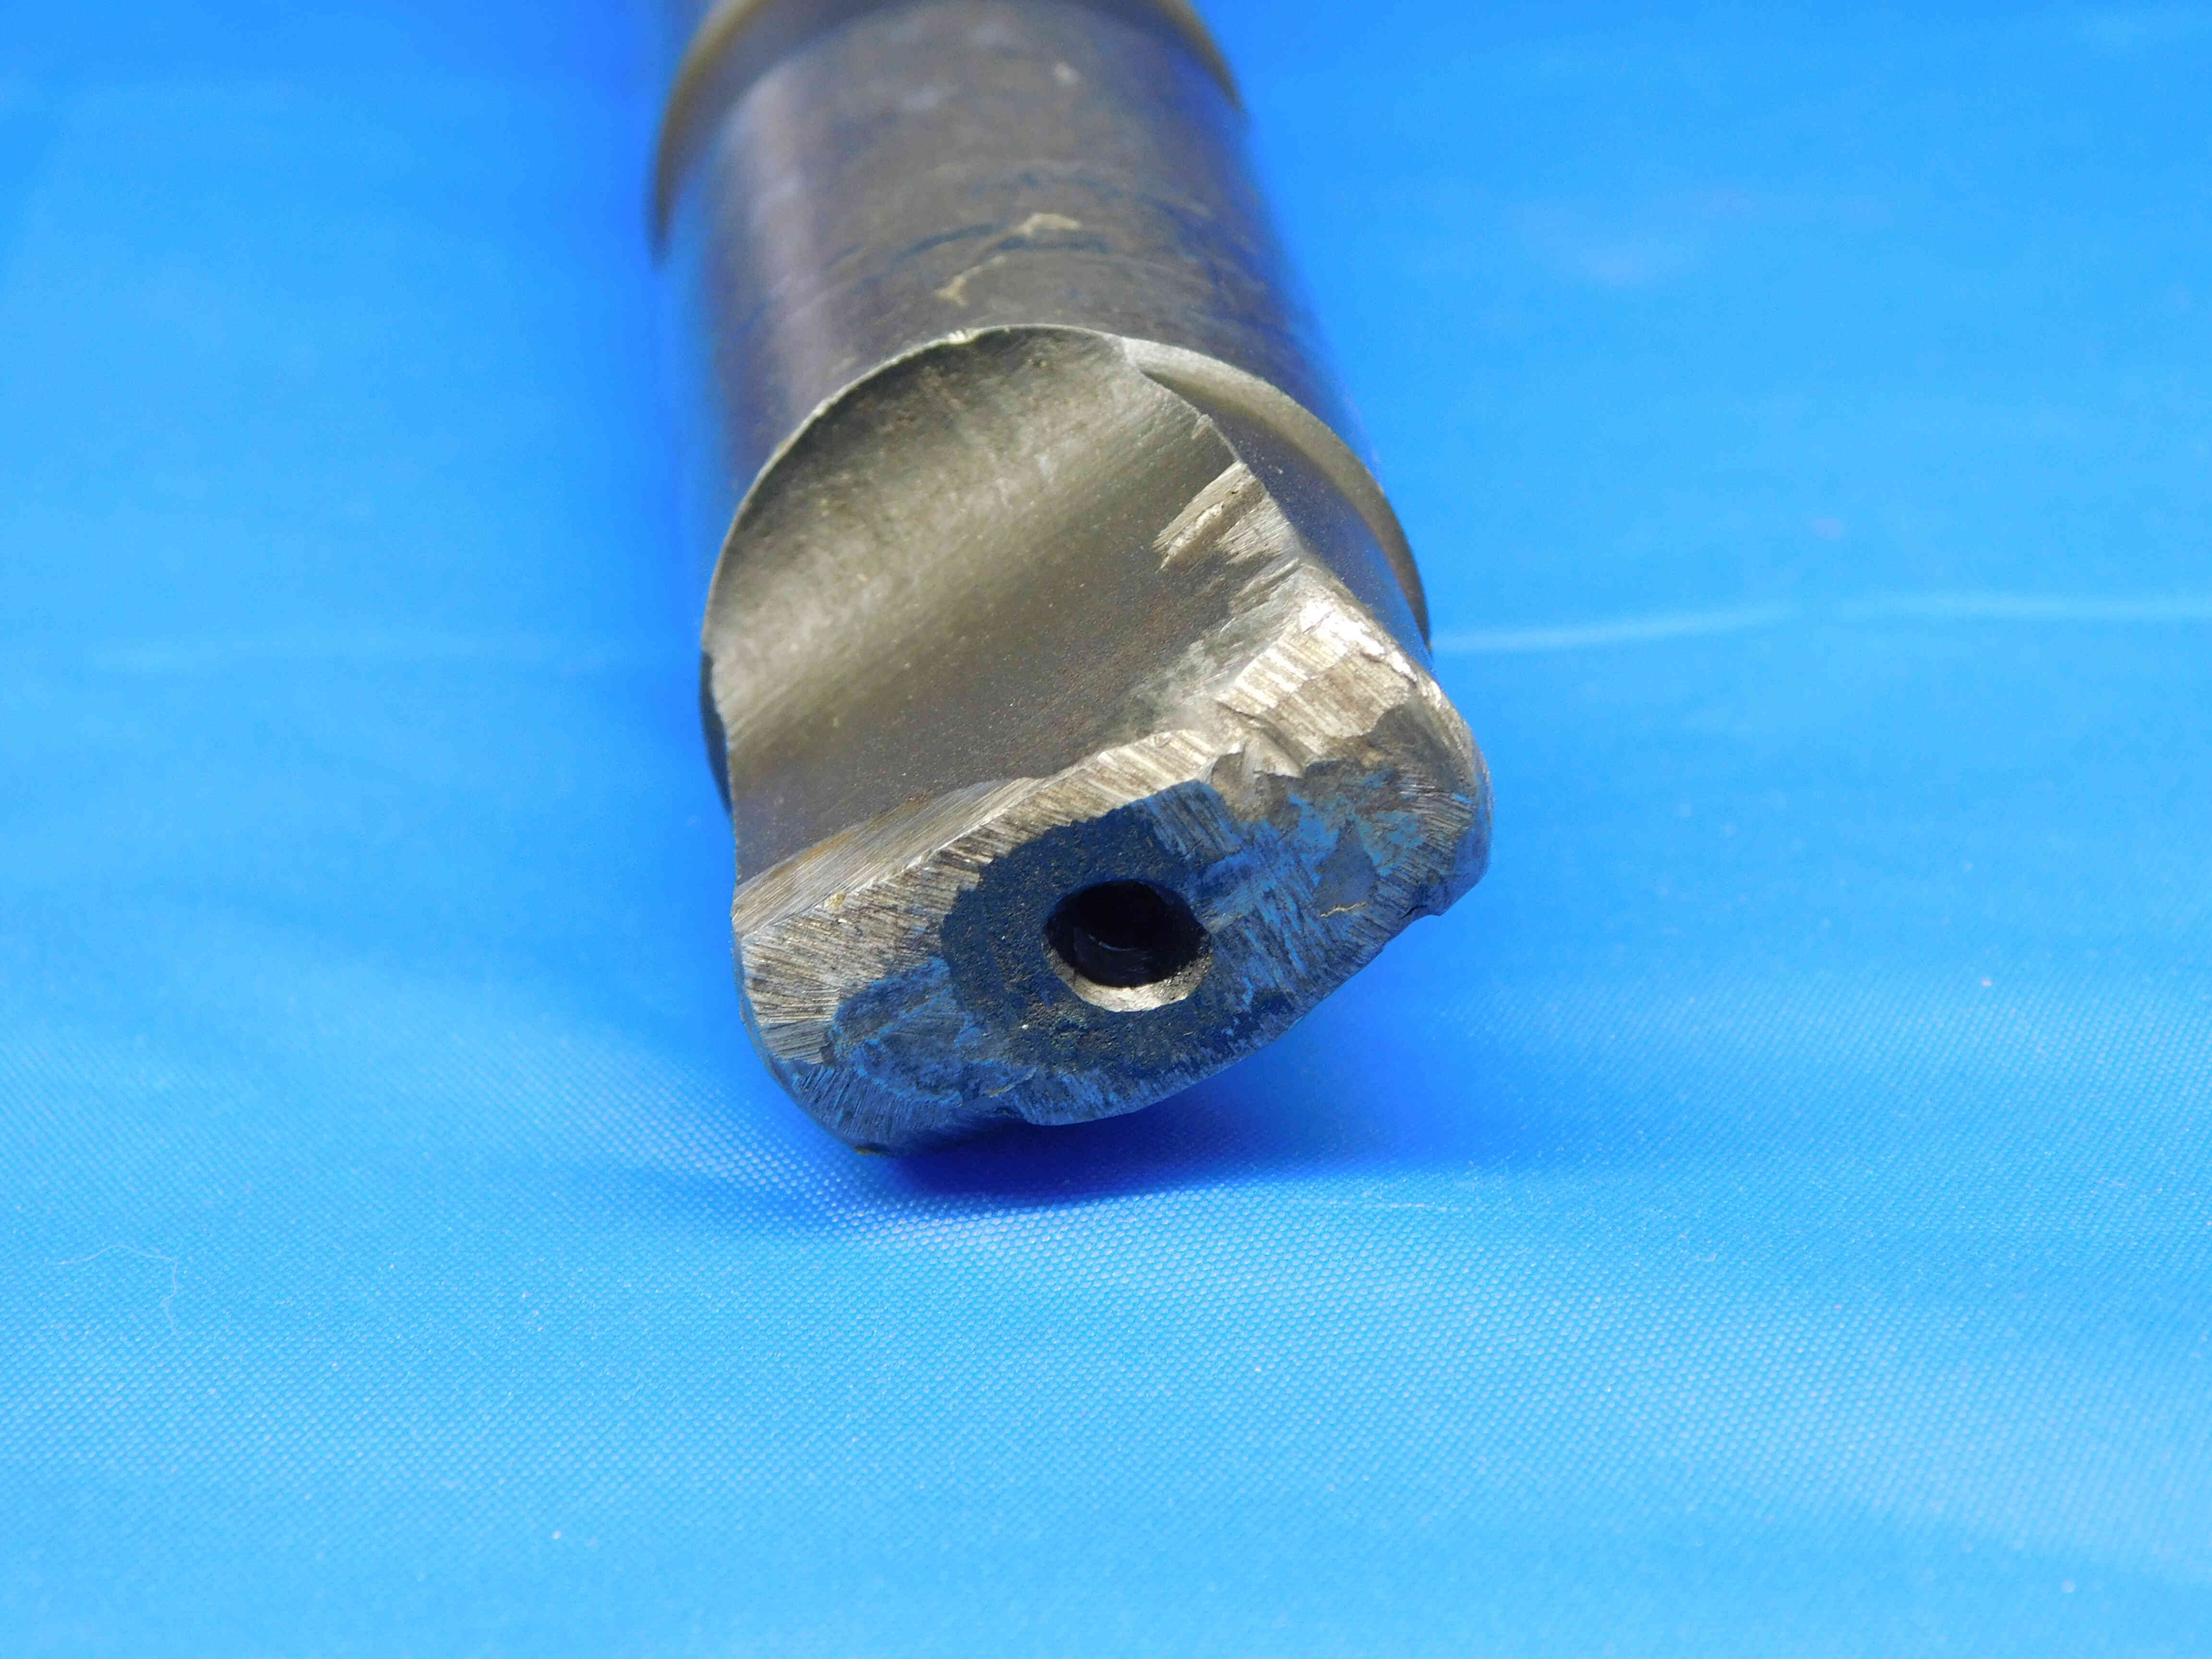
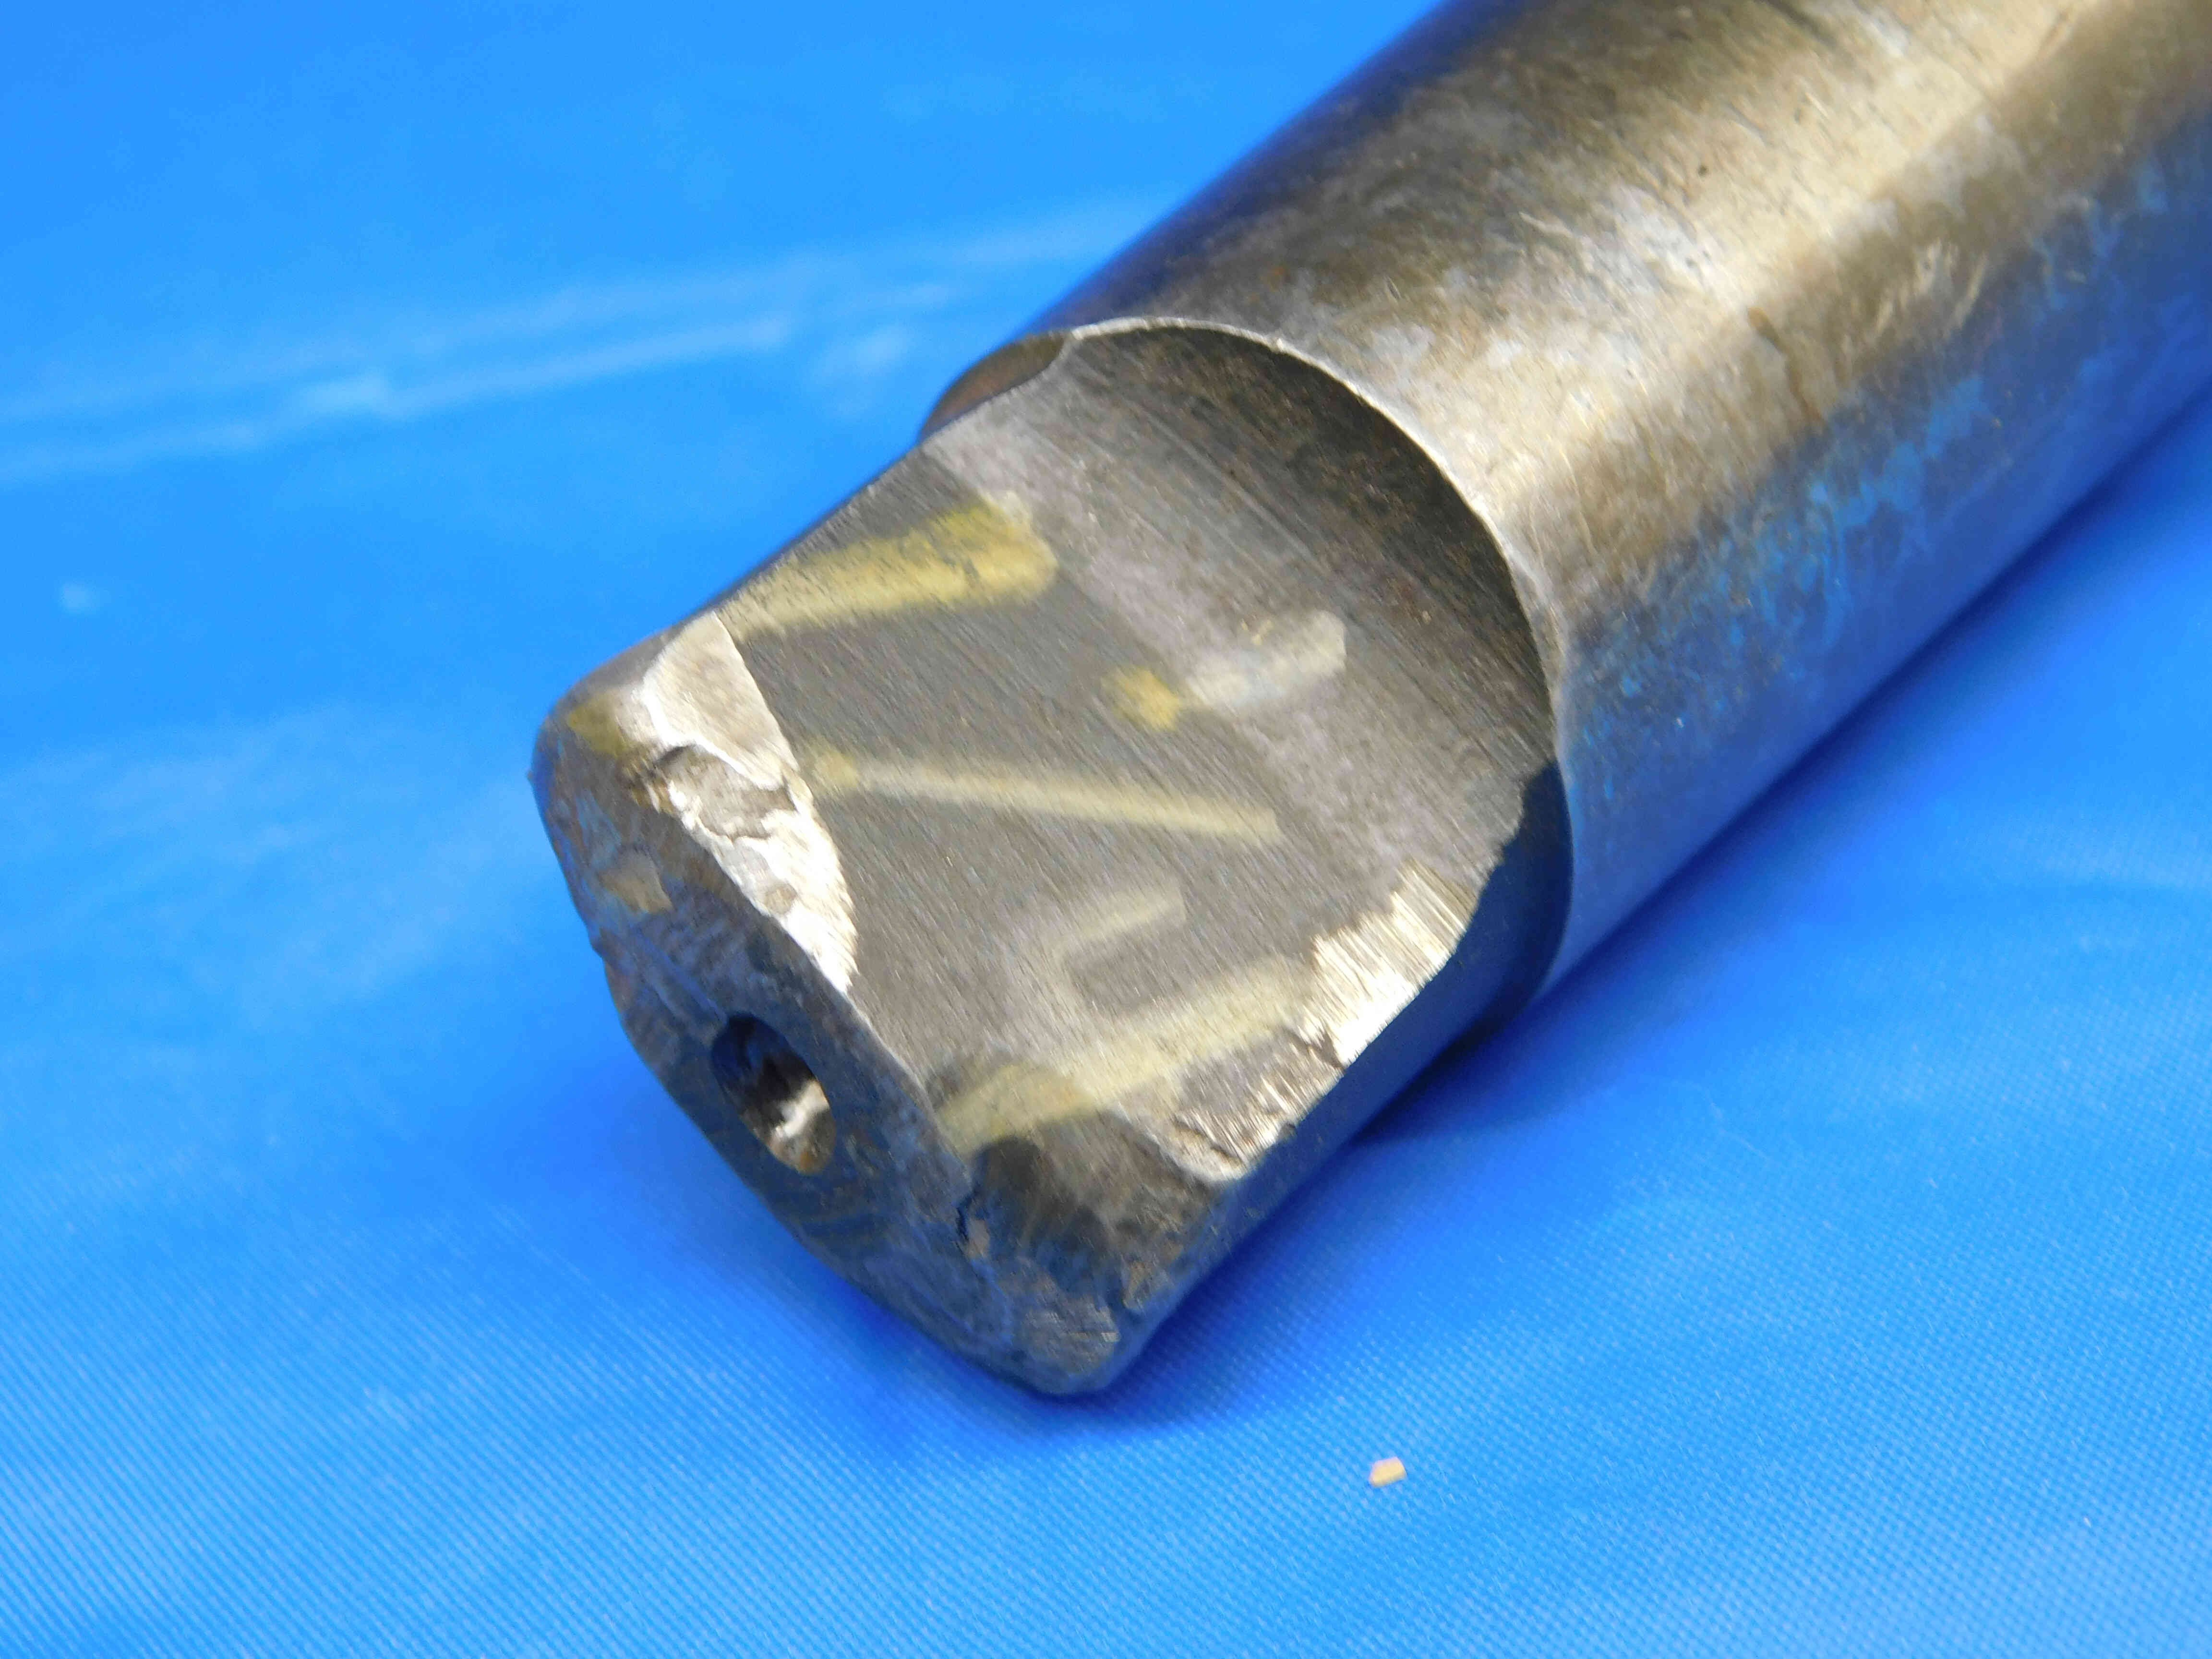
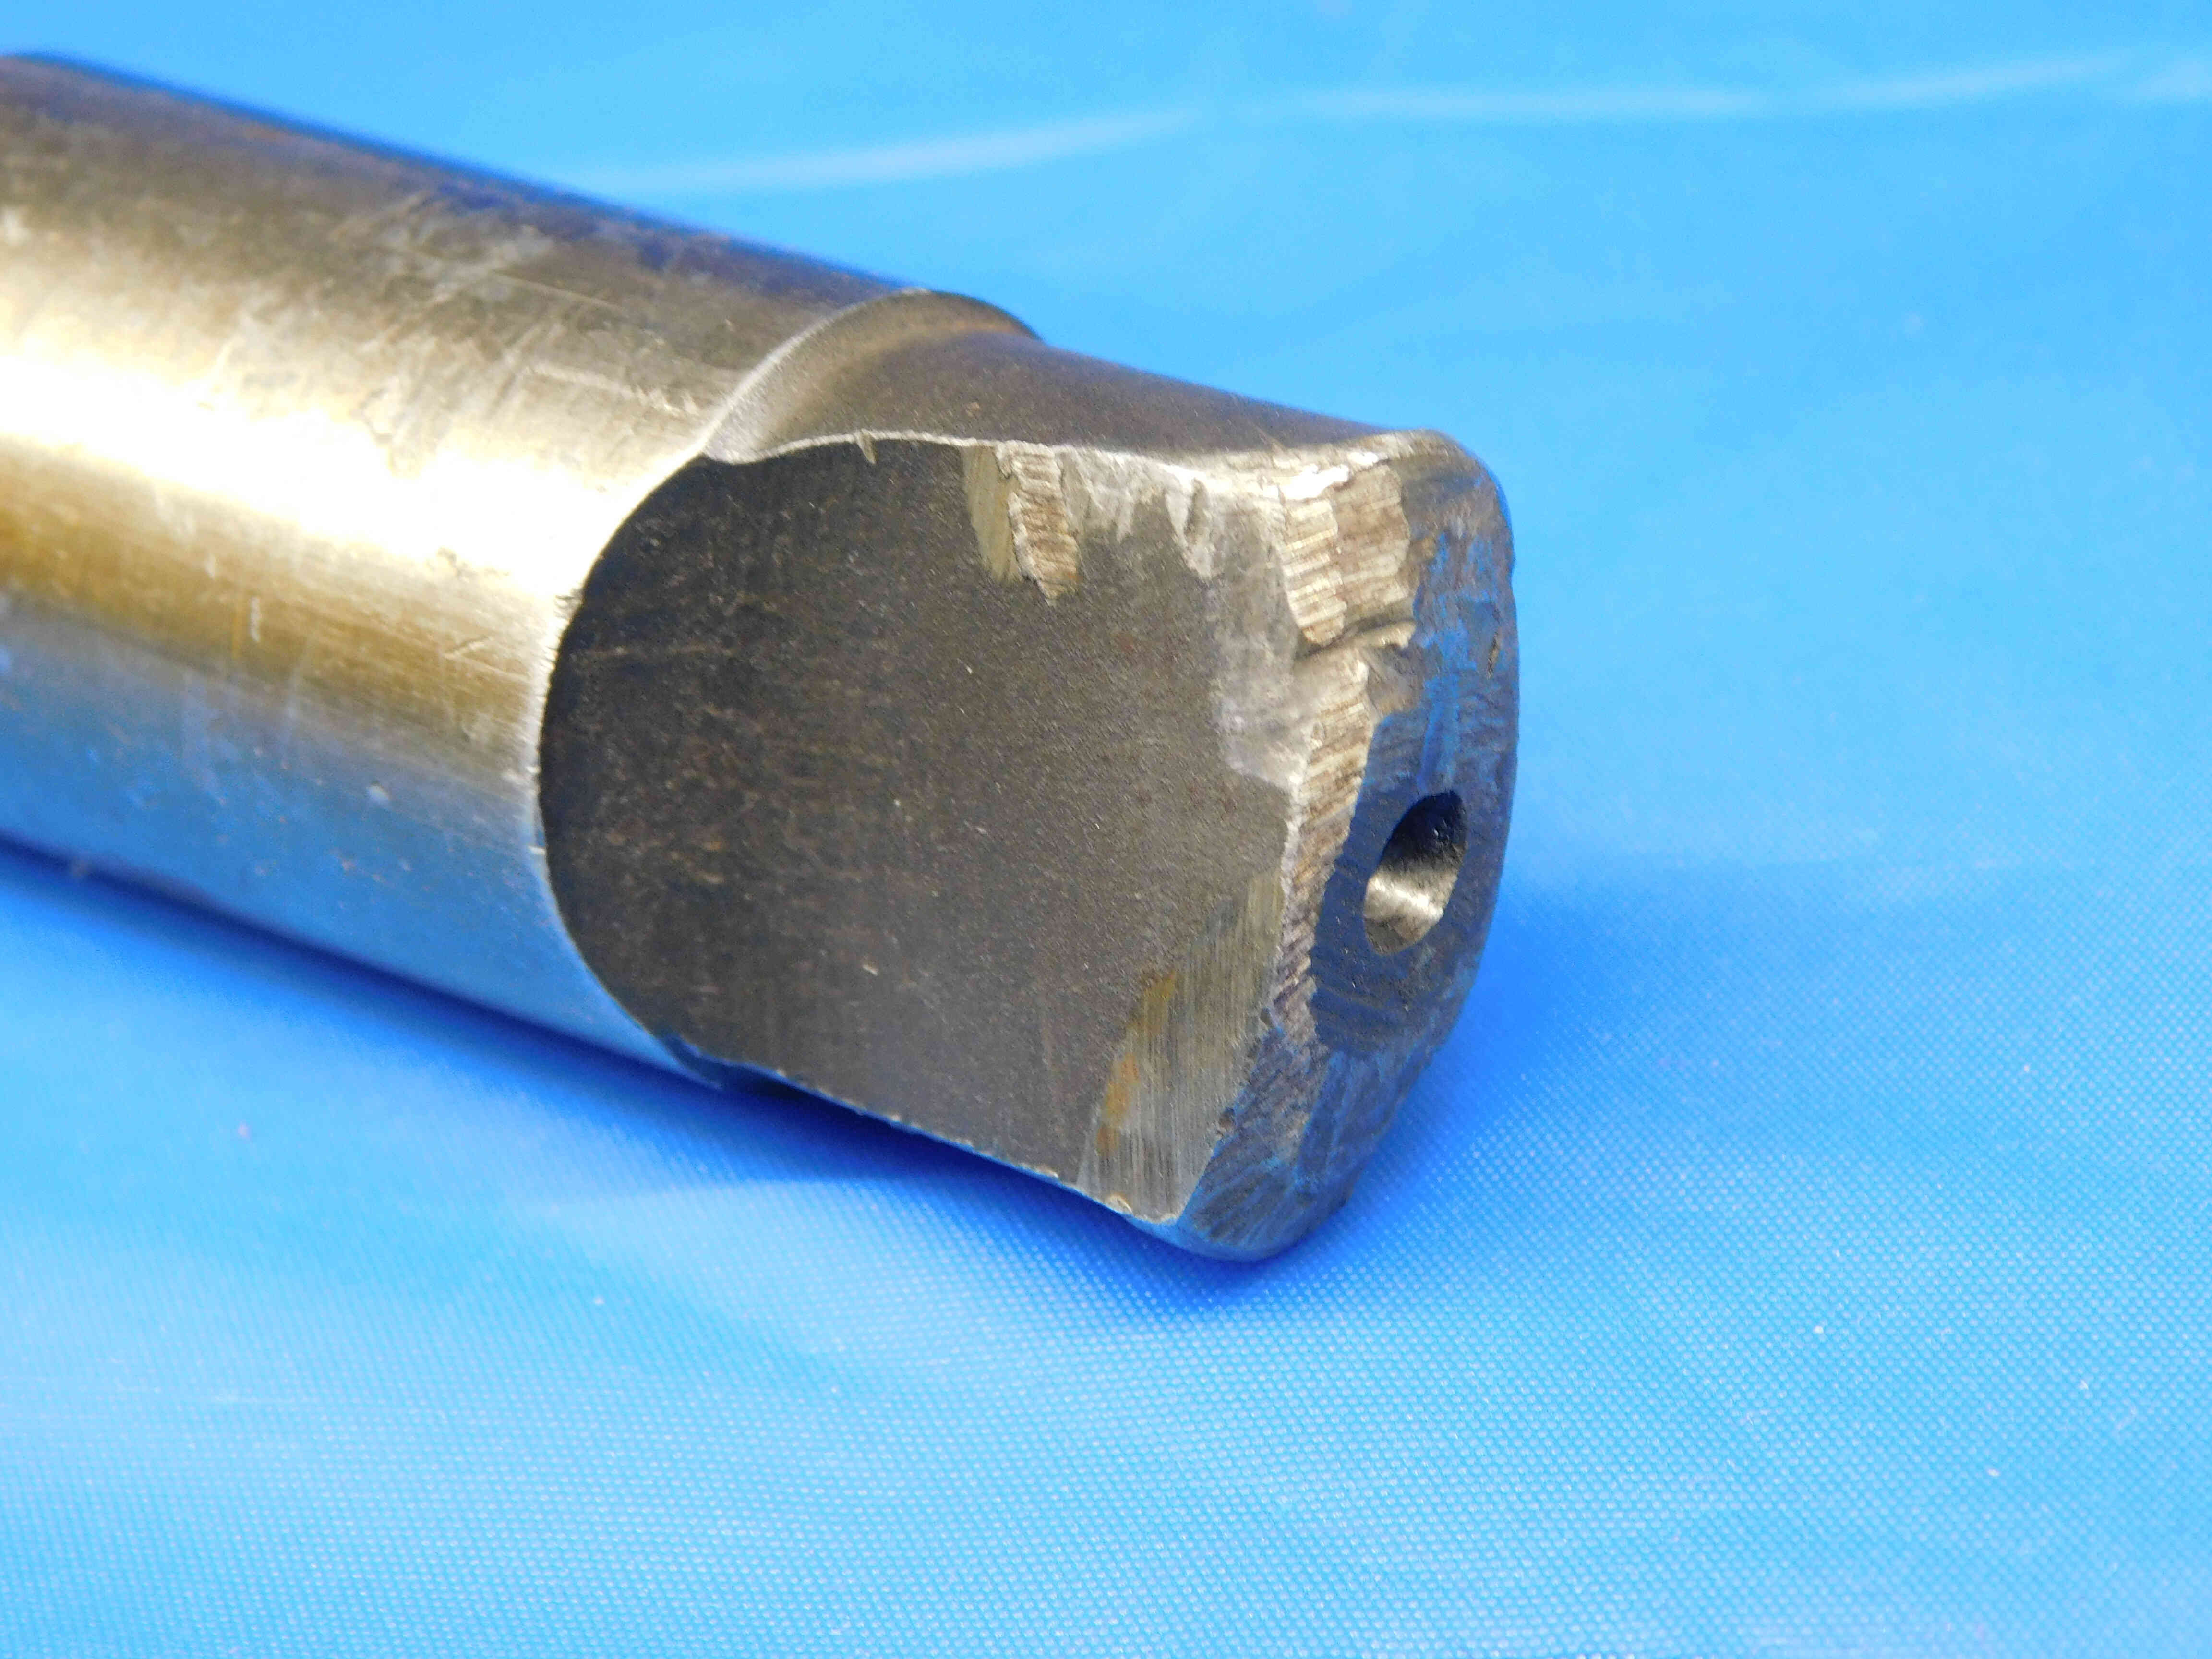
Always inspect the tang (the flat section at the end of the taper) for damage. On smaller drill bits, major damage to the tang will almost always disqualify it from being listed. Larger drill bits (>2" O.D.) might still be listed in this condition, but this should be confirmed by your trainer. See below for examples of badly damaged tangs:
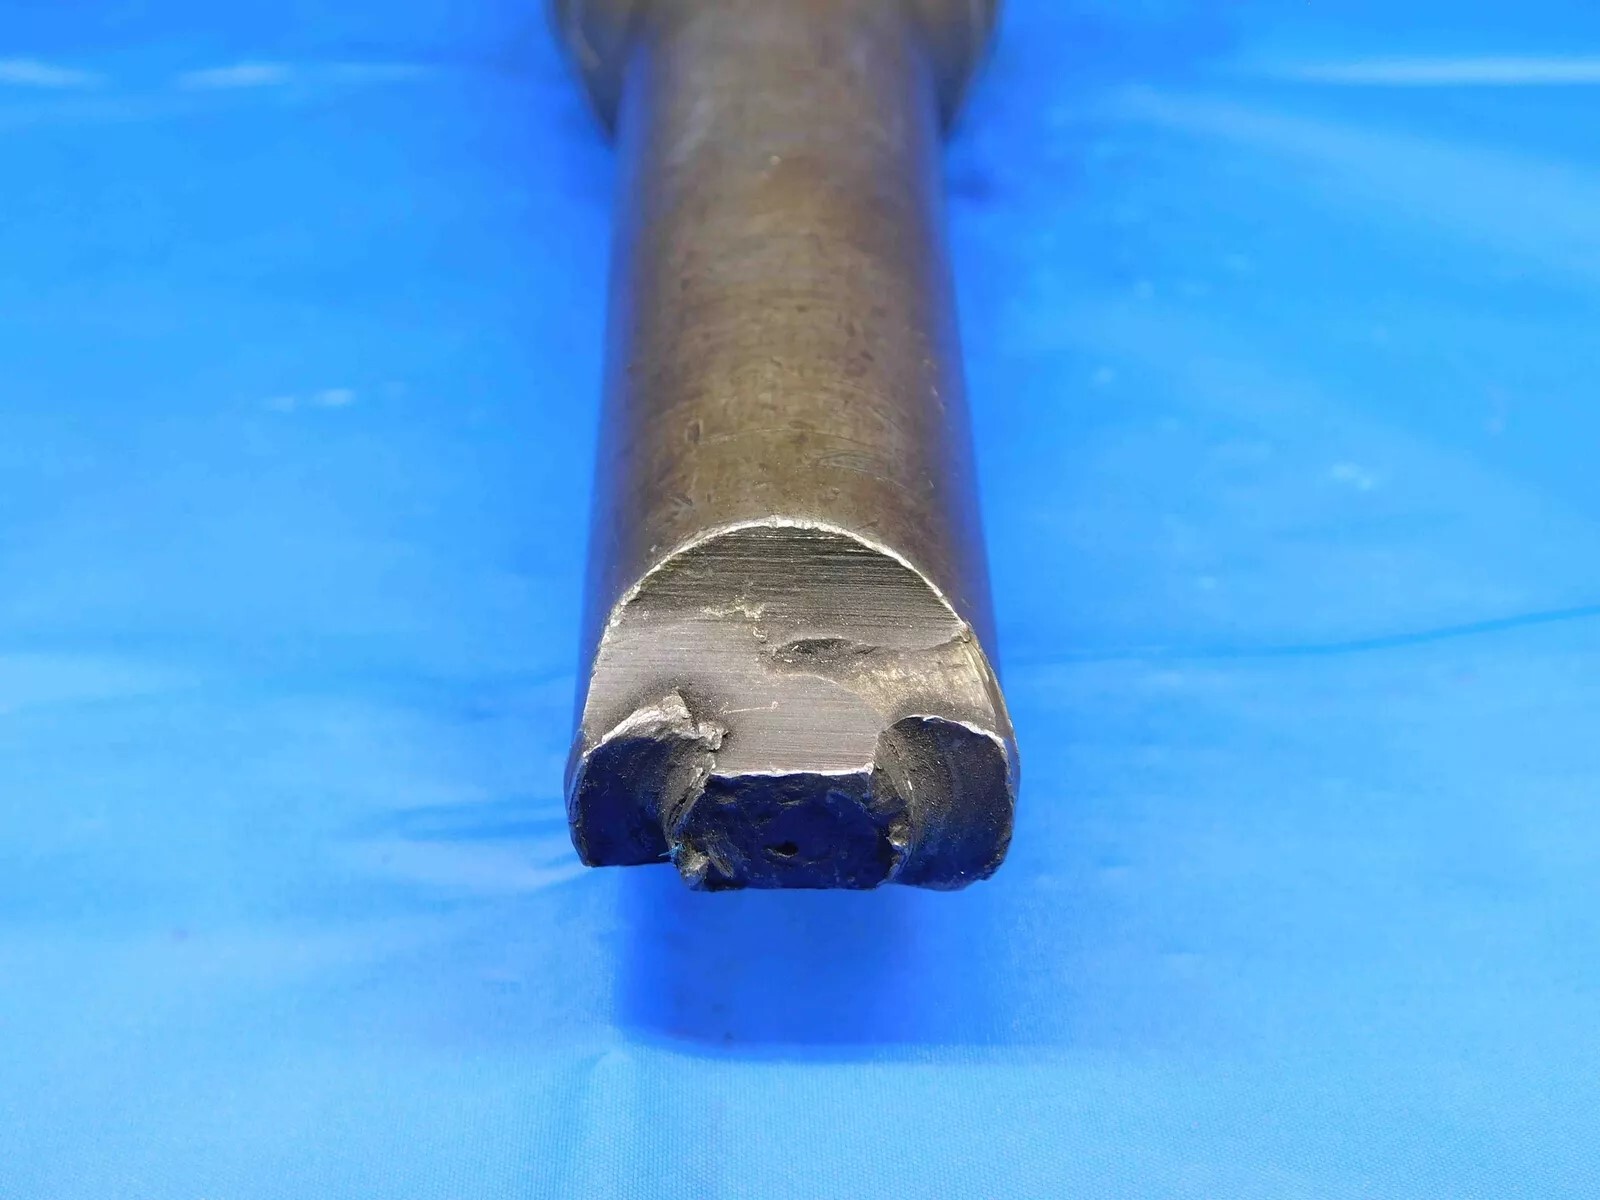
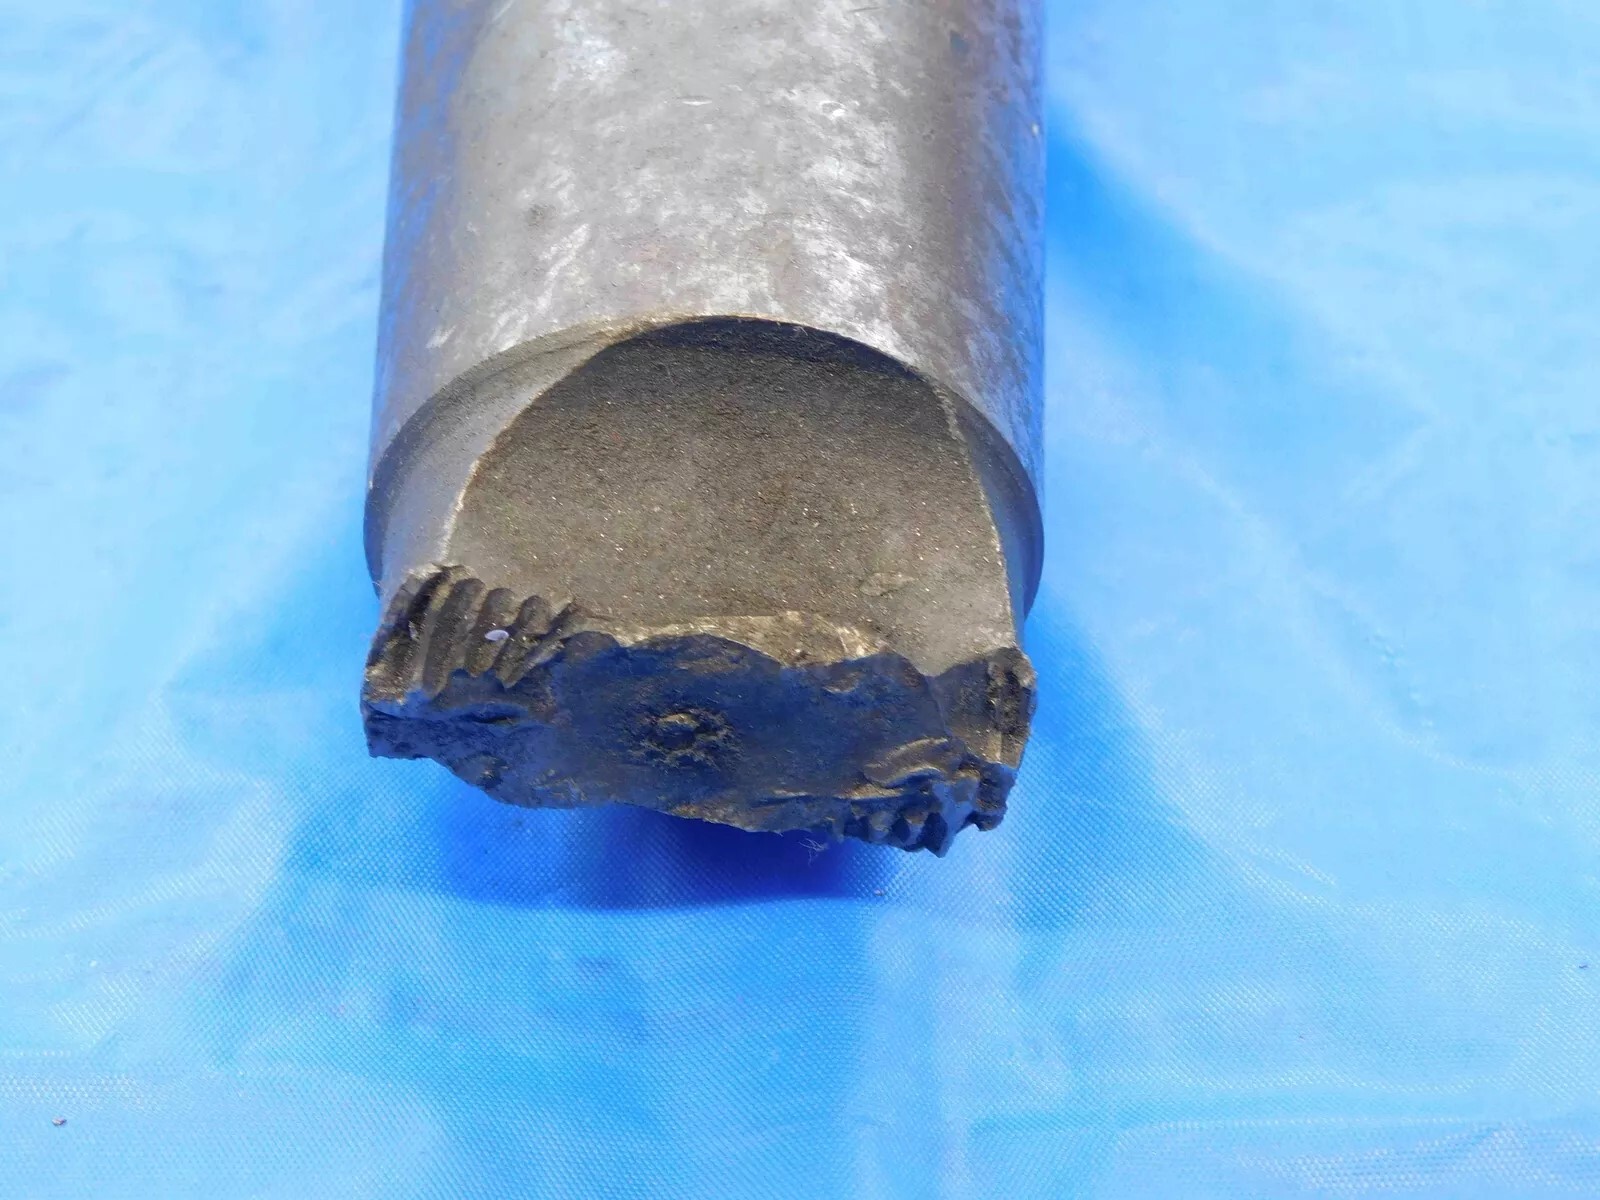
Another thing to look for are tangs that have been twisted, like the ones shown below. When inspecting tangs, you should view them from the side in order to see this most easily. These should also be treated as major damage:
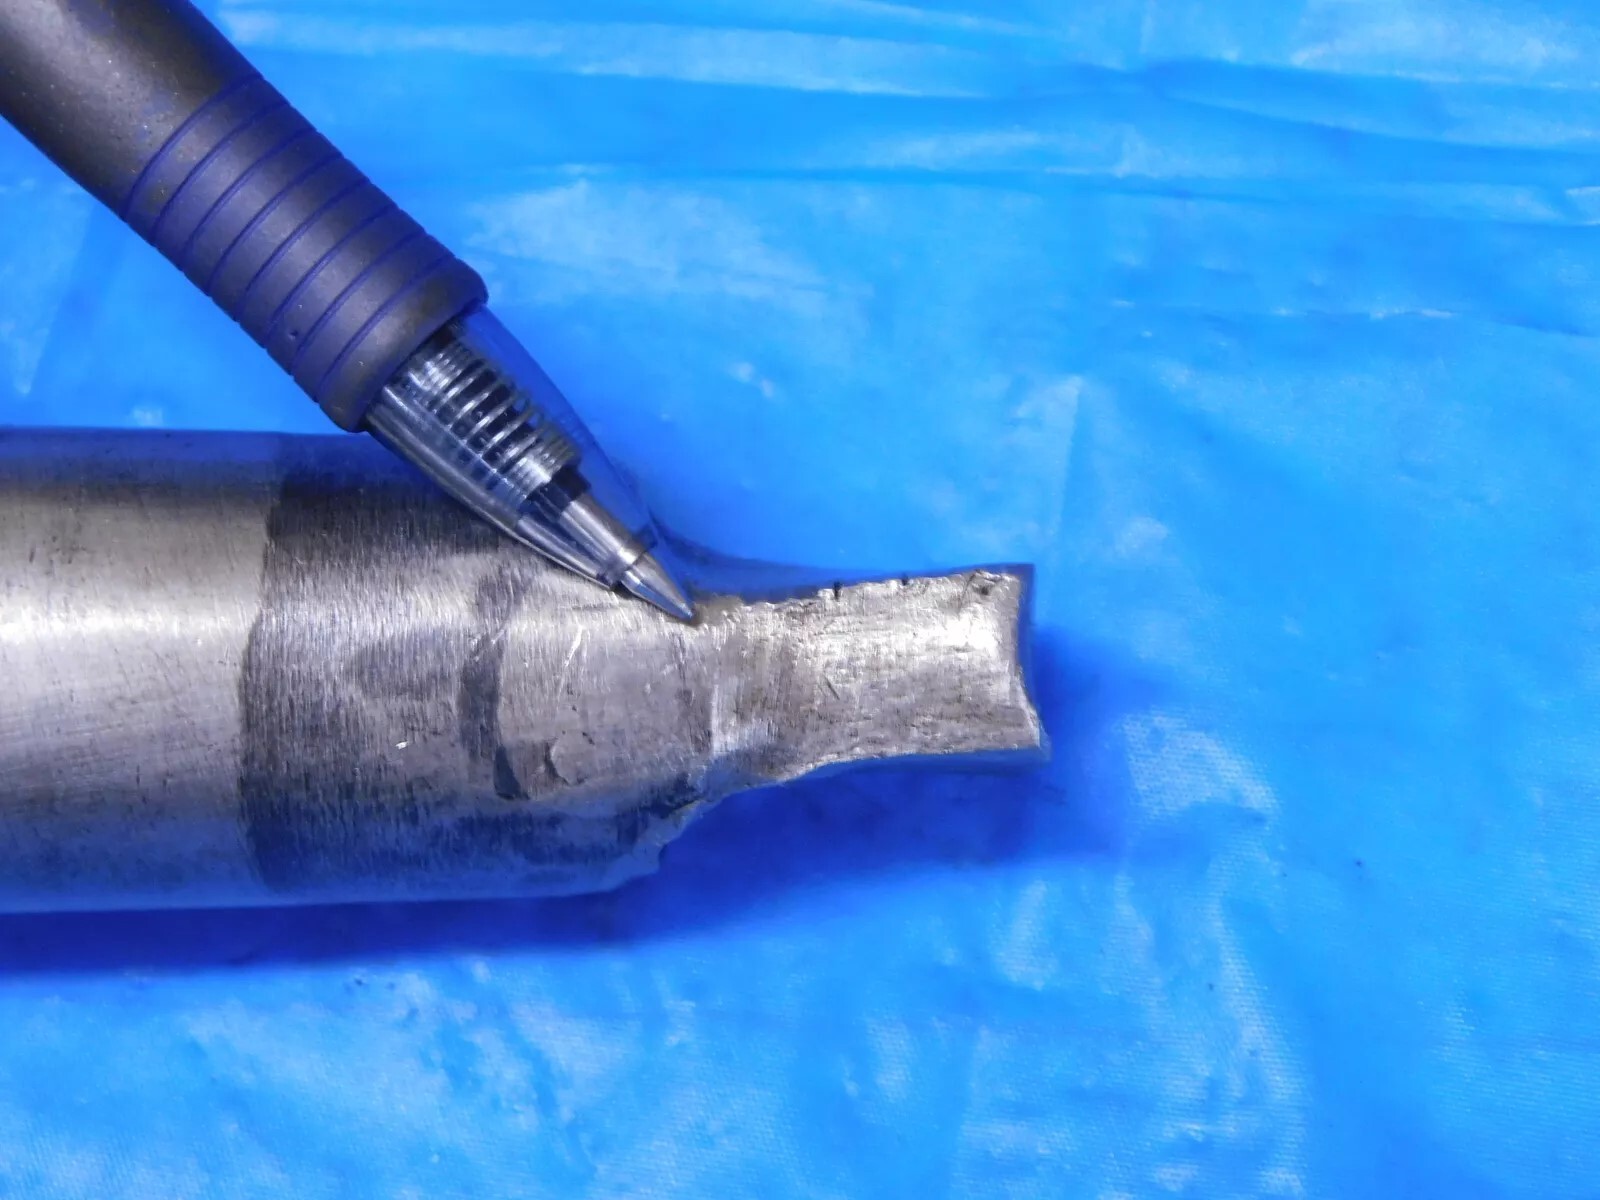
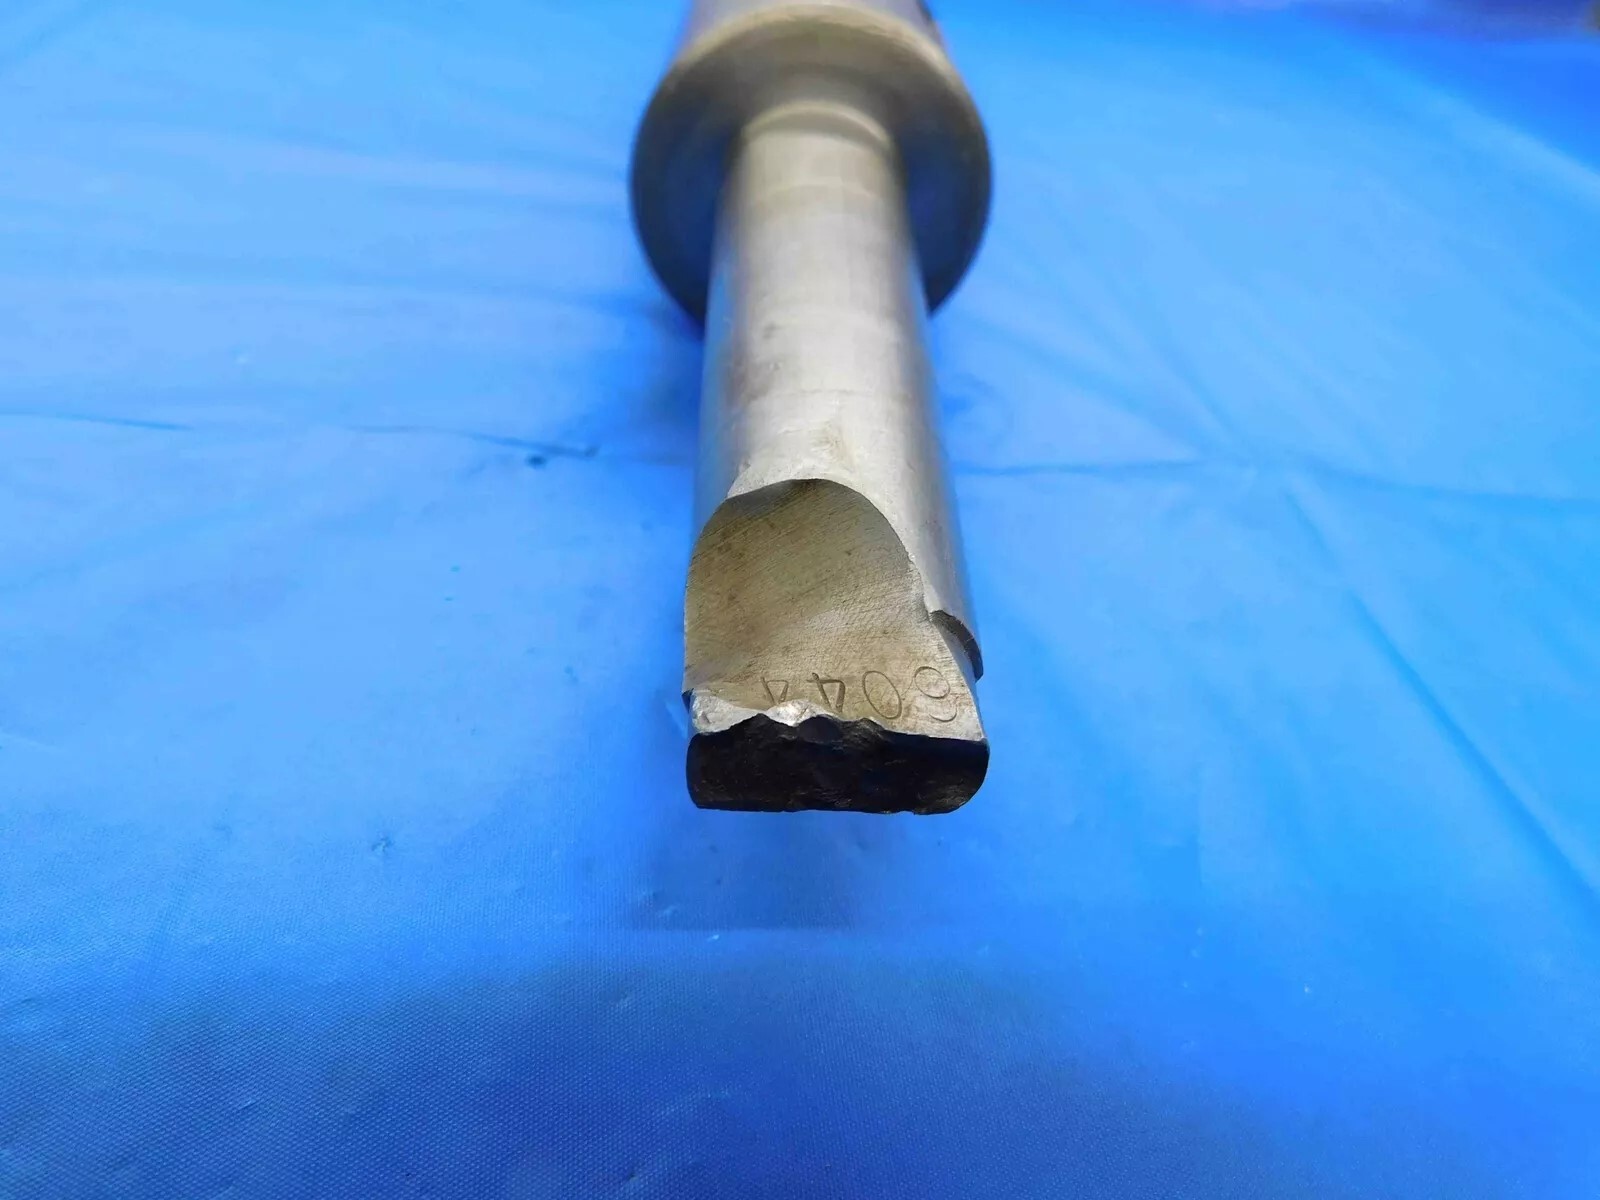
Tangs with small chips or minor wear are generally okay to list. See below for examples of tangs that are okay to list (assuming the rest of the drill bit is in acceptable condition):
Use WD-40 and a Scotch-Brite pad to remove any rust or residue from the drill bit, taking care not to remove any labeling while doing so. Wipe down with a dry rag to remove any excess WD-40 before picturing.
Click here for info on how to upload pictures
If you are picturing a single drill bit:
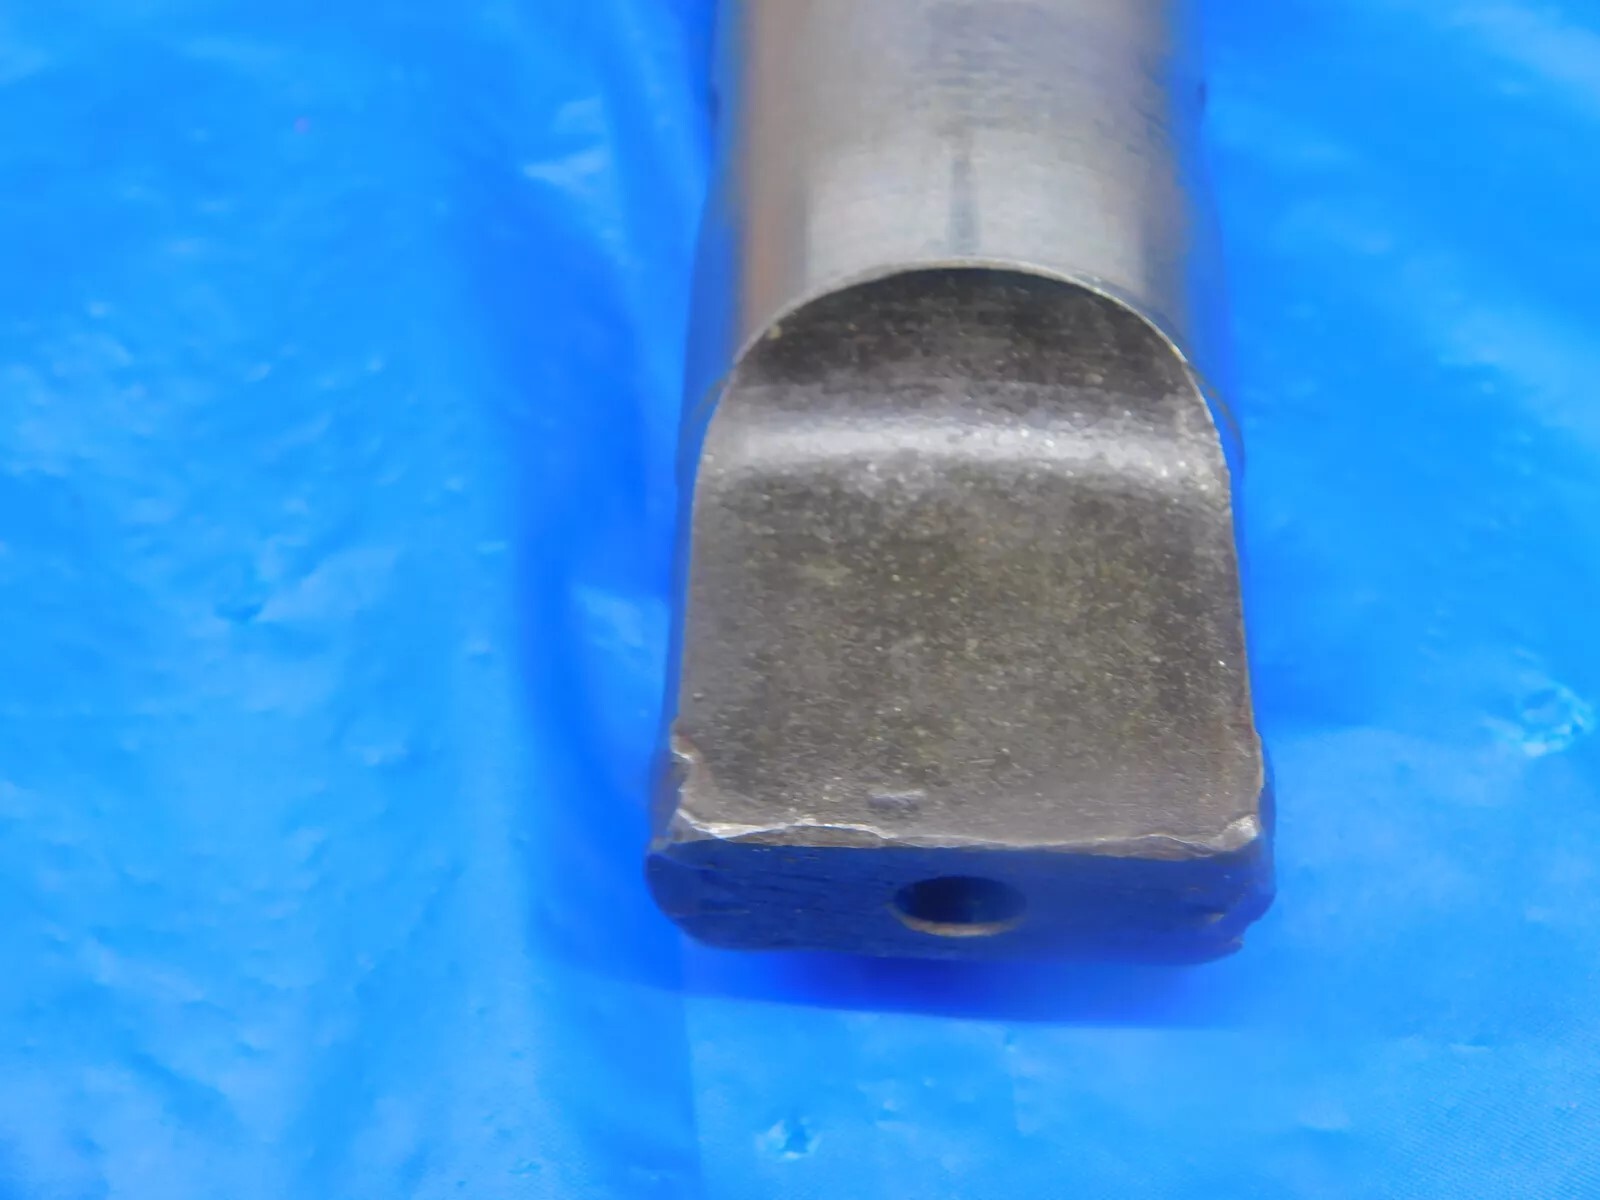
1st Picture: A three-quarters (or "3D") angle of the drill bit, with the working end toward the camera. Any packaging should be included in this picture.
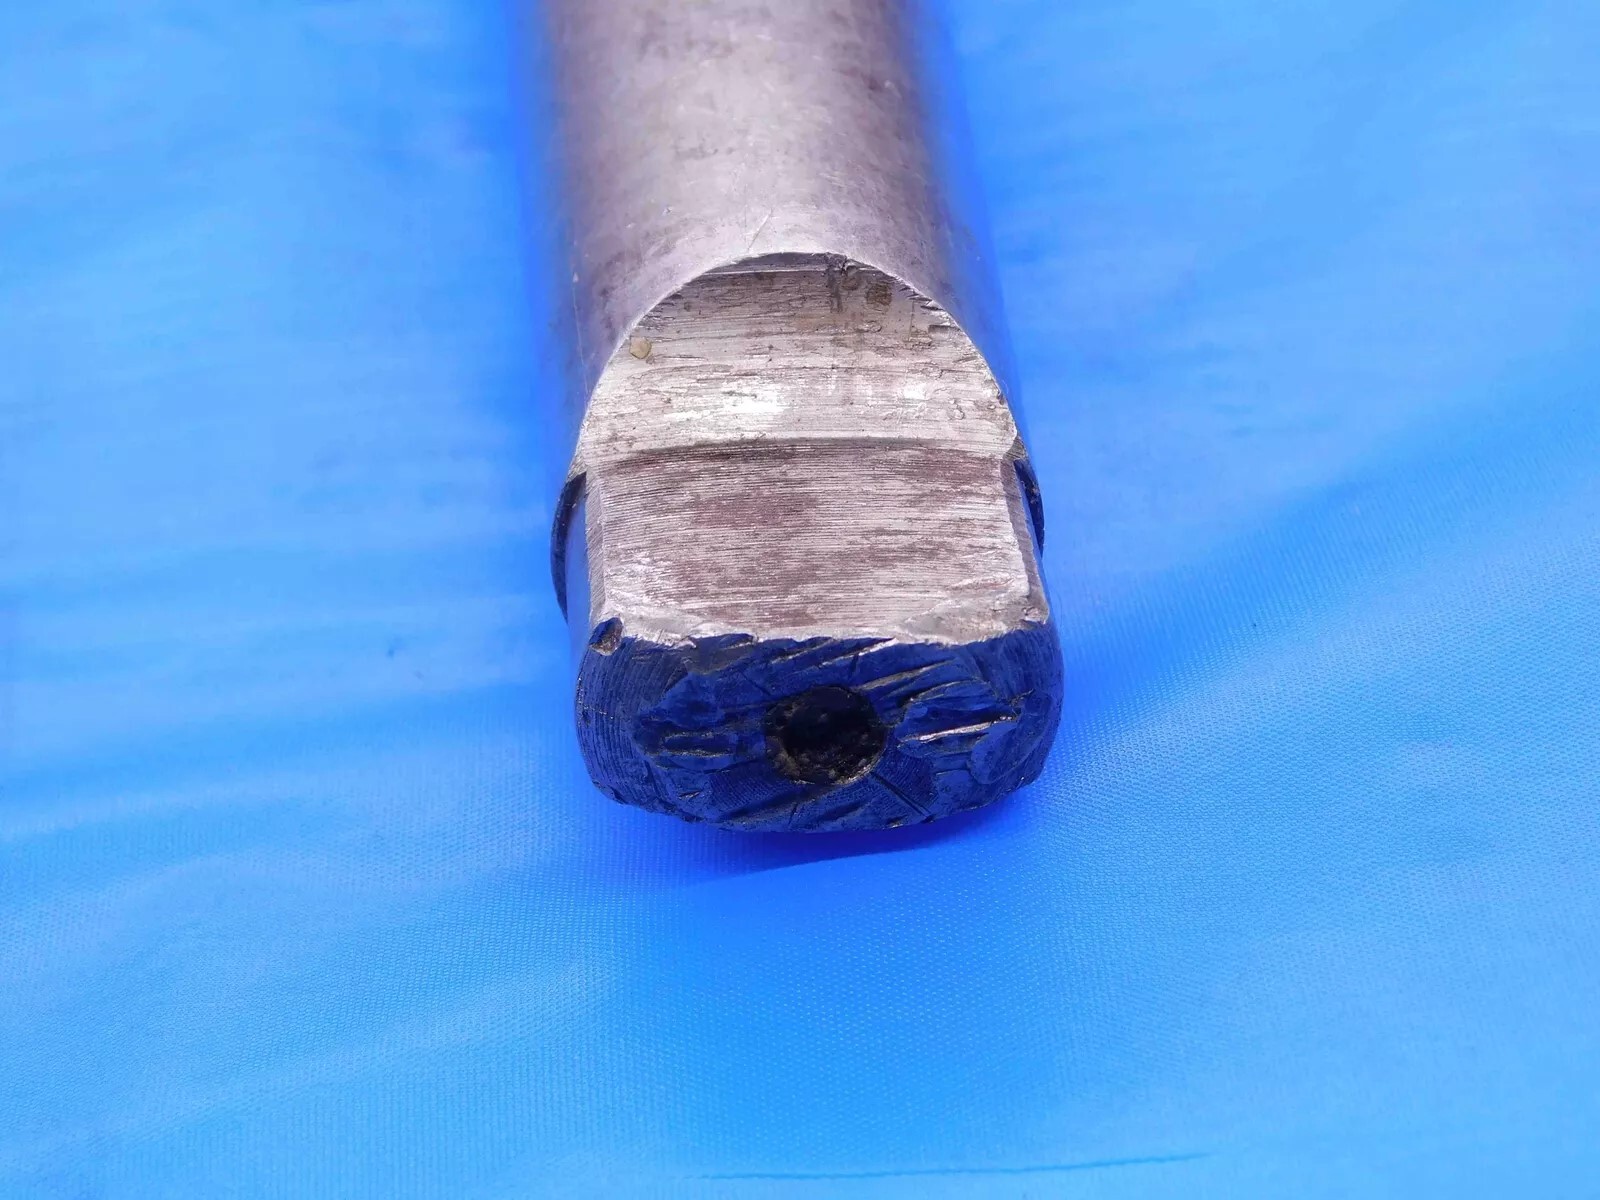
2nd Picture: A side view of the drill bit, with a tape measure at the bottom of the frame to provide size reference. If there is labeling on the drill bit, it should be visible and readable (i.e., right-side up) in this picture if possible. Make sure there is sufficient space between the drill bit and the tape measure so that the tape measure is not covering up any part of the drill bit. Any packaging should be included in this shot as well.
NOTE: If you have packaging with labeling that does not match the item, black it out with a marker before taking pictures. Used items can often end up in mismatched packages and we do not want to cause confusion by having inaccurate brands or part numbers showing in the listing.
3rd Picture: A close-up, head-on shot of the working end.
4th Picture: A close-up shot of the labeling. Depending on the size of the drill bit and where the labeling is located, this may require more than one picture (this is the case in the first set of example pictures below). If there is no labeling present, or if it is too faded to show up in a photo, skip this picture. If you have packaging with (accurate) labeling on it, include a picture of this as well.
5th & 6th Pictures (Morse Taper Shank Only): A close-up shot of the tang at the end of the shank (both sides). Refer to "Picture 5" and "Picture 6" in the second example below.
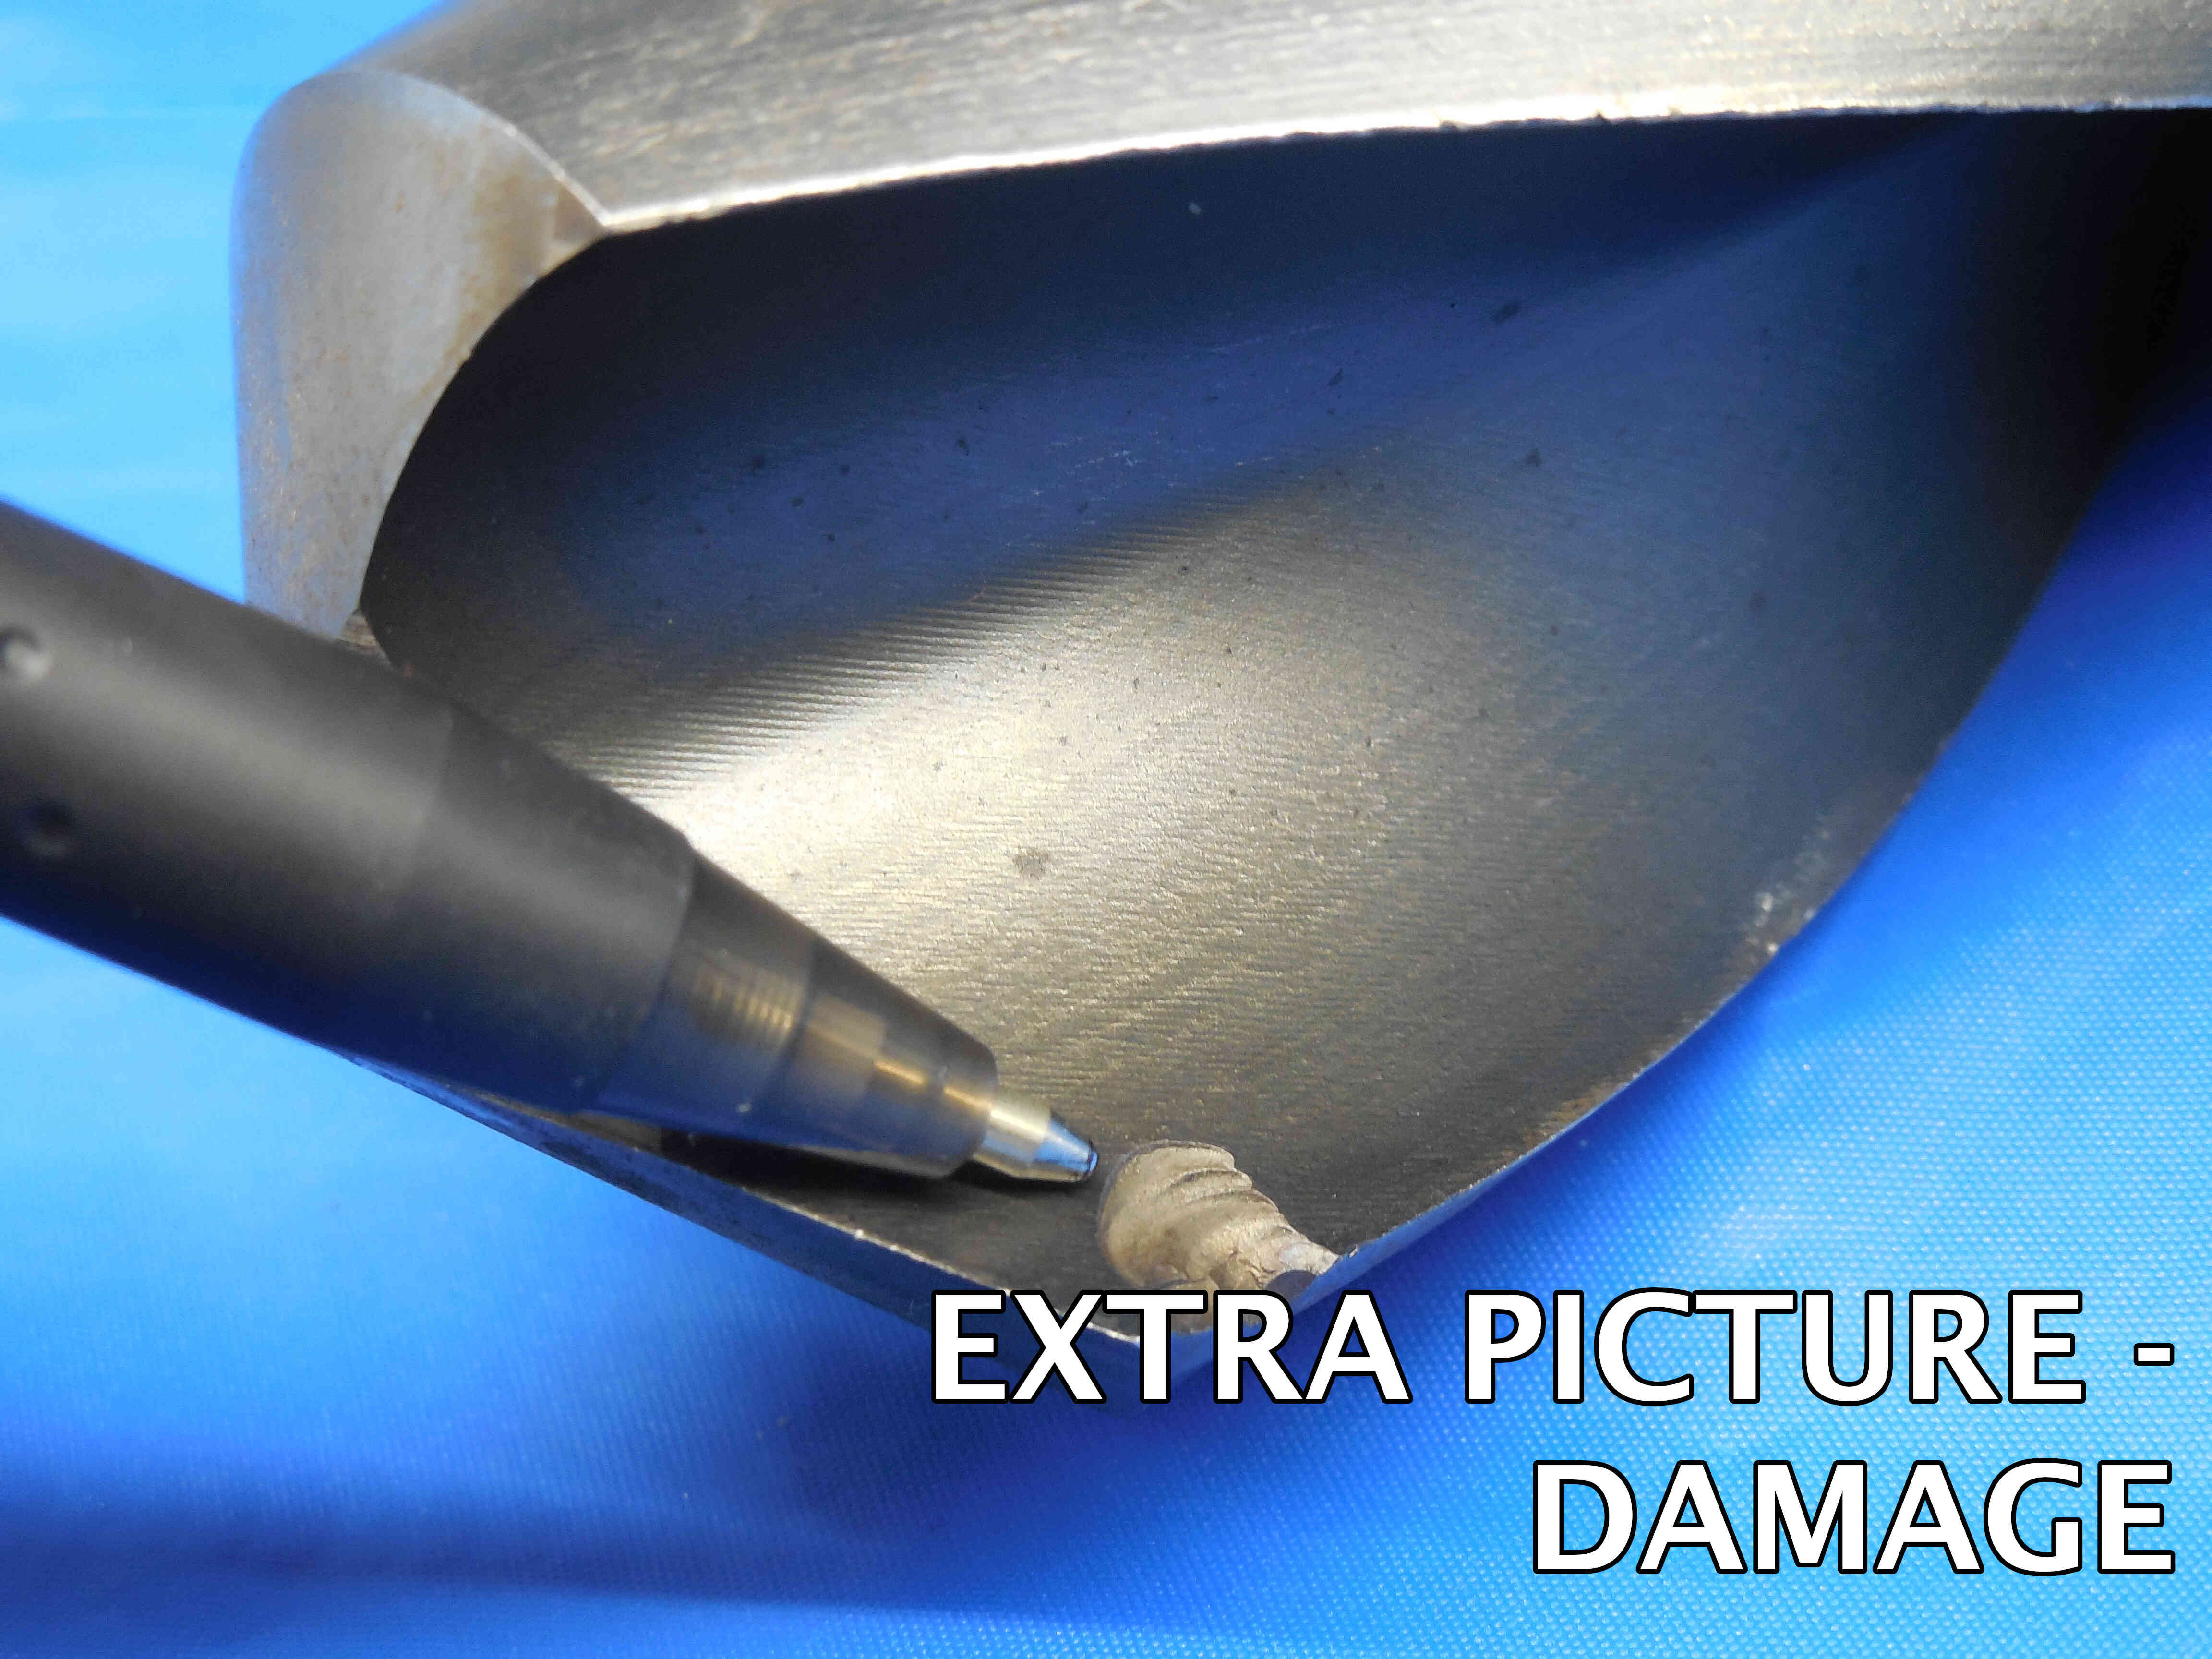
Additional Pictures: Any damage or modification to the drill tip, cutting edges, or shank must be clearly pictured. Use a pen to point to the damaged / modified area. Refer to the second set of pictures below for an example. If there are any flat sections on the shank (whether manufactured or modified) which are not clearly visible in the previous pictures, they should be shown in an additional picture as well. If you believe additional pictures are needed for any other reason, contact your trainer to verify if it is necessary.
Refer to the examples below:
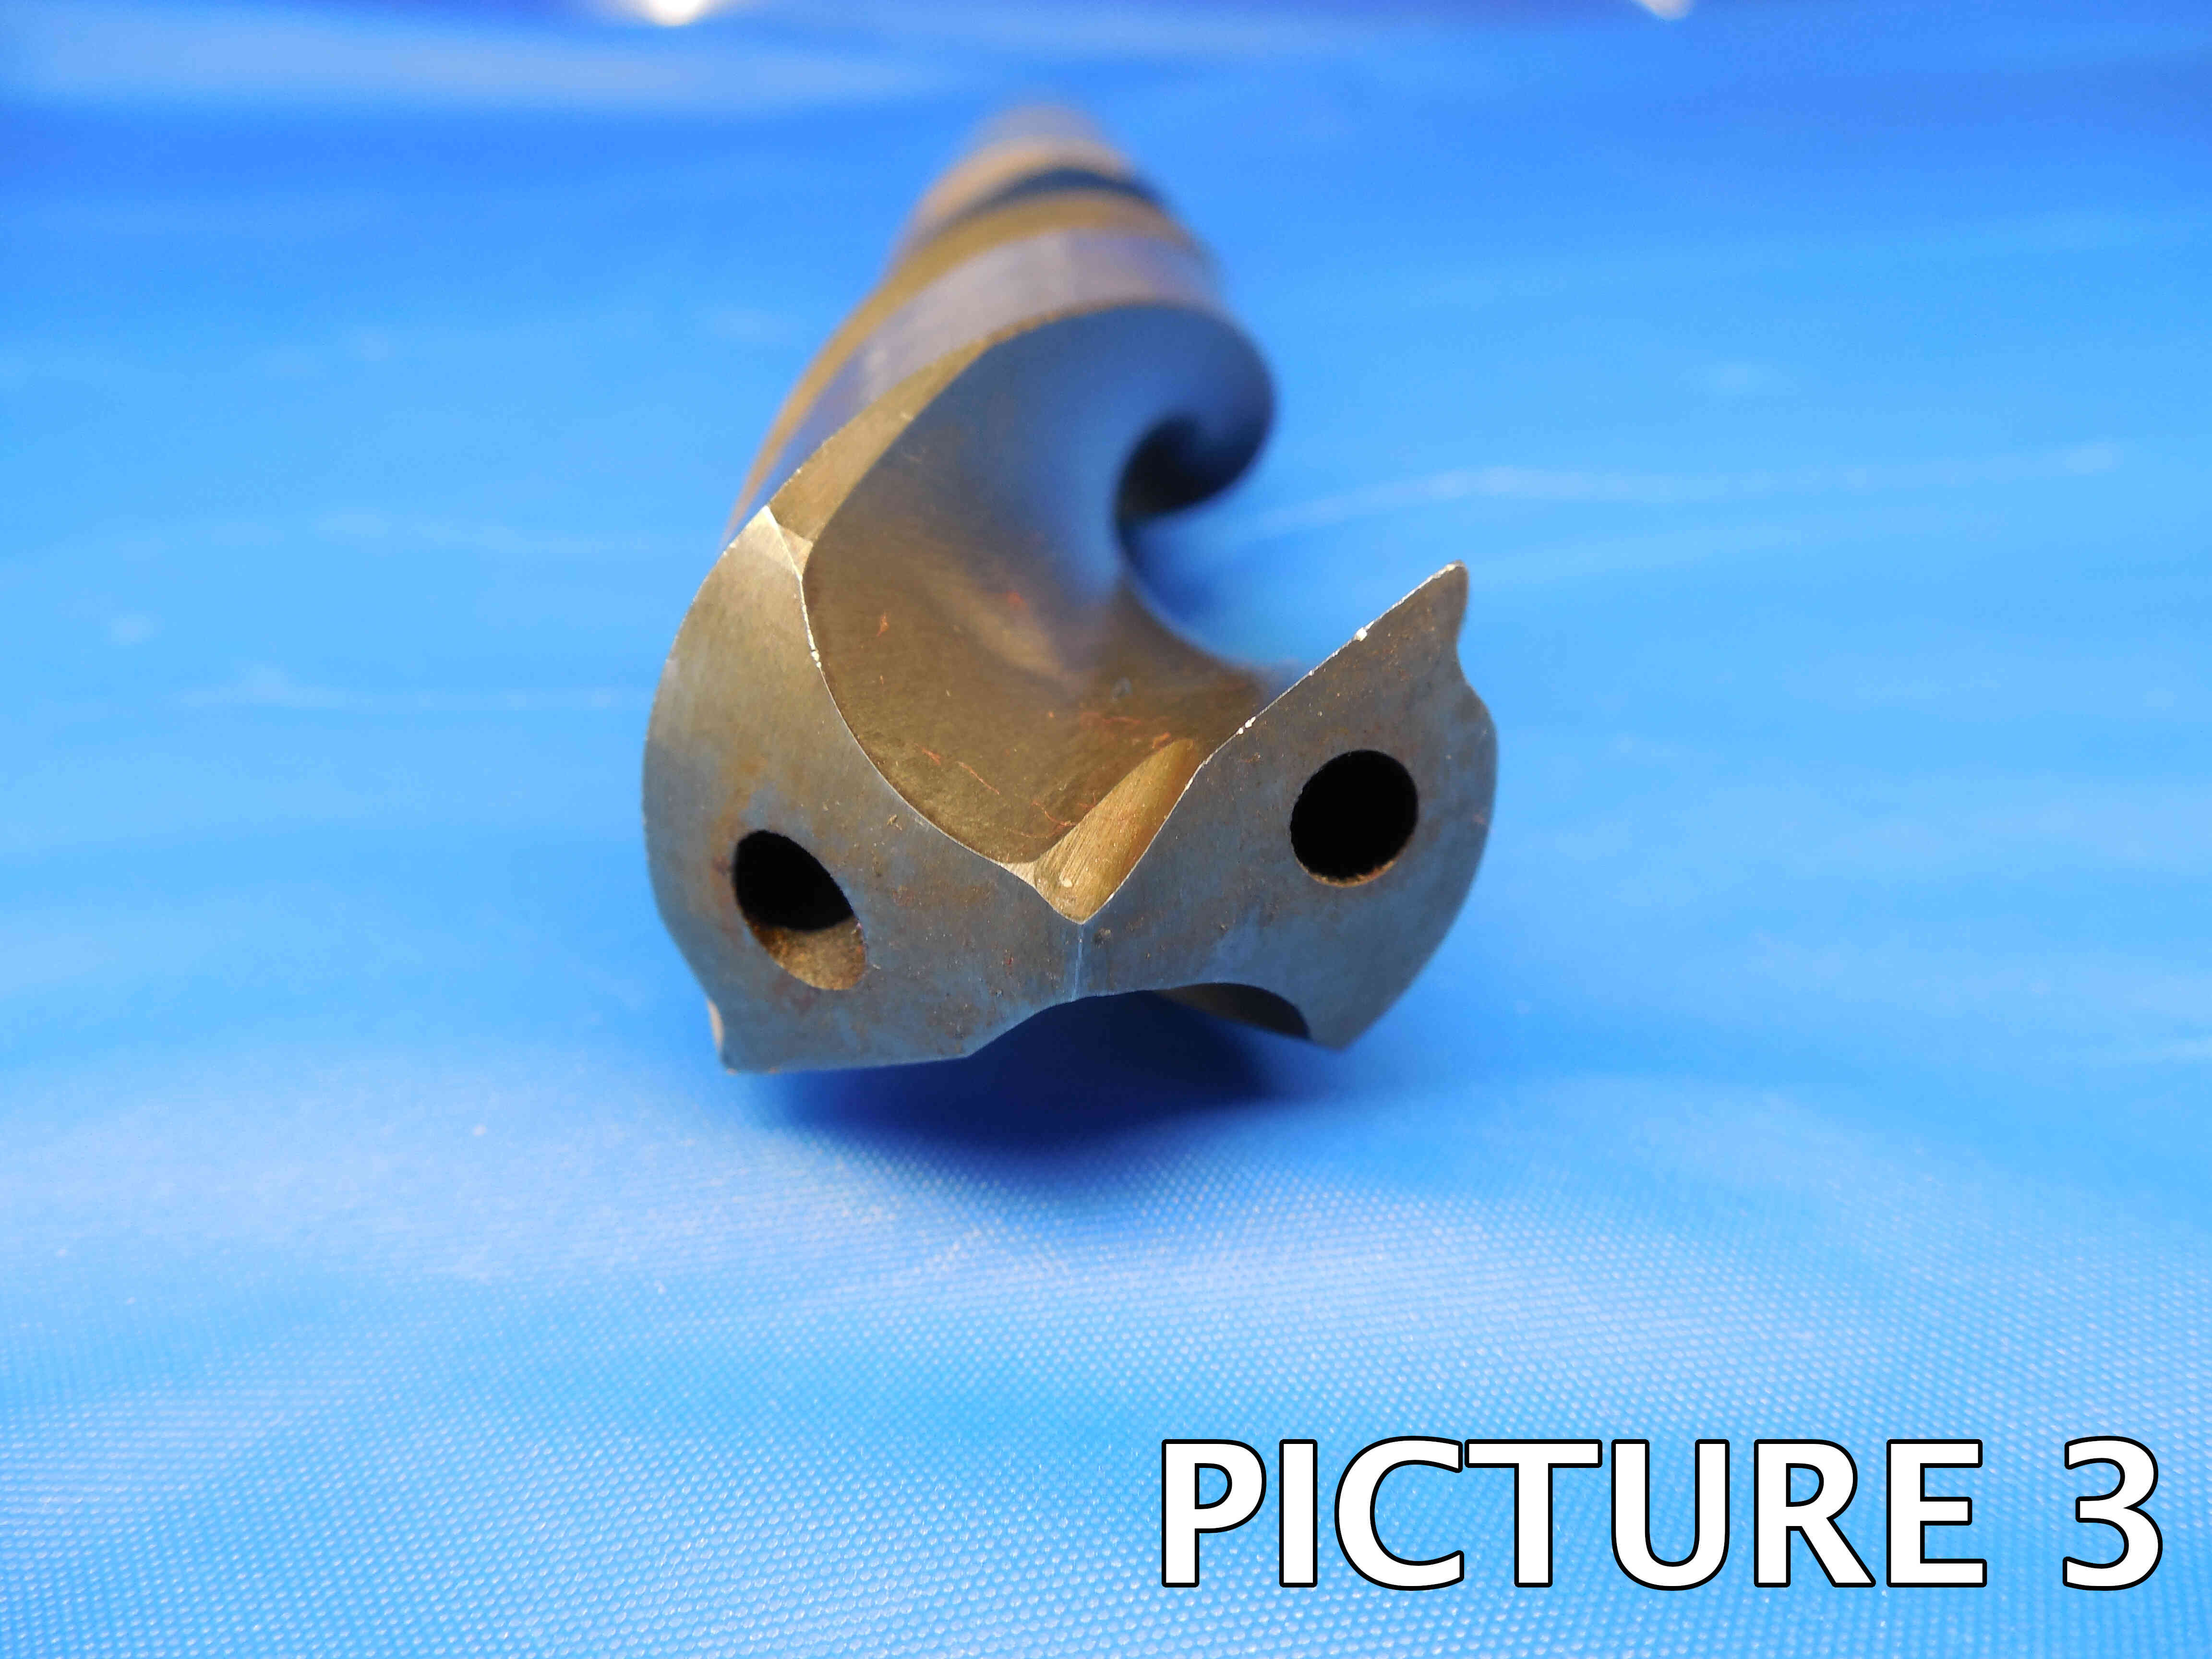
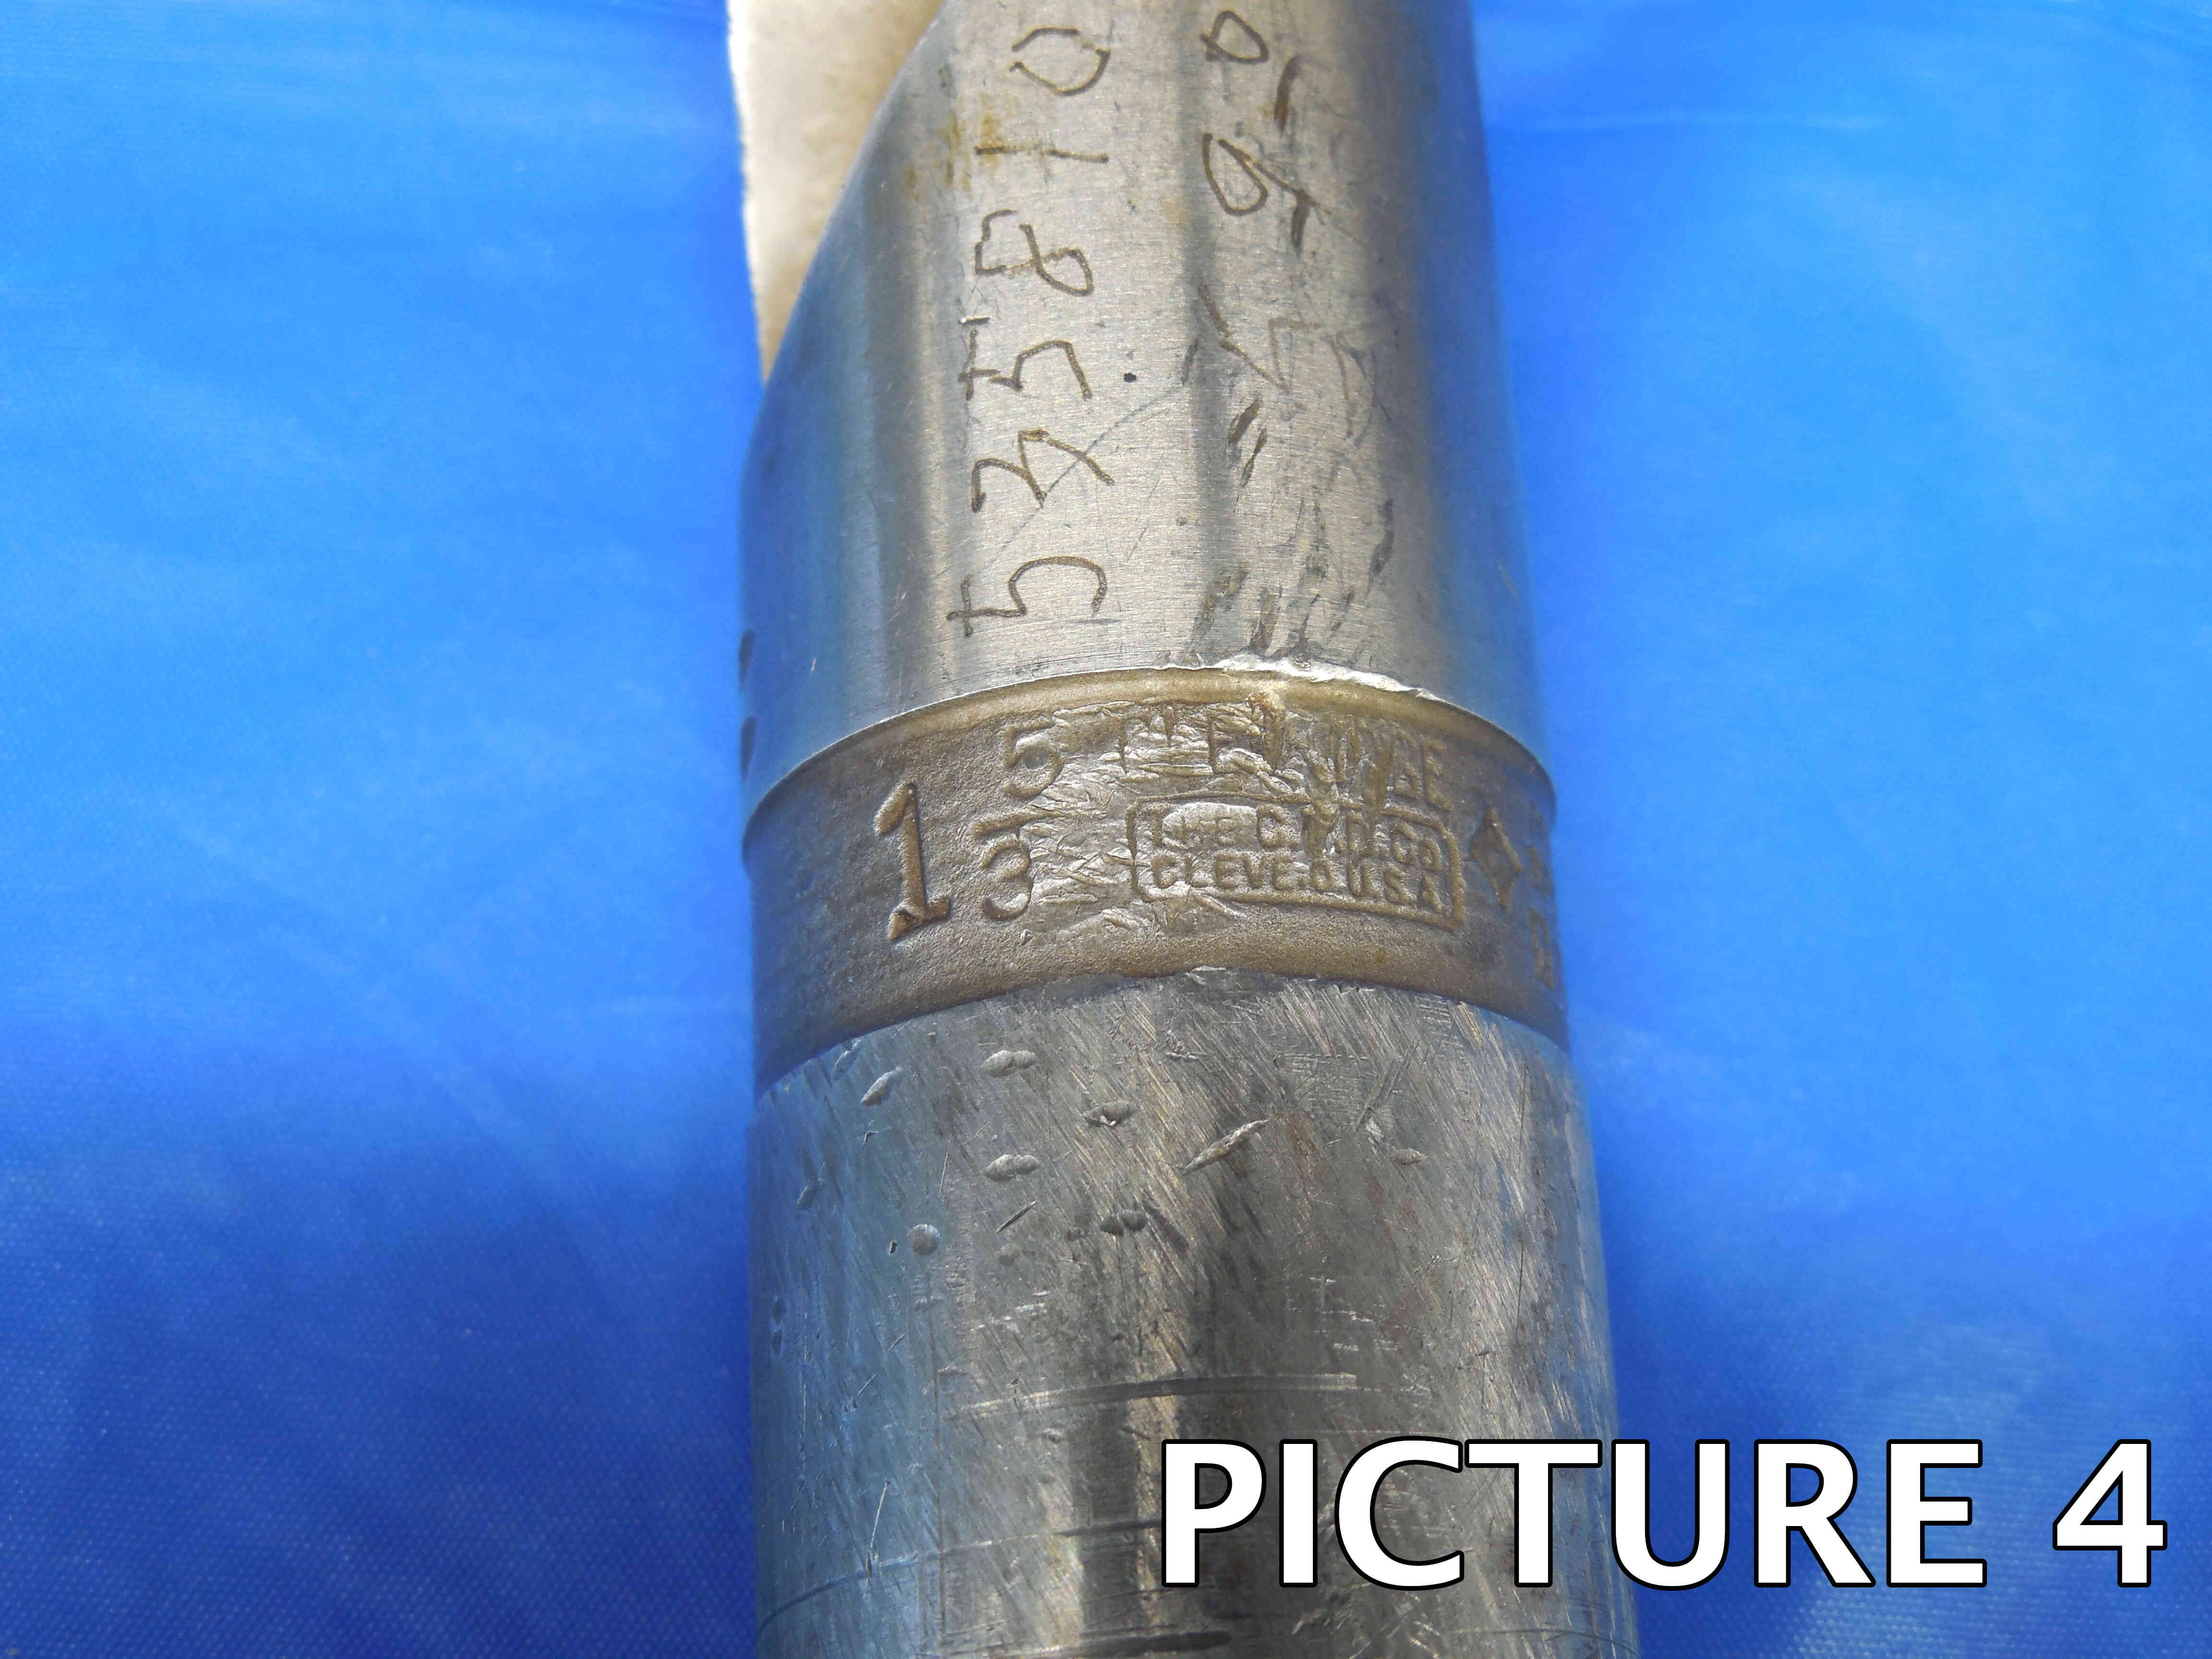
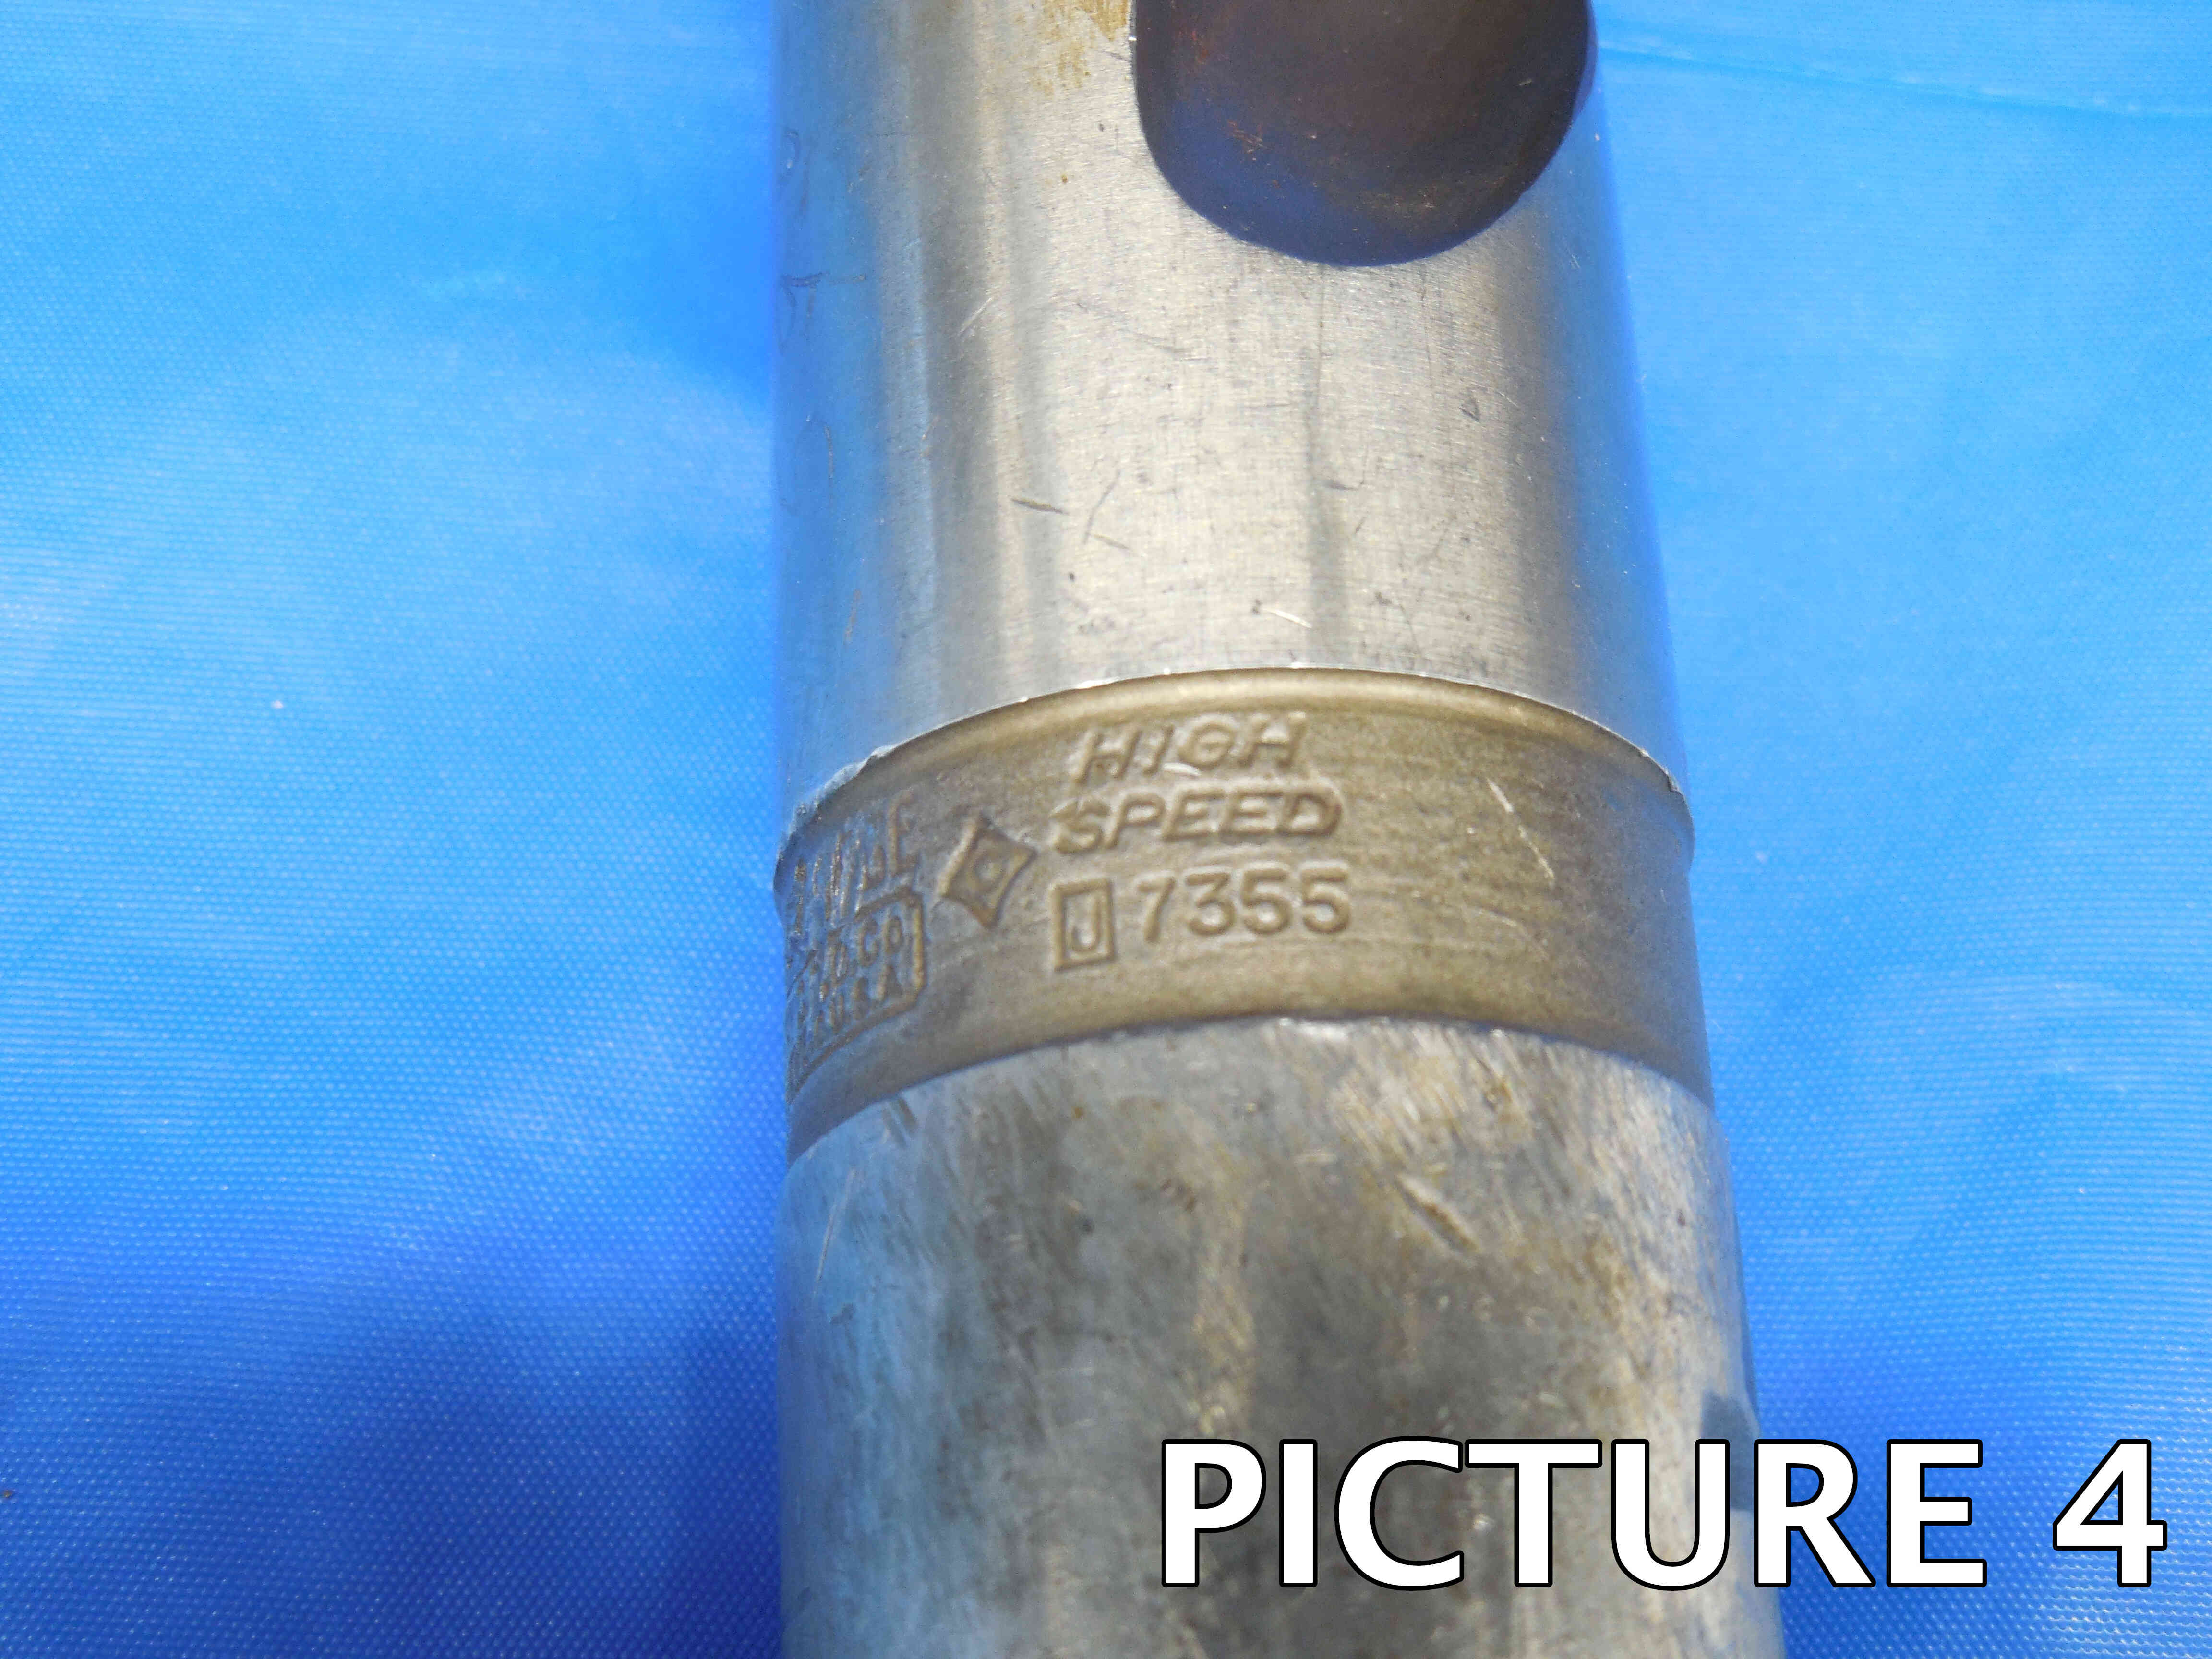
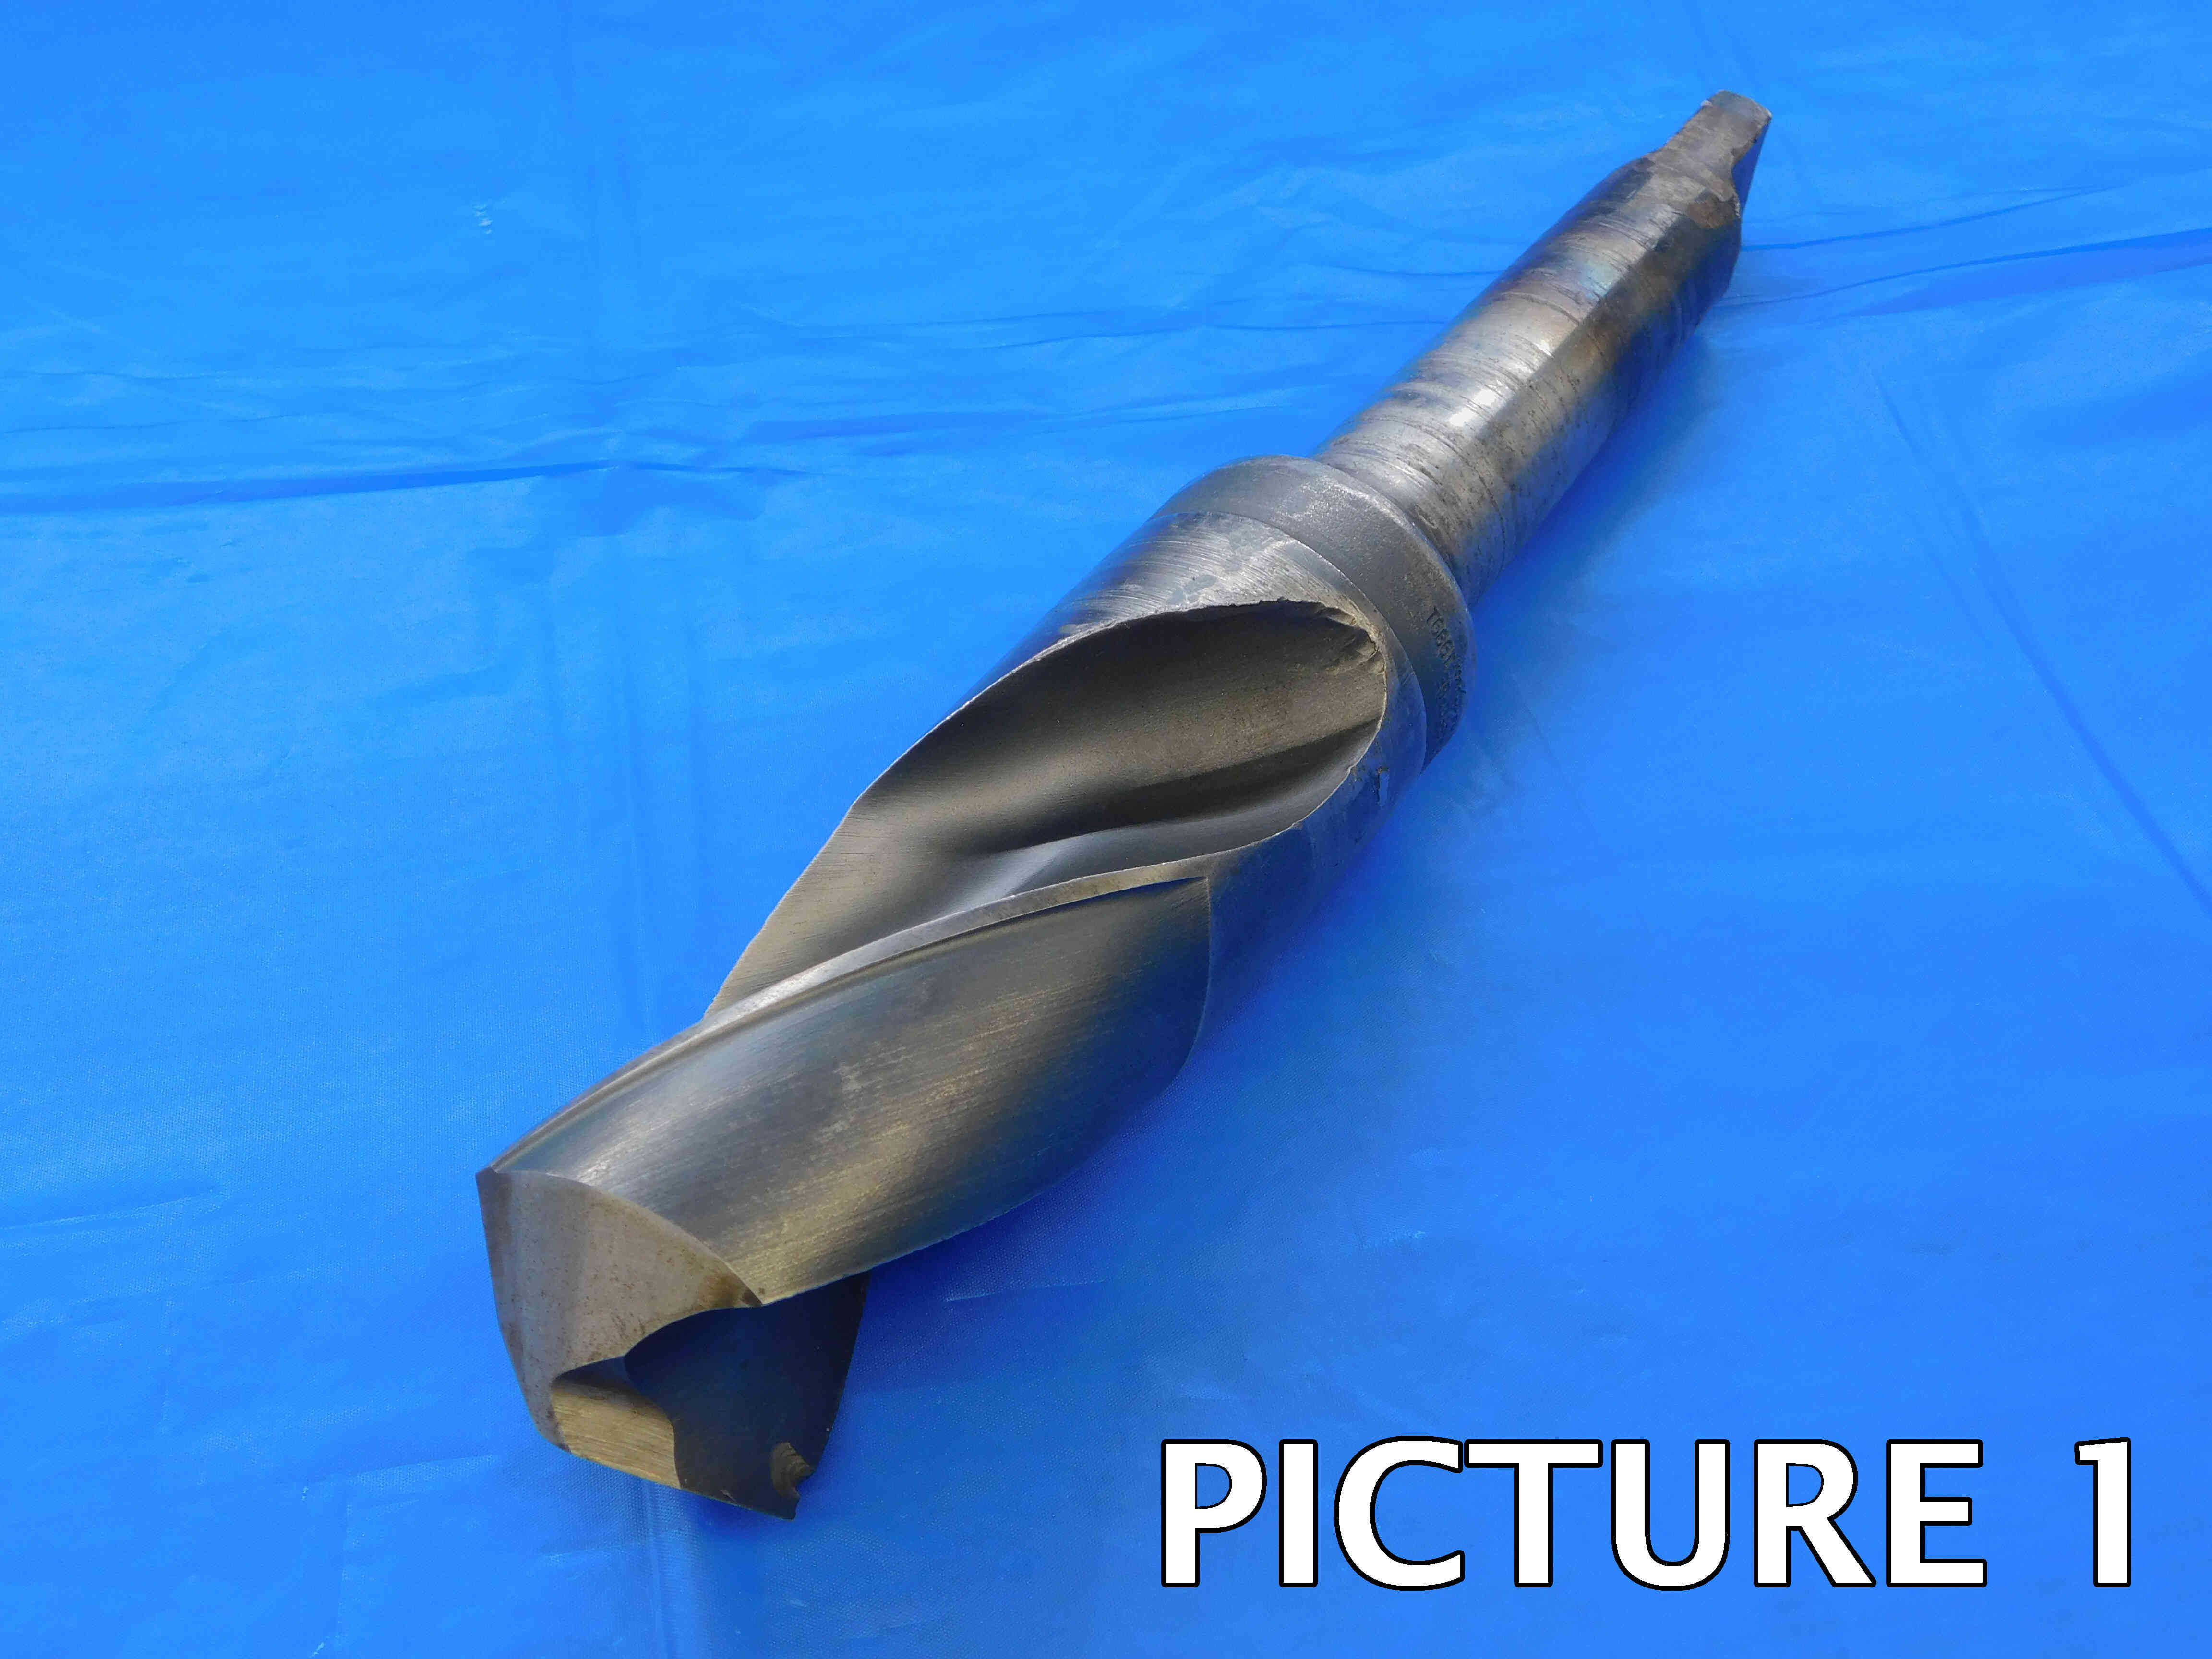
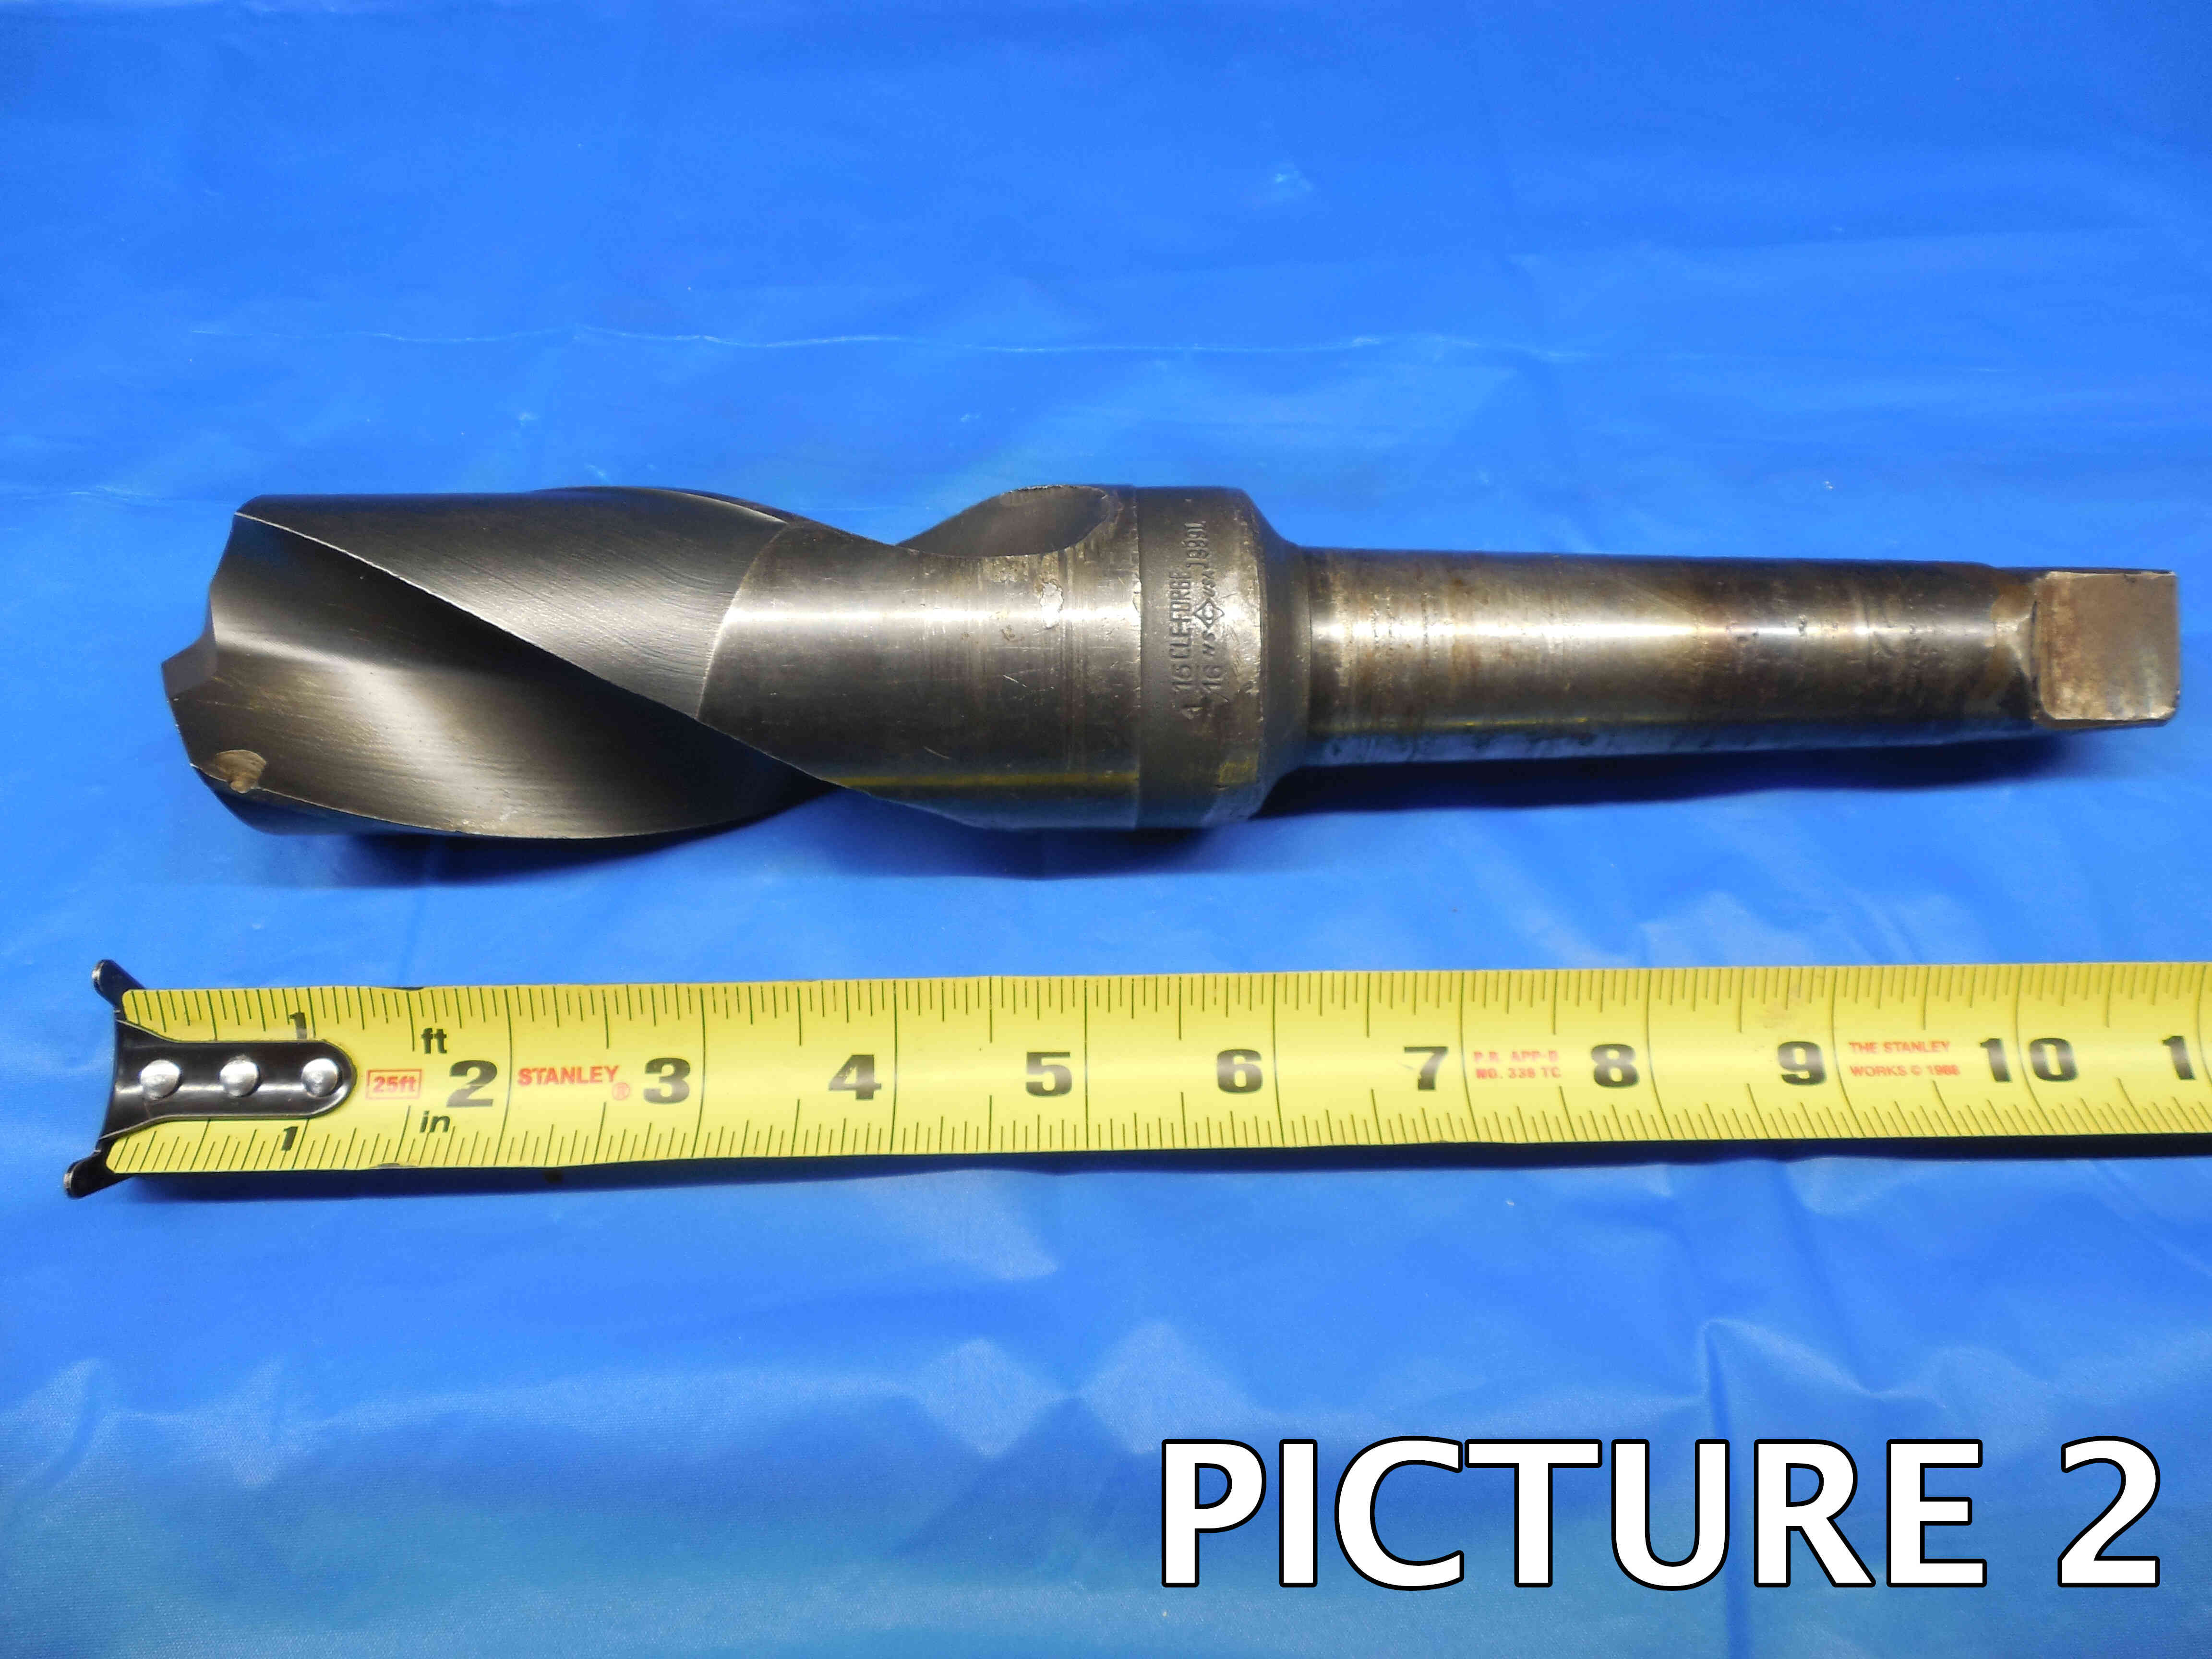
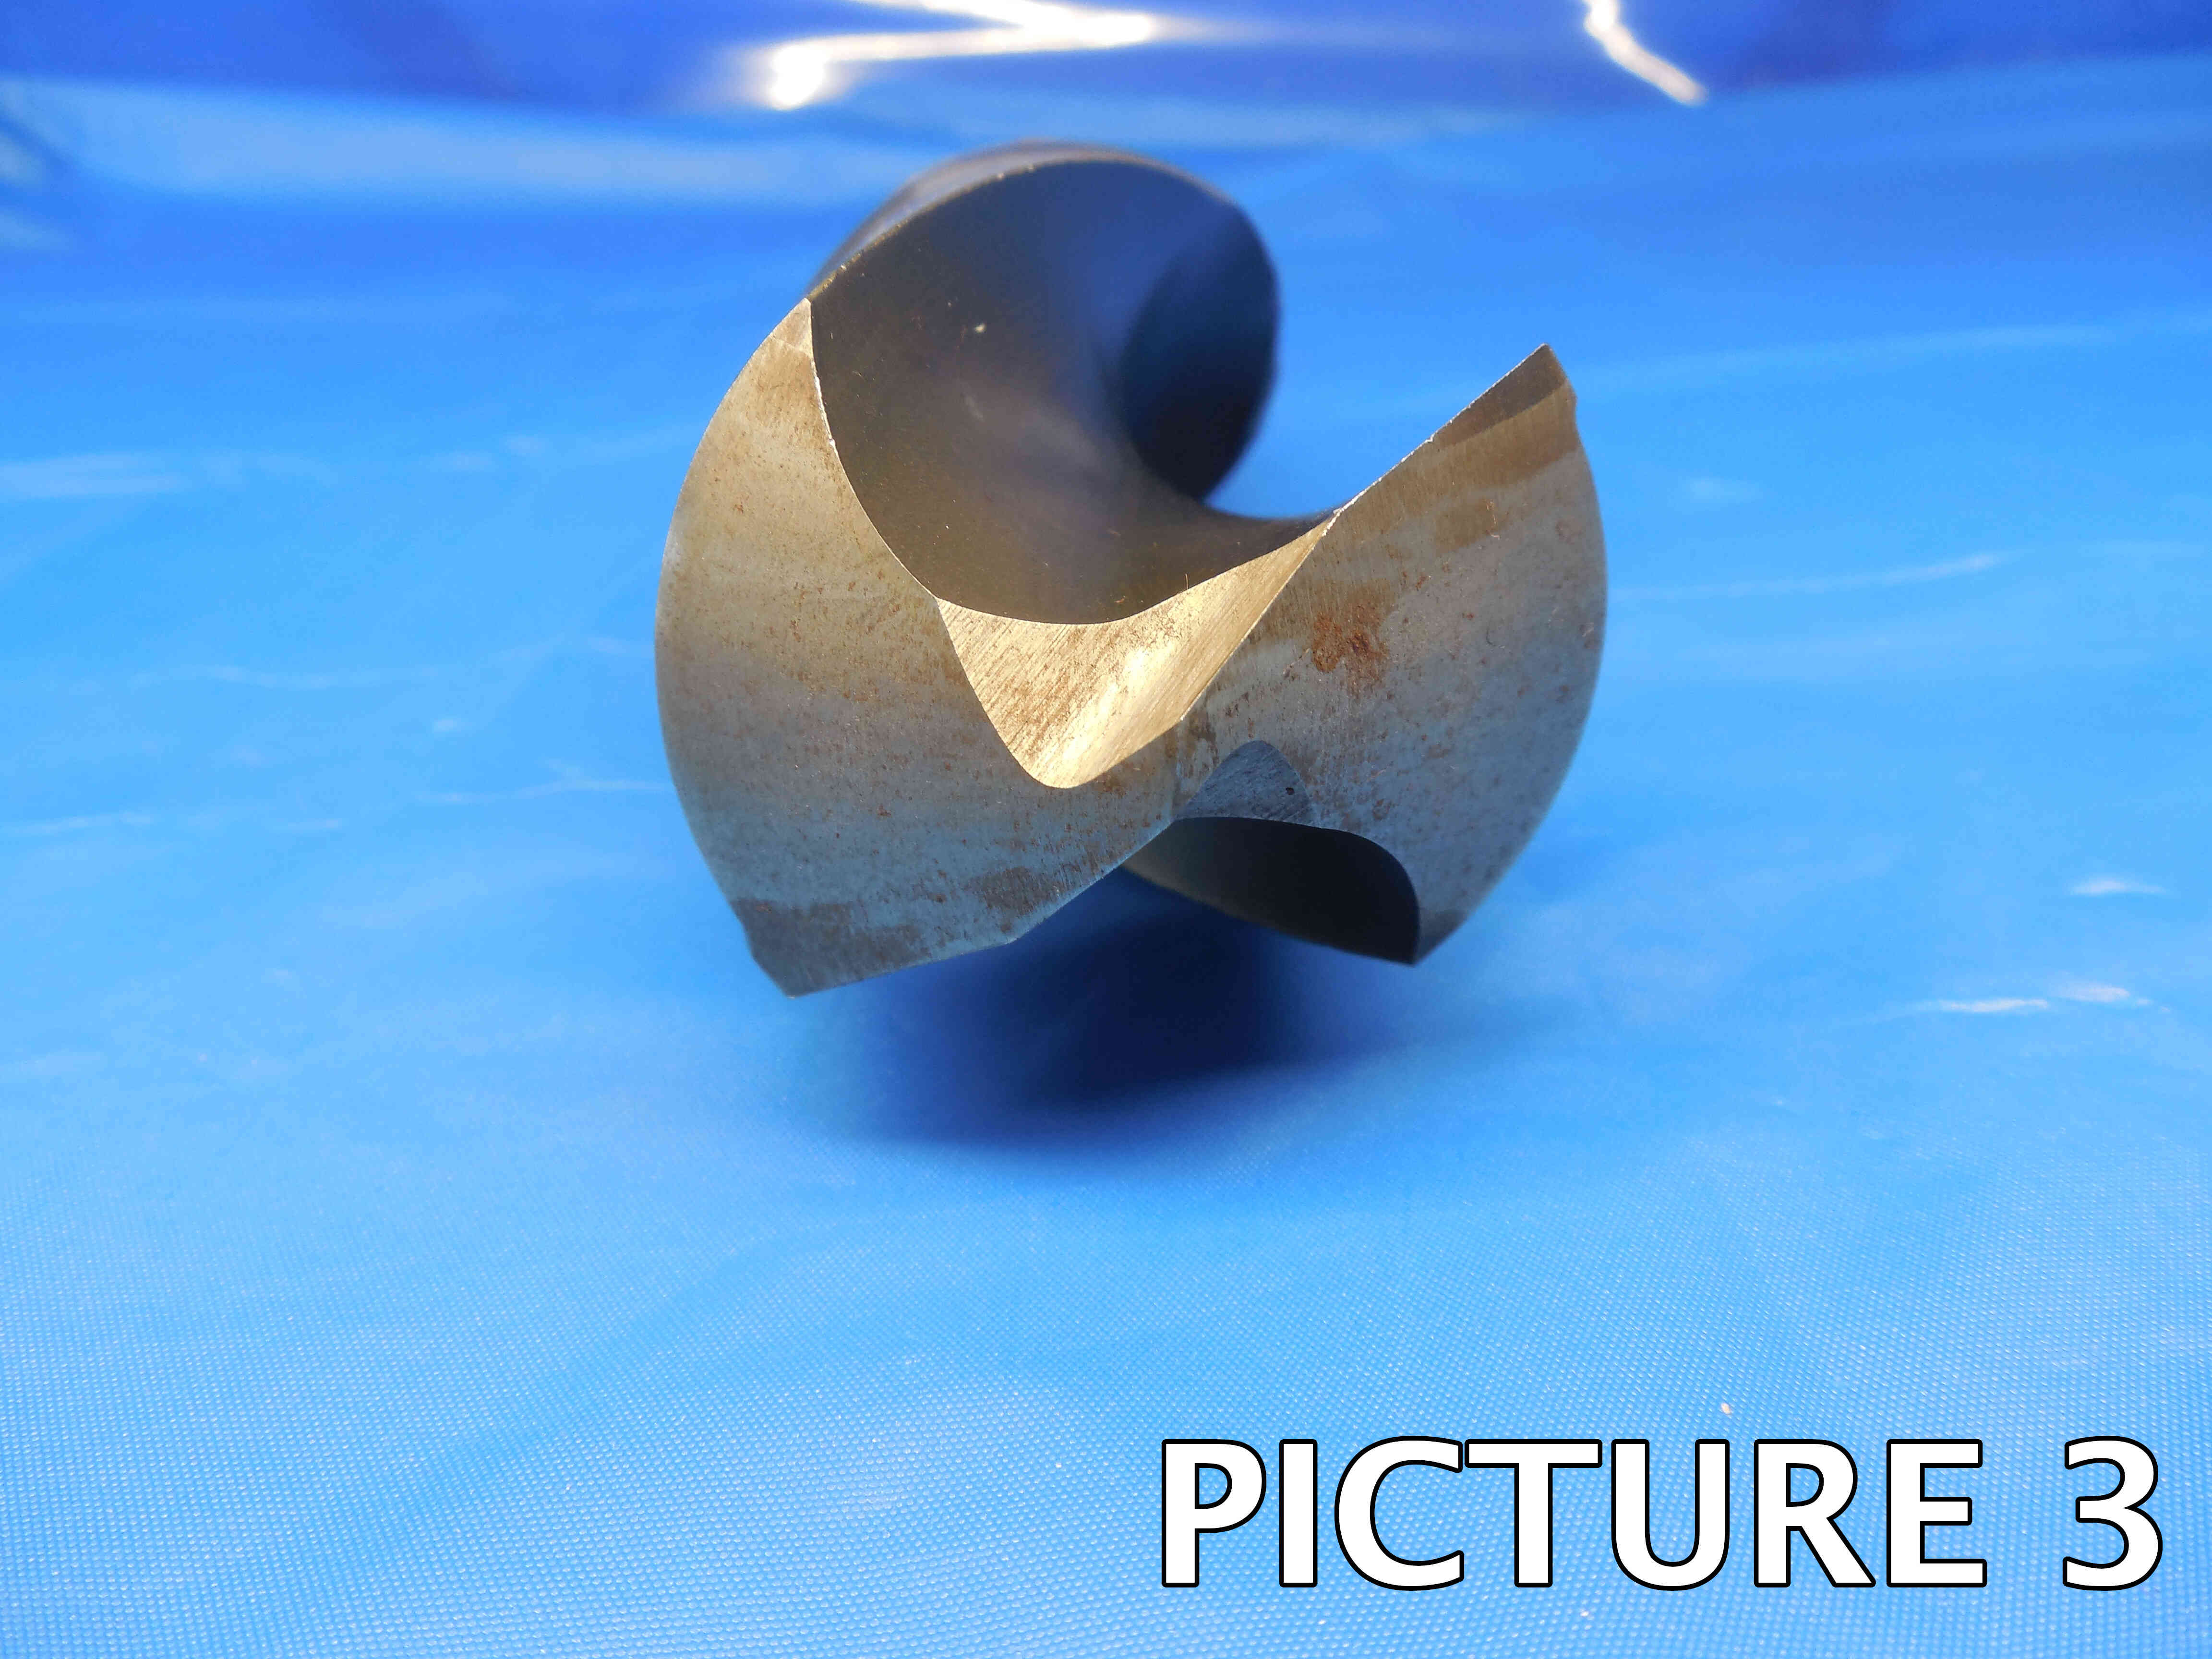
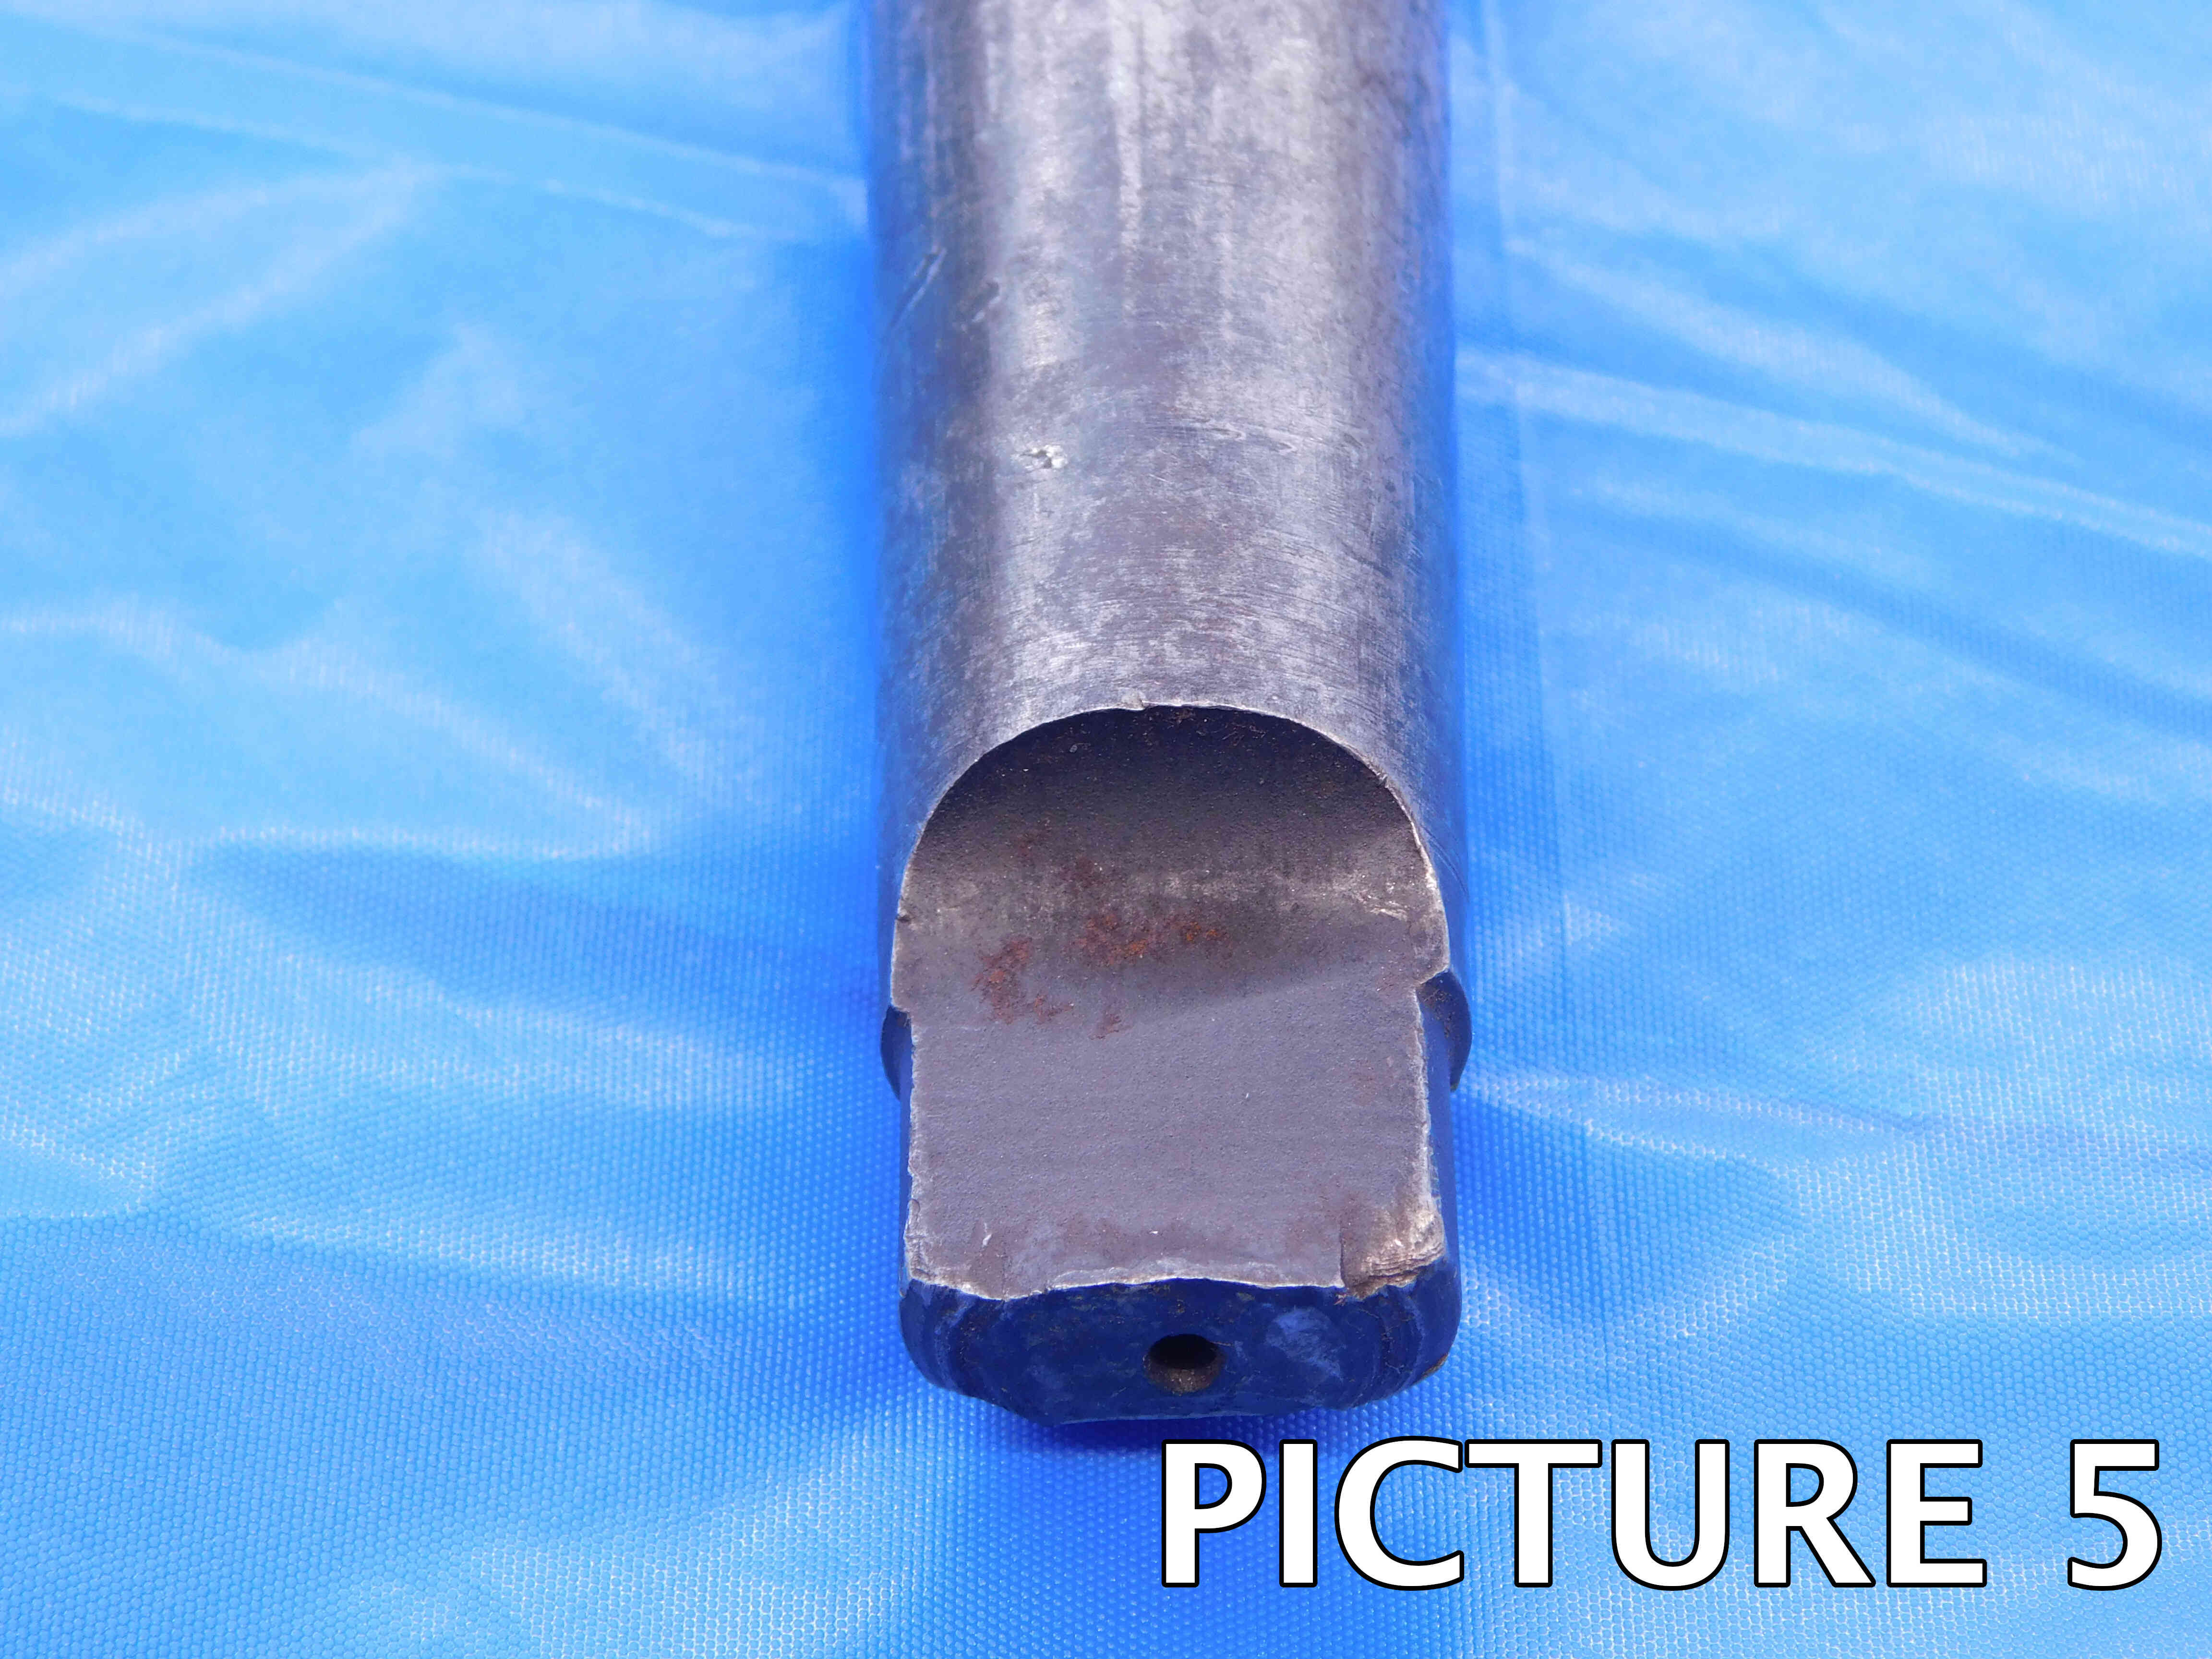
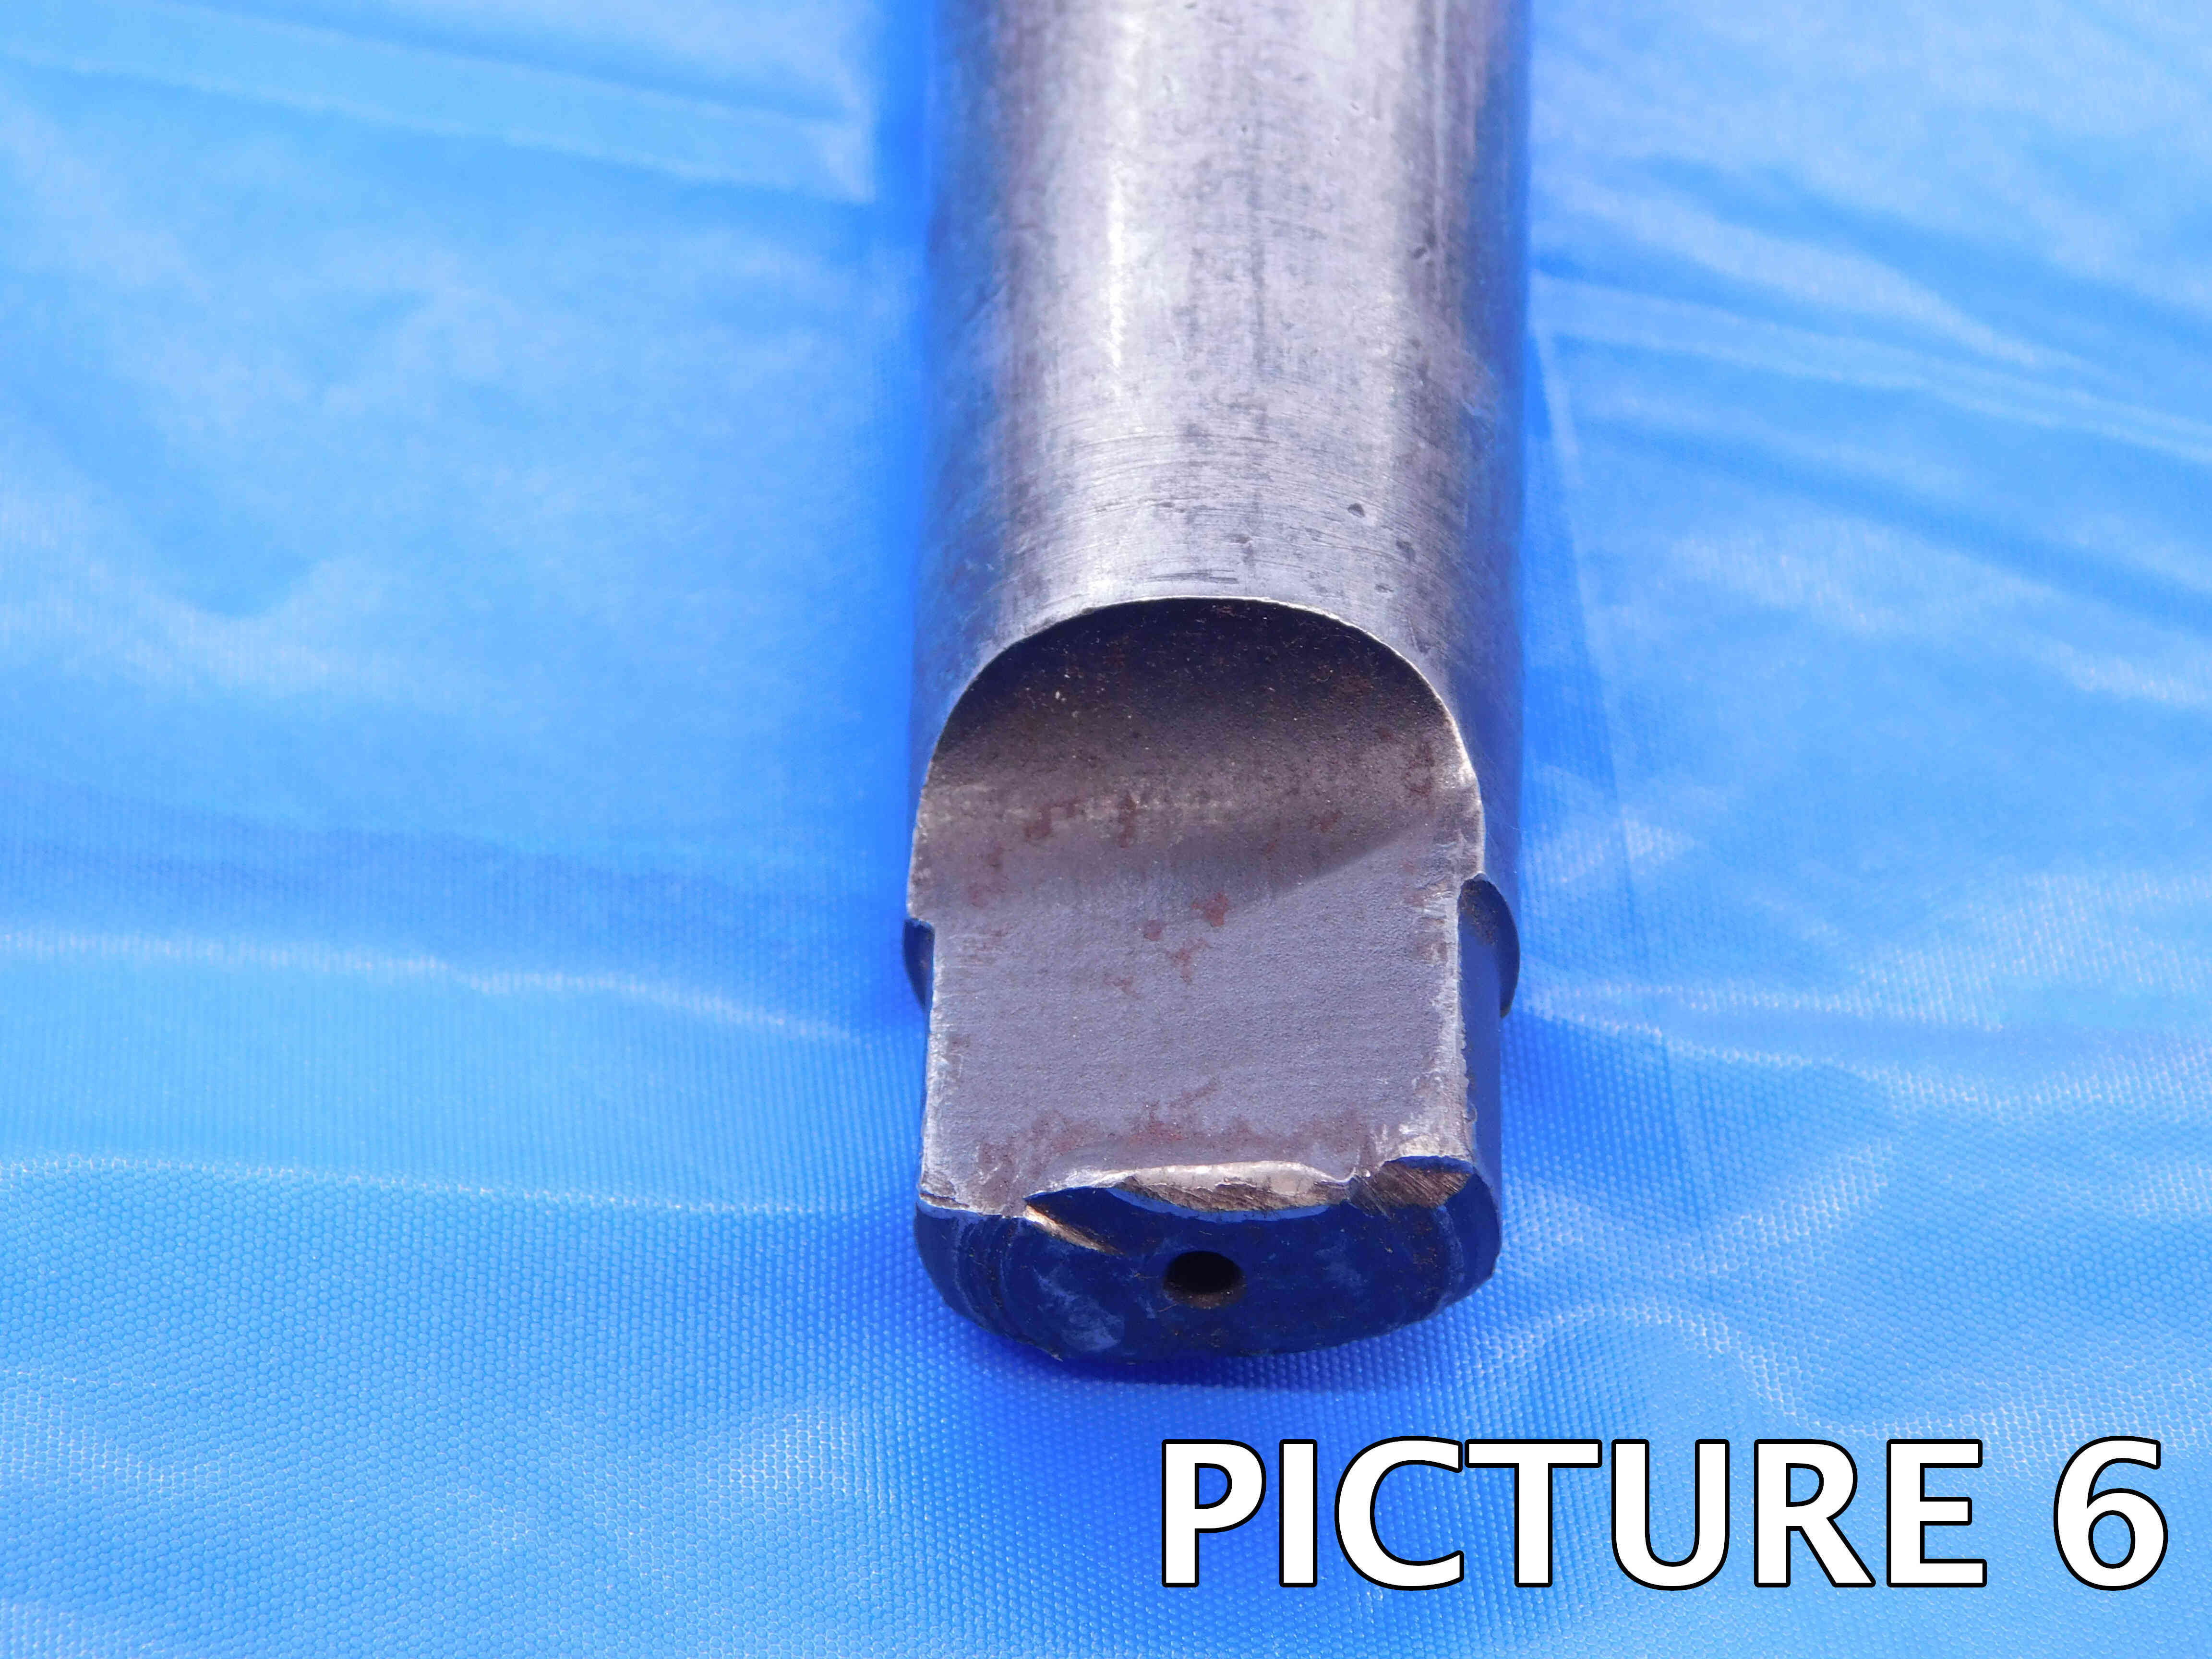
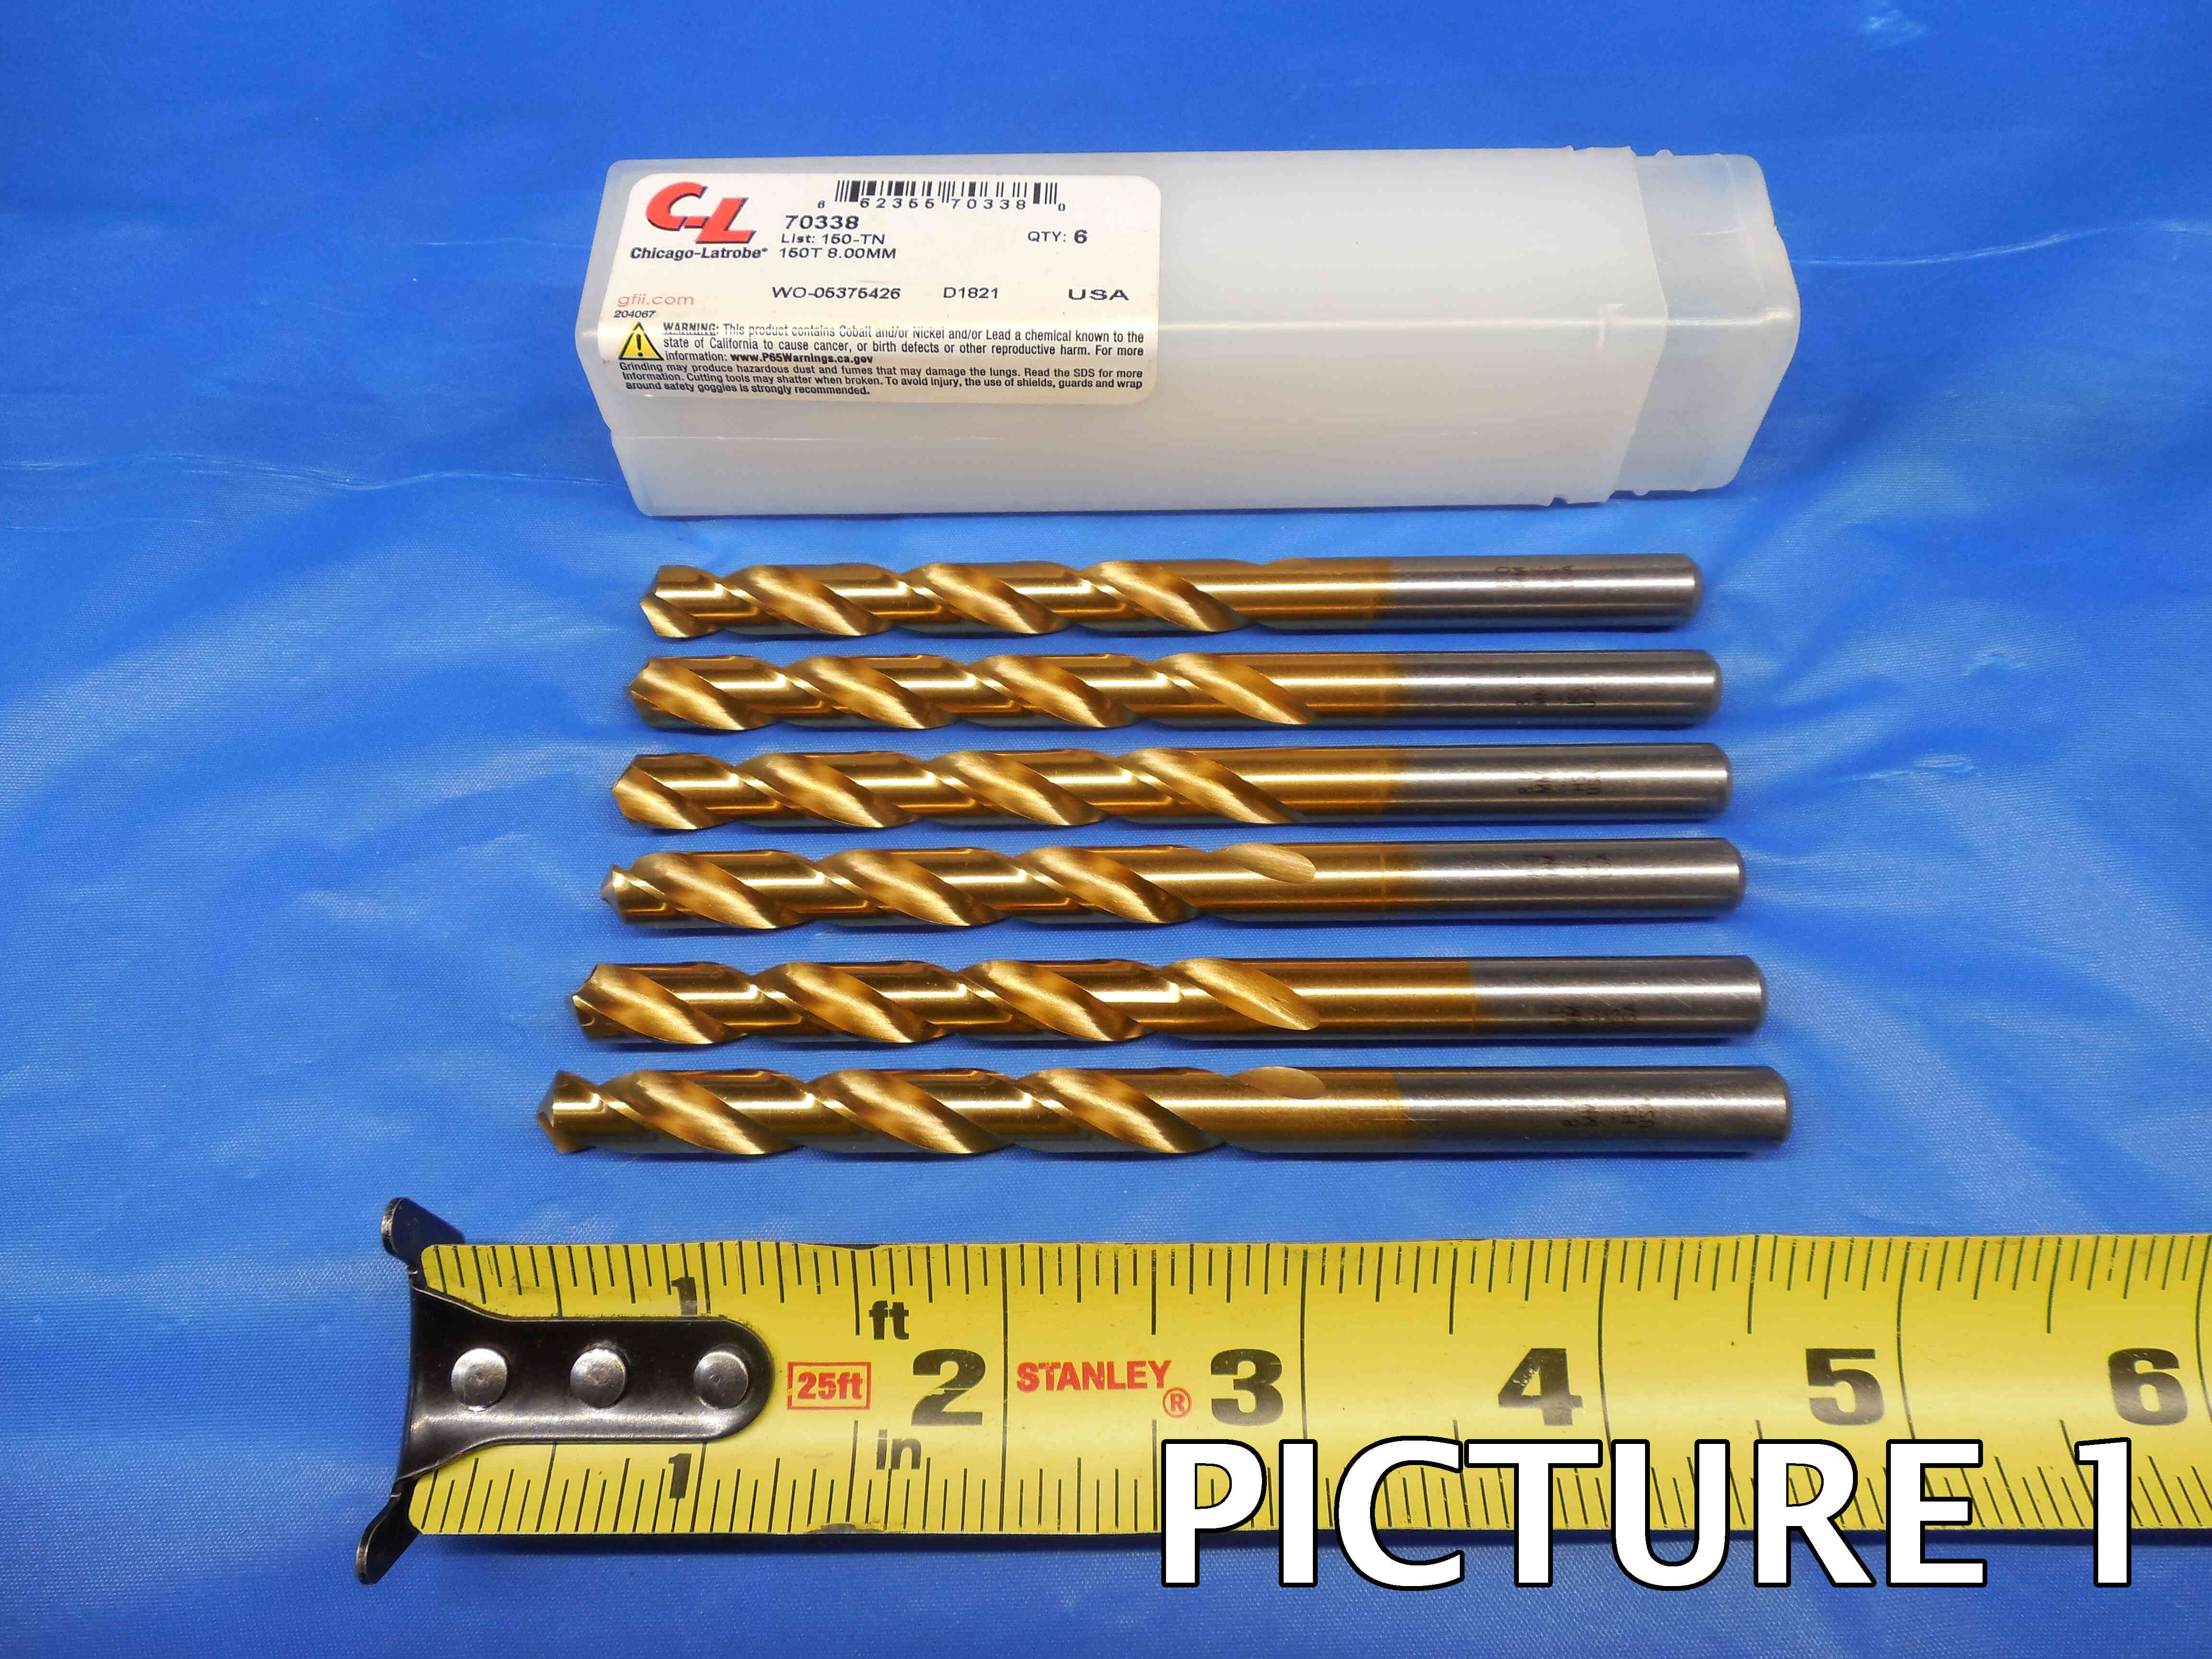
If you are picturing multiple drill bits:
1st Picture: A side view of the drill bits, with a tape measure at the bottom of the frame to provide size reference. If the drill bits are different sizes, position them with the smallest at the front (closest to tape measure) and the largest in back. If there is labeling on the drill bits, it should be visible and readable (i.e., right-side up) in this picture if possible. Make sure to space out the drill bits so that the cutting edges are not touching. Any packaging should be included in this shot as well.
NOTE: If you have packaging with labeling that does not match the item, black it out with a marker before taking pictures. Used items can often end up in mismatched packages and we do not want to cause confusion by having inaccurate brands or part numbers showing in the listing.
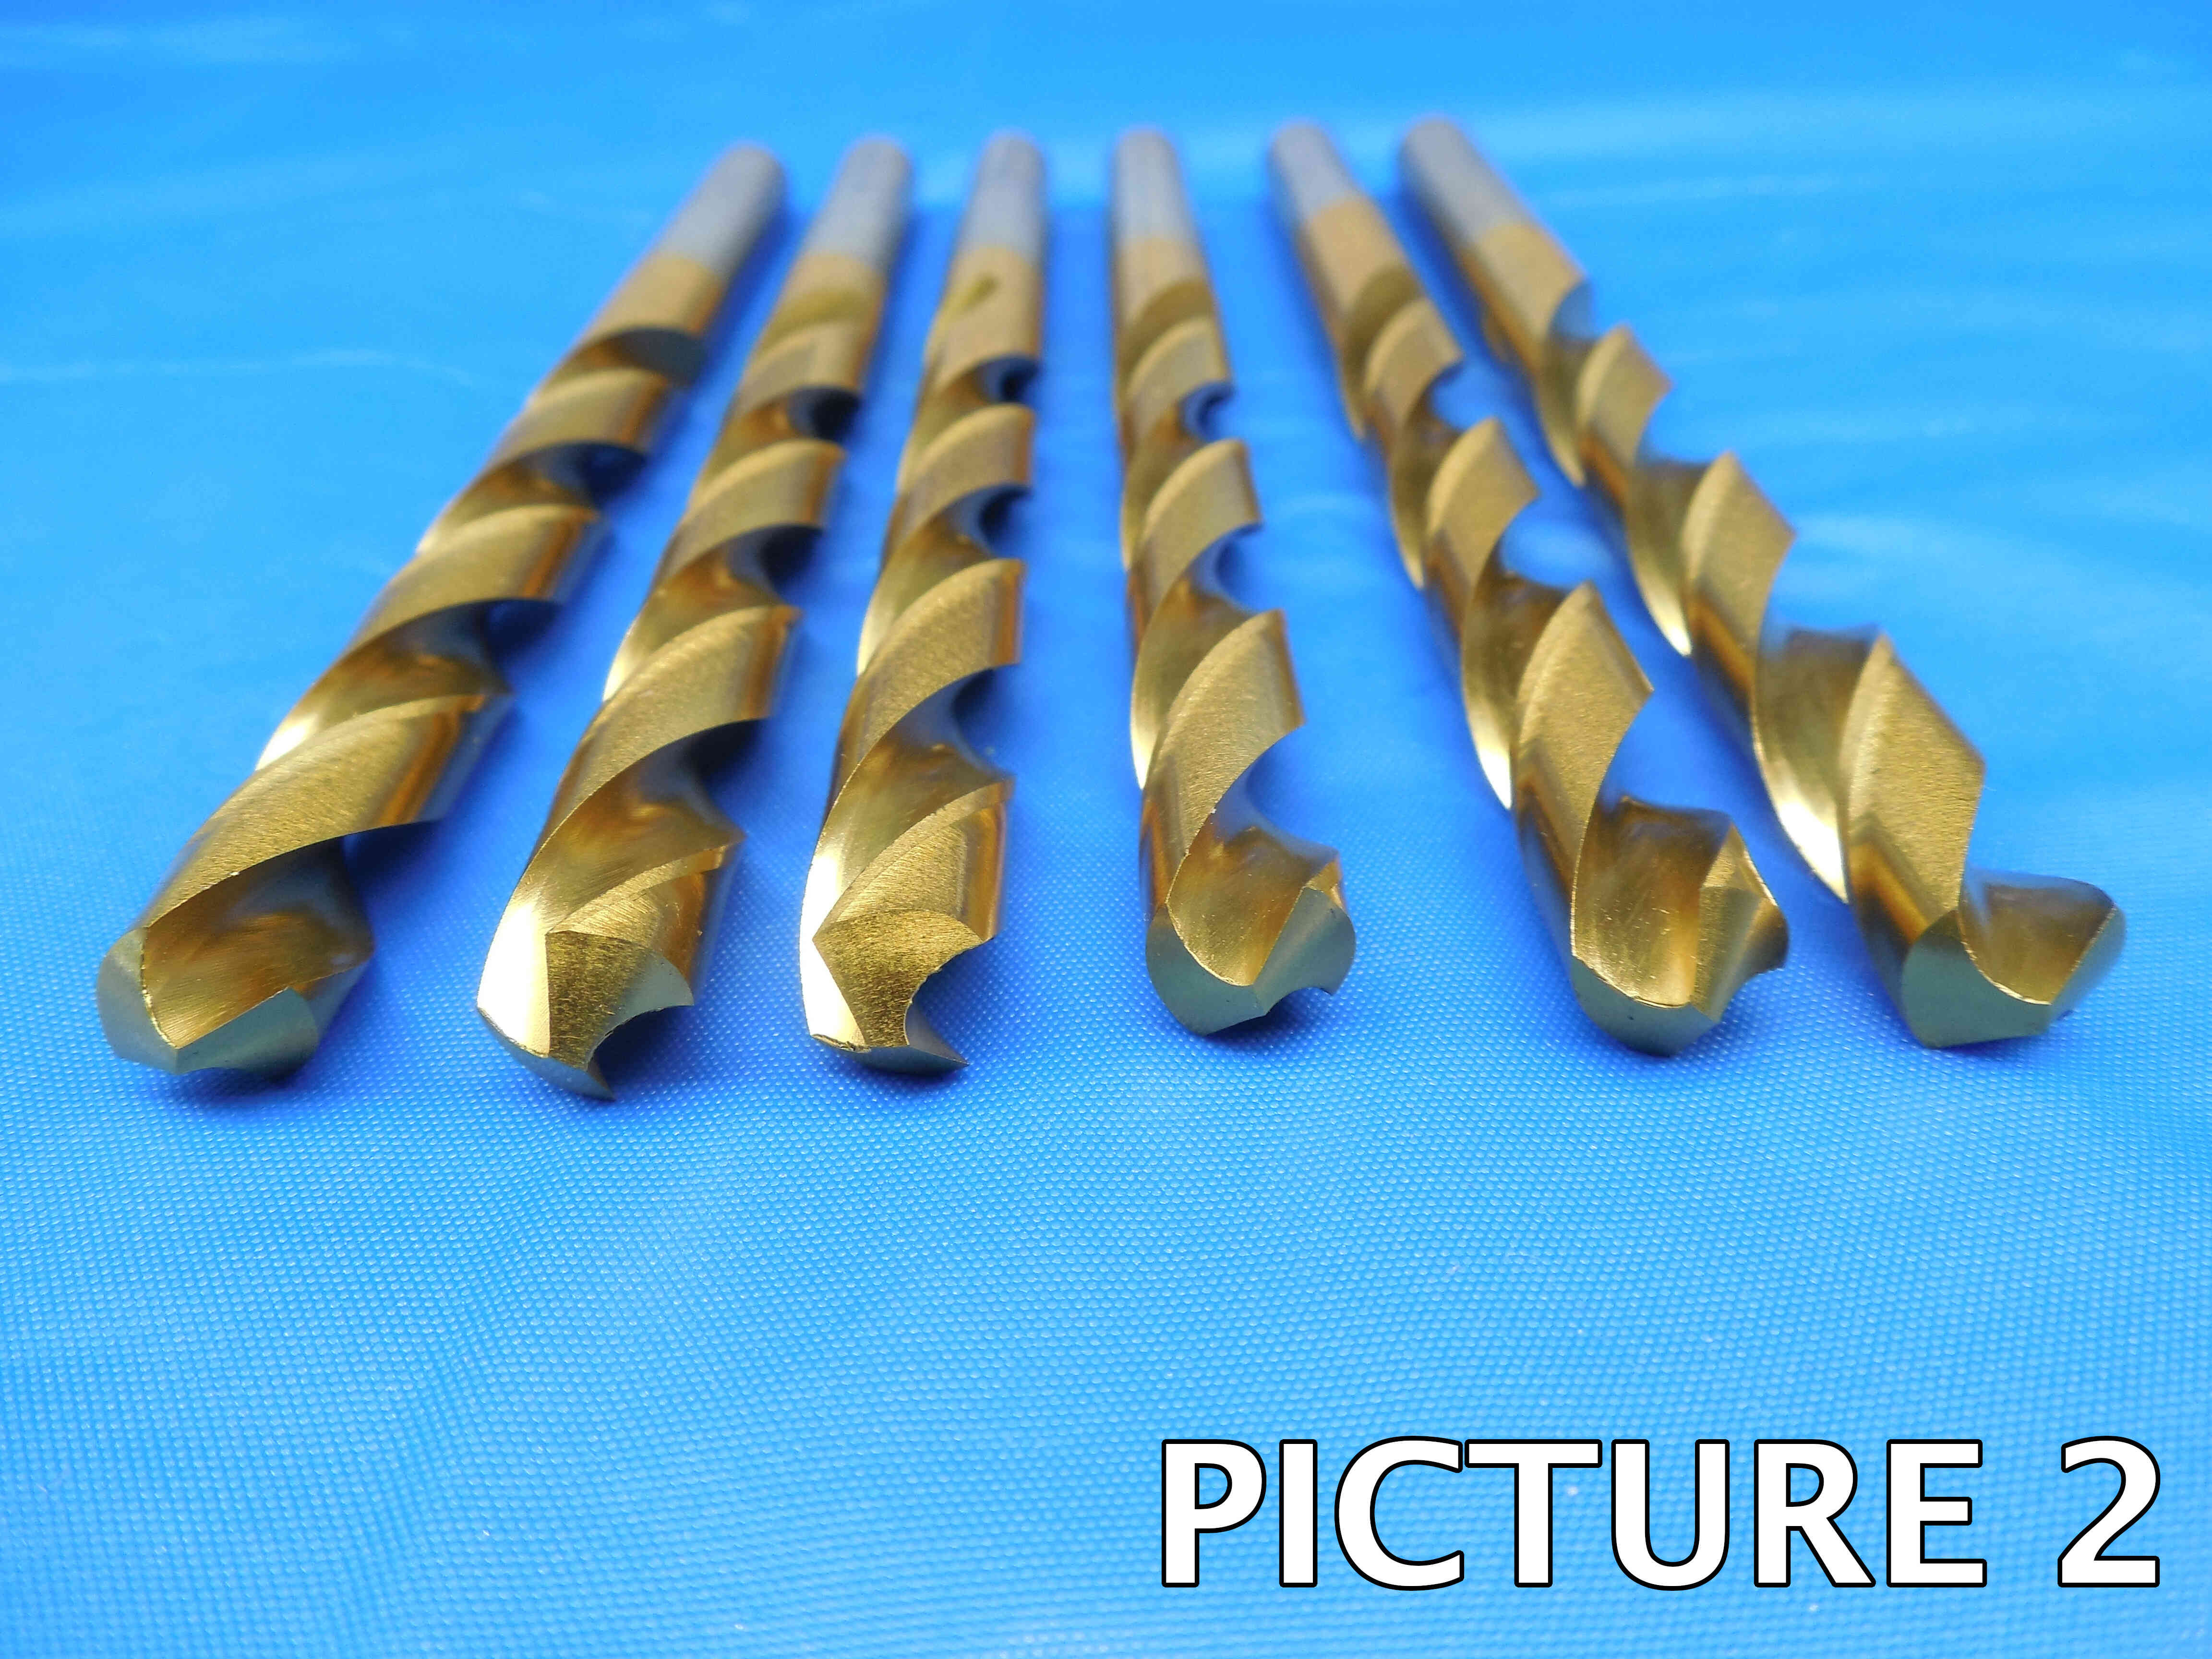
2nd Picture: A close-up, head-on shot of the working ends. If you have a particularly large number of drill bits, this may require multiple pictures.
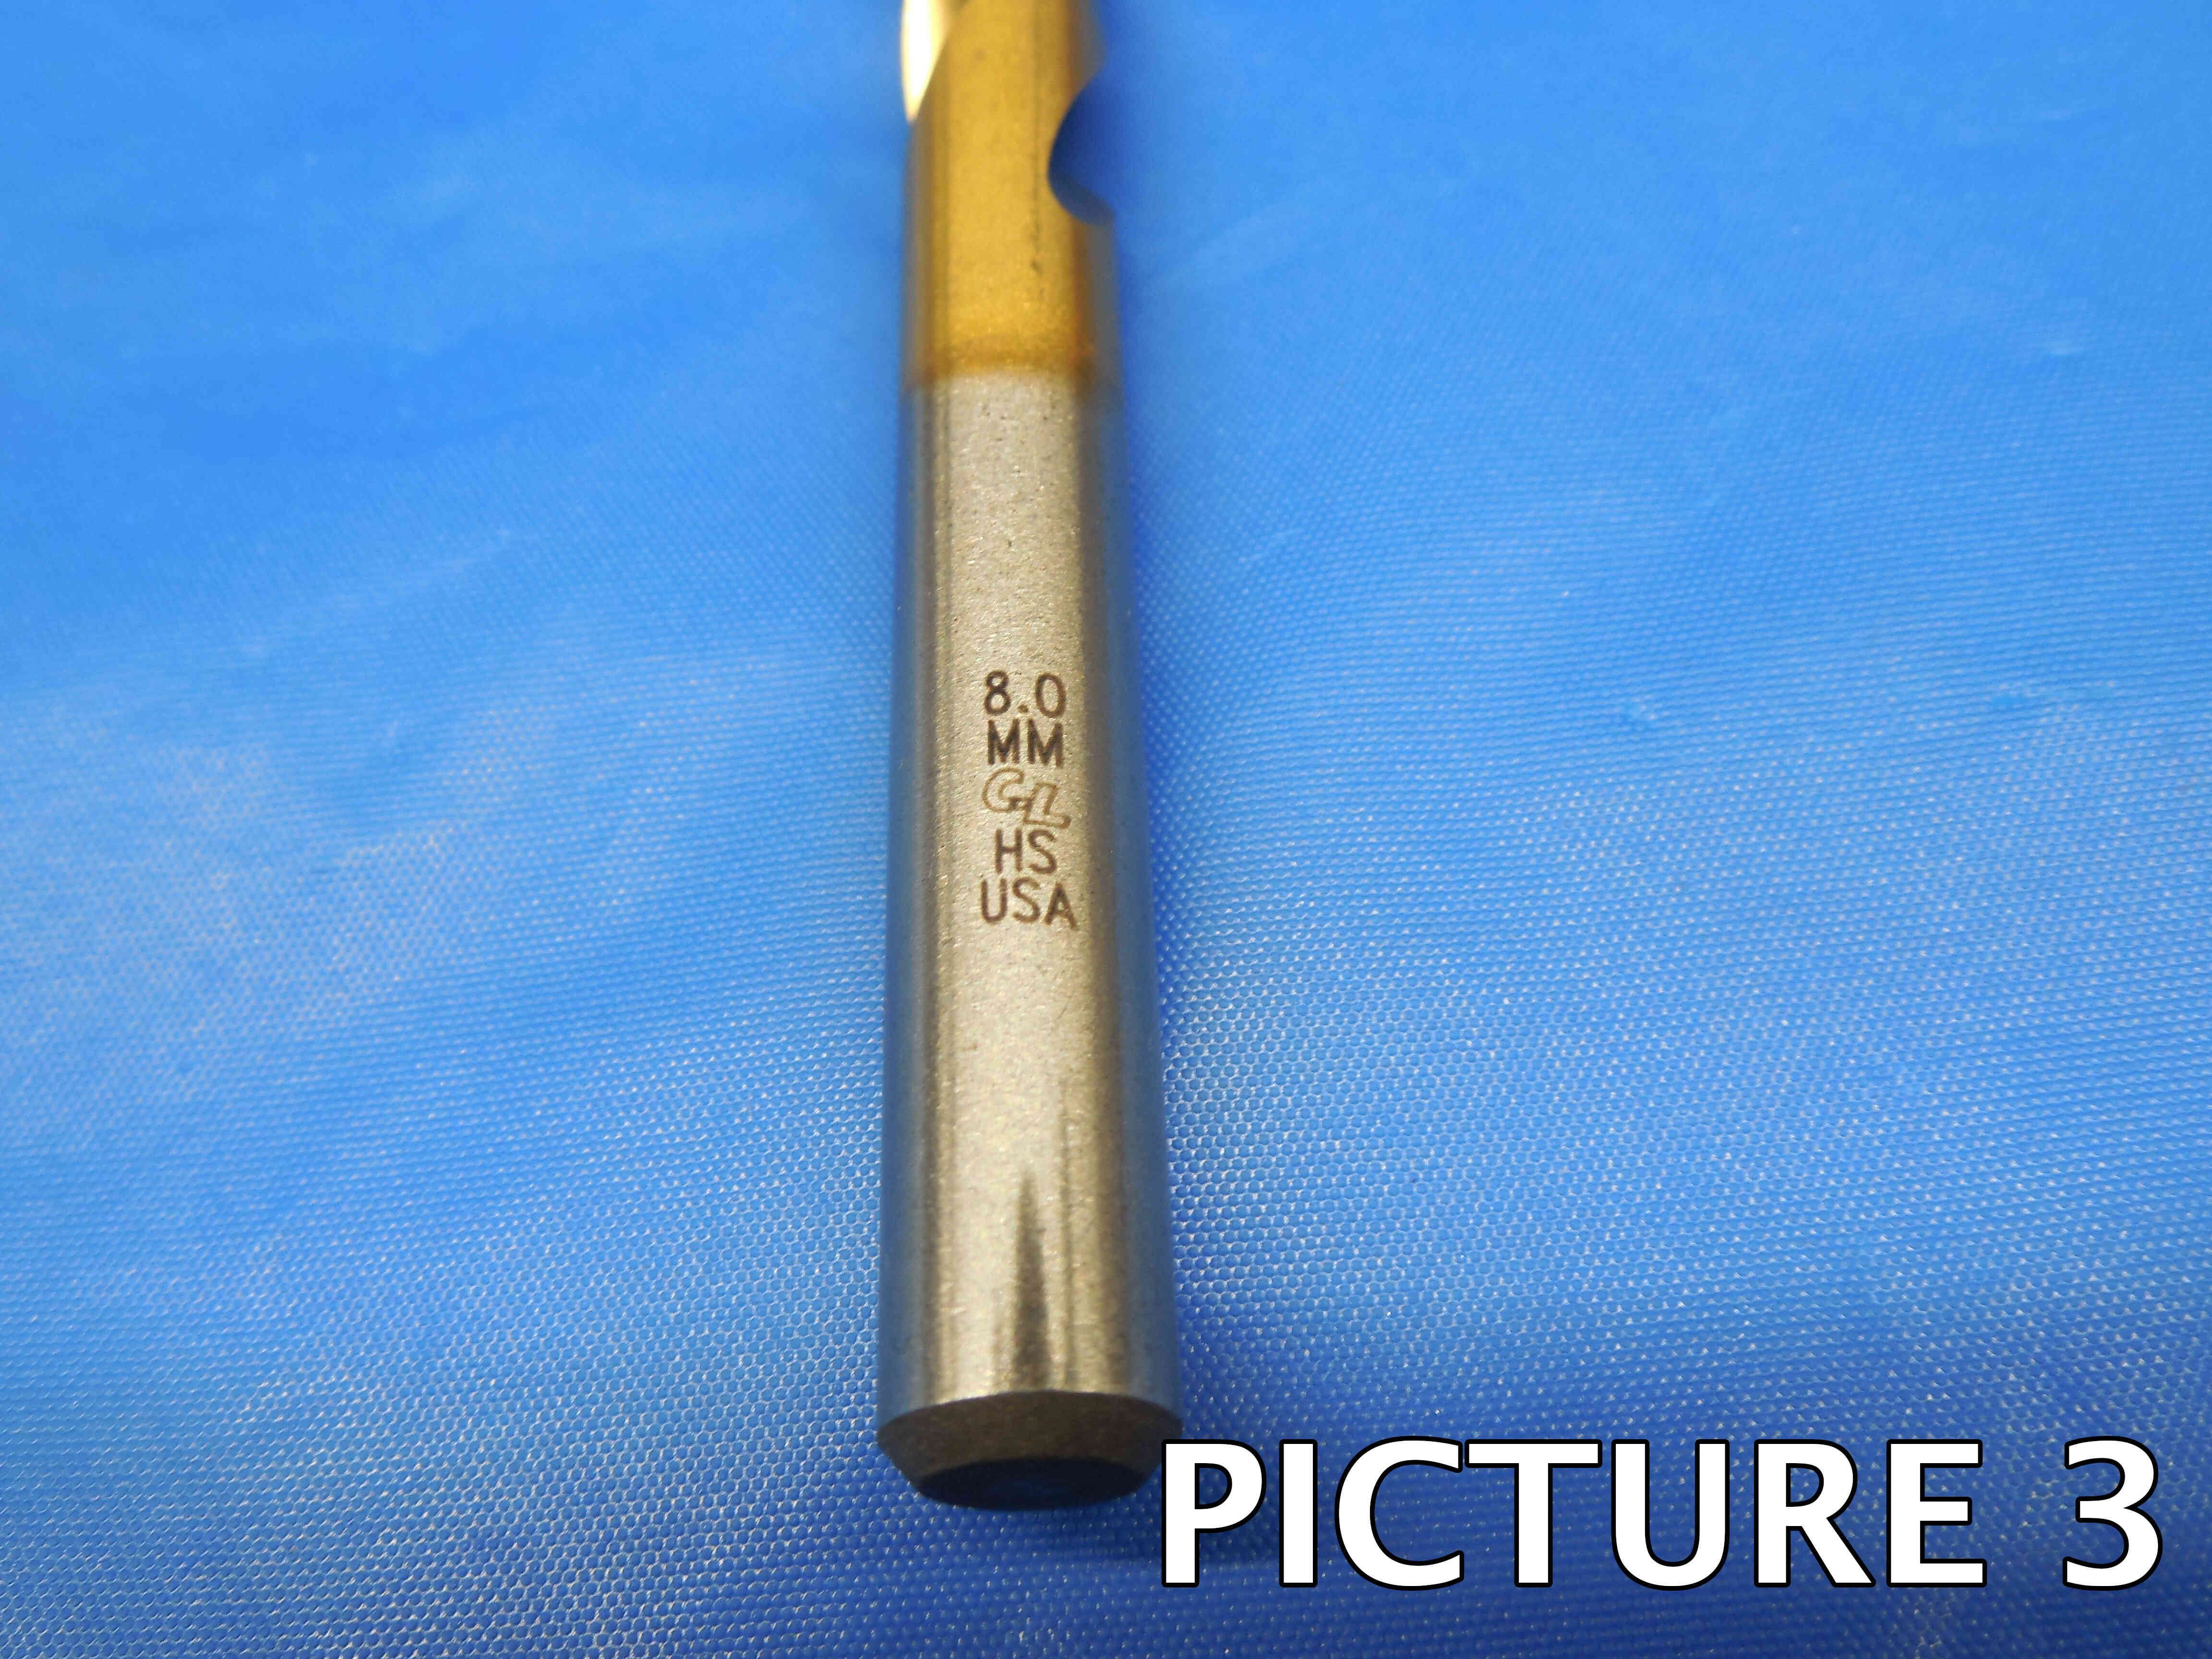
3rd Picture: A close-up shot of the labeling. If all of the drill bits are identical, only one label needs to be pictured. Otherwise, get all of the different labeling in as few shots as possible while still being readable. Depending on the size of the drill bits and where their labeling is located, this may require more than one picture. If there is no labeling present, or if it is too faded to show up in a photo, skip this picture. If you have packaging with (accurate) labeling on it, include a picture of this as well.
Additional Pictures: Any damage or modification to the drill tip, cutting edges, or shank must be clearly pictured. Use a pen to point to the damaged / modified area. If there are any flat sections on the shank (whether manufactured or modified) which are not clearly visible in the previous pictures, they should be shown in an additional picture as well. If you believe additional pictures are needed for any other reason, contact your trainer to verify if it is necessary.
Refer to the pictures below for examples:
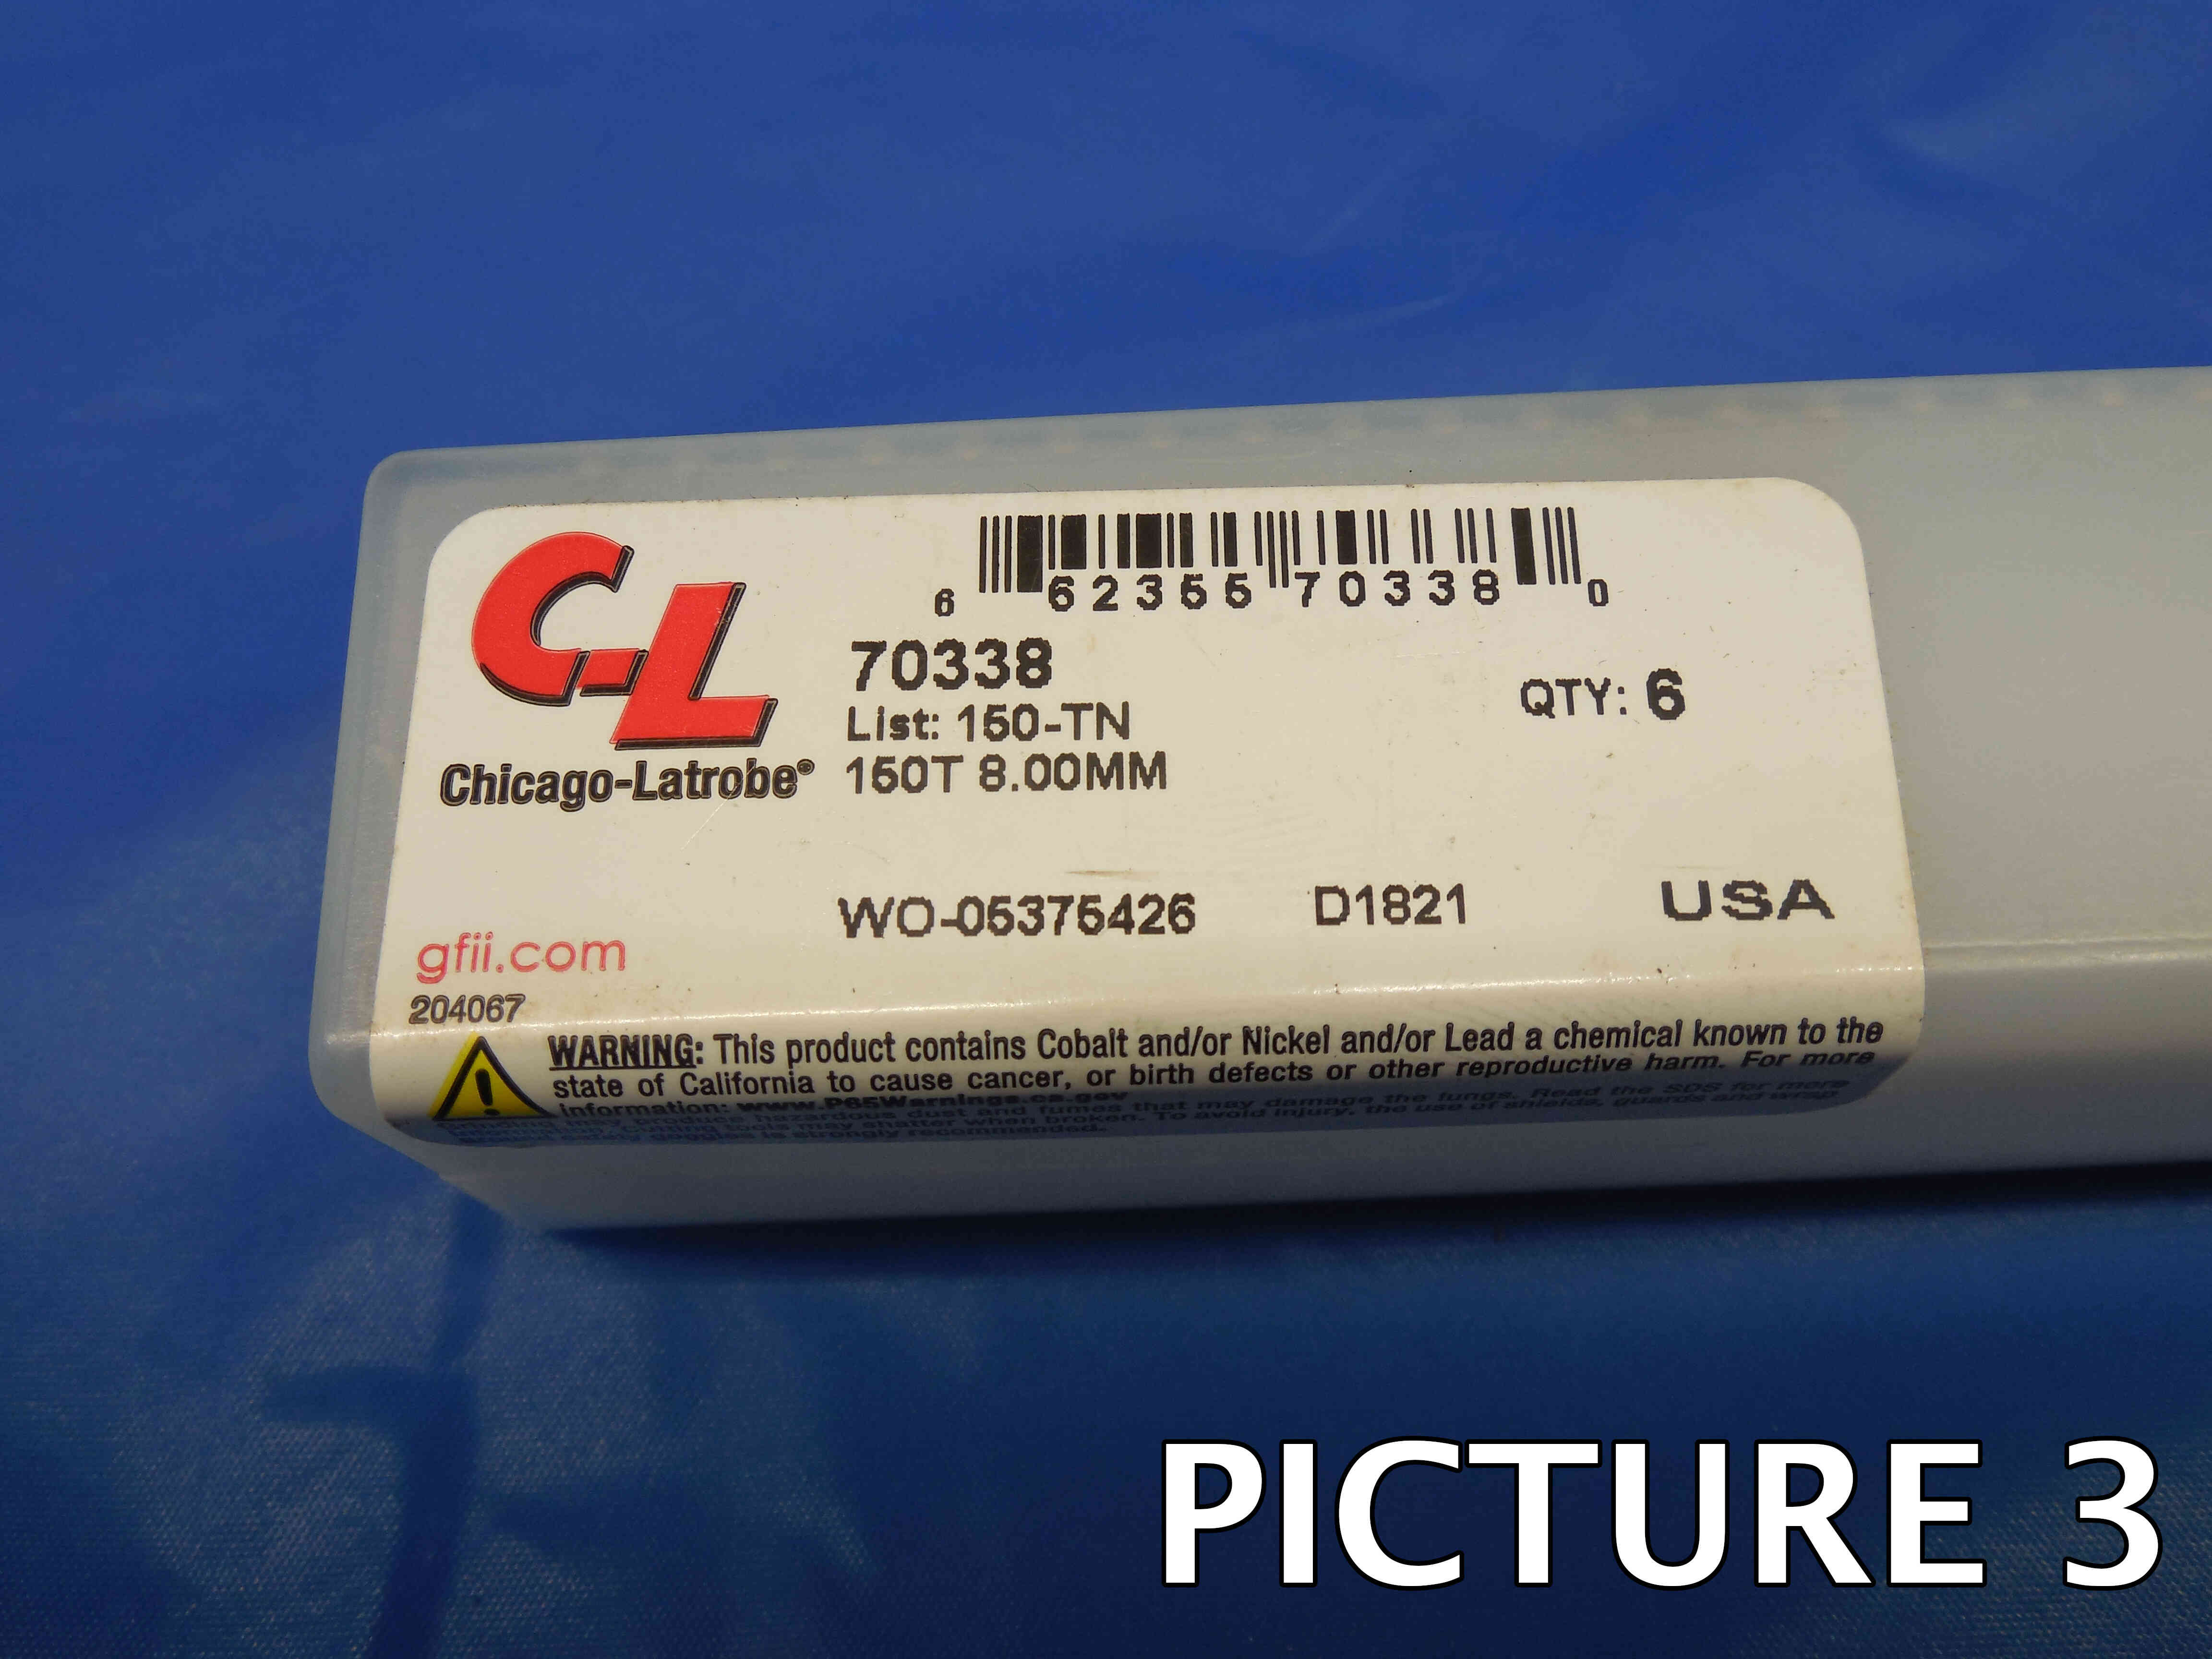
There will often be labeling on the shank of a drill bit, and nearly always on the case when there is one. This labeling may provide many of the specifications if researched online.
If the brand is not labeled, click the "Unlabeled" button to the right of the brand cell. Make sure this cell is not left blank, or the listing will not upload properly. Note: Items are often labeled with the country of origin (USA, China, Japan, Poland, etc). This should NOT be entered as the brand, and furthermore should not be included in the listing at all EXCEPT for USA which can be used as a filler.
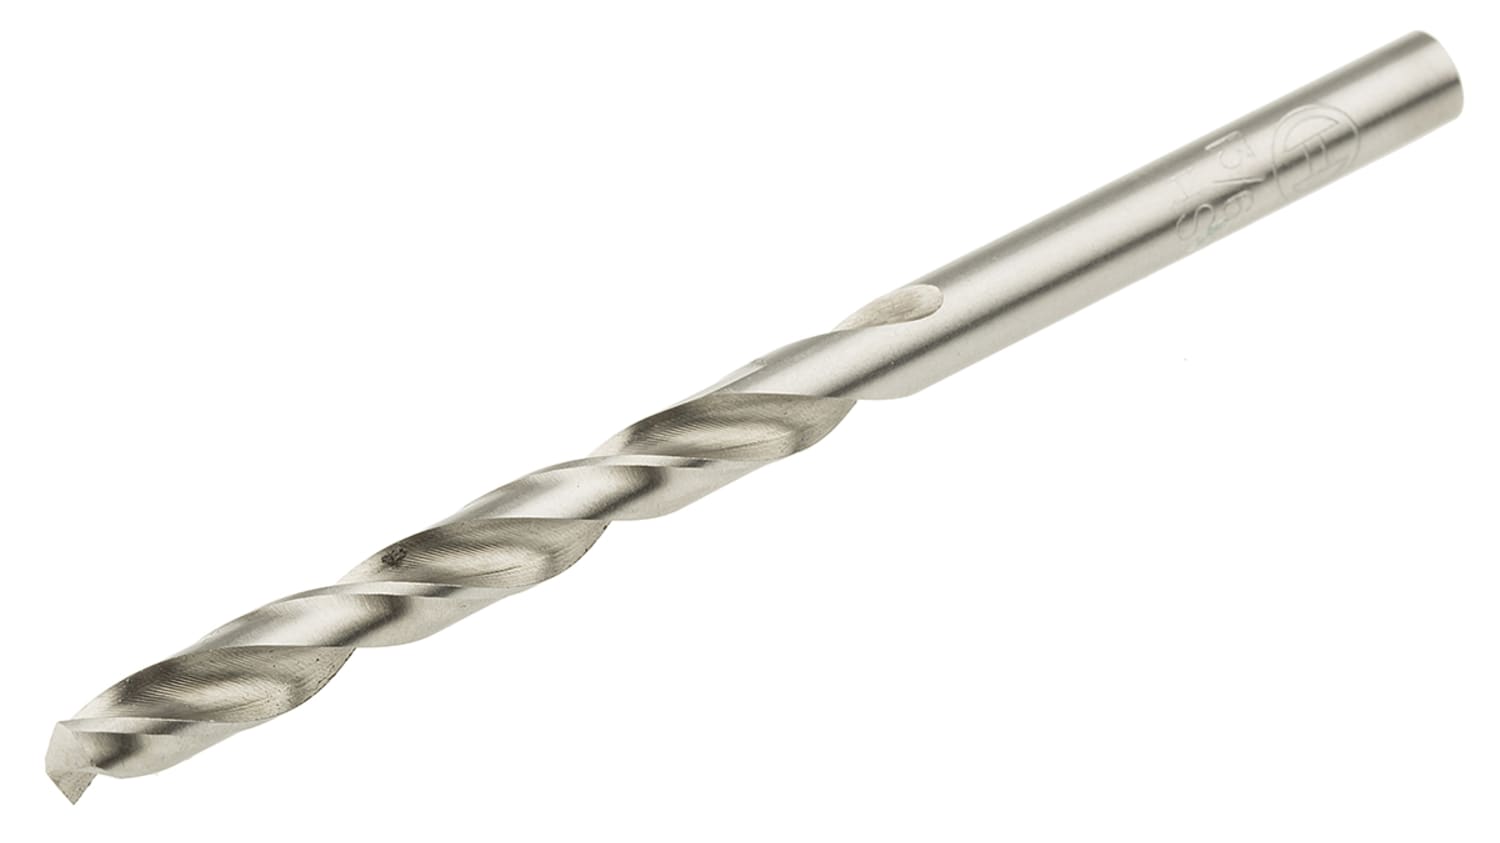
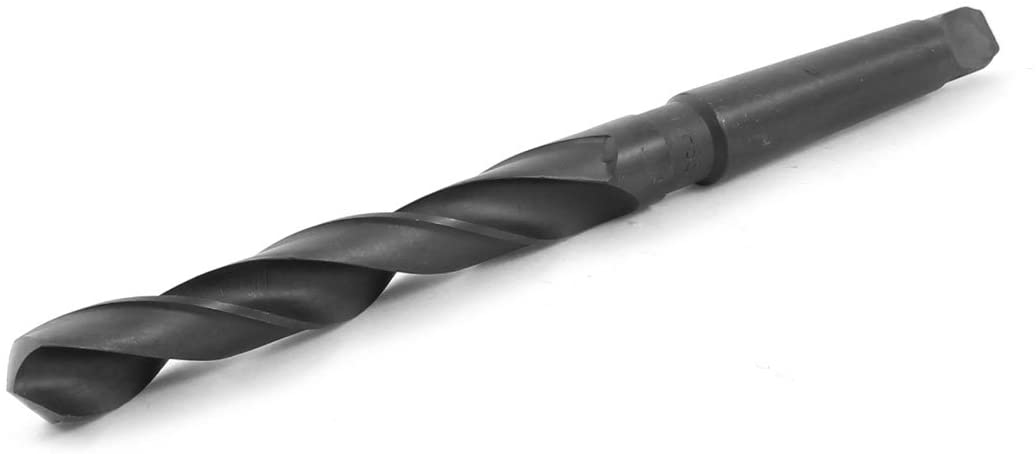

High speed steel (often referred to as "HSS" and sometimes "HS") is the most common drill bit material. It is cost effective and works well for many general purpose applications. If the bit is coated, you may have to look at the base of the shank for the color of the material.
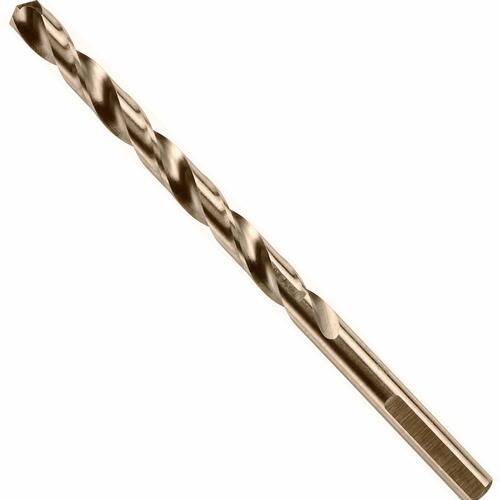
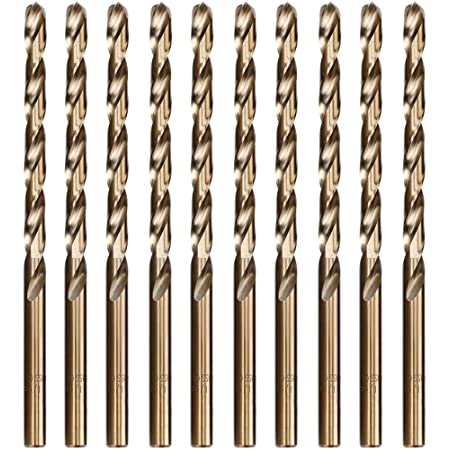
Cobalt drill bits will have a brighter, almost golden color. They are not used for general purpose, but for withstanding very high drilling temperatures and hard abrasive materials. Cobalt will often be denoted in labeling as "M-42", which is an HSS-Cobalt alloy but can simply be described as Cobalt or M-42 Cobalt.
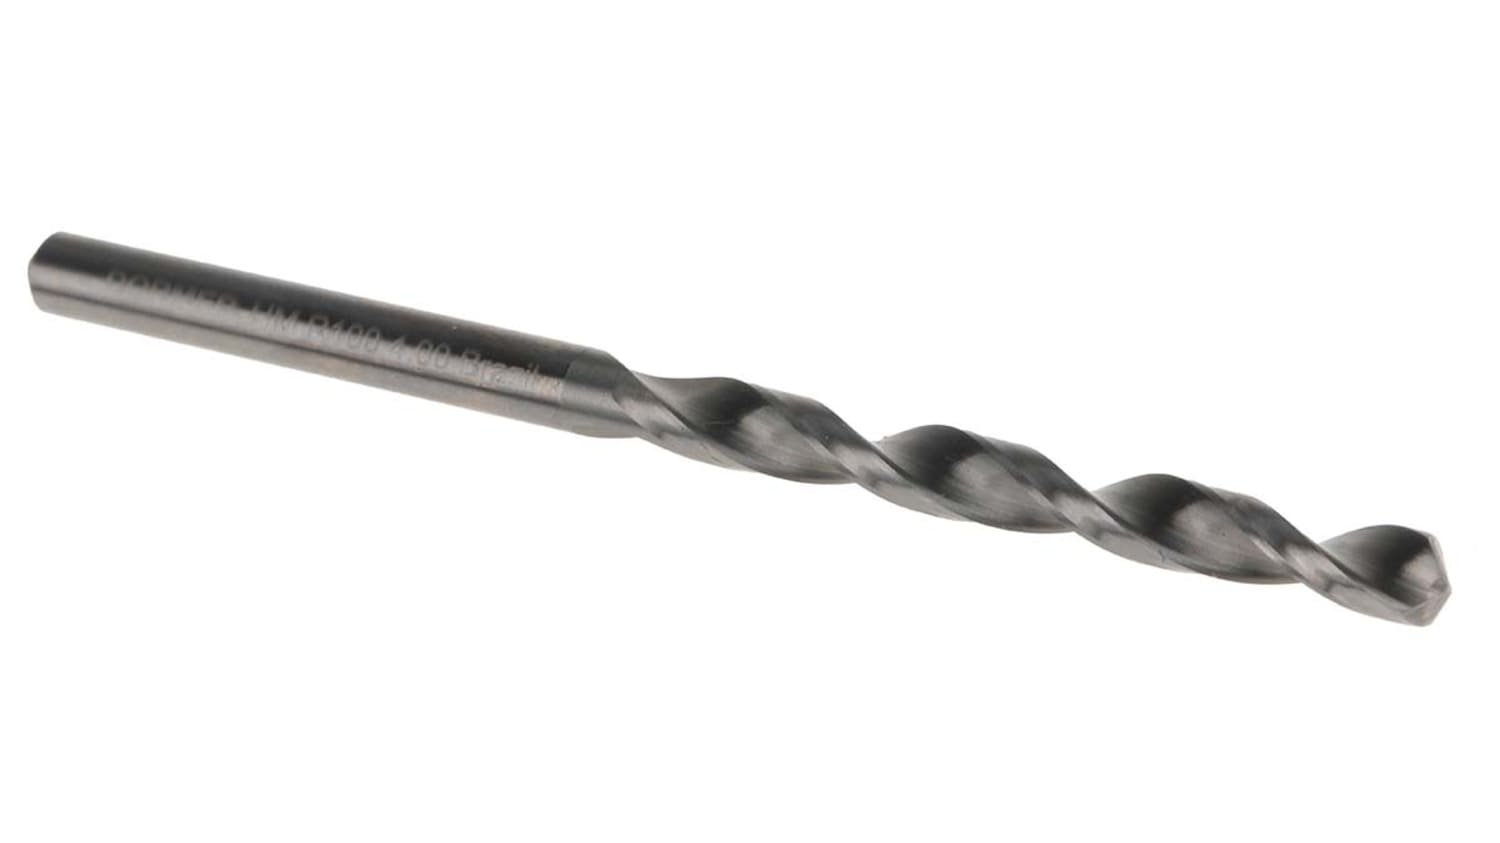
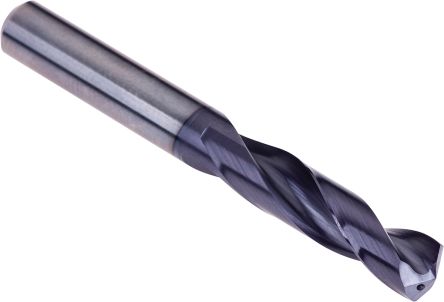
Carbide will have a darker gray appearance when uncoated, but can often look quite similar to HSS. The easiest way to tell carbide apart from other metals, is that it is extremely heavy weighing twice as much as steel. Carbide is popular for its wear resistance and toughness, as well as its ability to be manufactured into many shapes.
Some drill bits will have a coating on the cutting edges which serves a variety of purposes. Some coatings can be difficult to tell apart, so leave this cell blank if you are not sure. The most common coatings are described below:
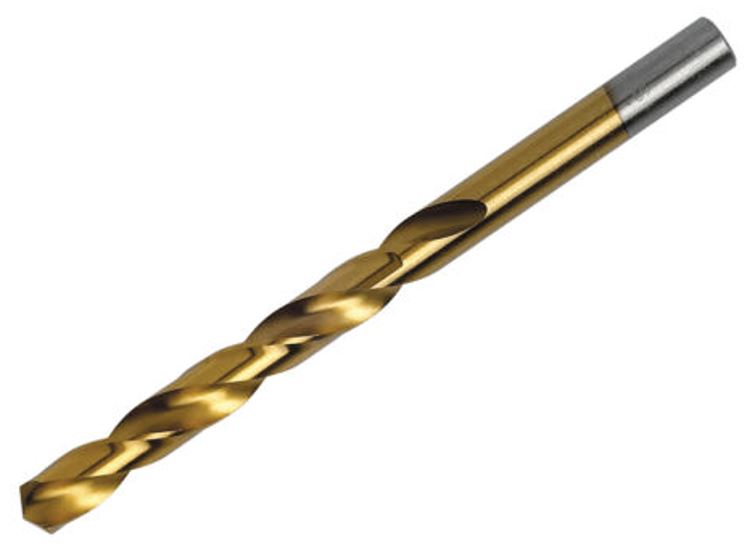
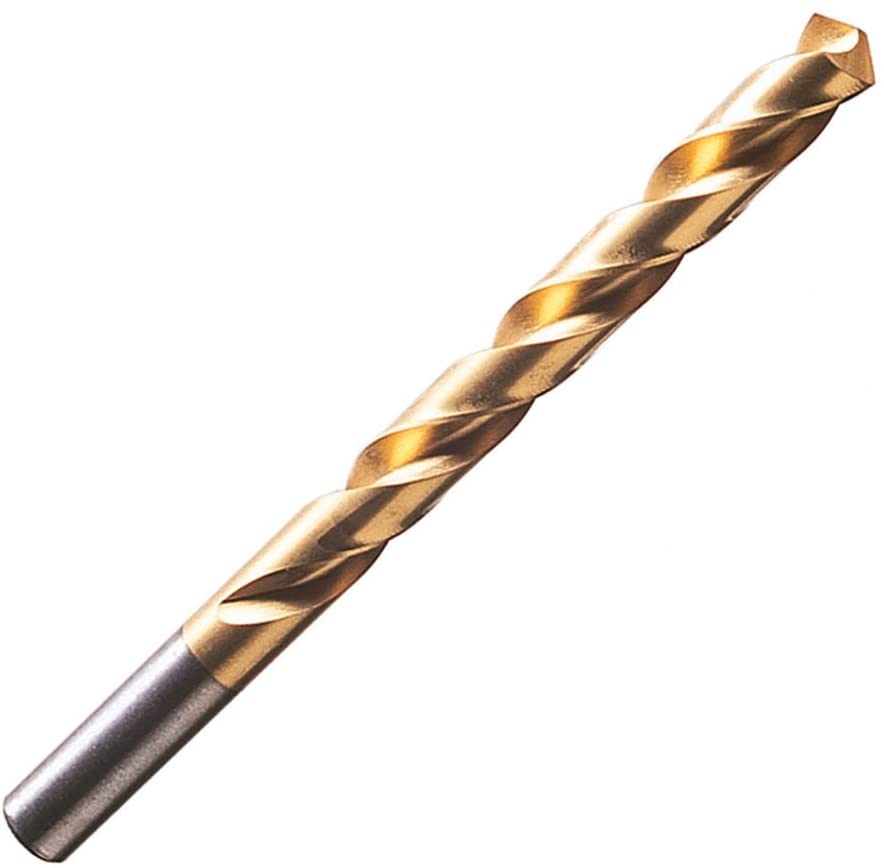
TiN is the most common coating, and can be used for many applications. It increases wear and deformation resistance and will have a golden color. There will be a difference in colors between the flutes and the very base of the shank. TiN coating is said to increase the life of an HSS drill bit by 6 times.
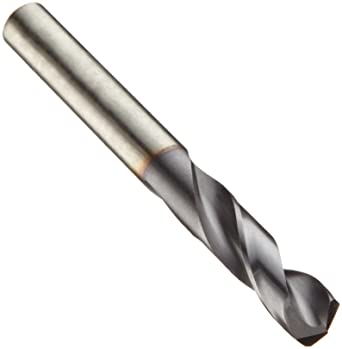

TiCN coatings are even more wear resistant than TiN. Looking only at the flutes it may be hard to tell apart from solid carbide, but importantly there will be a difference in color between the flutes and the base of the shank. There should also be a bronze discoloration from the chemical reaction between the coated and uncoated portions of the shank.
TiAlN (Titanium Aluminum Nitride)
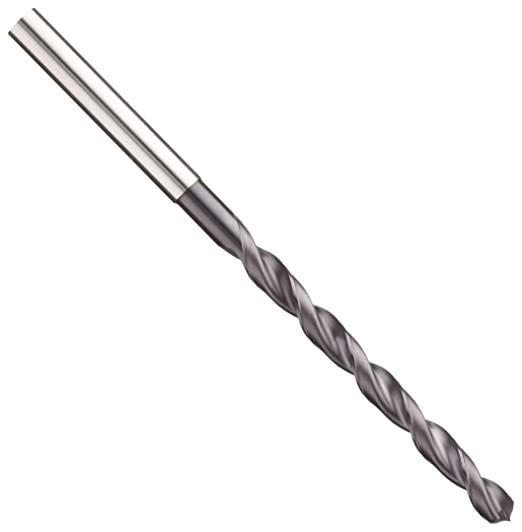
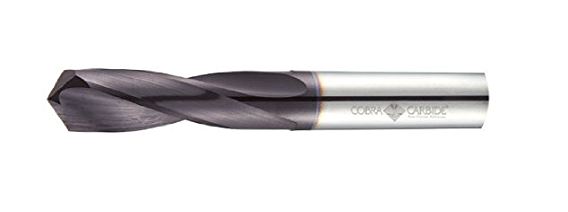
TiAlN will be a violet gray color and will be more resistant in high temperatures. There will be less of a chemical reaction between the coated & uncoated portions of the drill bit.
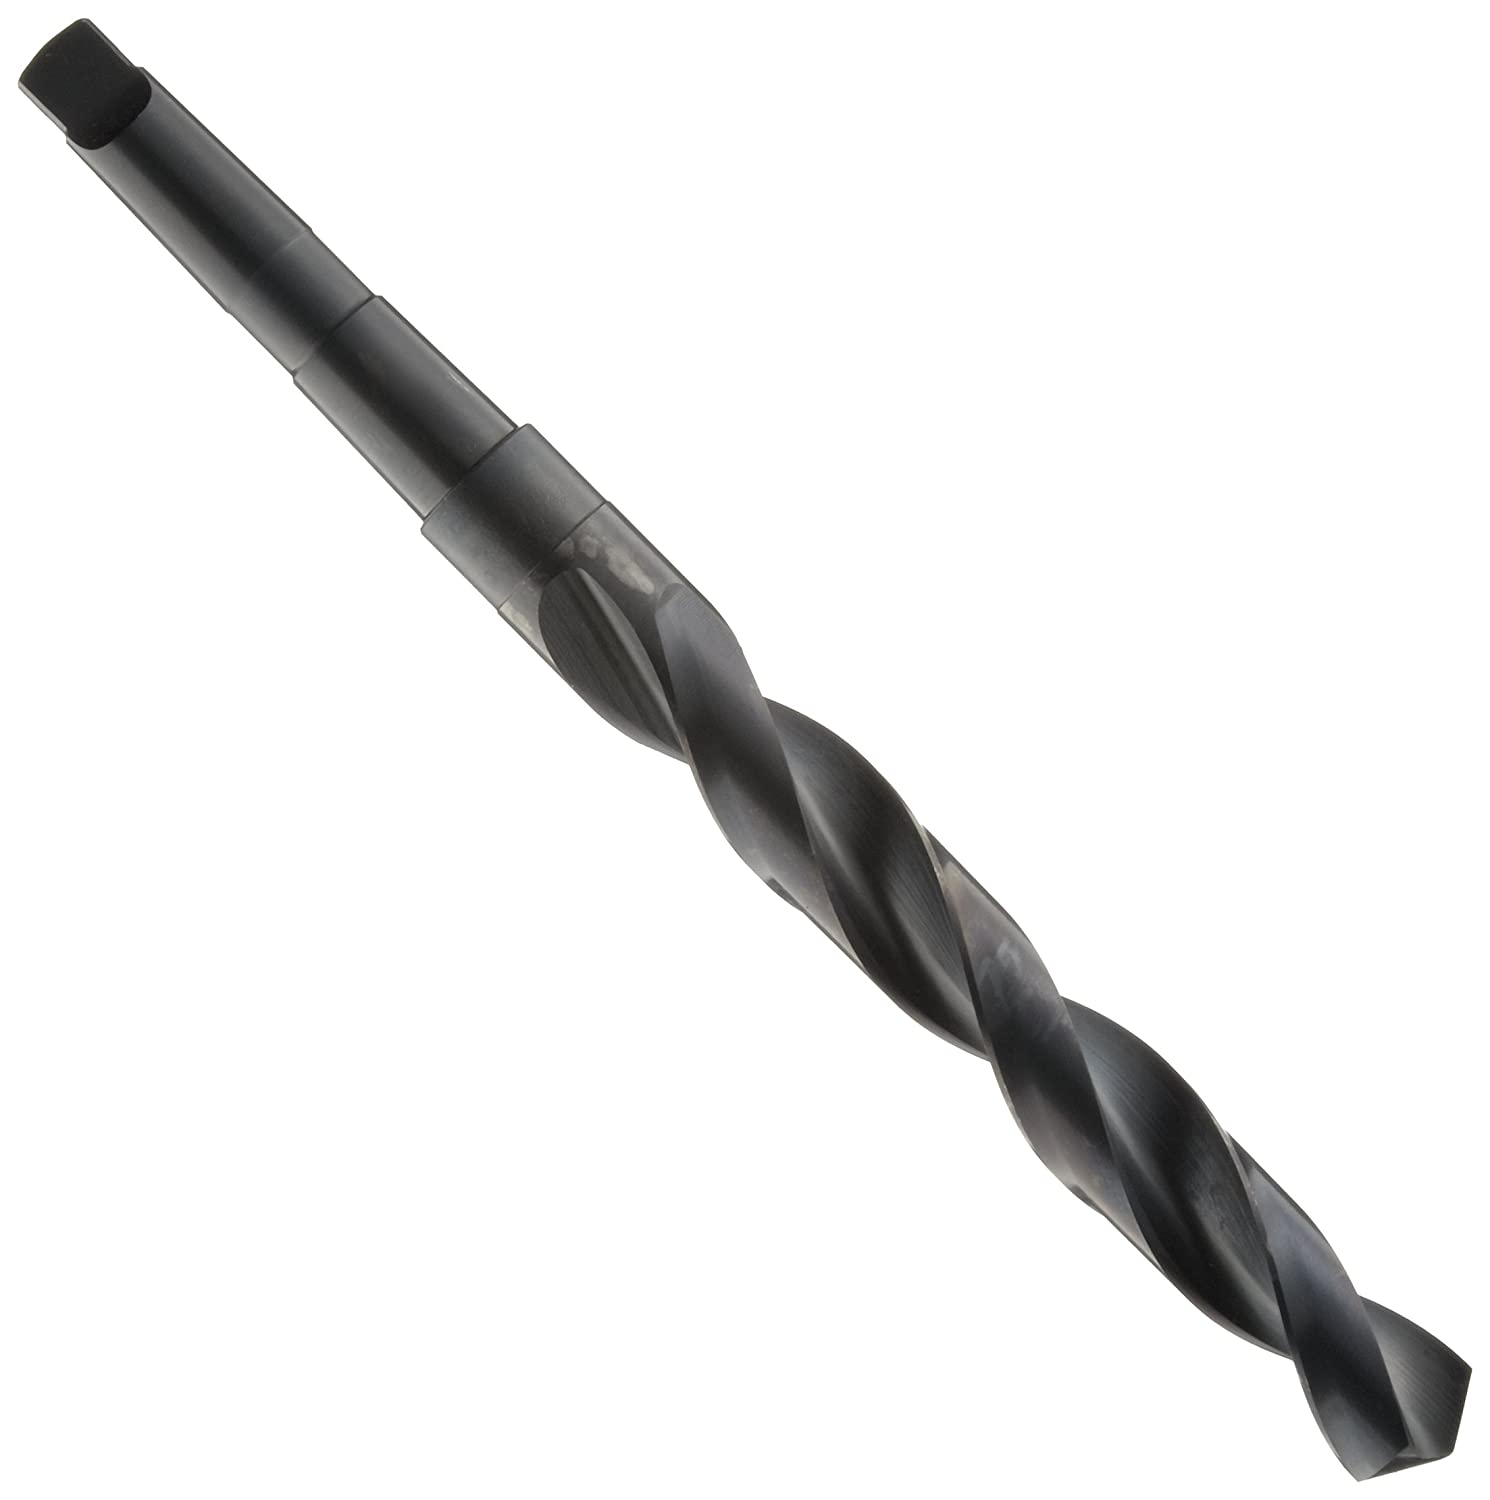
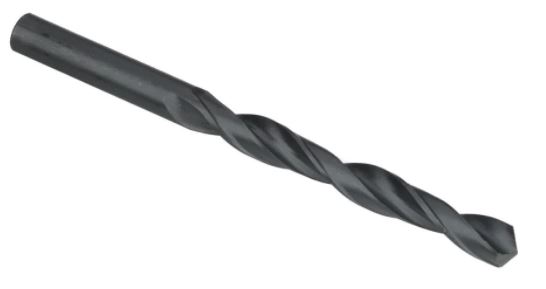
Oxide coated drill bits will be black in color and have slightly longer life than HSS due to reduced friction. This may be difficult to identify as some uncoated HSS drill bits may also be black in color. They are technically not coated in black oxide, but heat treated. It is safer to advertise as uncoated if you are unsure.
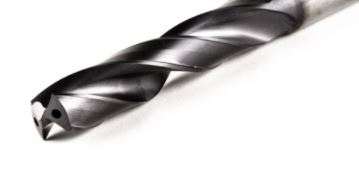
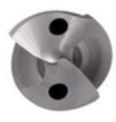
A drill bit may be coolant thru, allowing coolant to pass through the base of the shank and through the flutes in order to help control the temperature. This will be seen at the tip of the drill bit, where there will be holes that run through the entire bit and will connect to a hole the the back of the shank where to coolant enters.
The length of a twist drill has much to do with its rigidity - a shorter bit will be stronger and less likely to wander or break but may not have the reach needed for all jobs. Twist drill bits are often categorized by length as described below.
Please note that these length descriptions (Jobber Length, Taper Length, Extra Length, Aircraft Extension, Screw Machine Length, & Silver & Deming) apply only to twist drill bits with straight shanks. Morse taper drill bits do not fall into these categories, and should not be described with these names.
There are other categories outside of length which are also used to describe drill bits. Please refer to the sections below for more information:
(Click on an icon to jump to that section)
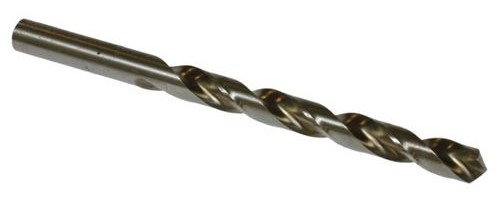
This is the most common length type and is seen in many of the pictures throughout this FAQ. It is identified as having about 8-12 times the flute length as the drilling diameter. This will look like about 3/4 of the OAL are flutes.
***To confirm if a drill bit is Jobber Length, compare its dimensions with the charts here: Jobber Length Dimensions

Taper length drills are designed for general purpose drilling where a length longer than jobber length is required. These can be difficult to visually distinguish from jobbers since the extra flute length is not always immediately obvious - so you may have to rely on labeling to identify this drill length.
***To confirm if a drill bit is Taper Length, compare its dimensions with the charts here: Taper Length Dimensions

These are extra long drill bits (up to 18") with flutes extending nearly the entire length of the bit. Extra length drills can be fragile and easily broken so they are often used in conjunction with a shorter drill that starts the hole.
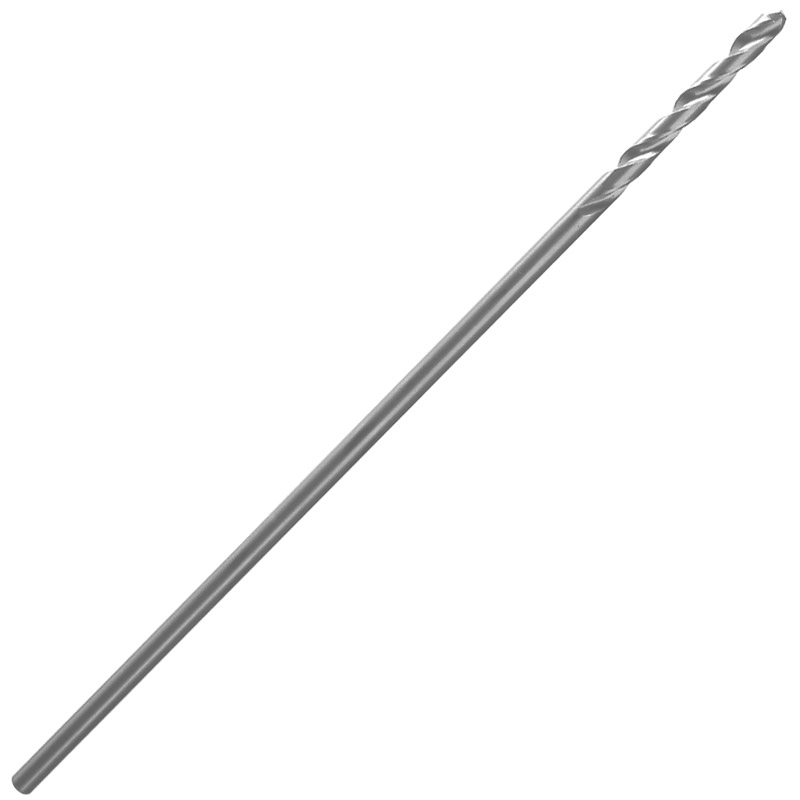
Similar in length to extra length bits, aircraft extension drill bits emphasize reach over cutting depth and have a shorter flute length (about the same as a jobber drill, when compared to the drill diameter) with a much longer shank. This makes the bit much stronger and less susceptible to bending and breaking.

Screw Machine drill bits (also called maintenance drill bits, or sometimes stub drills) will have a shorter flute length for increased rigidity and precision. Originally designed for screw machines, many people prefer these due to their high strength and added working clearance.
***To confirm if a drill bit is Screw Machine Length, compare its dimensions with the charts here: Screw Machine Length Dimensions
Silver and Deming / Reduced Shank
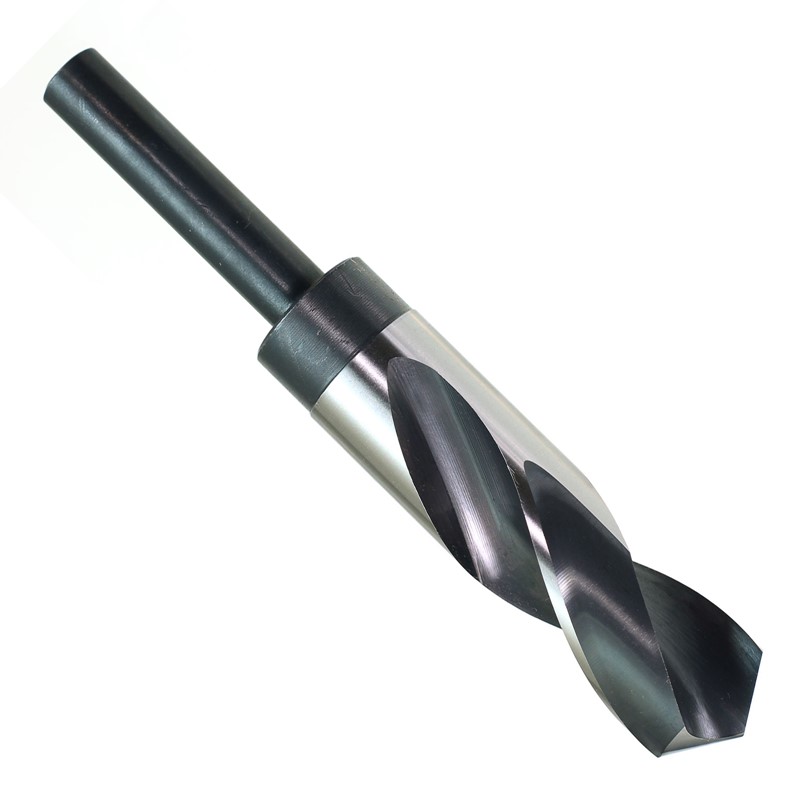
More than a length specification, Silver and Deming drill bits, often also referred to as Reduced Shank drill bits, are always 6" long with a 3" flute length and a 1/2" diameter shank. All Silver and Deming bits are over 1/2" cutting diameter, ranging from 33/64" to 1-1/2", and are primarily intended for use in a drill press.
Other Twist Drill Bit Types (Can be Morse Taper):
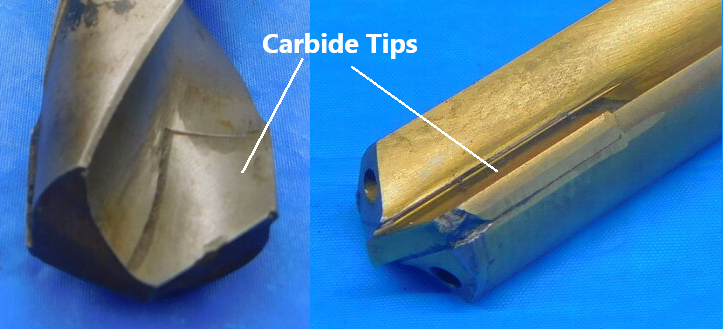
Some HSS and cobalt drill bits are reinforced with solid carbide tips for increased hardness and resistance to heat and wear. You should be able to see a distinct separation between the carbide cutting edges and the rest of the drill bit.

As the name suggests, Flat Bottom drill bits are flat at the end rather than coming to a point. They are used primarily for enlarging a pre-drilled hole, or for starting a hole in a rounded or inclined surface.
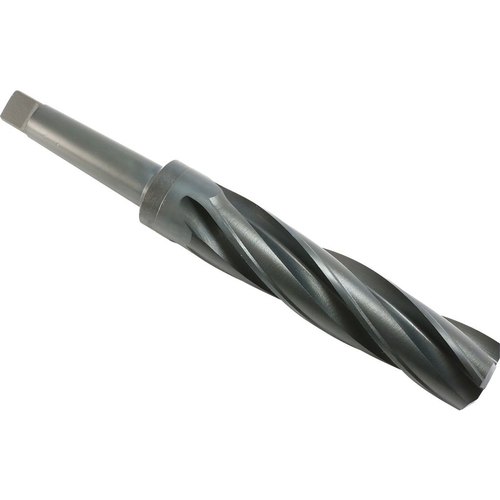
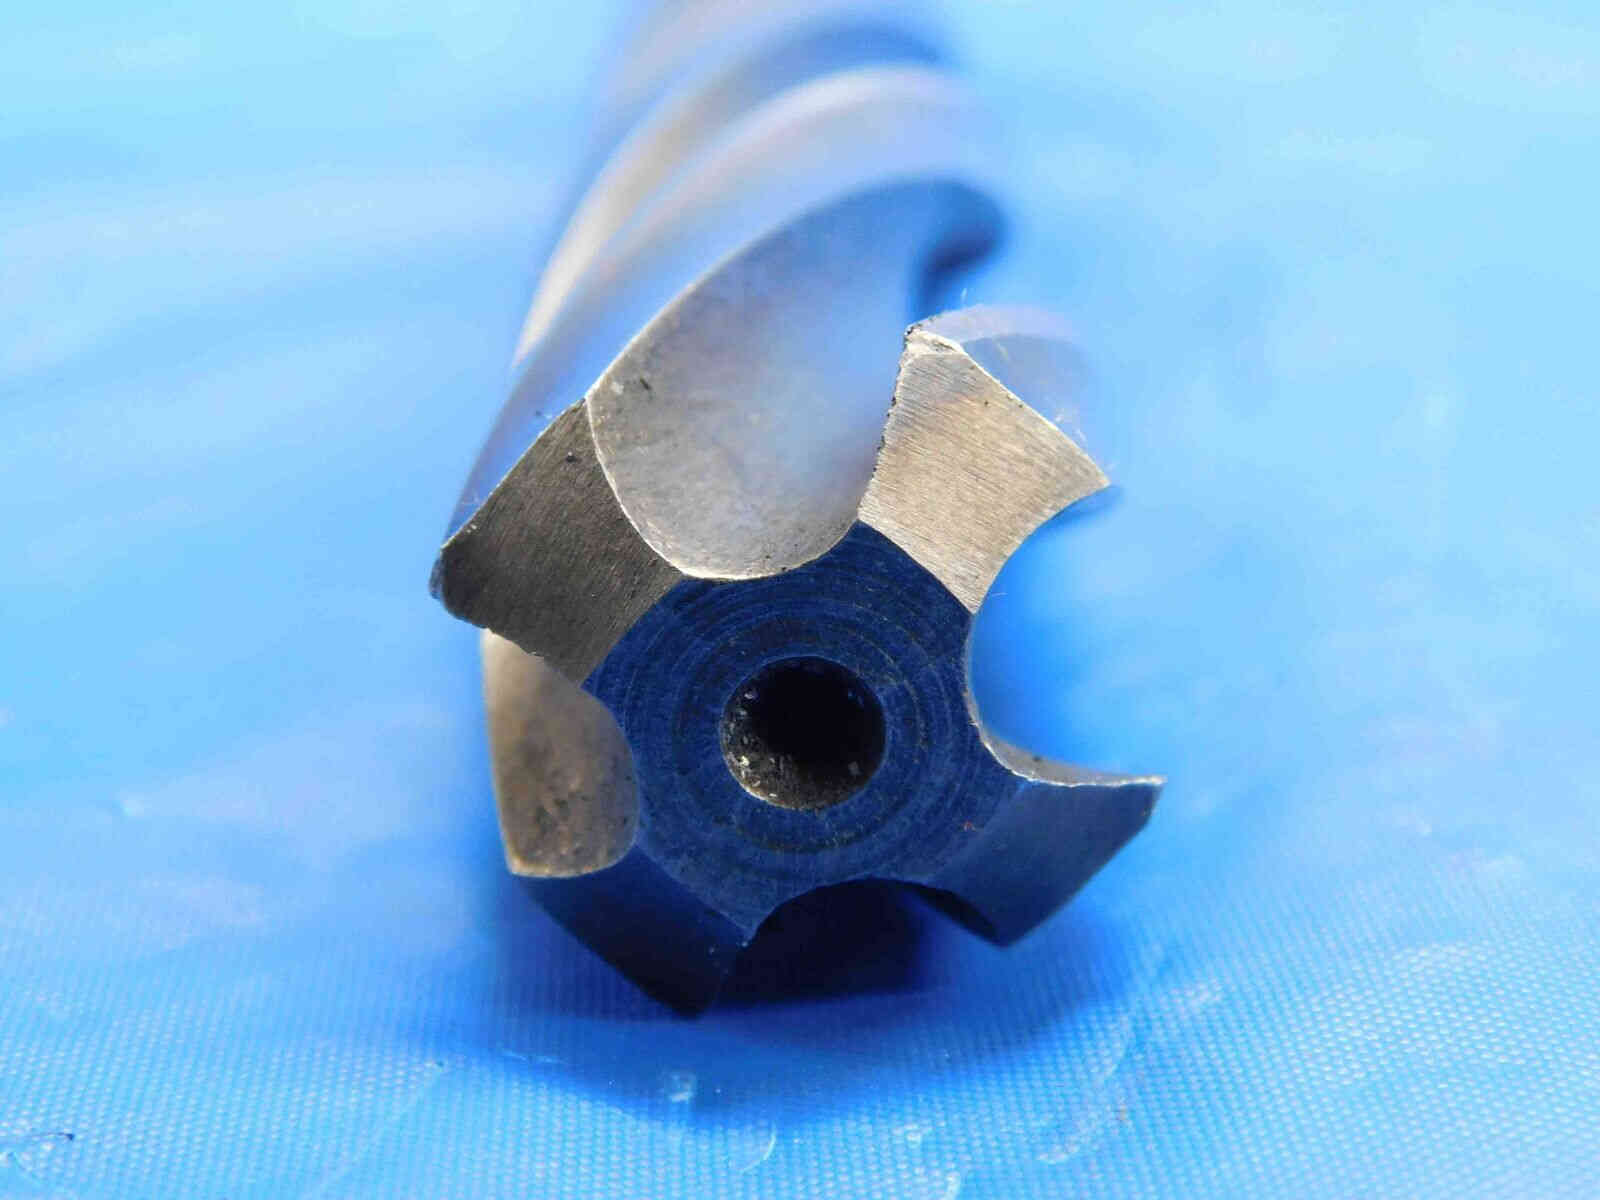
Core Drills have more than two flutes and a flat end similar to Flat Bottom drills. They are used primarily for enlarging or re-aligning pre-existing drilled holes.
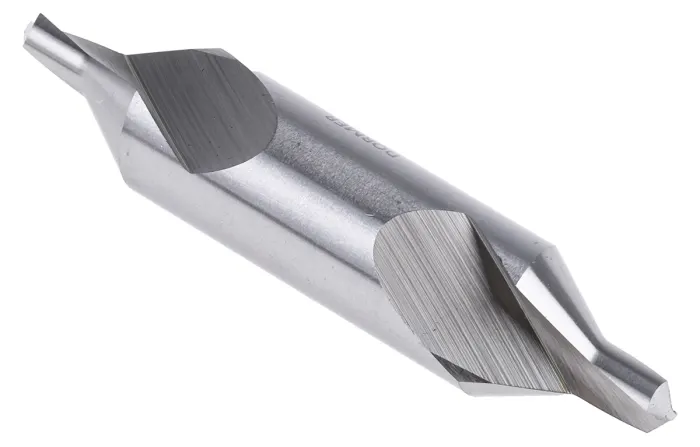
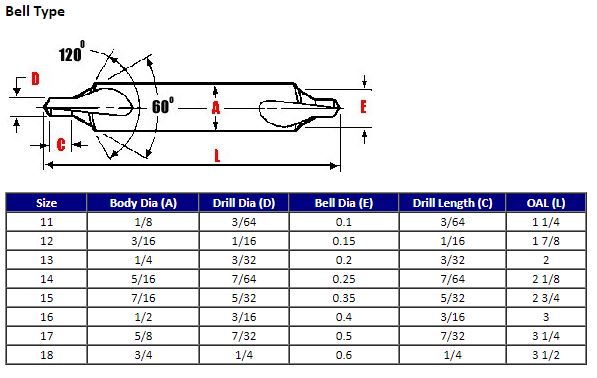
Center Drills are used to create starting holes for larger-size drill bits. They have a short flute length and overall length which increases rigidity and accuracy, making them ideal for starting holes in the exact center of a workpiece (hence the name "Center Drill"). Center drills are typically double-ended, and include a 60 degree countersink for enlarging the hole opening.
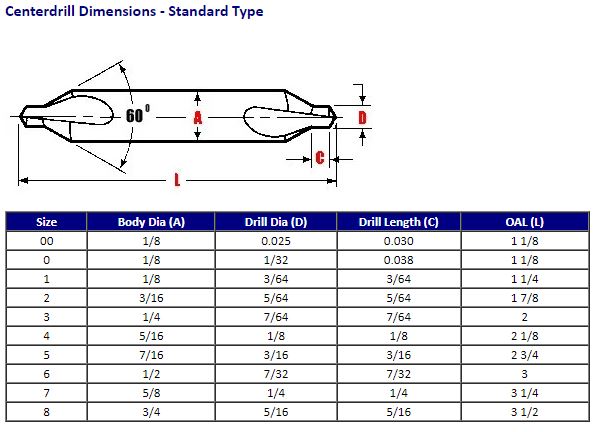
Center drills come in specific number sizes which will often be labeled, but if not it can be determined by comparing the dimensions of the tool to the charts below (note the different numbering for "bell type" center drills, which have a second taper at the bottom of the chamfer):
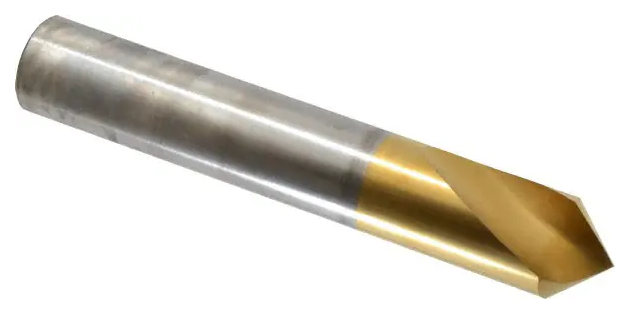
Spotting Drills, also called Spot Drills, are very similar to center drills in that they have very short flute lengths and are used to start holes for larger drill bits. Unlike center drills, spot drills are typically single-ended and do not include a countersink. Spotting drills are highly precise and have an even higher rigidity than center drills. They can come in one of a few different tip angles, the most common being 90, 82, and 60 degrees.
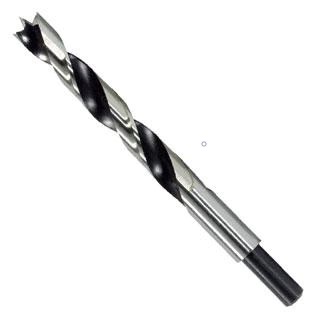
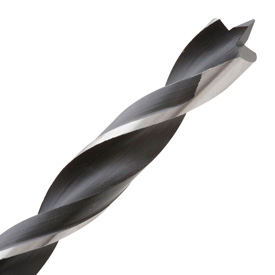
Brad point drill bits are specially designed to drill and bore clean holes in hard and soft woods without wandering. These drill bits have been designed with a center pin as seen in the images above.
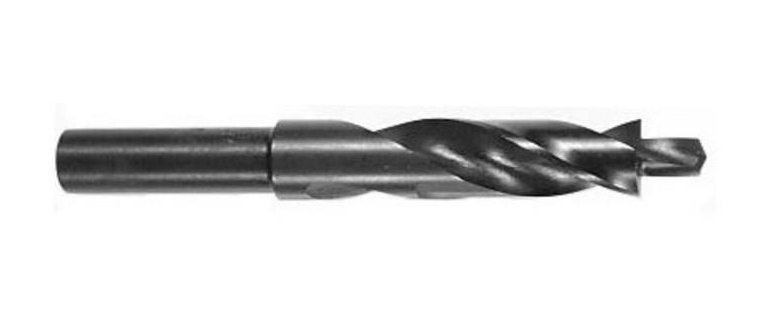
These drill bits will have a defined step between two drilling sizes. They must be center cutting on both steps and will produce two separate diameter holes with no taper between. Note: If the smaller diameter is flat (meaning there is no drill tip), it is likely a standard Counterbore and not a Counterbore Drill Bit. For more information about Counterbores, click here.
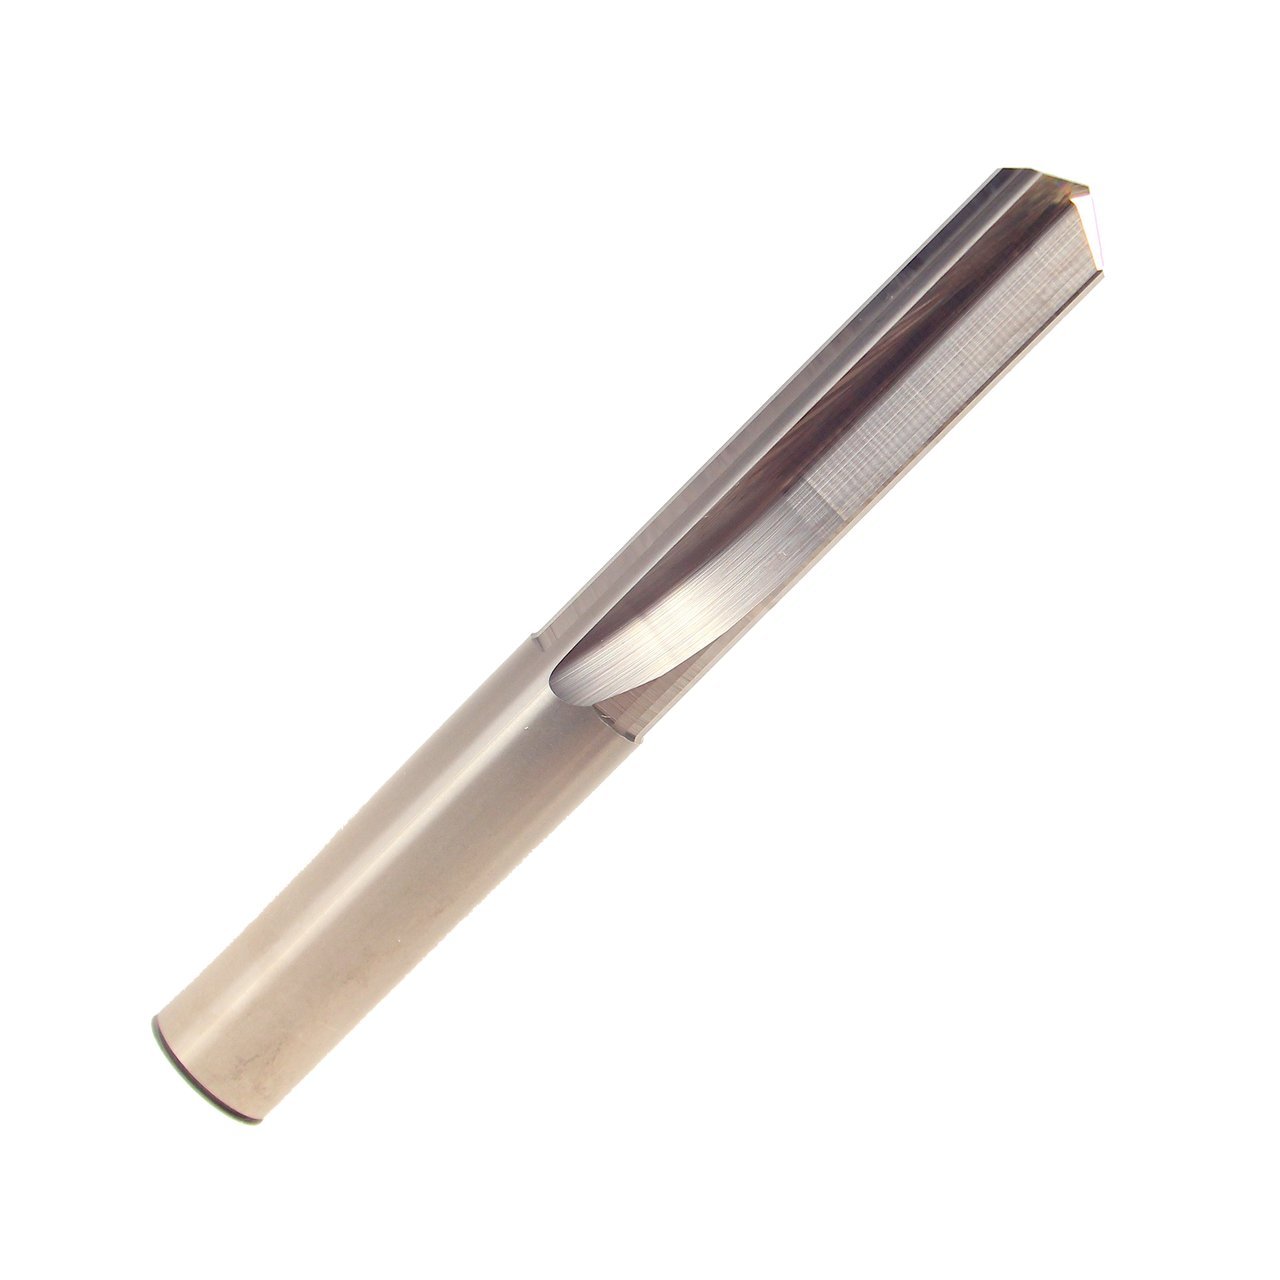
As the name implies, these drill bits are easily identified by their straight cutting edges. Note that straight flute drills do not actually fall under the category of twist drill bits since the flutes do not twist (which is where the name "twist drill" comes from), and so the word "twist" should be manually removed from the title of the listing by clicking "edit title" once all other information has been entered.
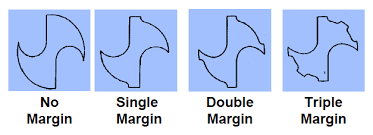

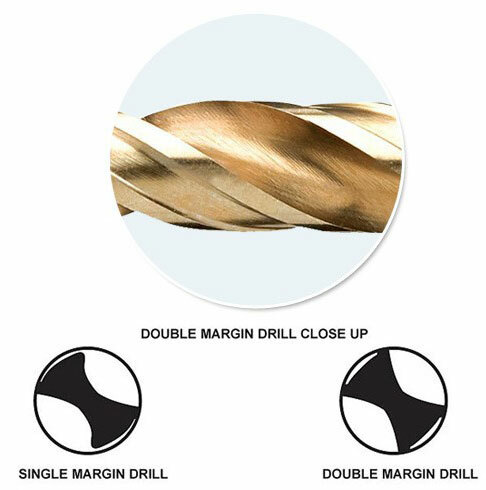
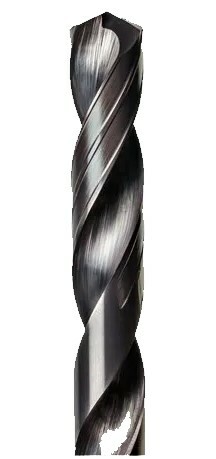
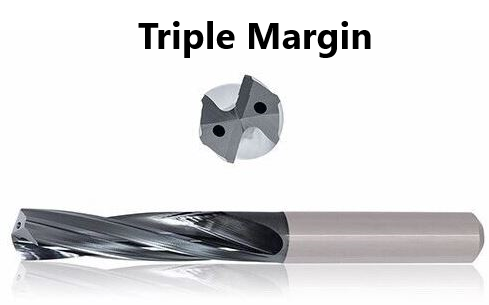
A Margin refers to a flat, raised section of the land which increases the stability of the drill bit. Many drill bits have a single margin at the cutting edge, but some will have additional margins which further increase stability and also serve to burnish the hole as it cuts, often removing the need to finish the hole using a reamer or deburring tool. As the names imply, Double Margin drill bits have two margins and Triple Margin drill bits have three margins.
If you are listing a single-piece drill bit, this can be left blank. Otherwise, simply enter the number of drill bits included in the listing.
The drilling diameter is often labeled on the shank, but can also be measured with handheld calipers. If the drill is one straight diameter, Be sure that you are measuring the outermost section on the cutting edges for the maximum diameter. Unlike many tooling measurements, drill bits may be sized in increments as small as 1/64ths so a precise measurement is needed. If no multiple of 1/64 is near your measurement, it may be a metric diameter or a letter or number size. Refer to the chart on this page for more info: Drill Size Chart.
Note: When entering a whole-number inch size, always include the " sign. The " sign should not be included for any size including a fraction or decimal. So, for example: If a drill's diameter is exactly one inch, it should be entered as 1" and not just 1. If the drilling diameter is one and a half inches, it should be entered as 1 1/2 or 1.5 and not 1 1/2" or 1.5".
Metric size measurements should be entered with a lowercase "mm" (ex.: 16mm, 40mm).
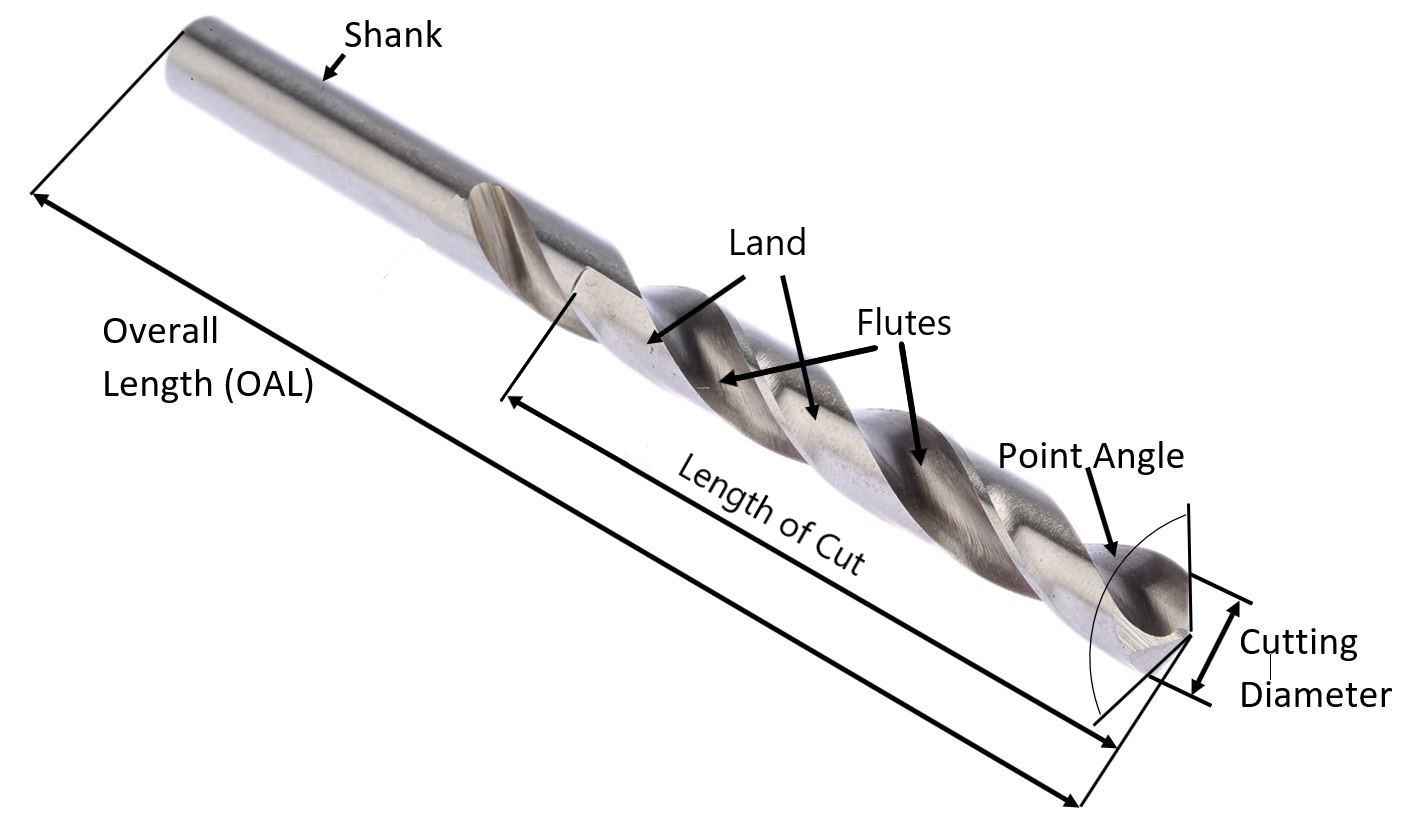
As seen in the diagram at the top of the page, the length of cut is measured from the tip of the drill bit all the way to where the cutting edge ends. On some drills, the flutes will continue past the end of the cutting edge, so make sure you are measuring to the end of the cutting edge and NOT the end of the flute.
The overall length is very simple; measure the distance between the farthest two points on the tool. This can be done with handheld calipers or even a tape measure as this does not need to be as precise as other measurements.
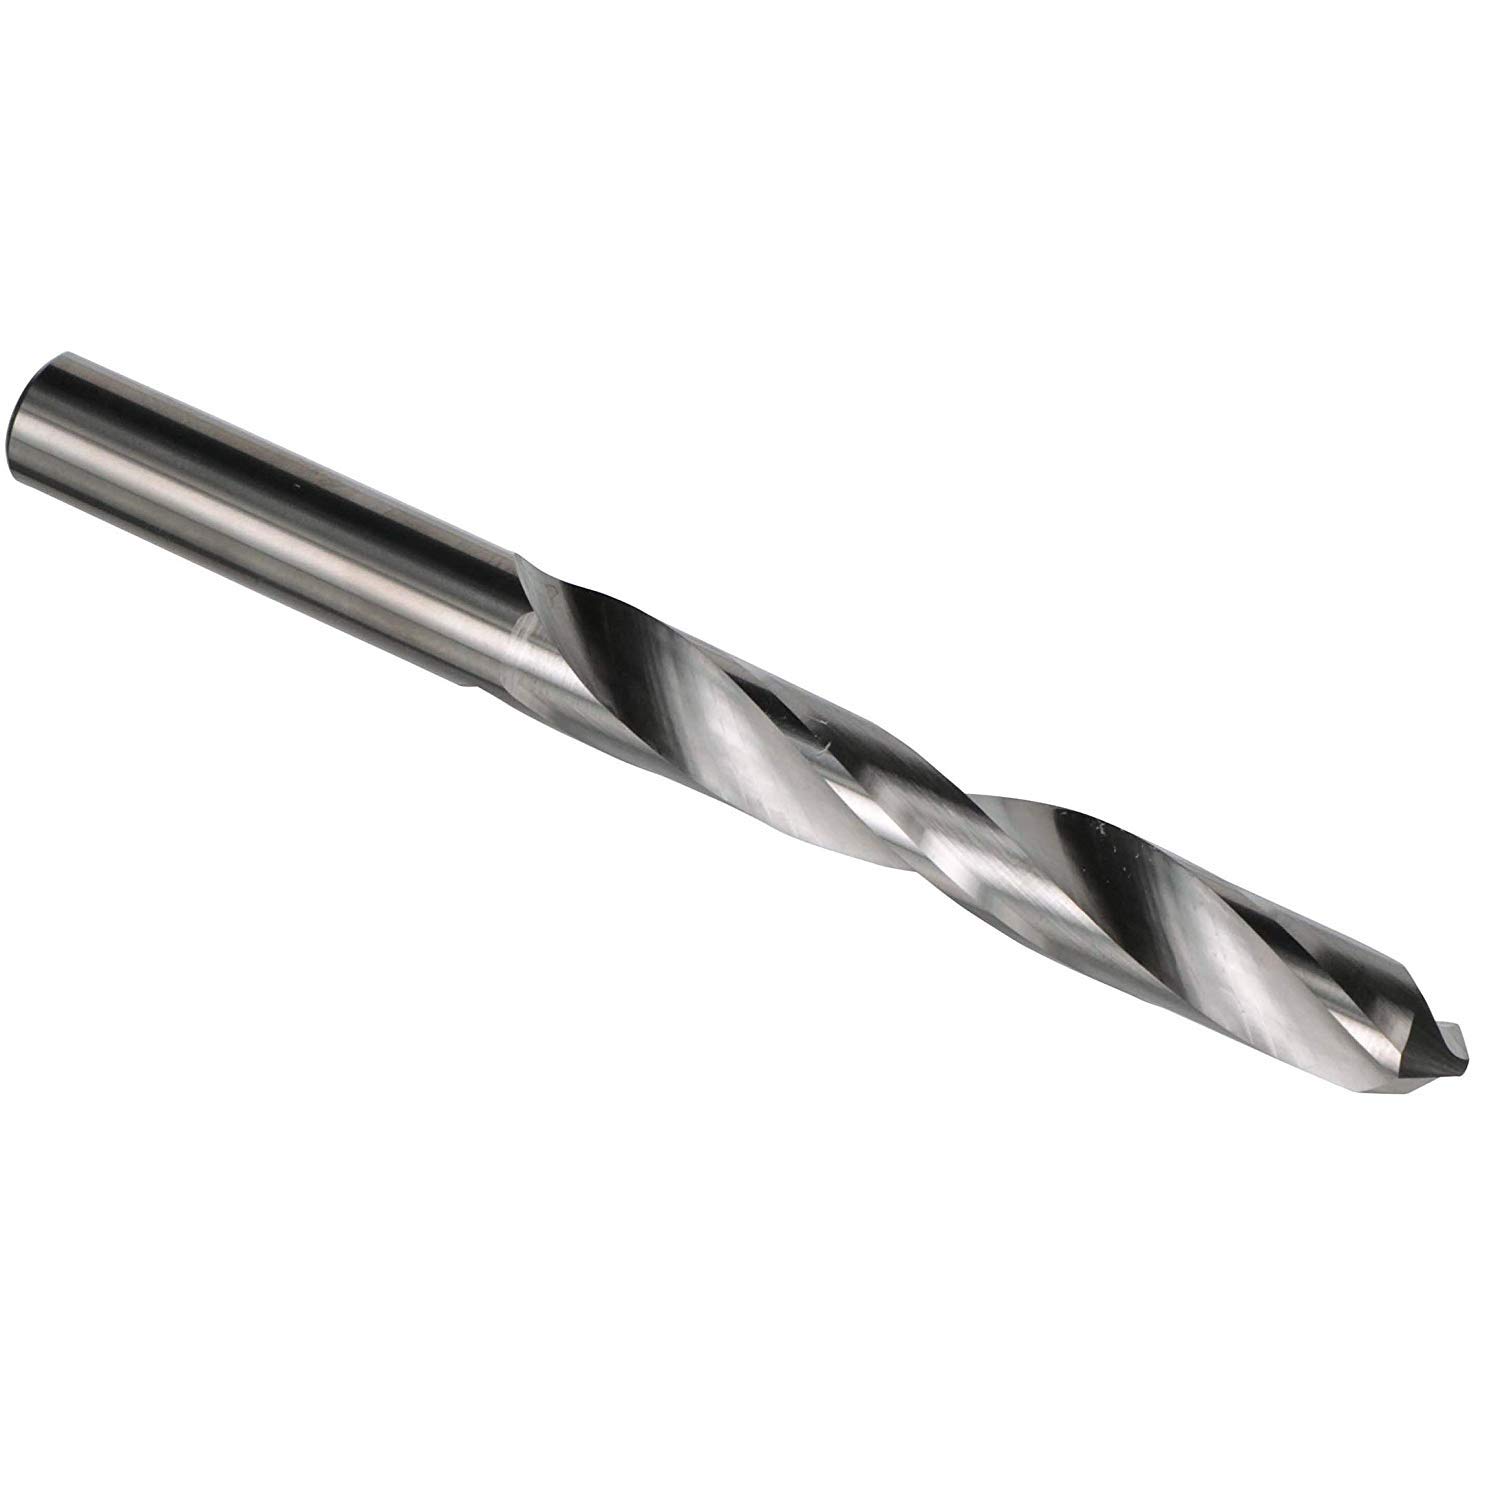
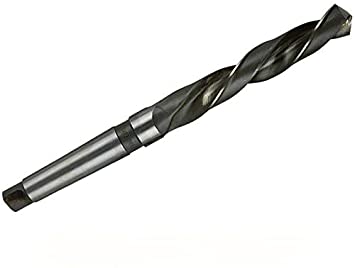
The drill bit above on the left has a straight shank diameter, while the drill bit on the right has a Morse Taper shank. Male Morse Tapers can be identified by their taper as well as the distinctive end which has two flat sections (called a "tang") seen in the picture above.
Straight Shank diameters are often common sizes and can usually be measured by calipers. Very often with drill bits, the straight shank is the same diameter as the drilling diameter. That being said, shank diameters can sometimes be very precise and should not be rounded more than .005" in either direction.
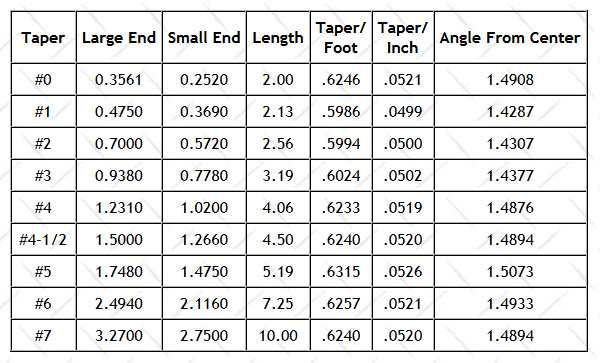
Morse taper sizes can be measured on the large end (the largest diameter on the portion of shank that tapers) with calipers, corresponding with the chart below:
Always check for tang damage on Morse Taper shanks! Damage must always be pictured. See below for examples:

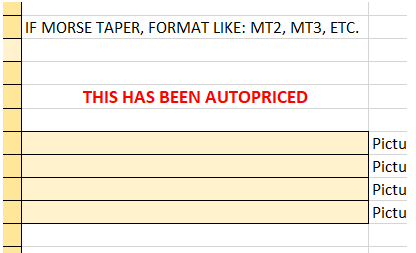
Some drill bits have their prices calculated automatically by the template. When this happens, red text saying "THIS HAS BEEN AUTOPRICED" will appear on the right side of the page.
Whenever an item is auto-priced, you must always select one of the five conditions from the box on the left side of the page (shown above). This will affect the pricing of the item, and there can often be a big difference in price range from Excellent to Budget.
This is a mostly subjective decision which will not necessarily have one correct answer. The most important thing to consider is the condition of the cutting edges and especially the tip. If you are unsure which condition option to use for an auto-priced drill, contact your trainer for guidance.
The "Filler" section is used to add other relevant information to the title which is not covered by the other sections. Fillers can be a good way to increase a listing's visibility - we always want to include as much information as possible that we think a customer might be searching for in order to make sure that our listing is coming up in their search results.
There is not necessarily one right answer when it comes to fillers, and often it will be up to you to decide what should and should not be added as filler. Drill bits generally do not require much filler, but some possible fillers include:
-Secondary labeling or branding / product names
-"USA" or "USA Made" for any US Manufacturers (you may need quickly research a brand if you are not sure since this will not always be specifically labeled)
-Morse taper drill bits should always have the MT abbreviation as filler (ex., Morse Taper #2 -> MT2)
Note: Keep in mind that titles have a maximum limit of 80 characters.
Additional Specifications & Special Condition
The Additional Specifications section should be used for any secondary labeling or additional measurements that do not fit in the other sections of the listing. There is no character limit here so any relevant information that is not already covered should be included (within reason - we don't want to overload the listing with unnecessary information, so ask your trainer if you are not sure whether or not to include something in this section).
The Special Condition section should be used for any special notes about the item's condition such as damage or modification. Try to be specific when describing the condition, and reference pictures that point out the damage / modification if applicable. For example, "There are some chips along one cutting edge - see picture #5 for details." General wear and tear does not need to be mentioned, but anything that will affect the tool's usage should be included here.
Once all information is entered, click here for the next steps.
