Use WD-40 and a Scotch-Brite pad to remove any rust or residue from the boring bar, taking care not to remove any labeling while doing so. Wipe down with a dry rag to remove any excess WD-40 before picturing.
Click here for info on how to upload pictures
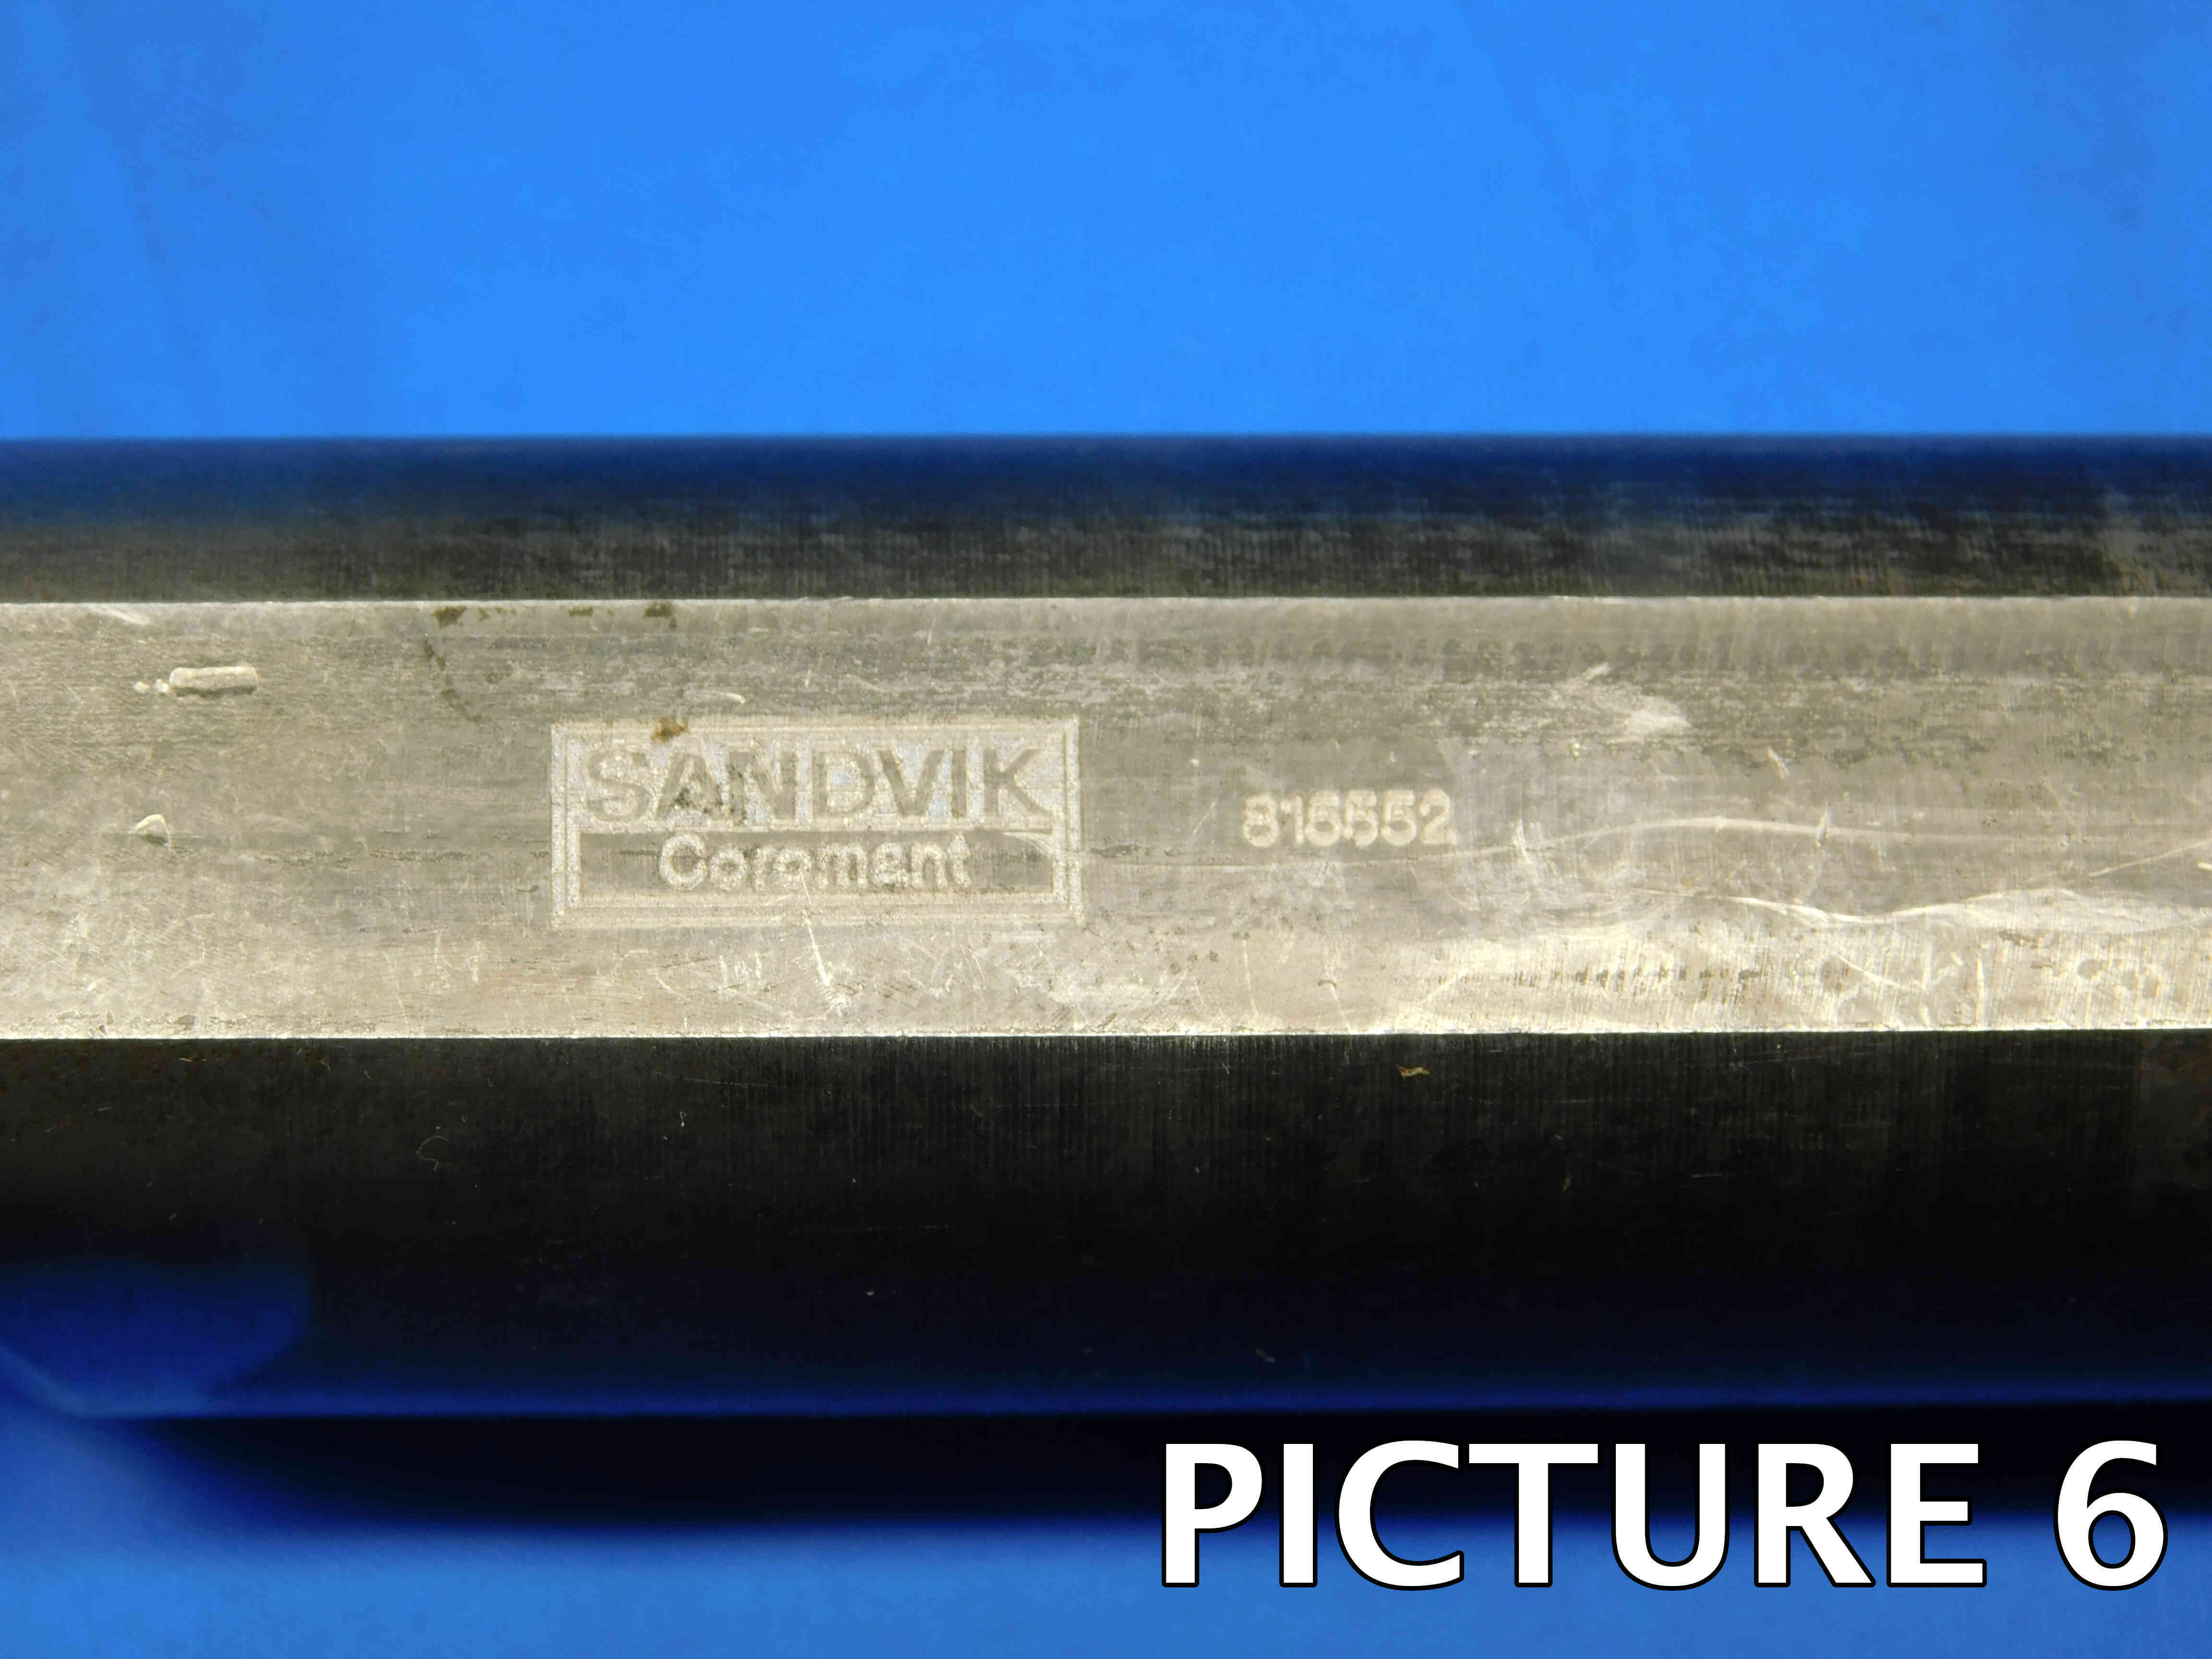
1st Picture: A three-quarters (or "3D") angle of the boring bar, with the insert pocket pointed toward the camera. See below for an example of what we mean by this:
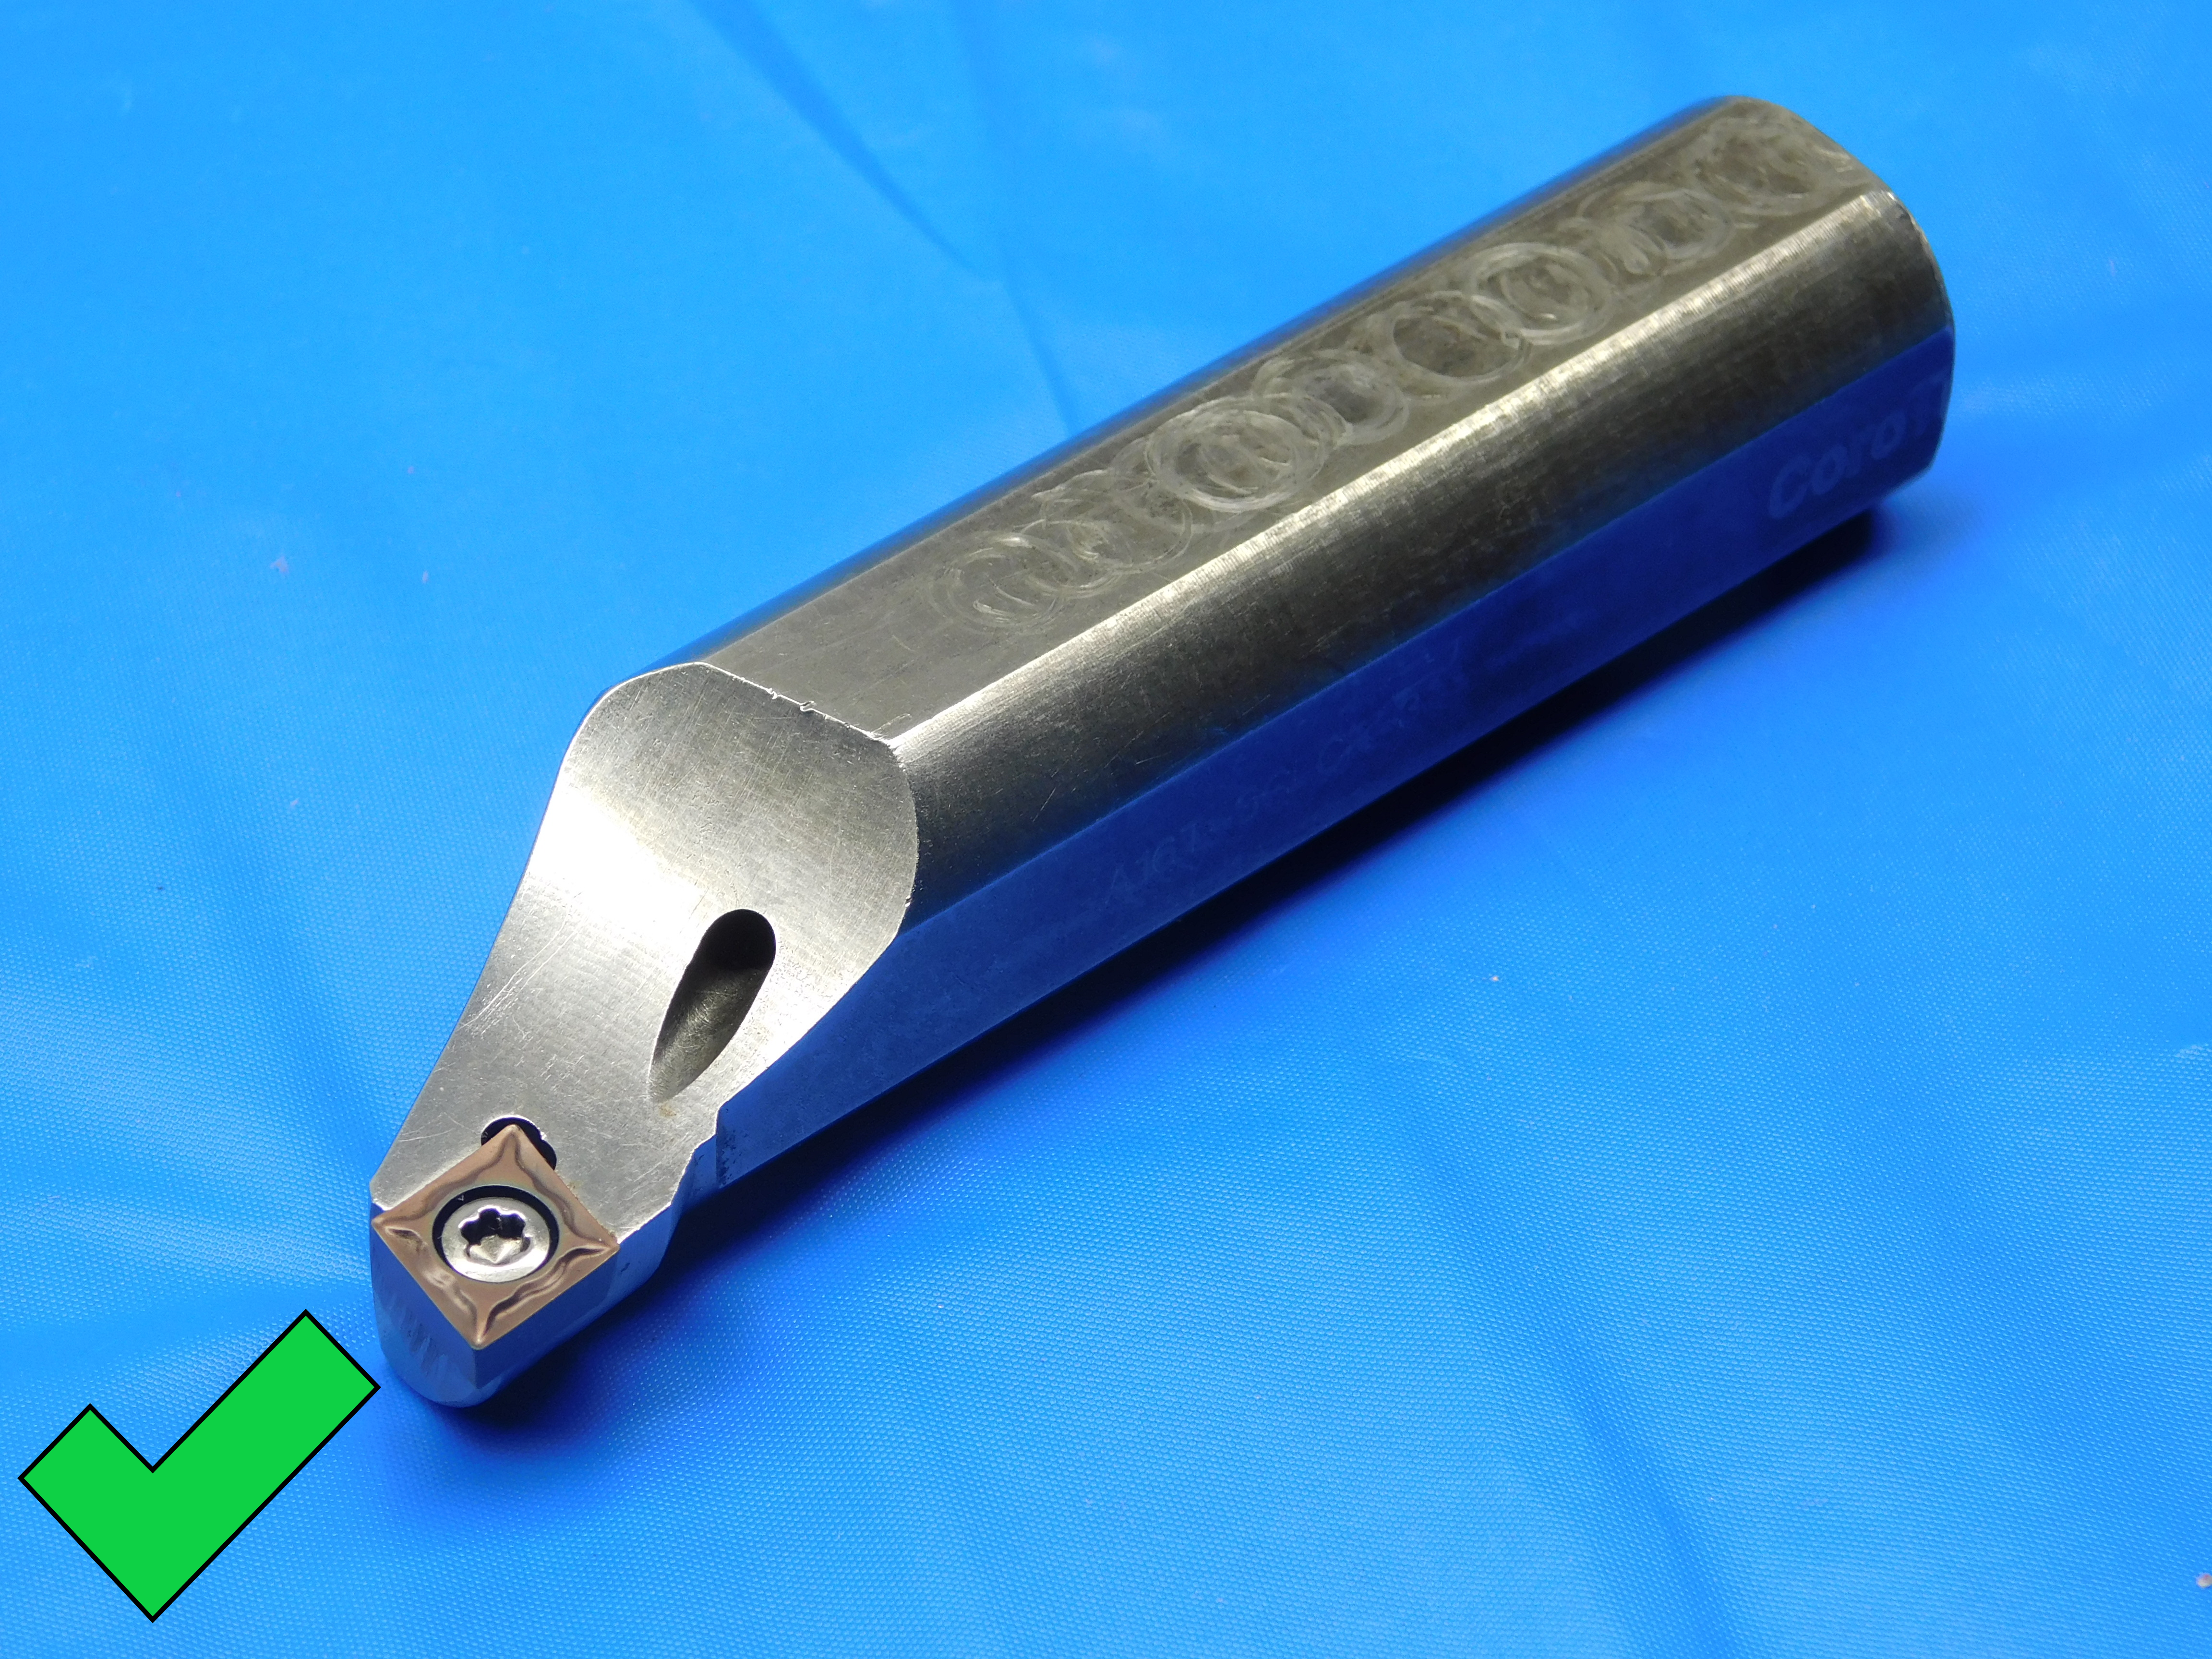
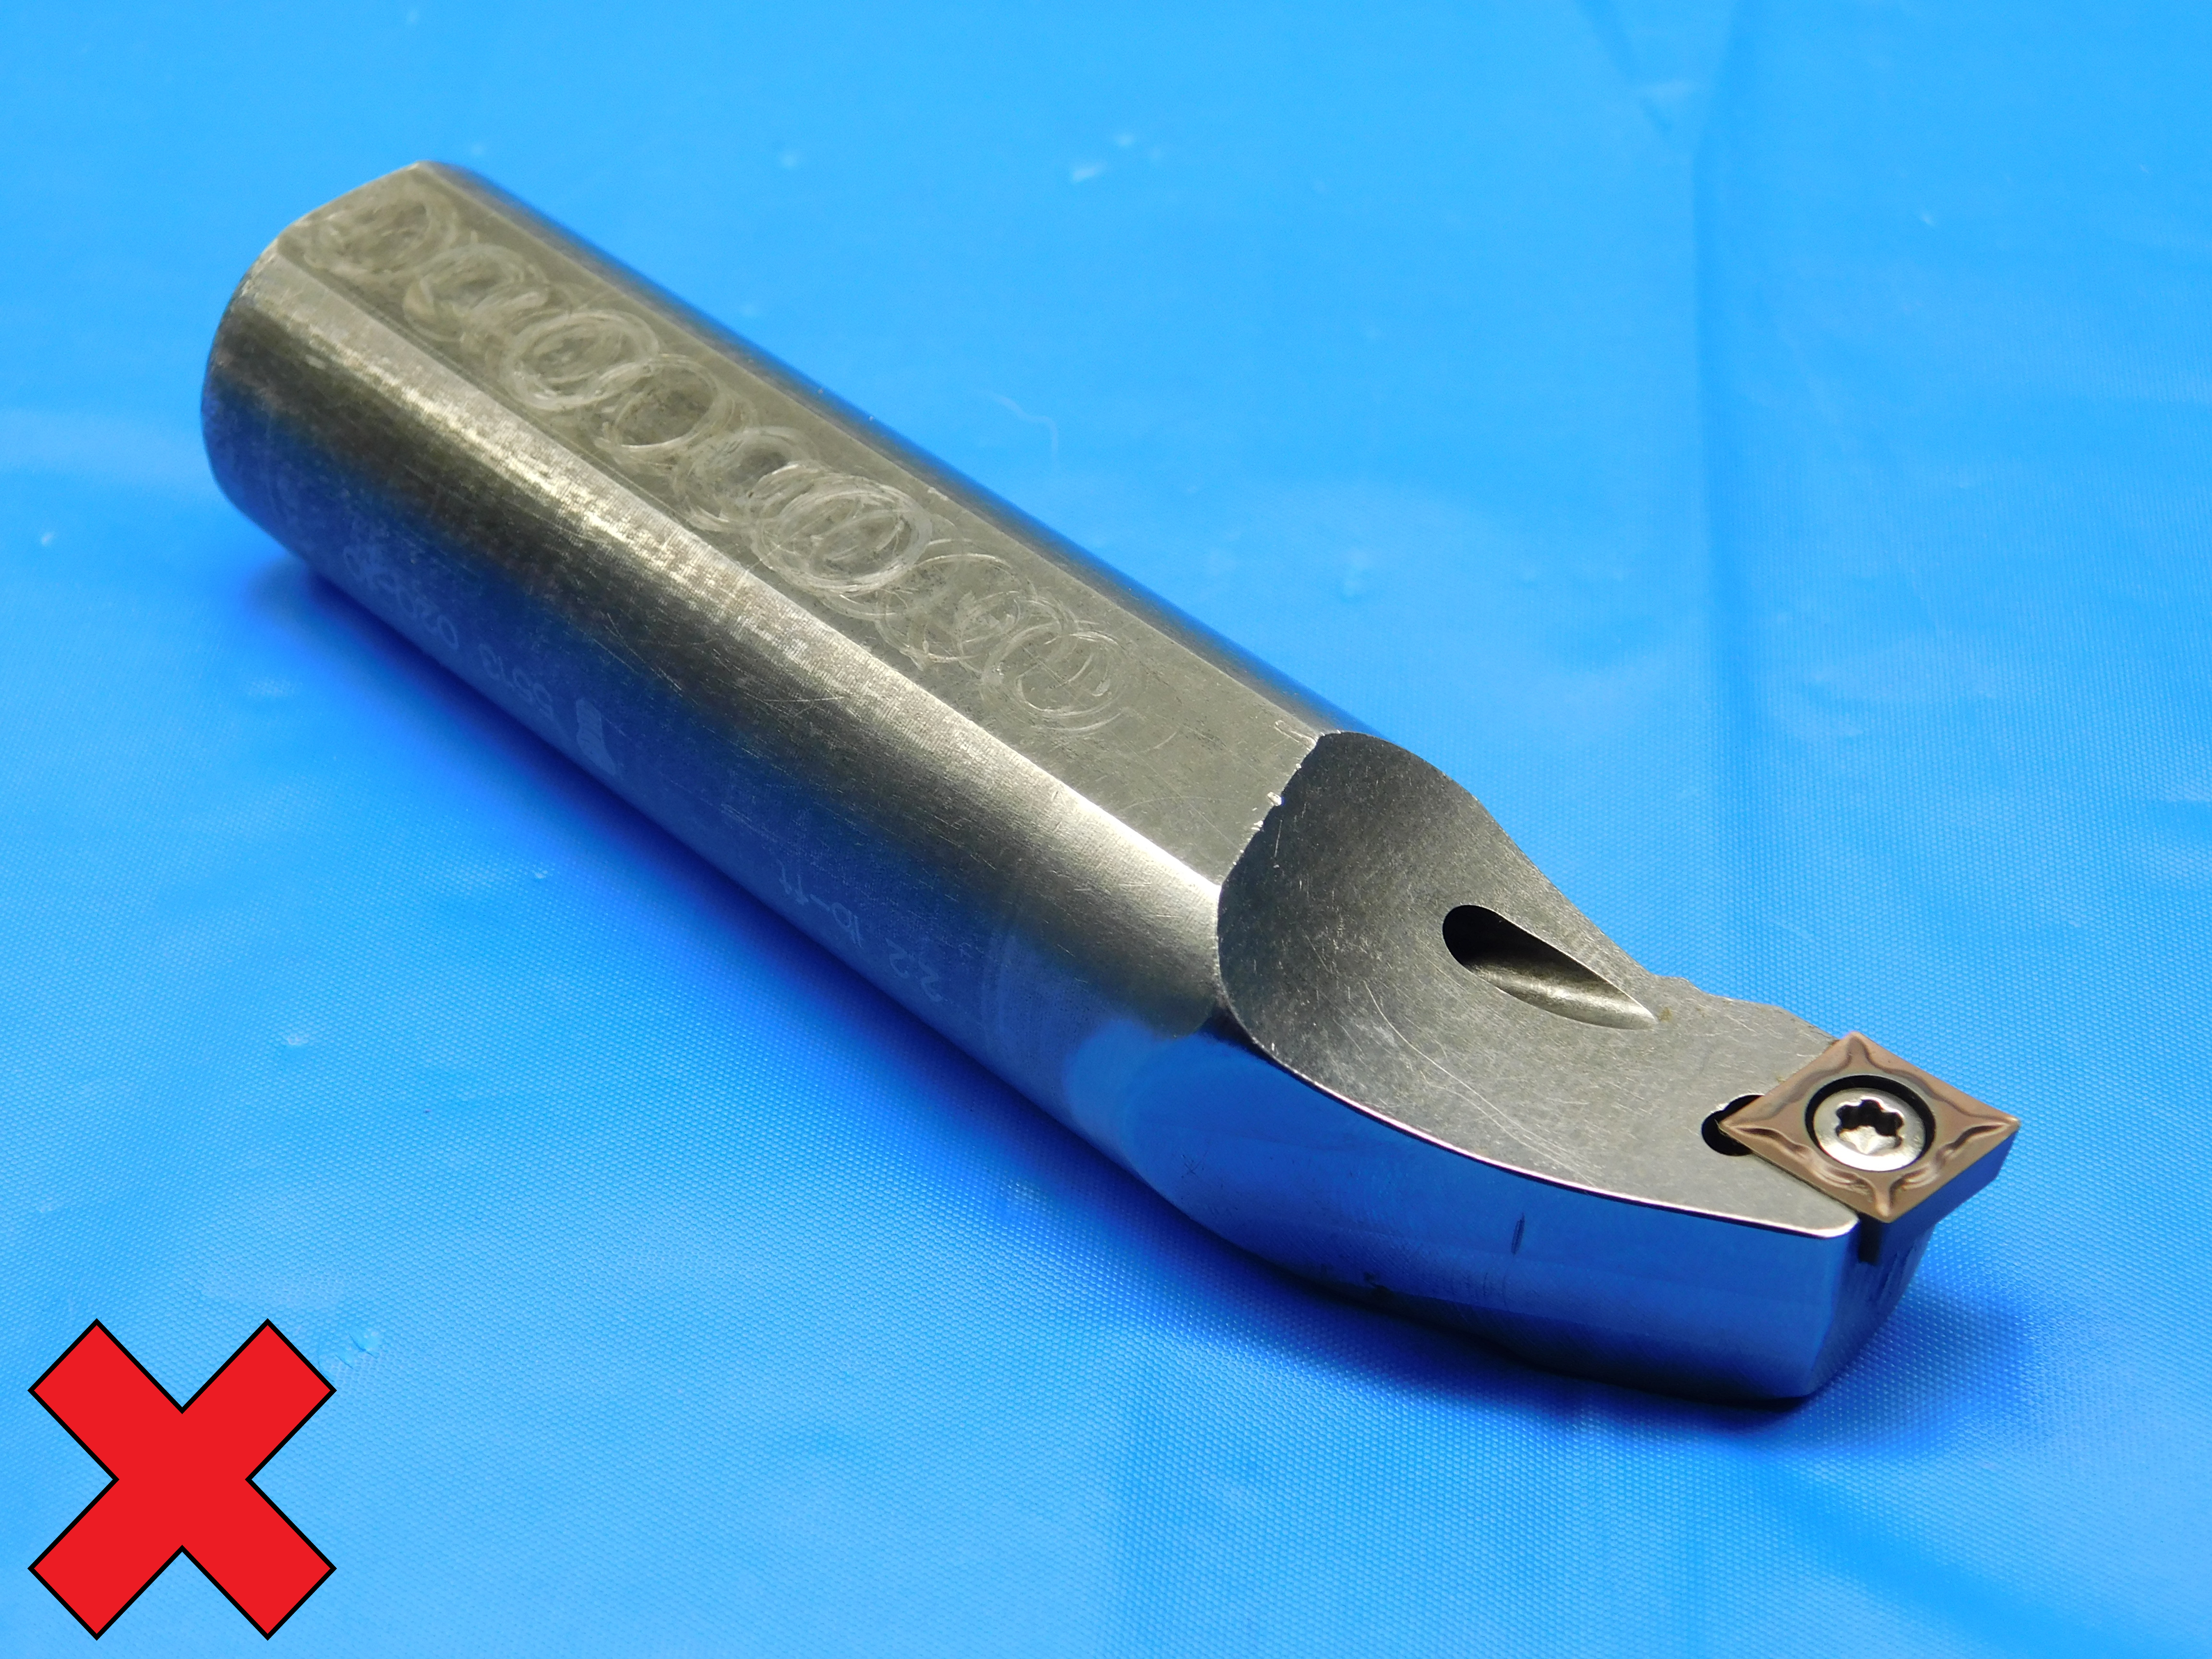
The specific direction will depend on whether it is a "right hand" or "left hand" tool - some will have the insert pocket pointing to the left, like in the picture above, but on others it will point to the right. If there is any packaging, it should be included in this picture as well.
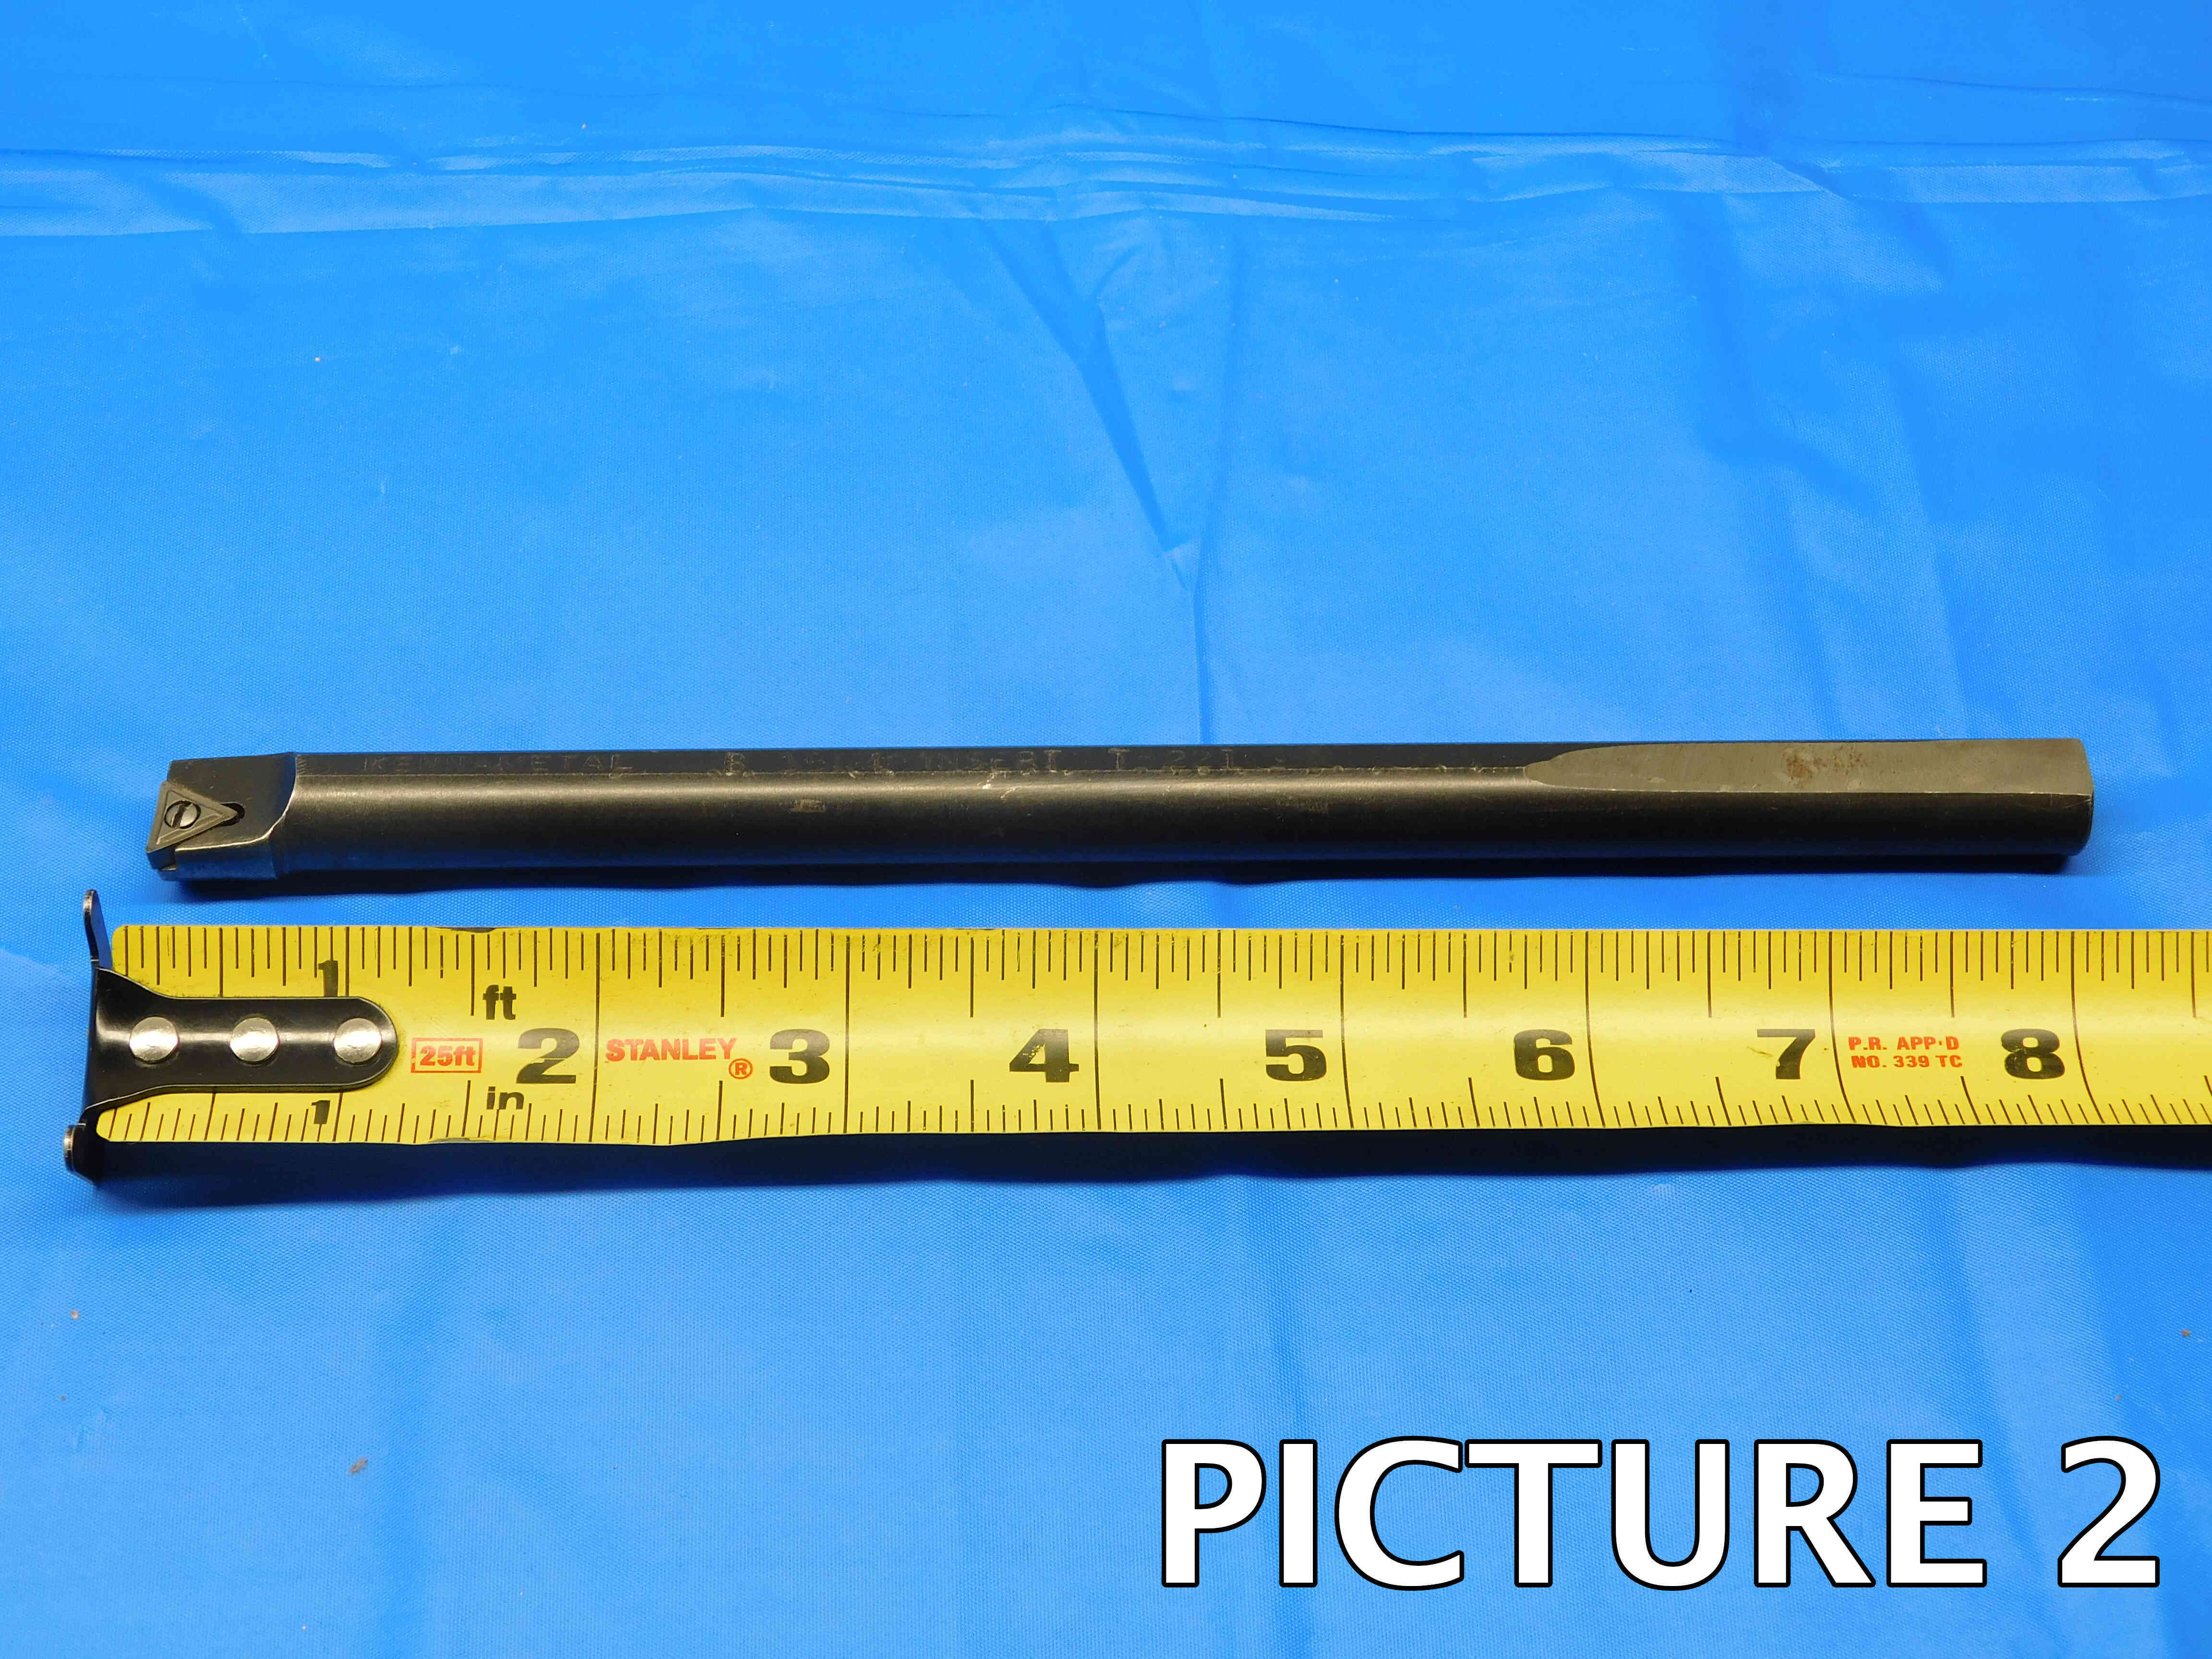
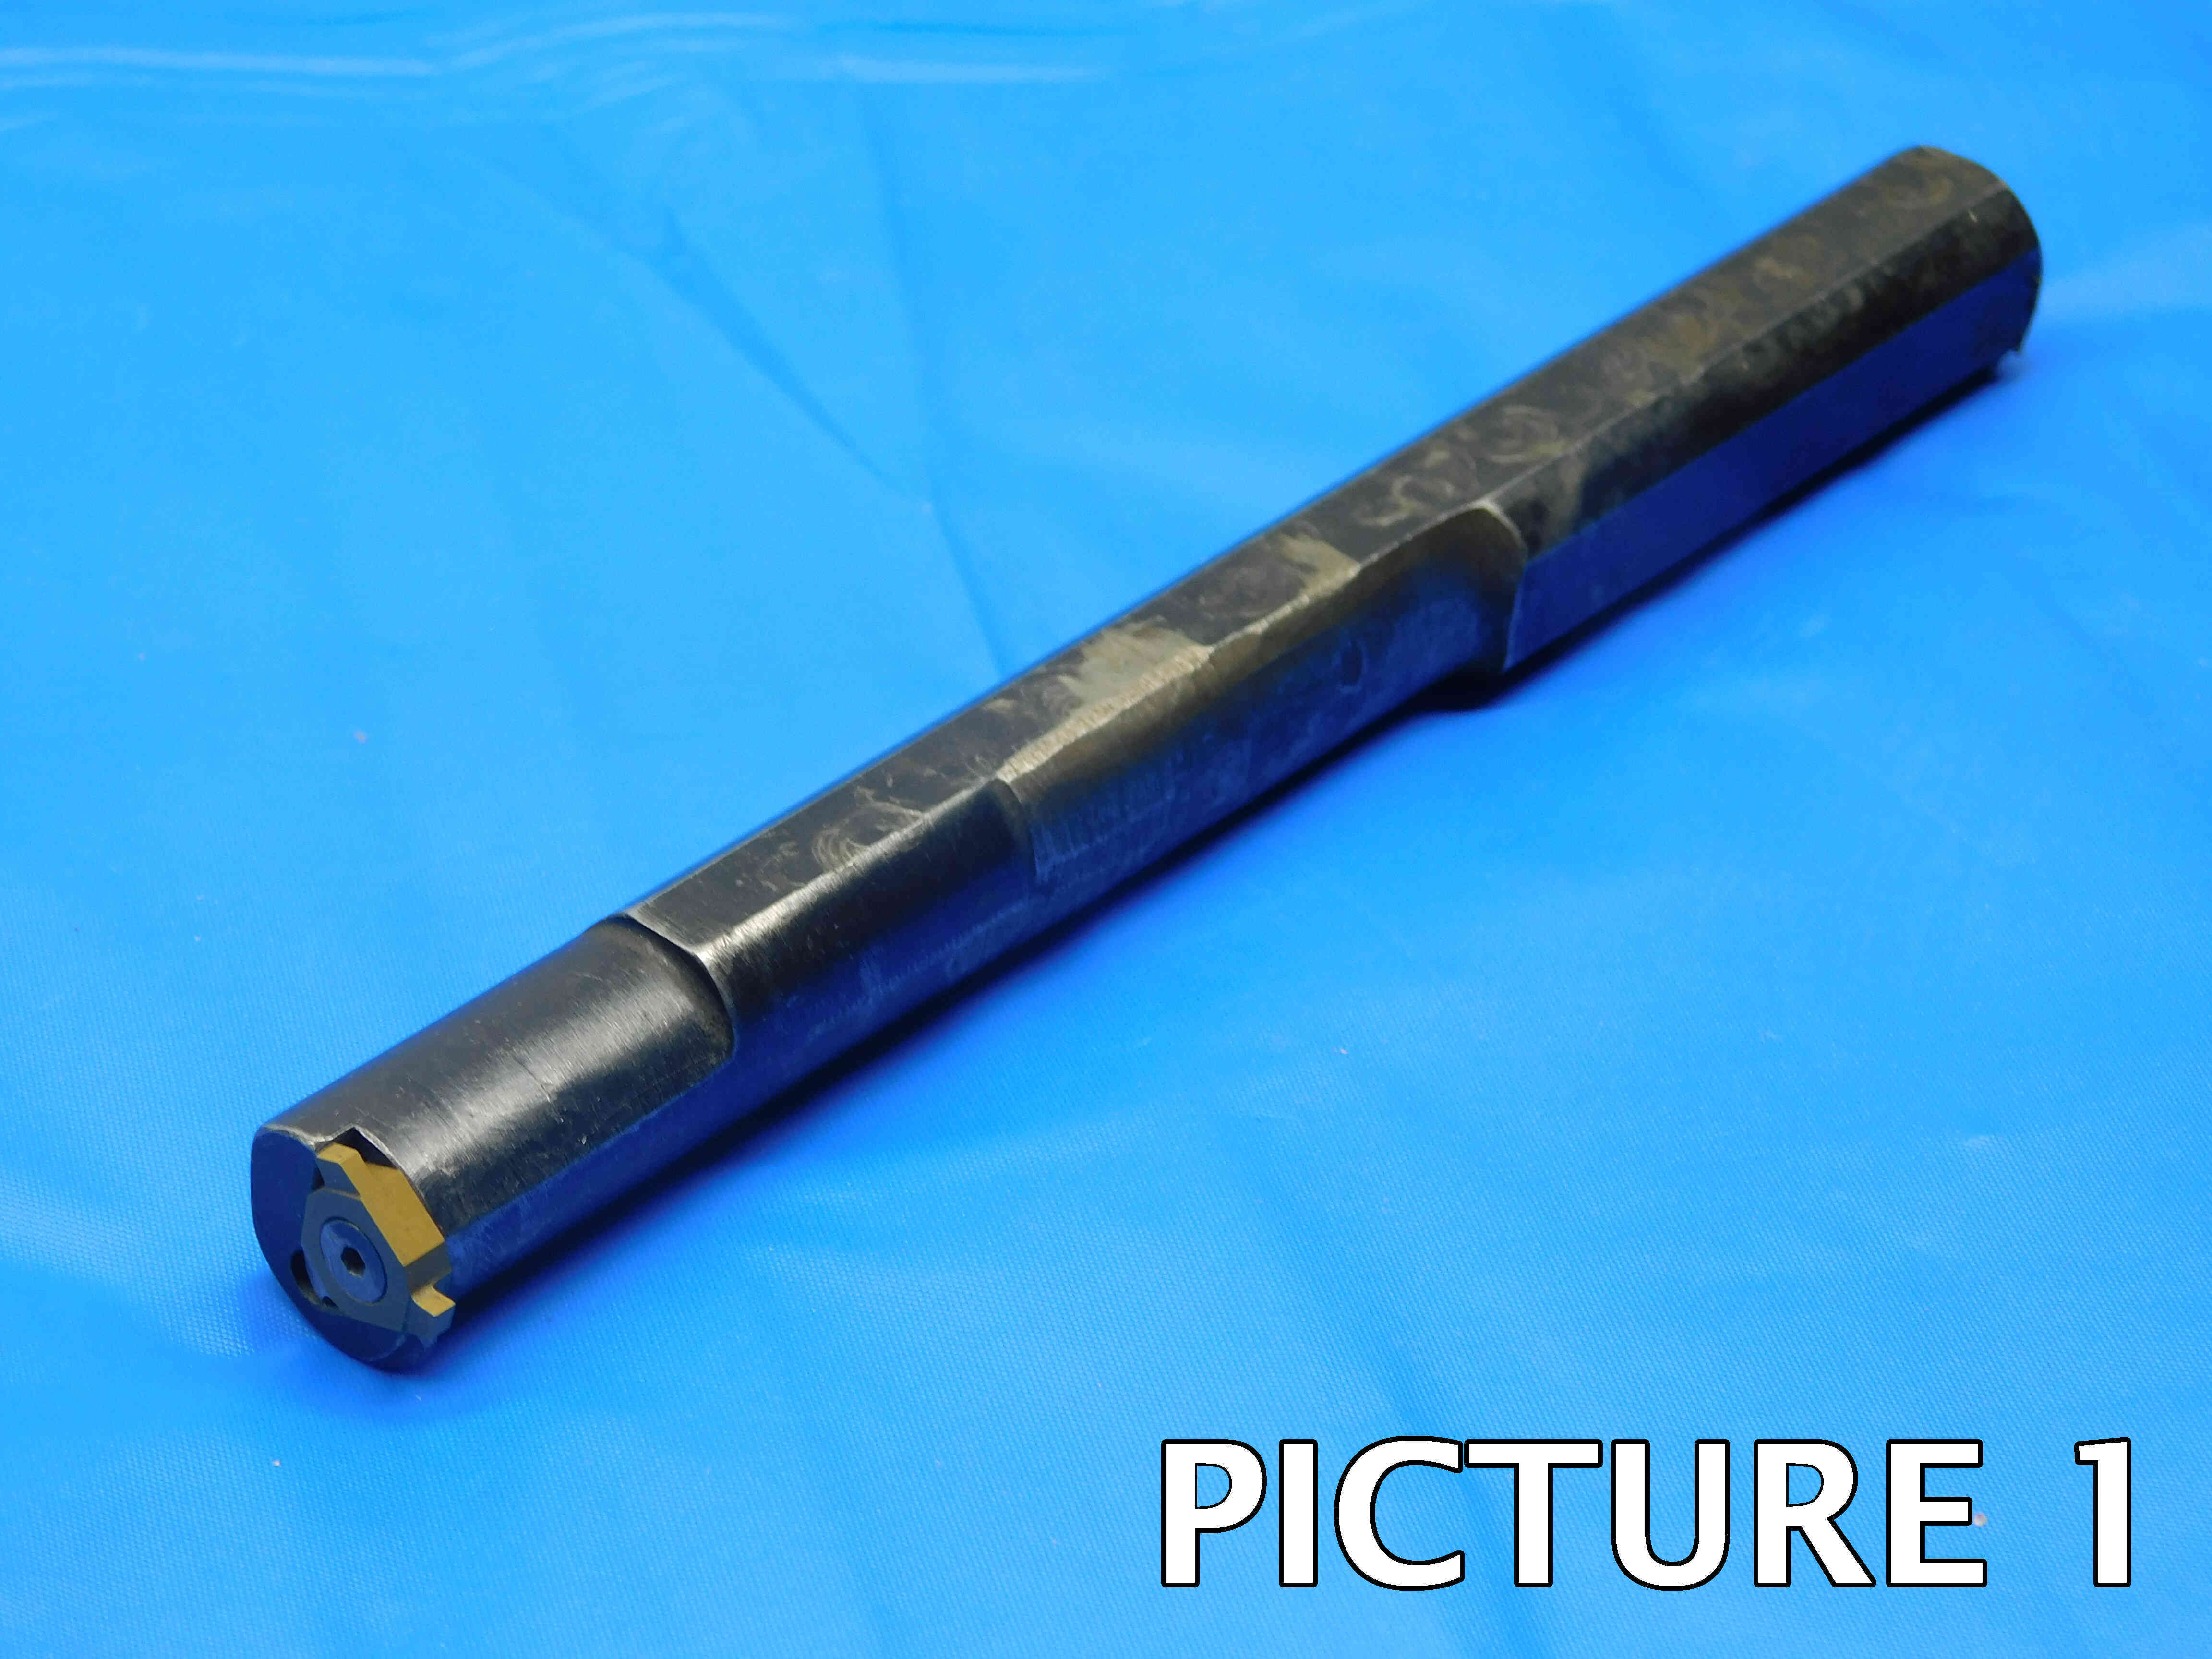
2nd Picture: A side view of the boring bar, with a tape measure at the bottom of the frame to provide size reference. Make sure there is sufficient space between the boring bar and the tape measure so that the tape measure is not covering up any part of the boring bar. Like the first picture, the insert pocket should be fully visible in this shot. If there is labeling on the boring bar, it should be visible and readable (i.e., right-side up) in this picture if possible (but if you have to choose between showing the labeling and showing the insert pocket, show the insert pocket). Any packaging should be included in this shot as well.
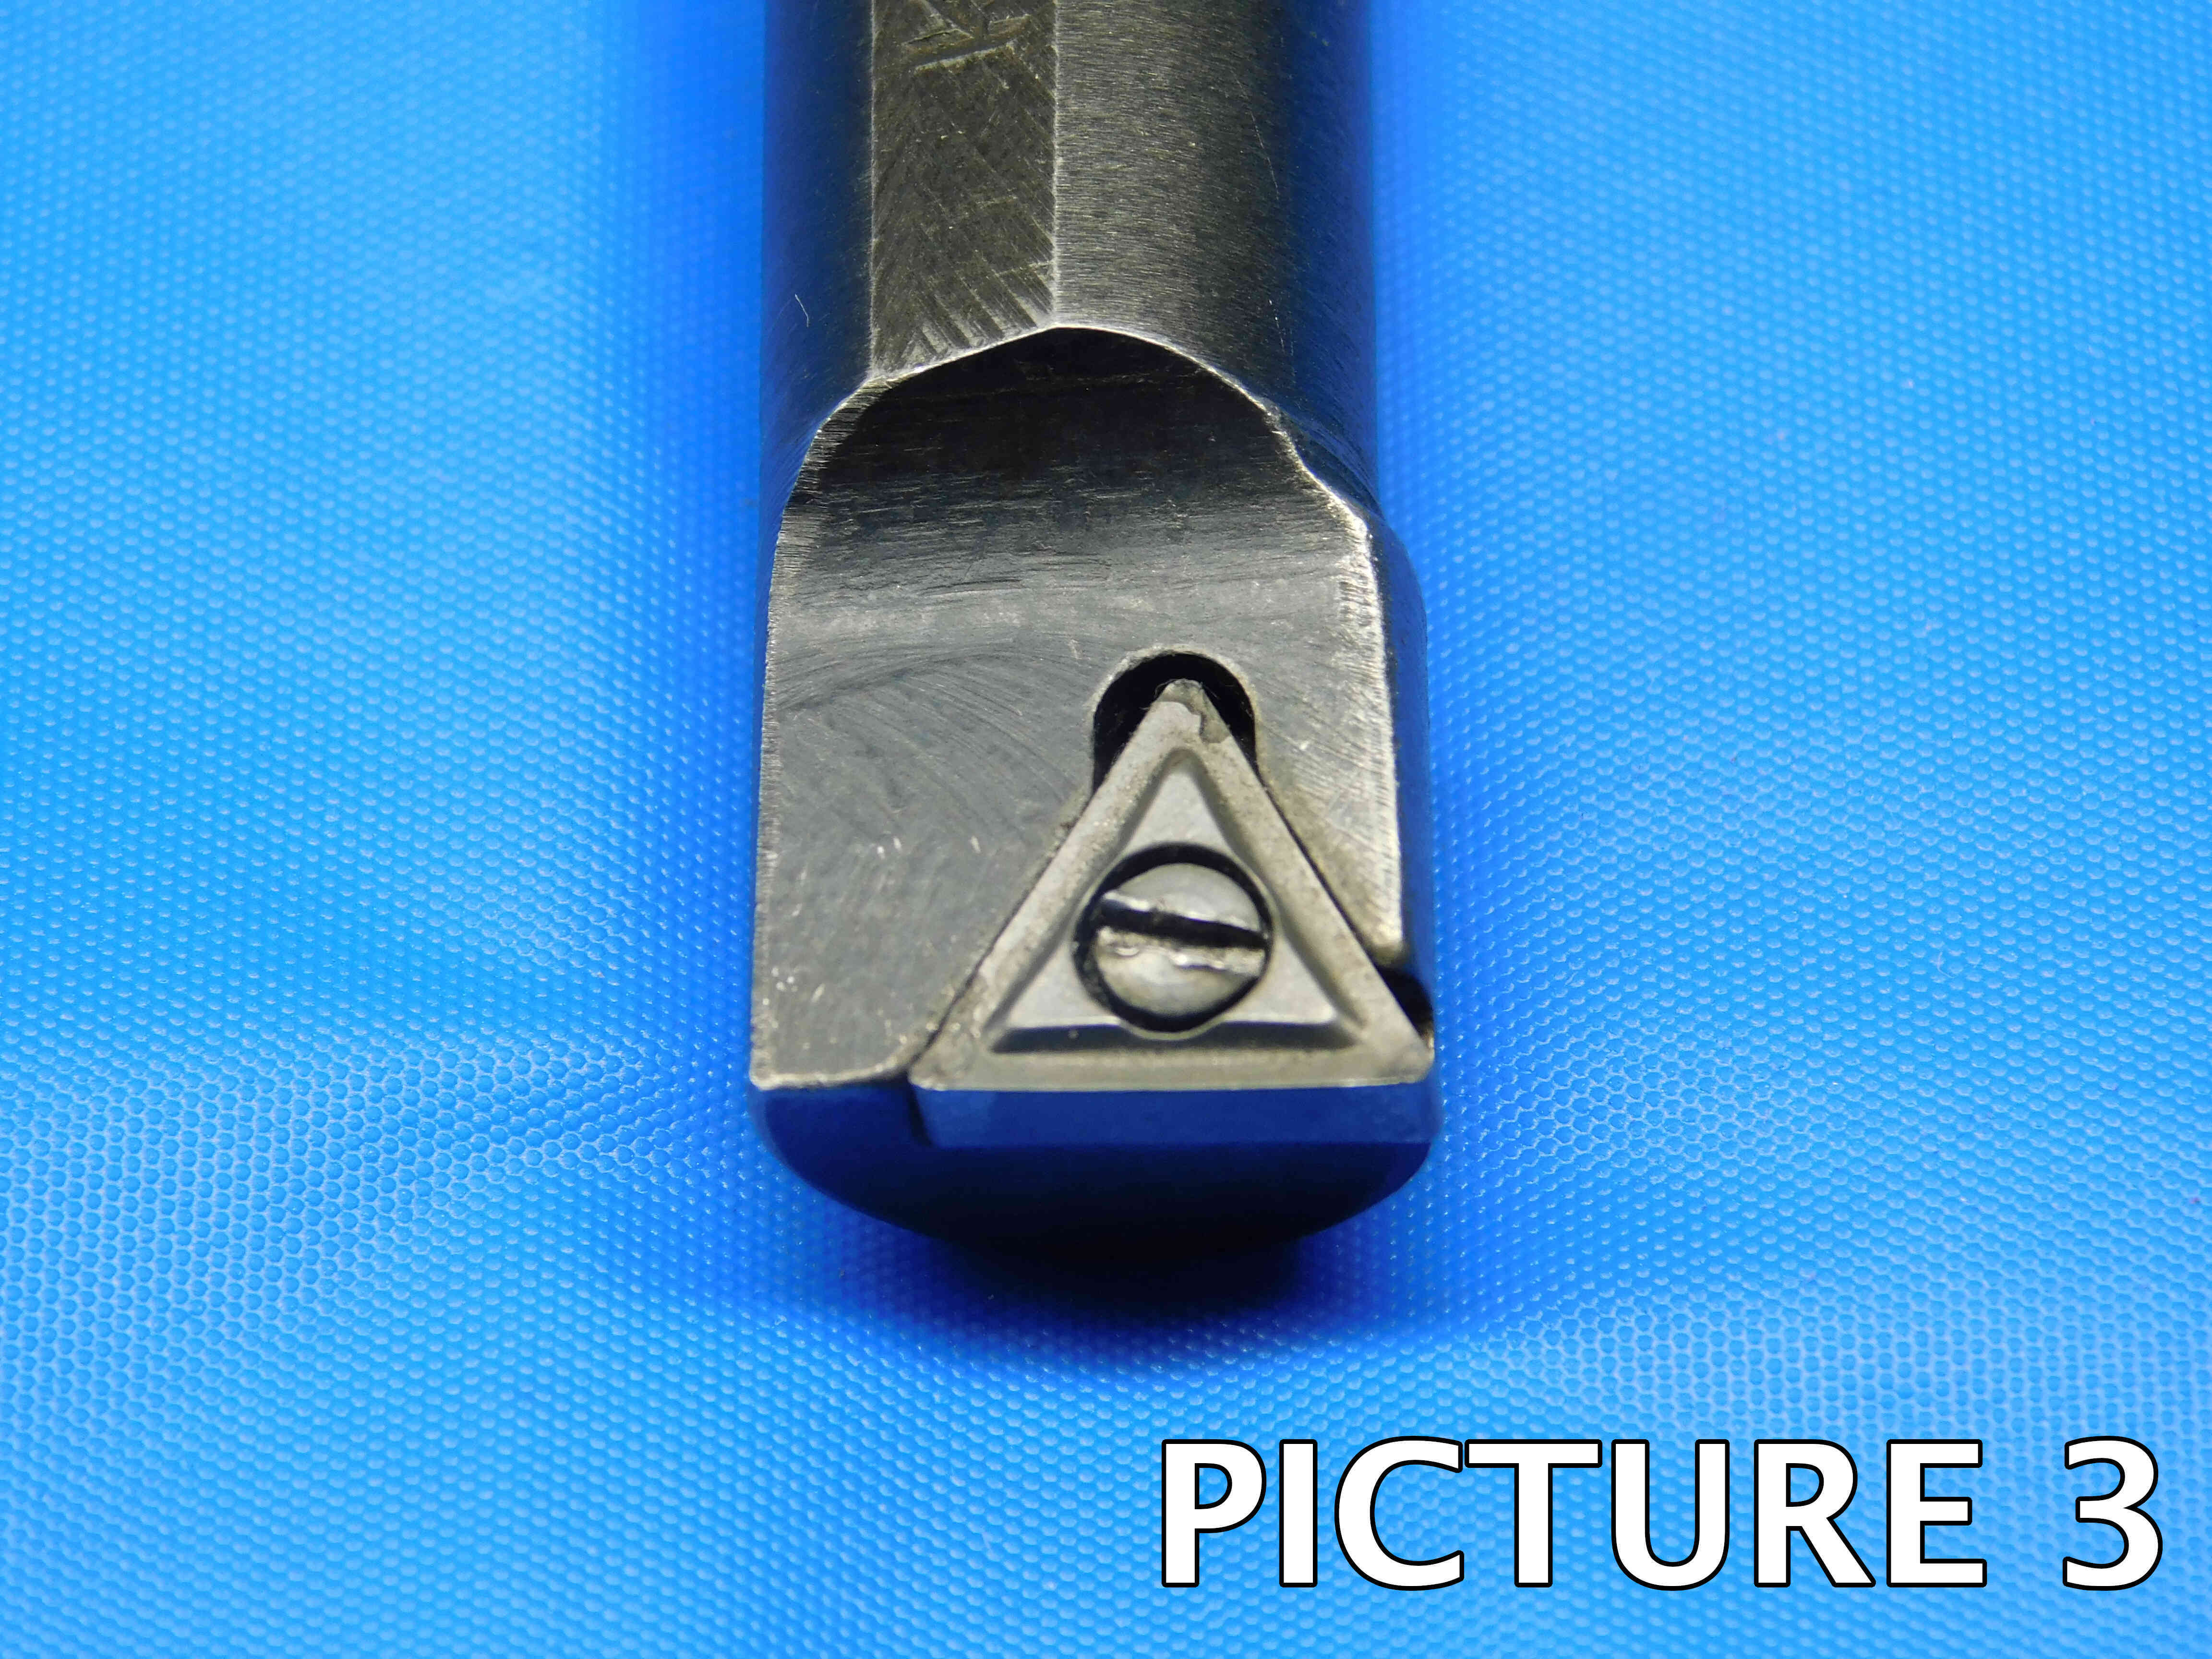
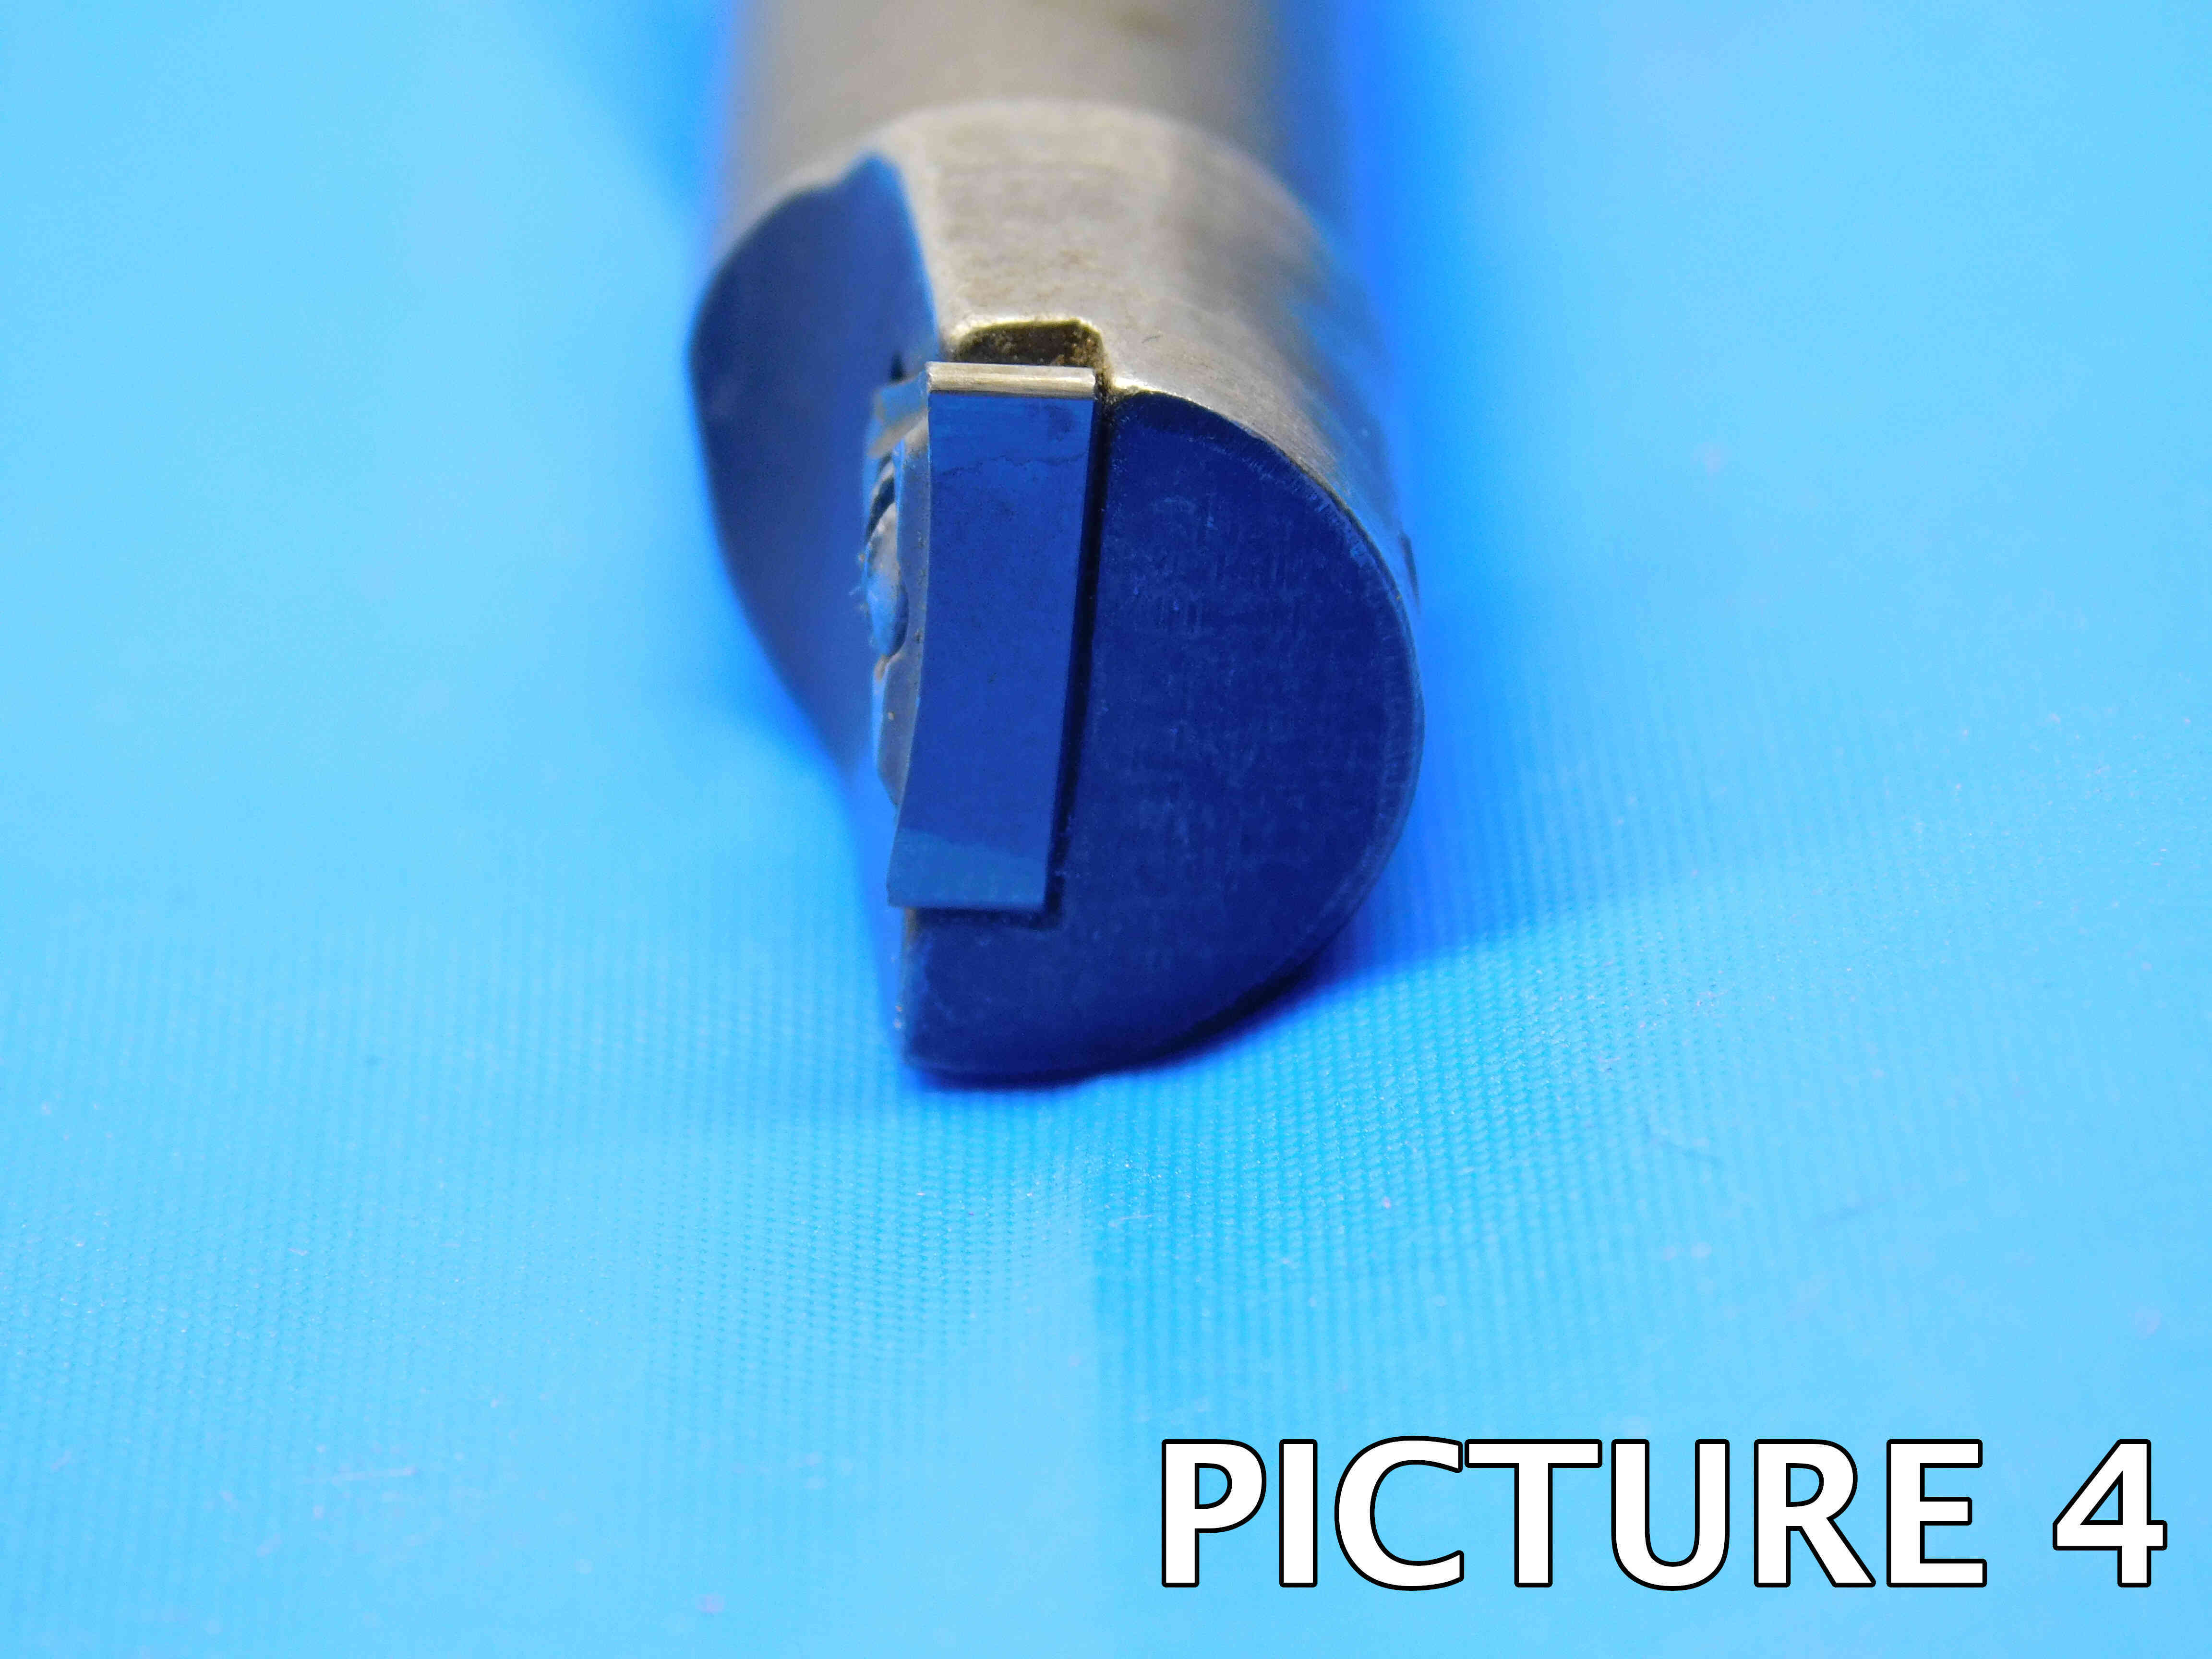
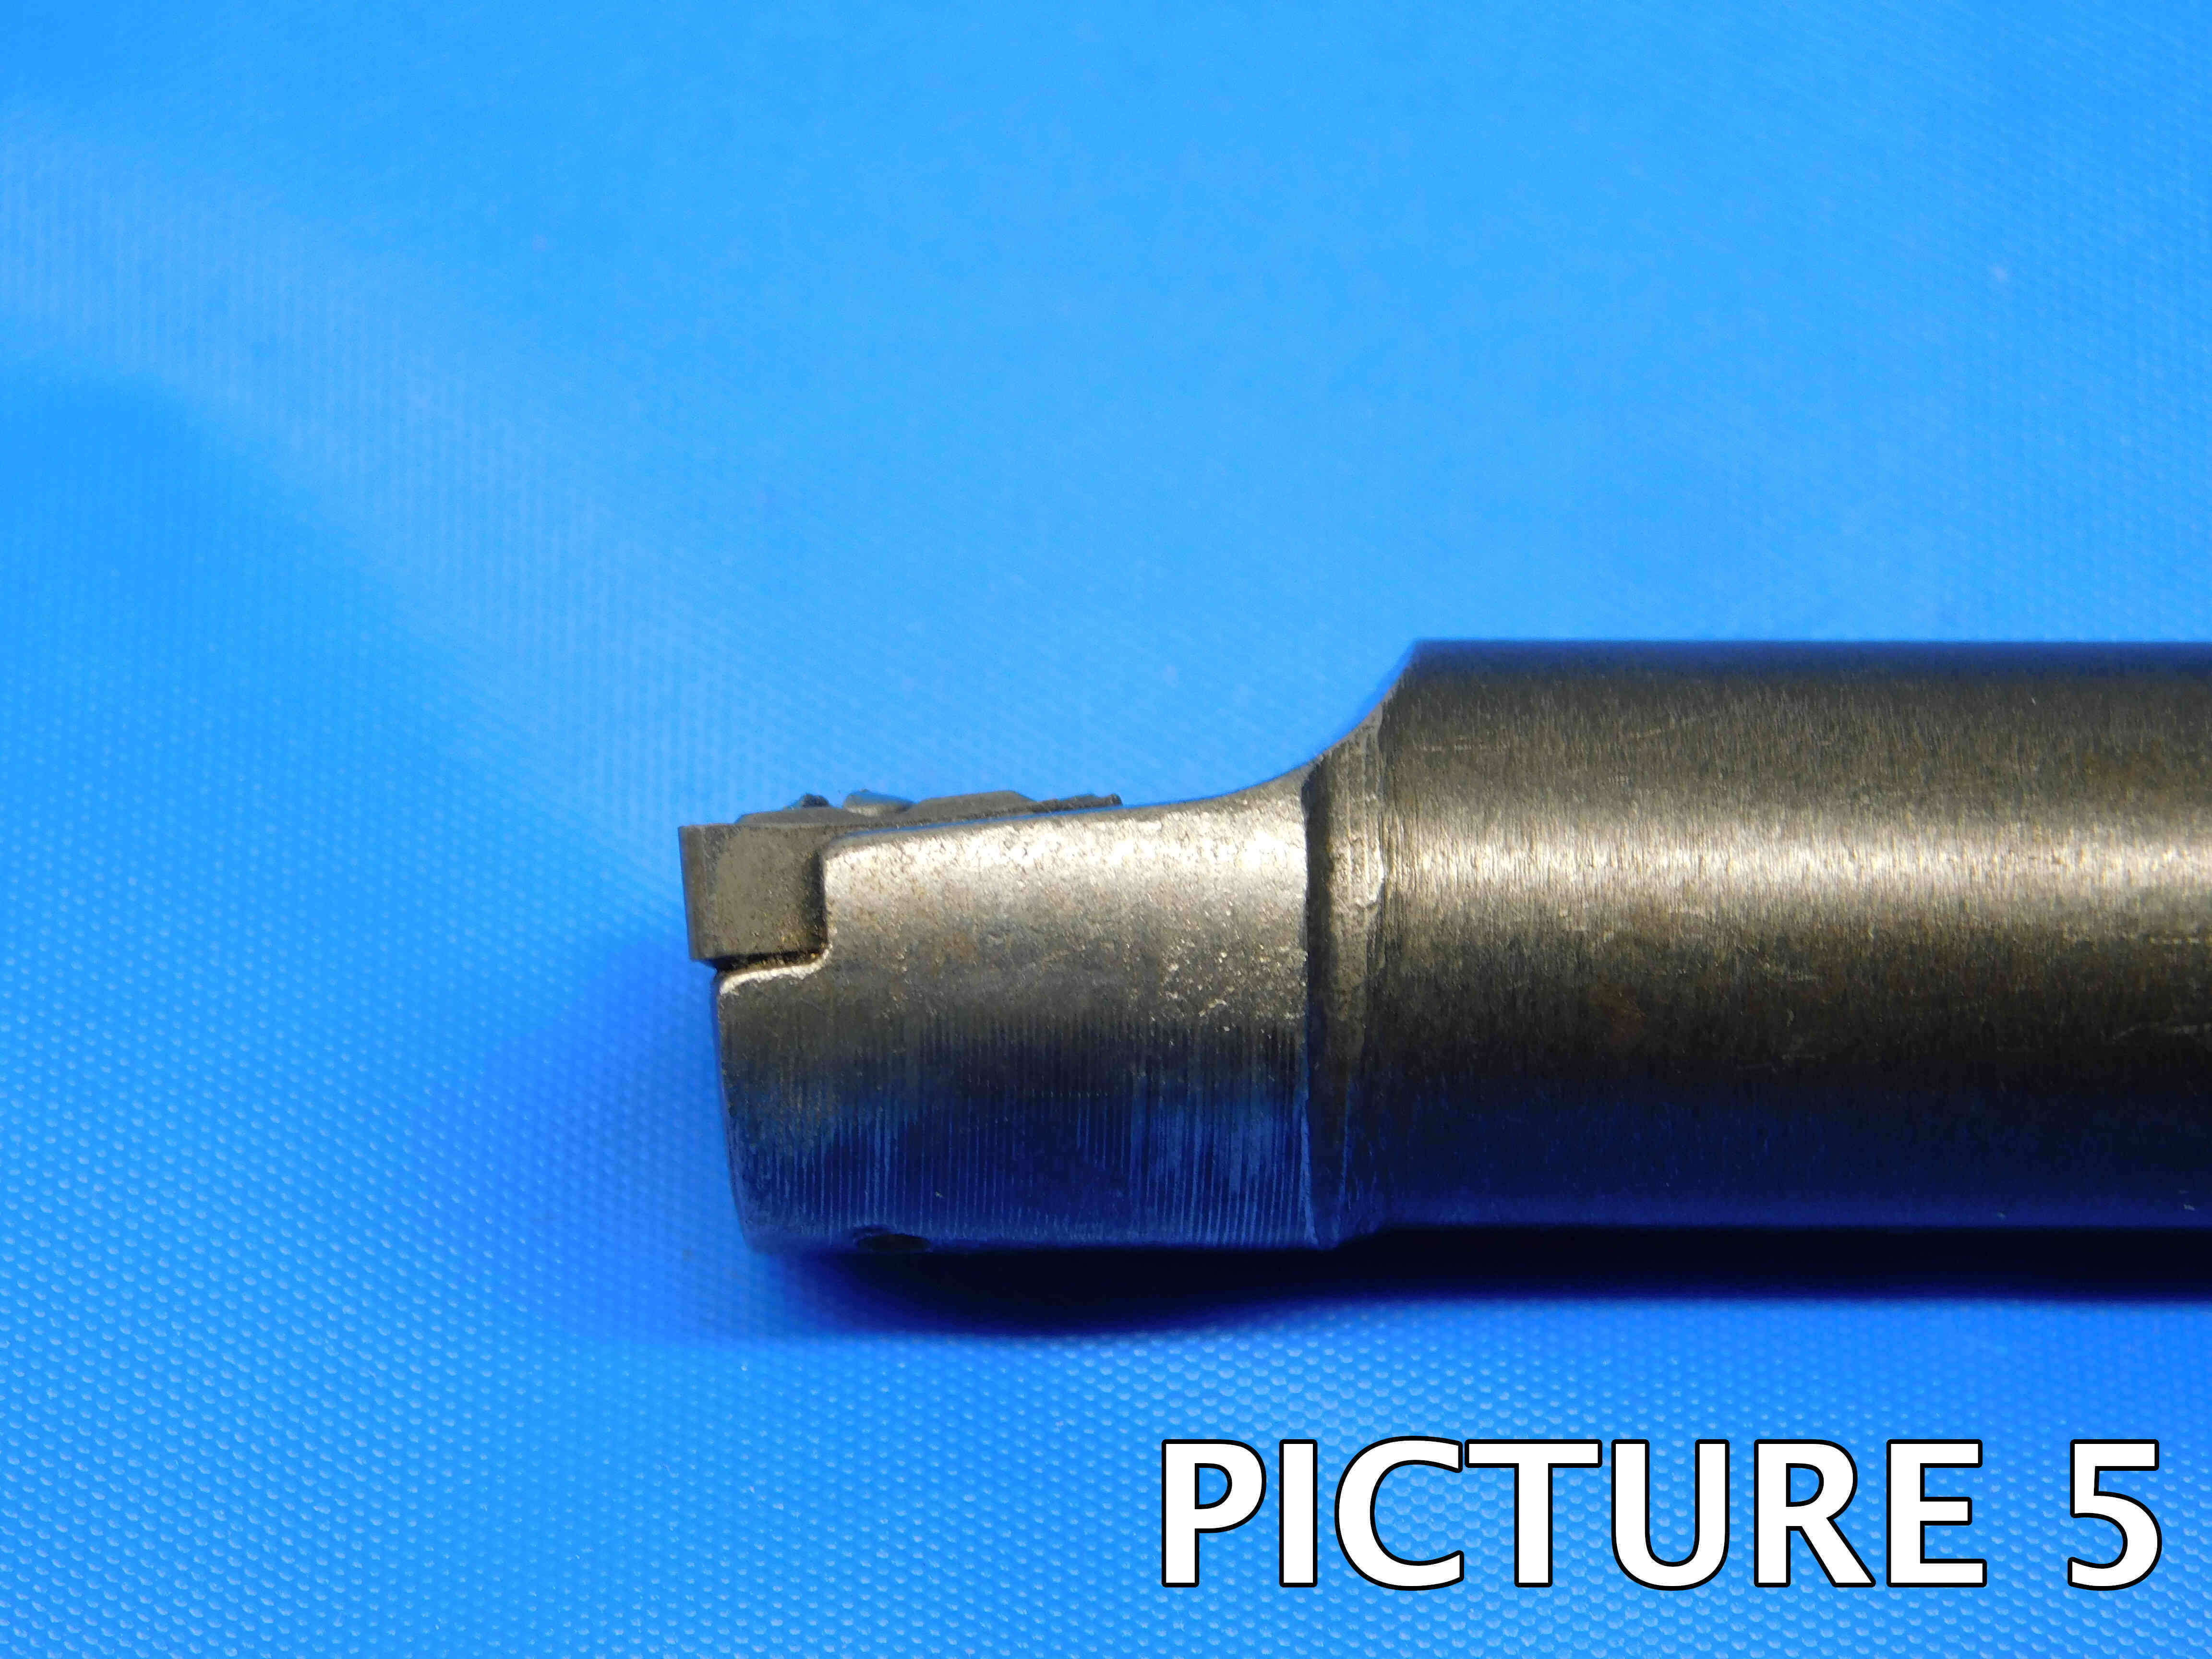
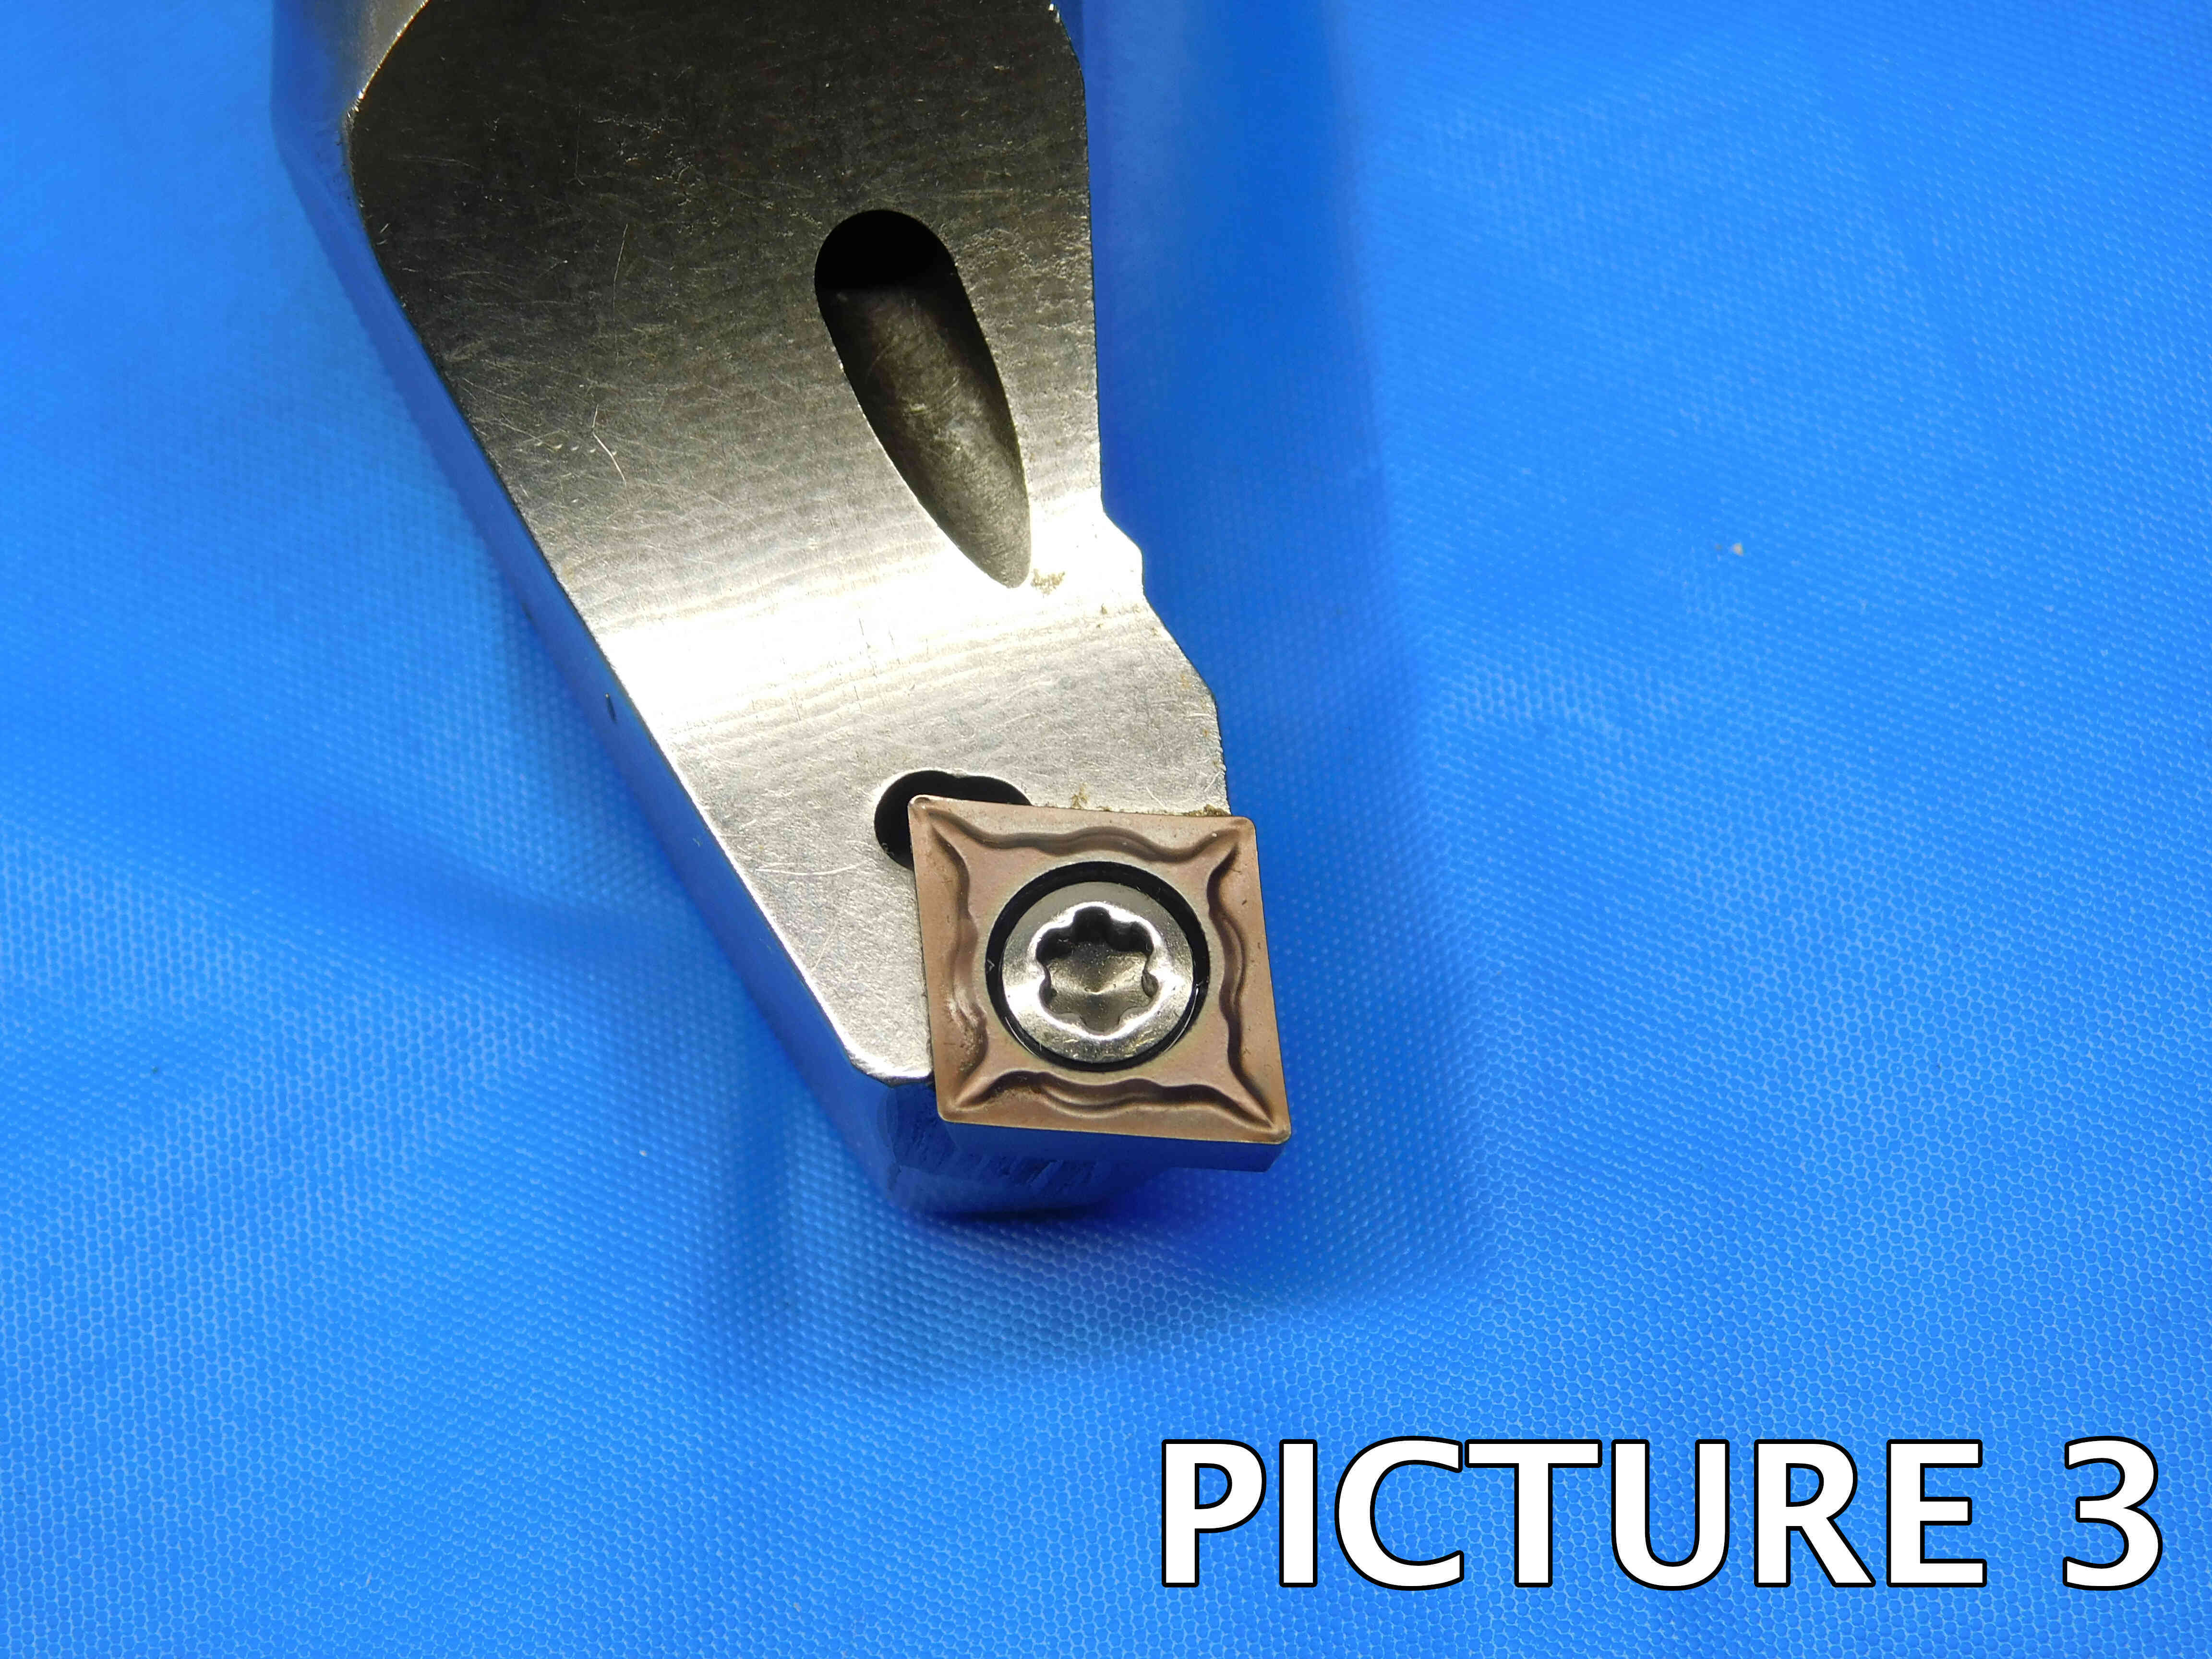
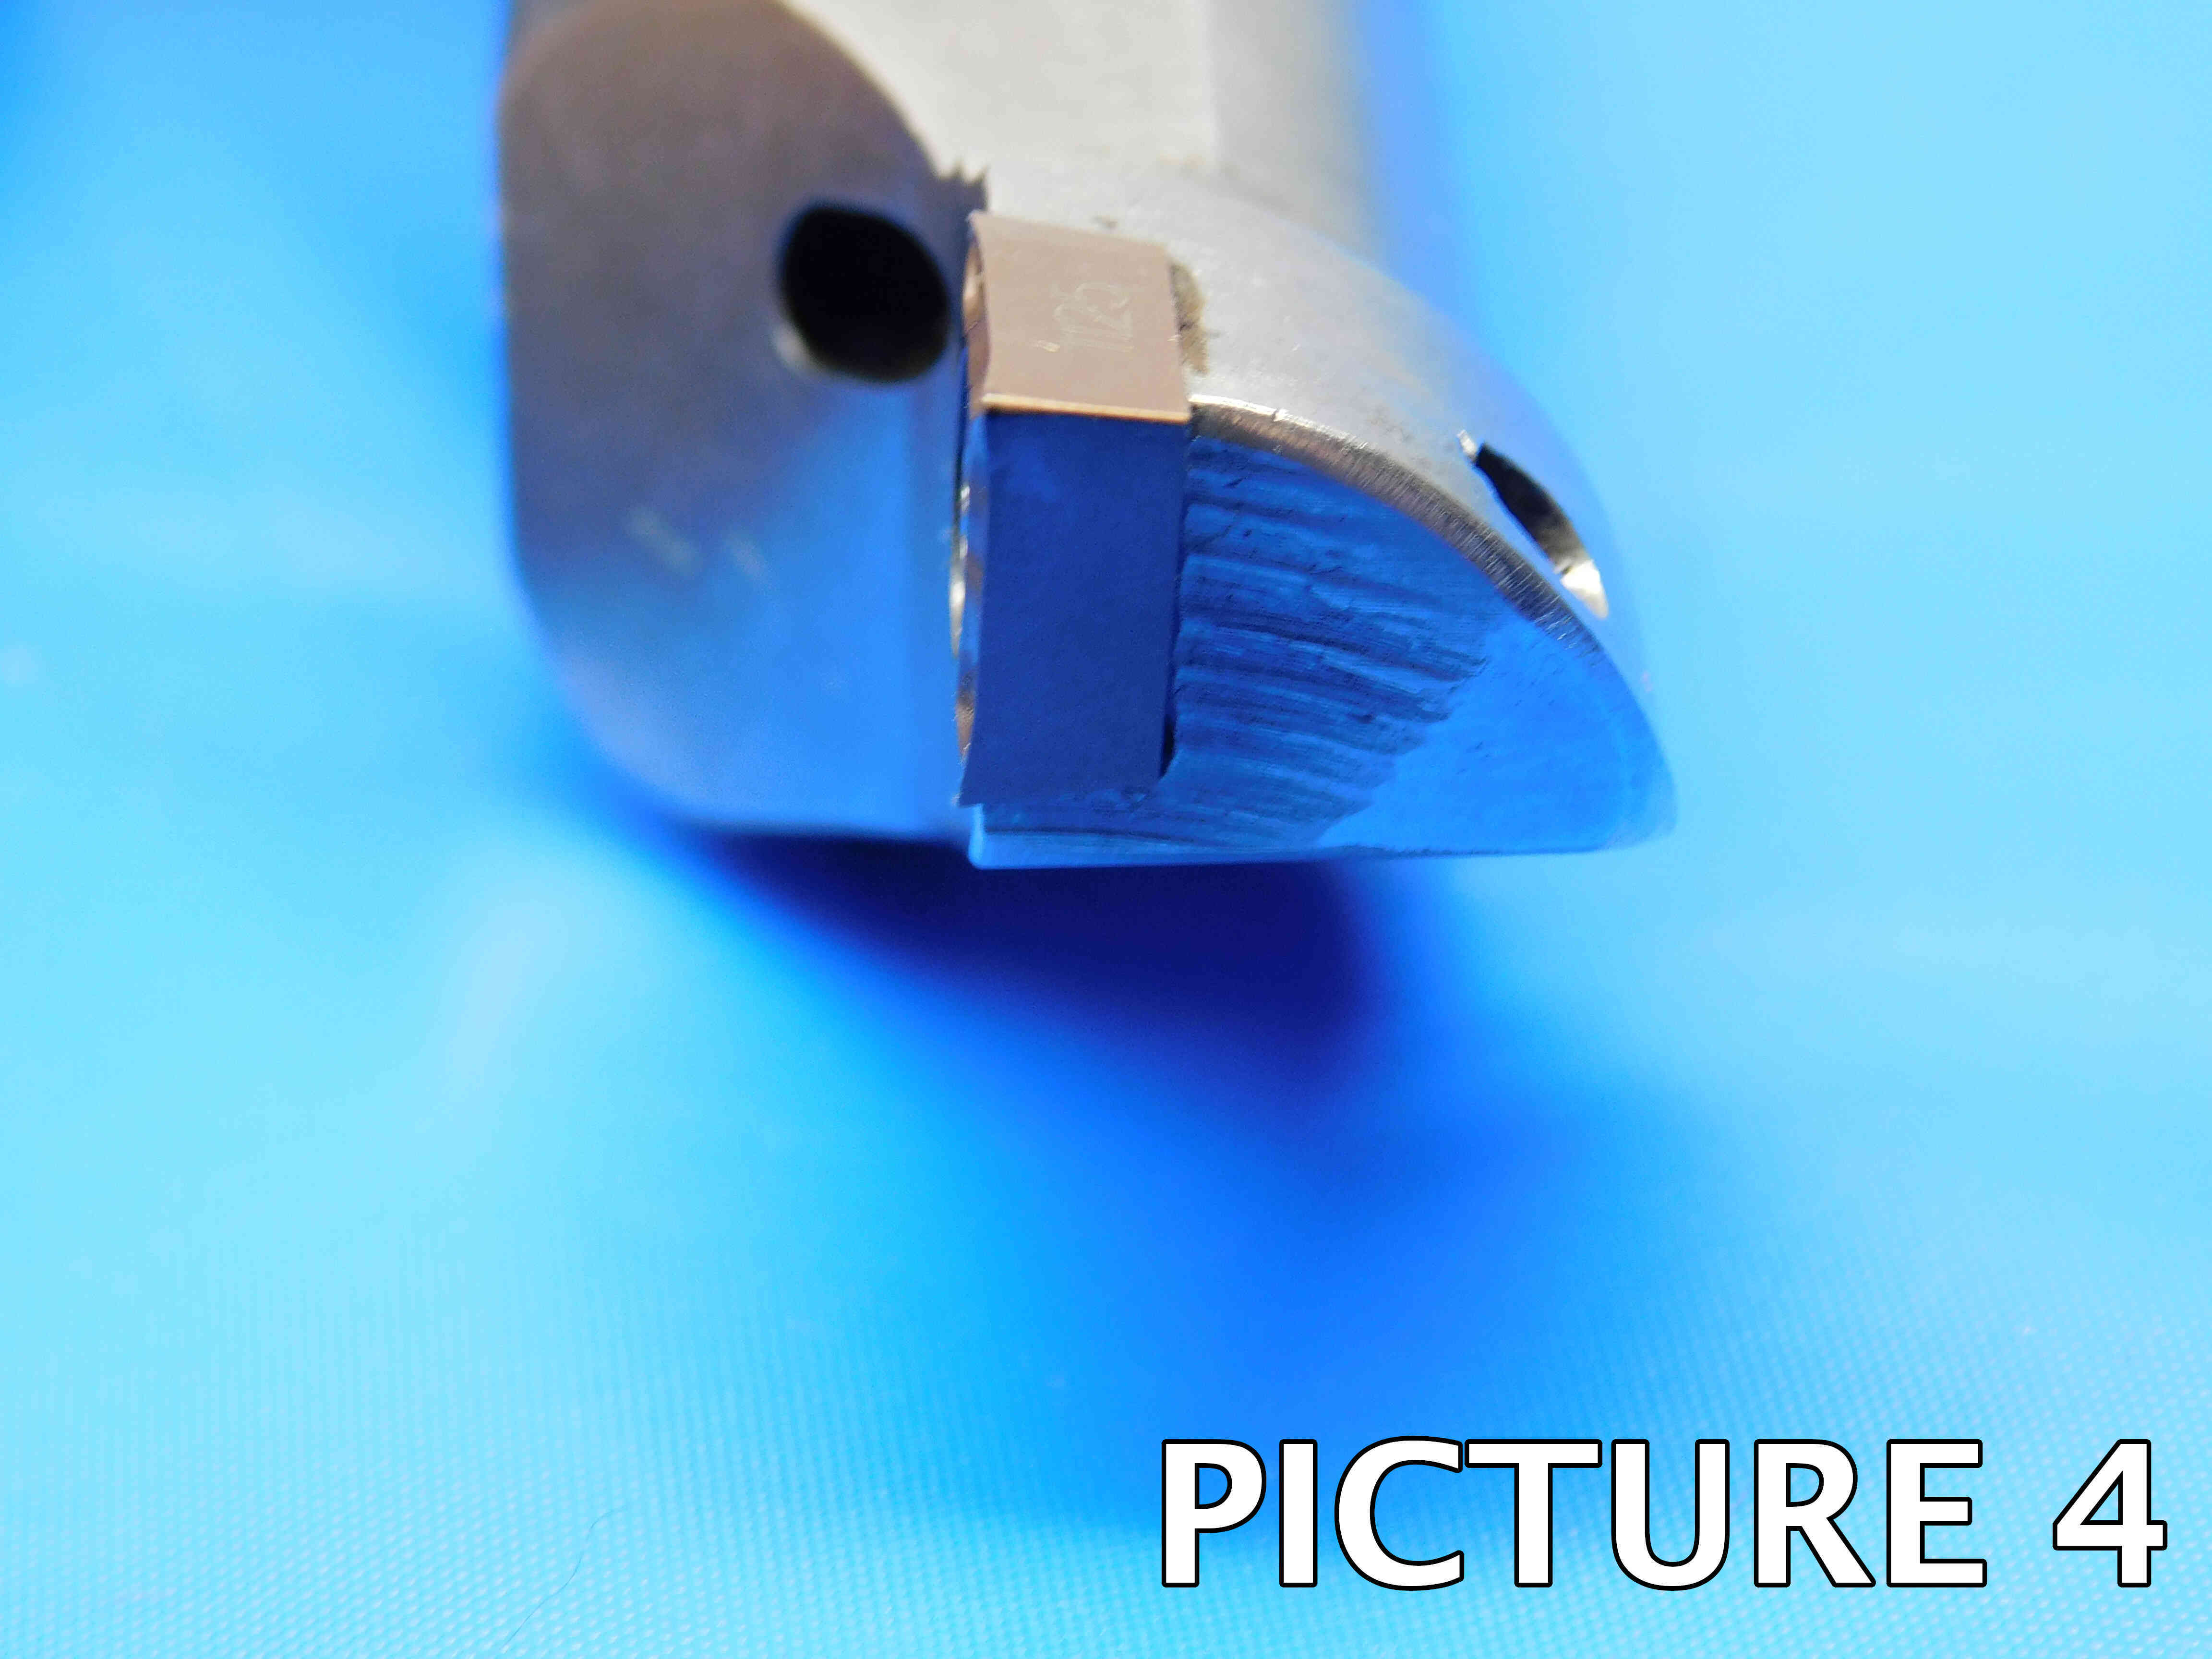
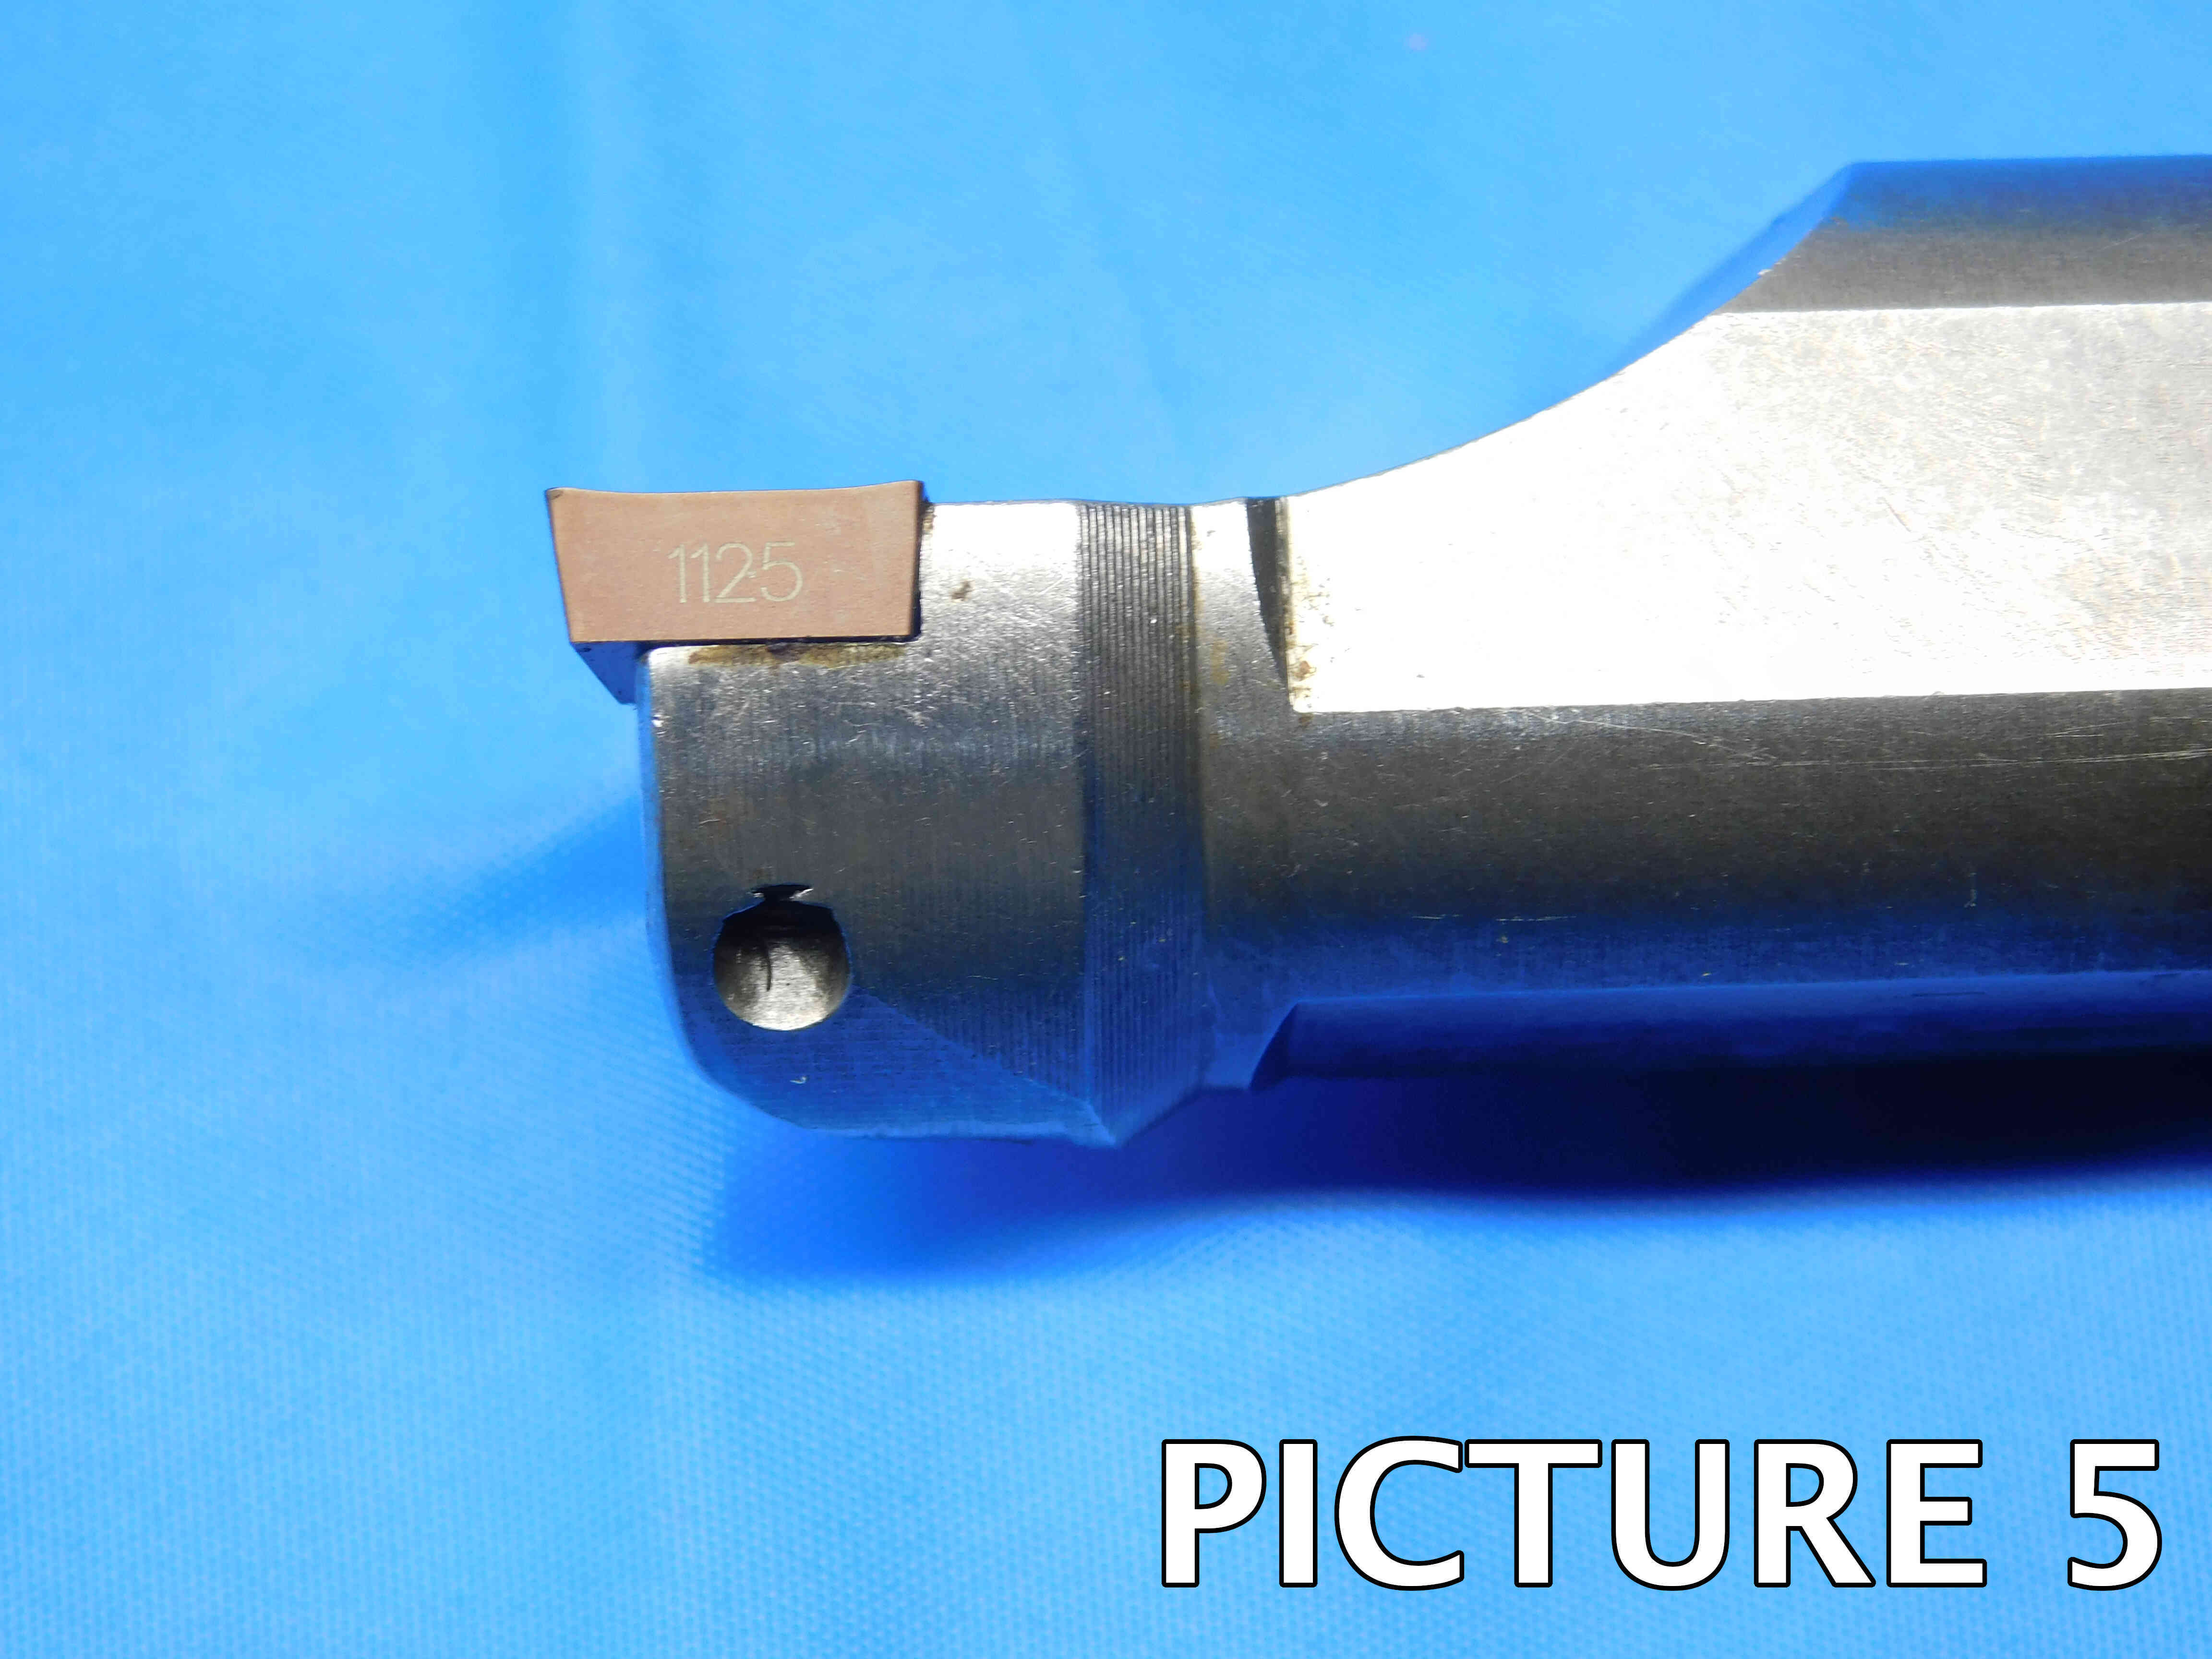
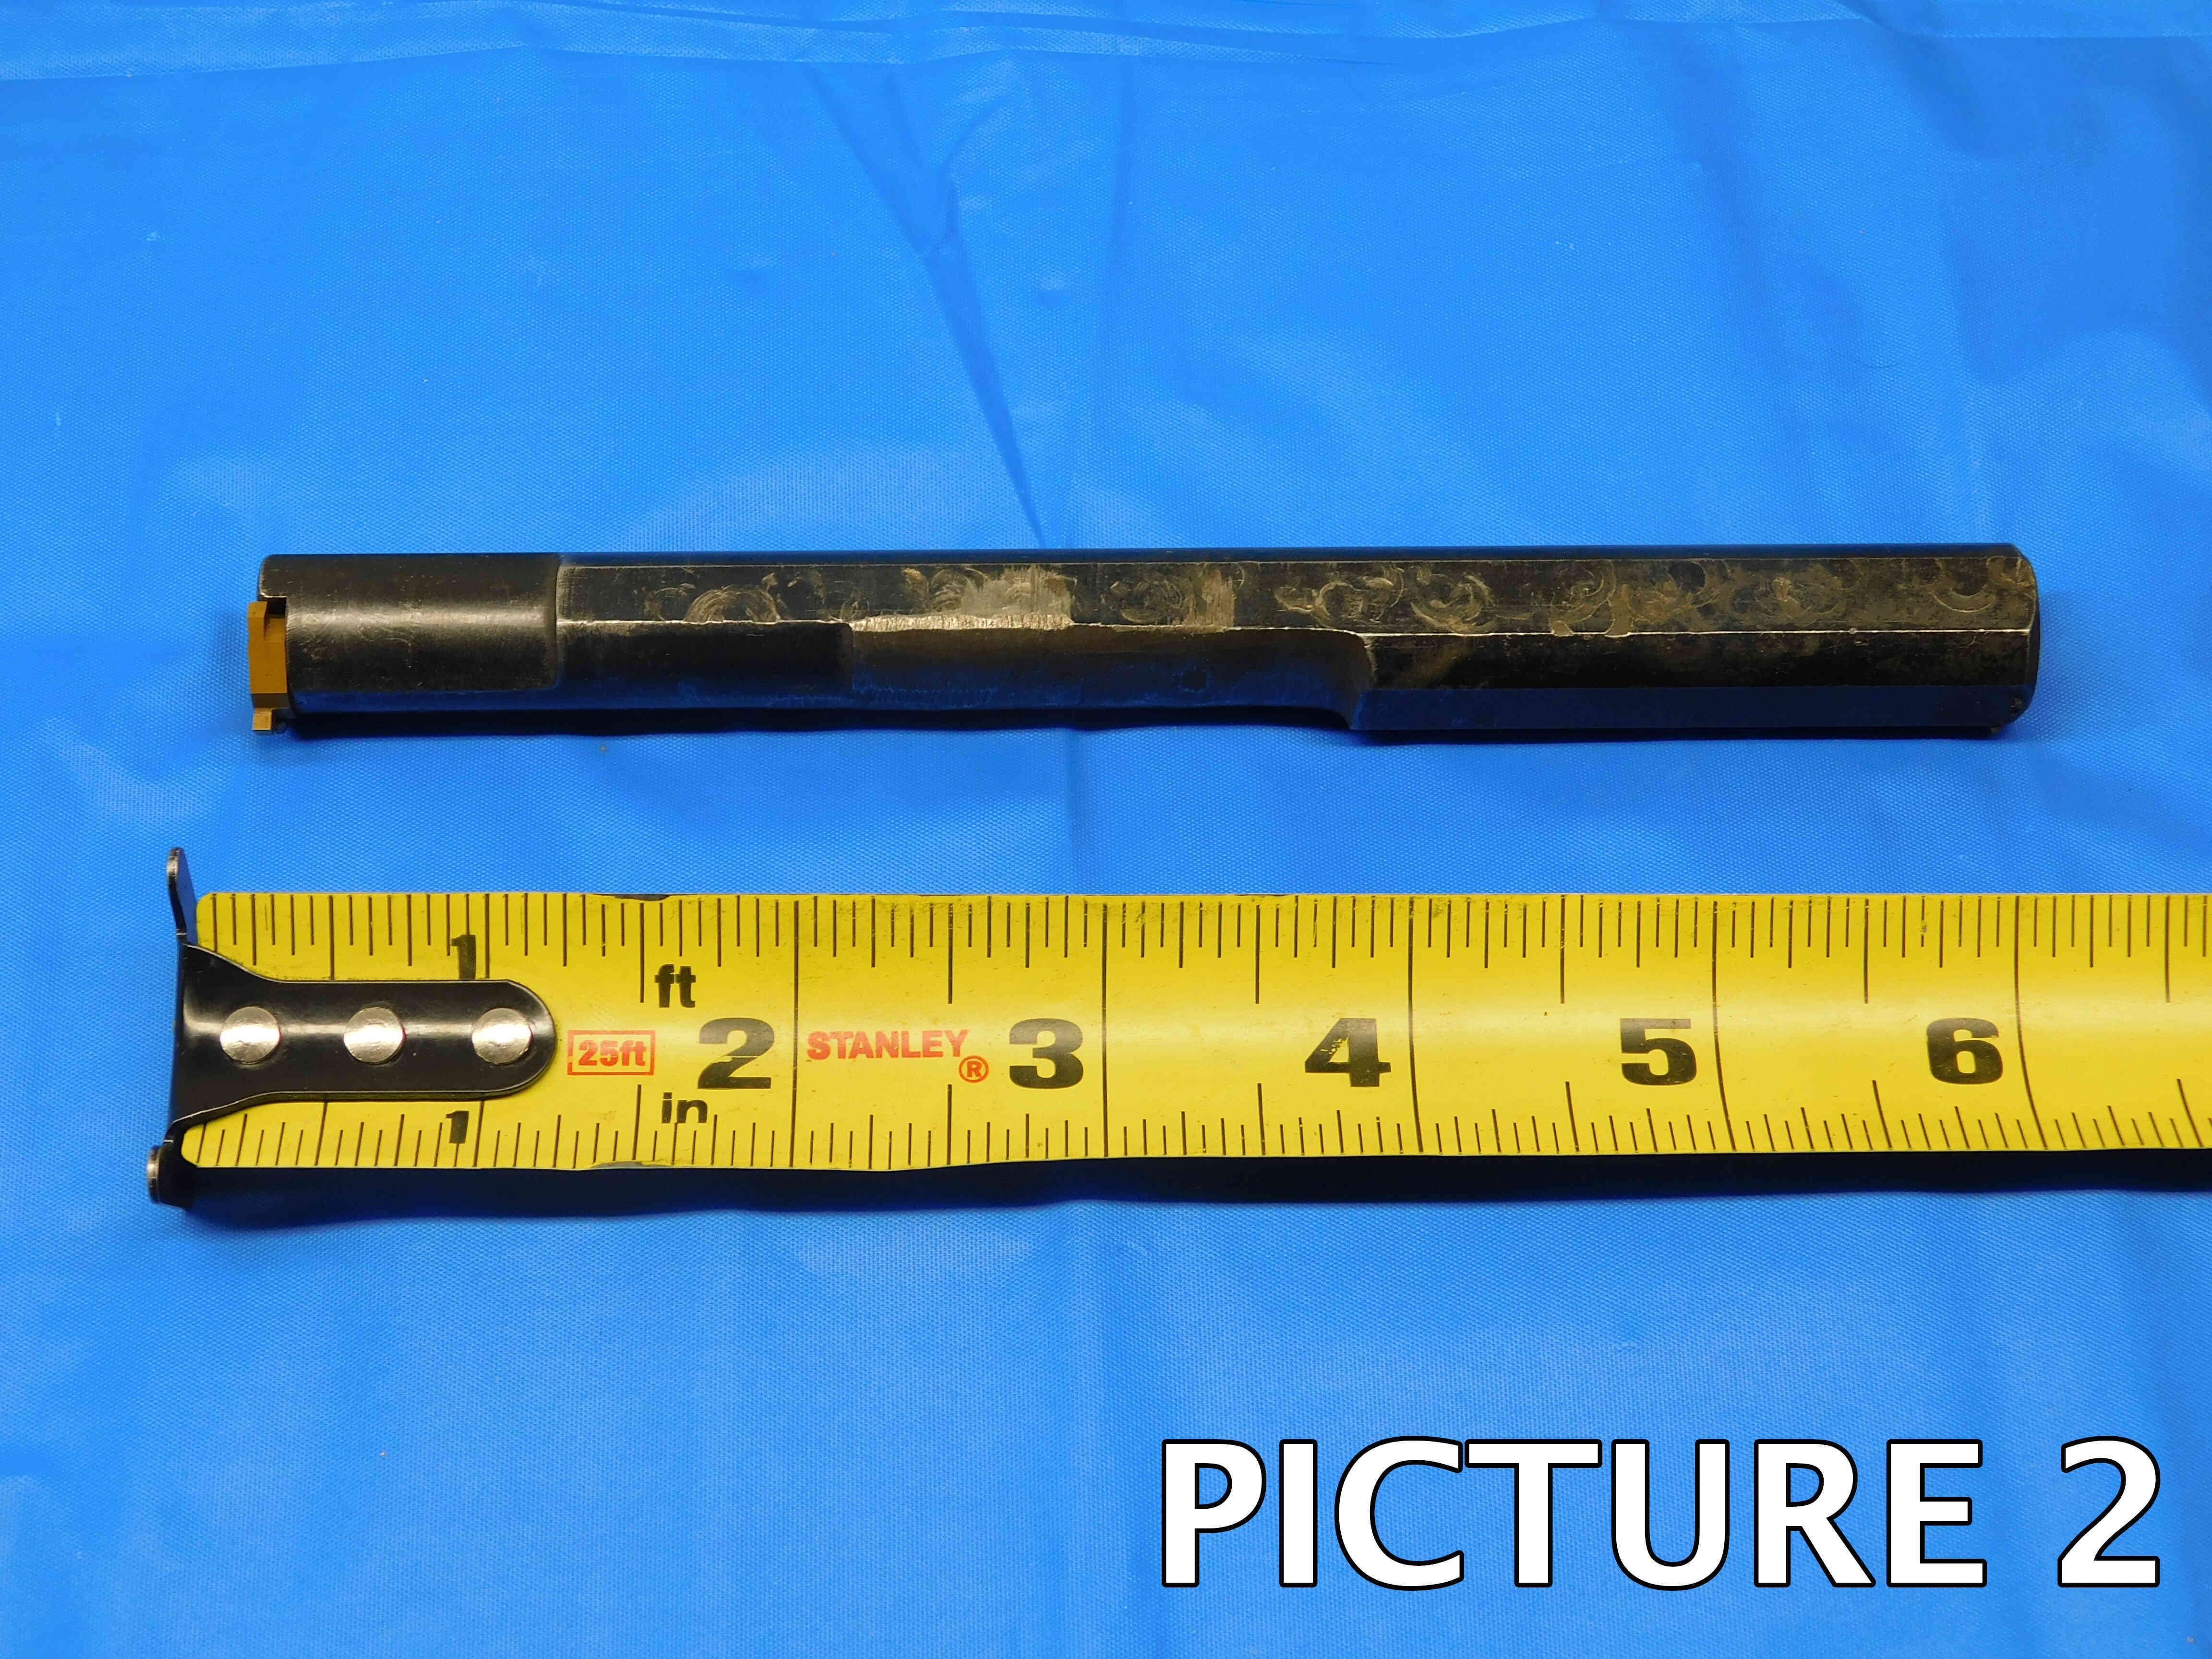
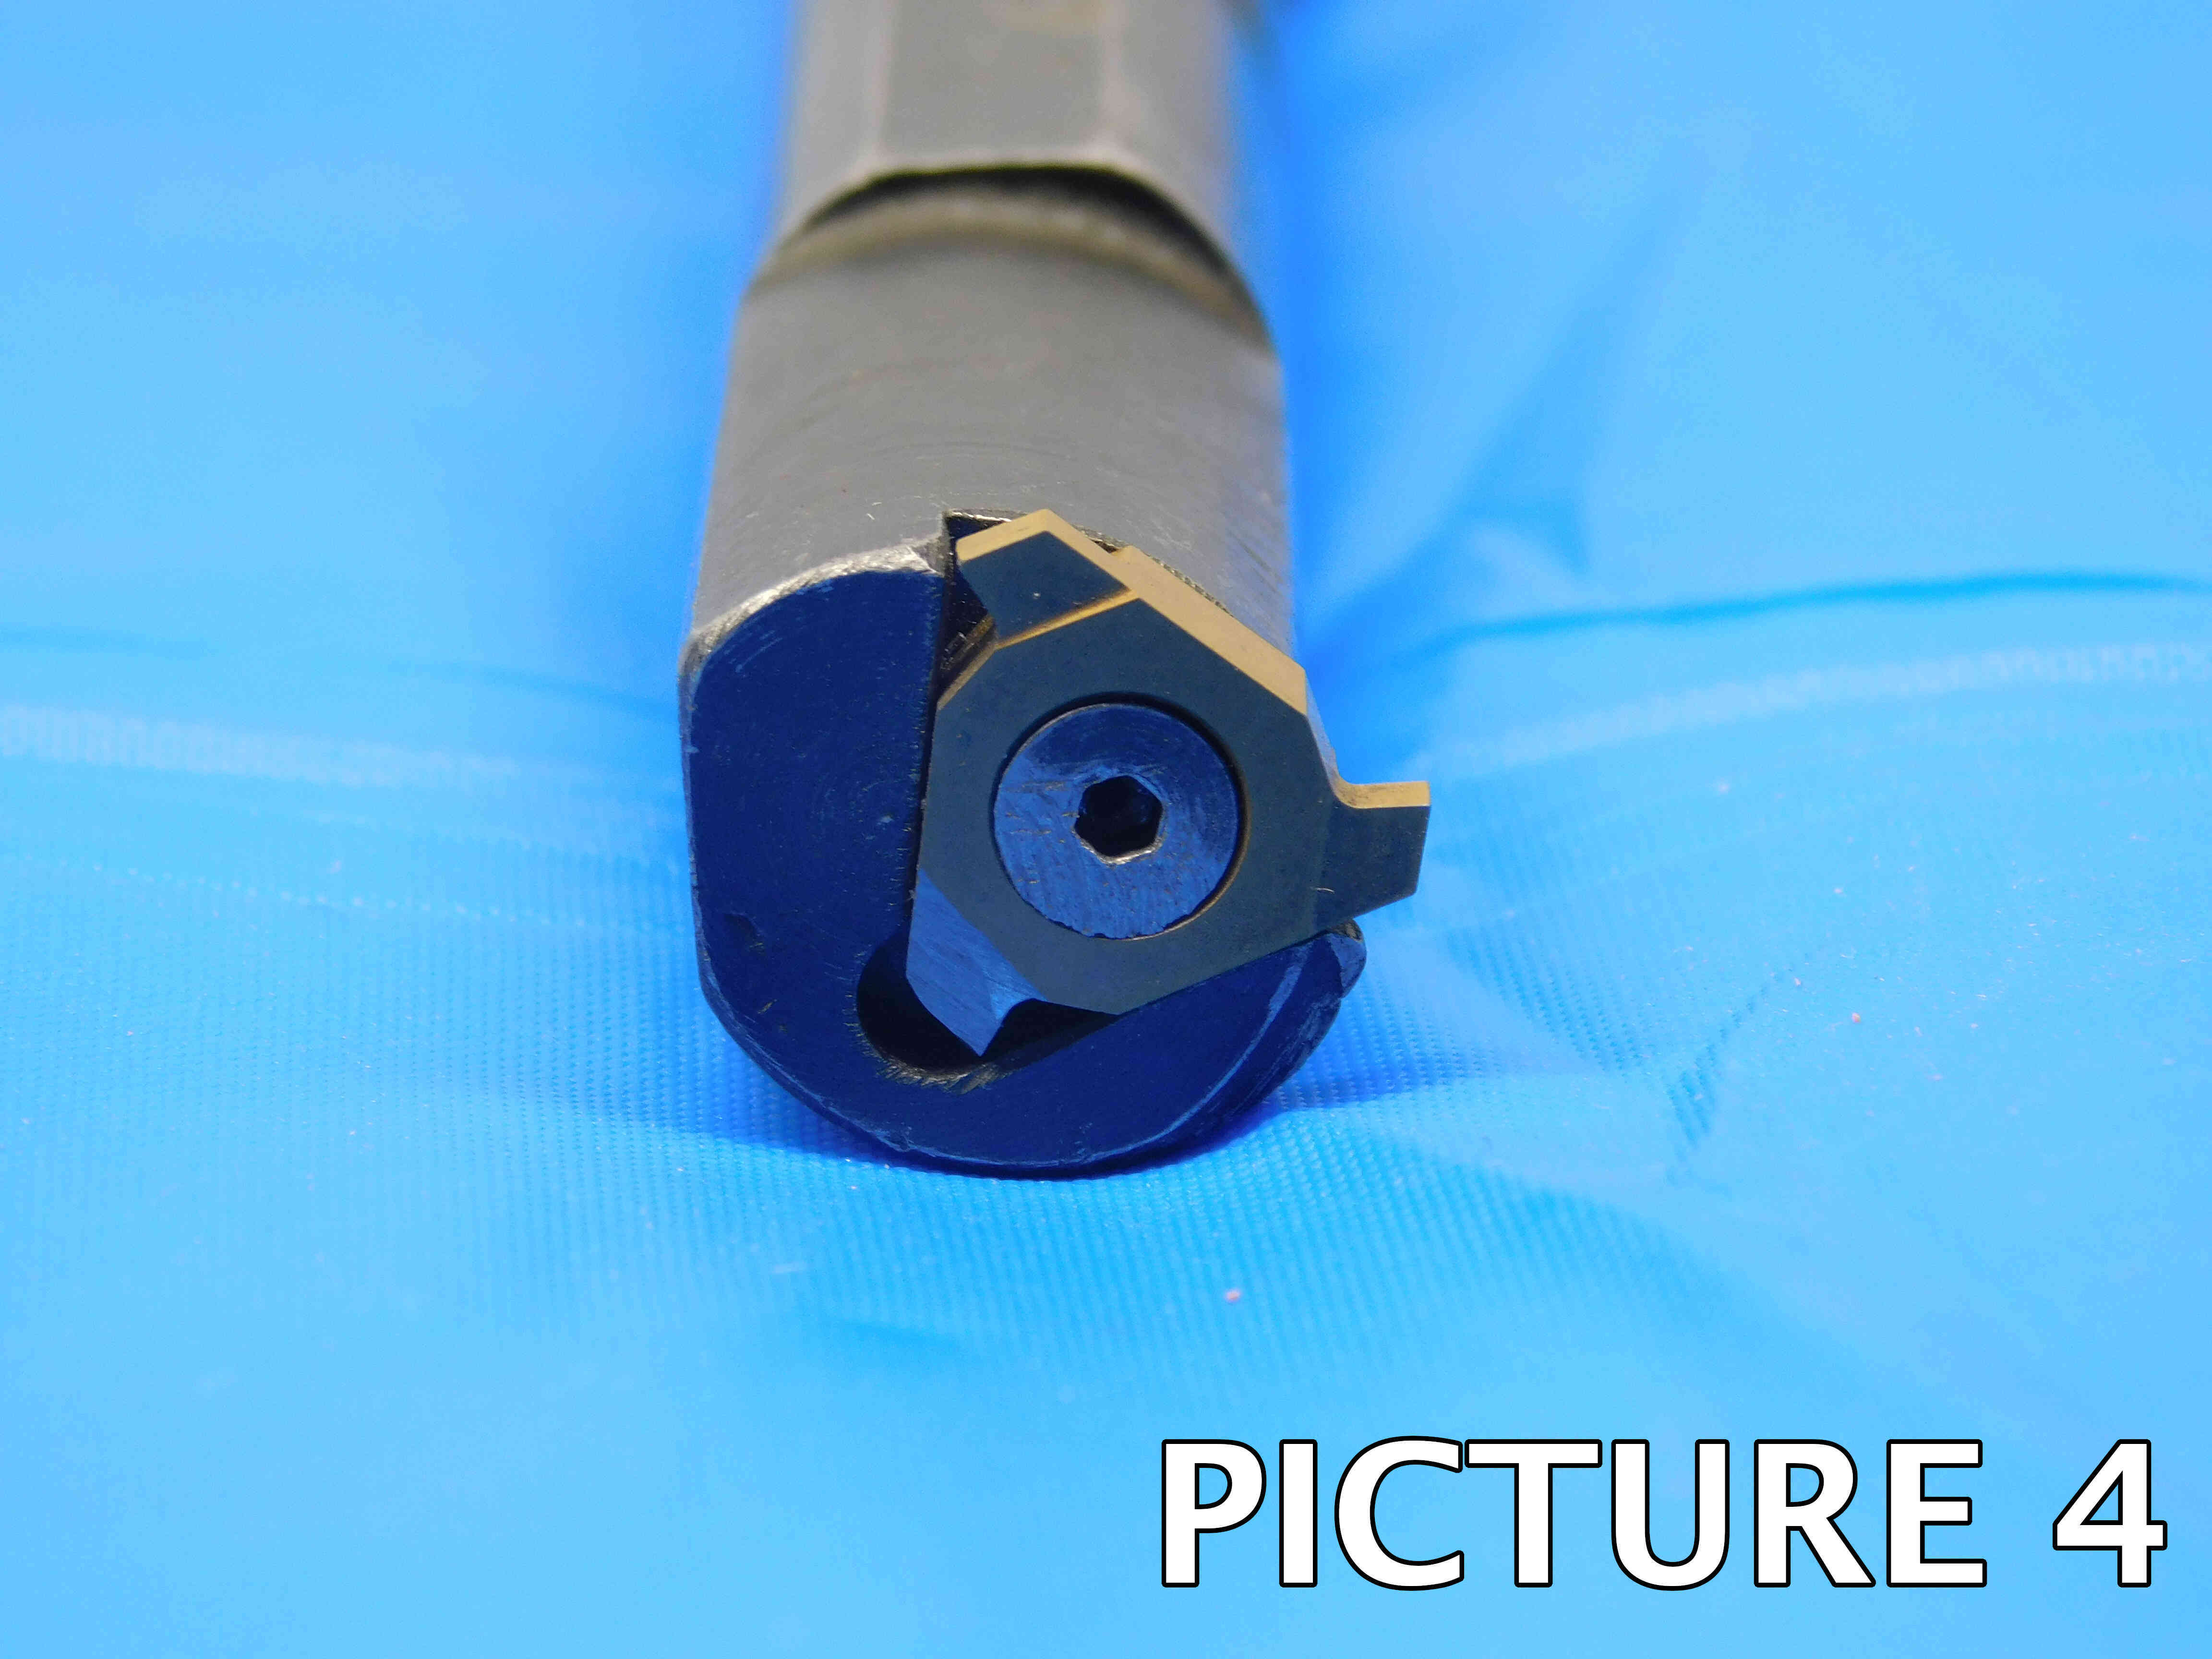
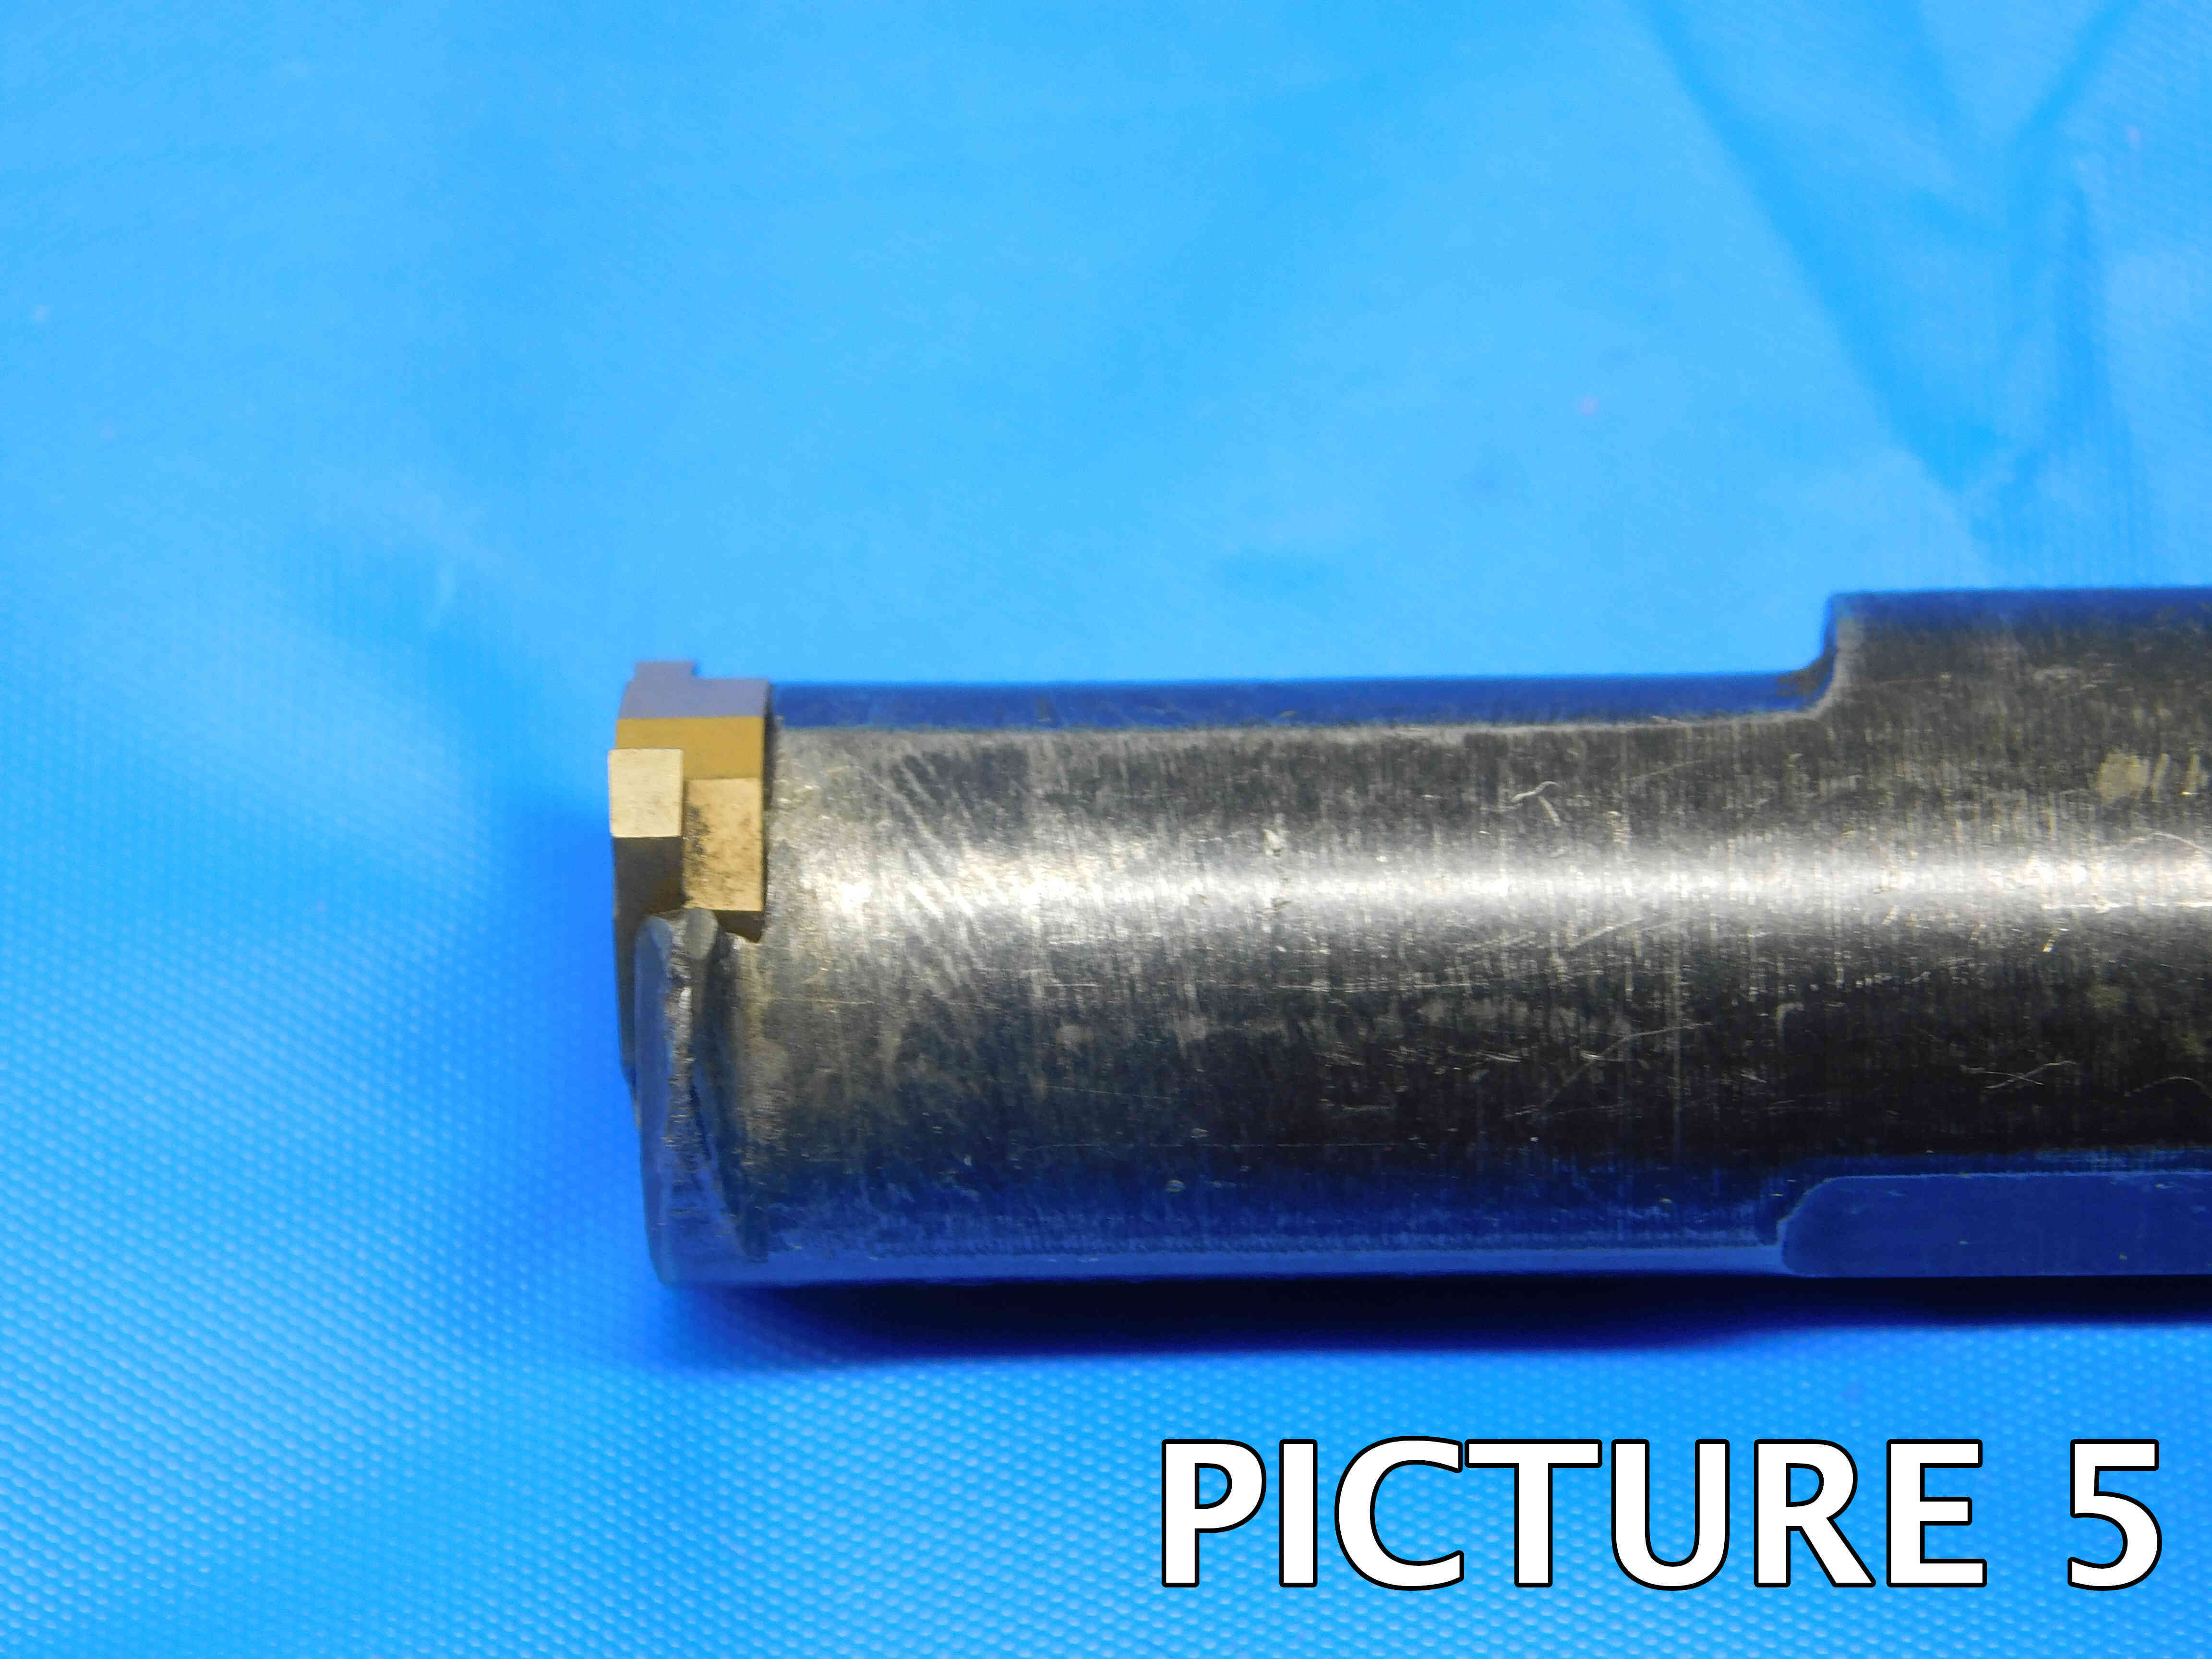
3rd, 4th, & 5th Picture: Pictures showing the insert pocket from three different specific angles:
- Top-down
- Head-on, turned 90 degrees so that the bottom of the pocket is visible
- Side view
All three pictures MUST be present on all used boring bars and must match the examples shown below! The insert pocket is the most important part of the tool and the condition must be 100% clear in the pictures! ***If a boring bar is NEW, you may skip the head-on & side view pocket pictures since there will not be any wear / damage that needs to be shown***
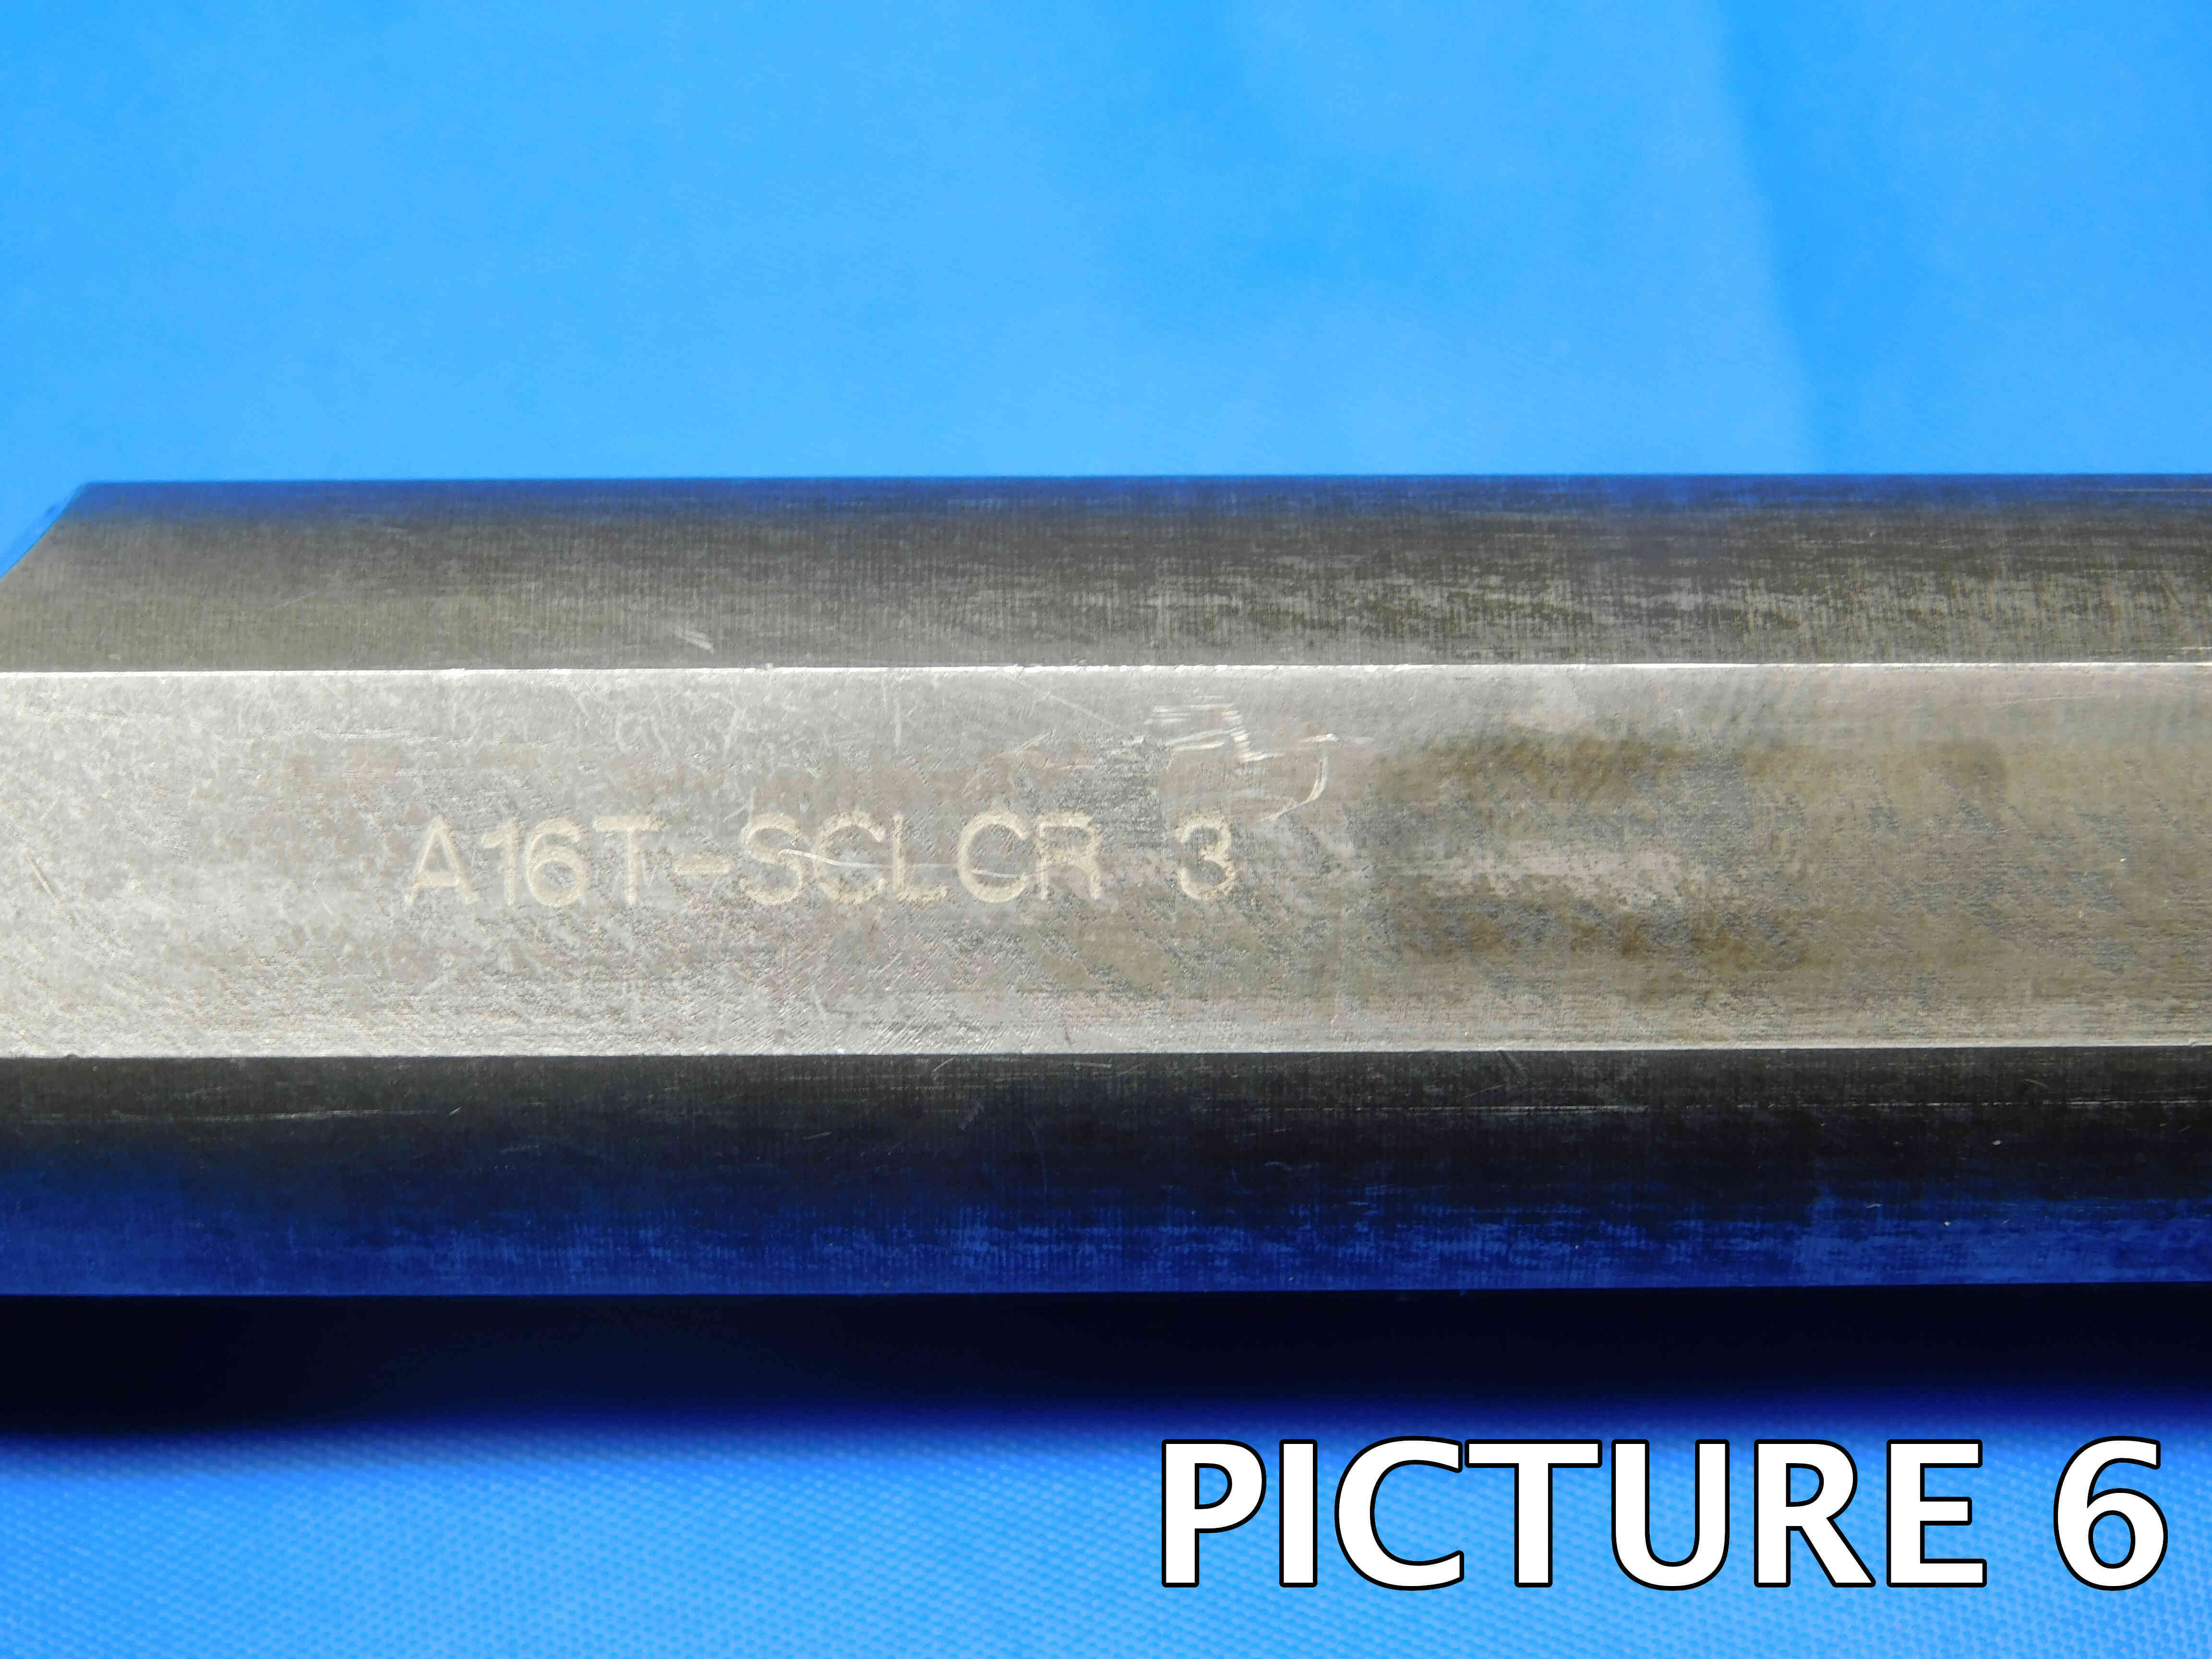
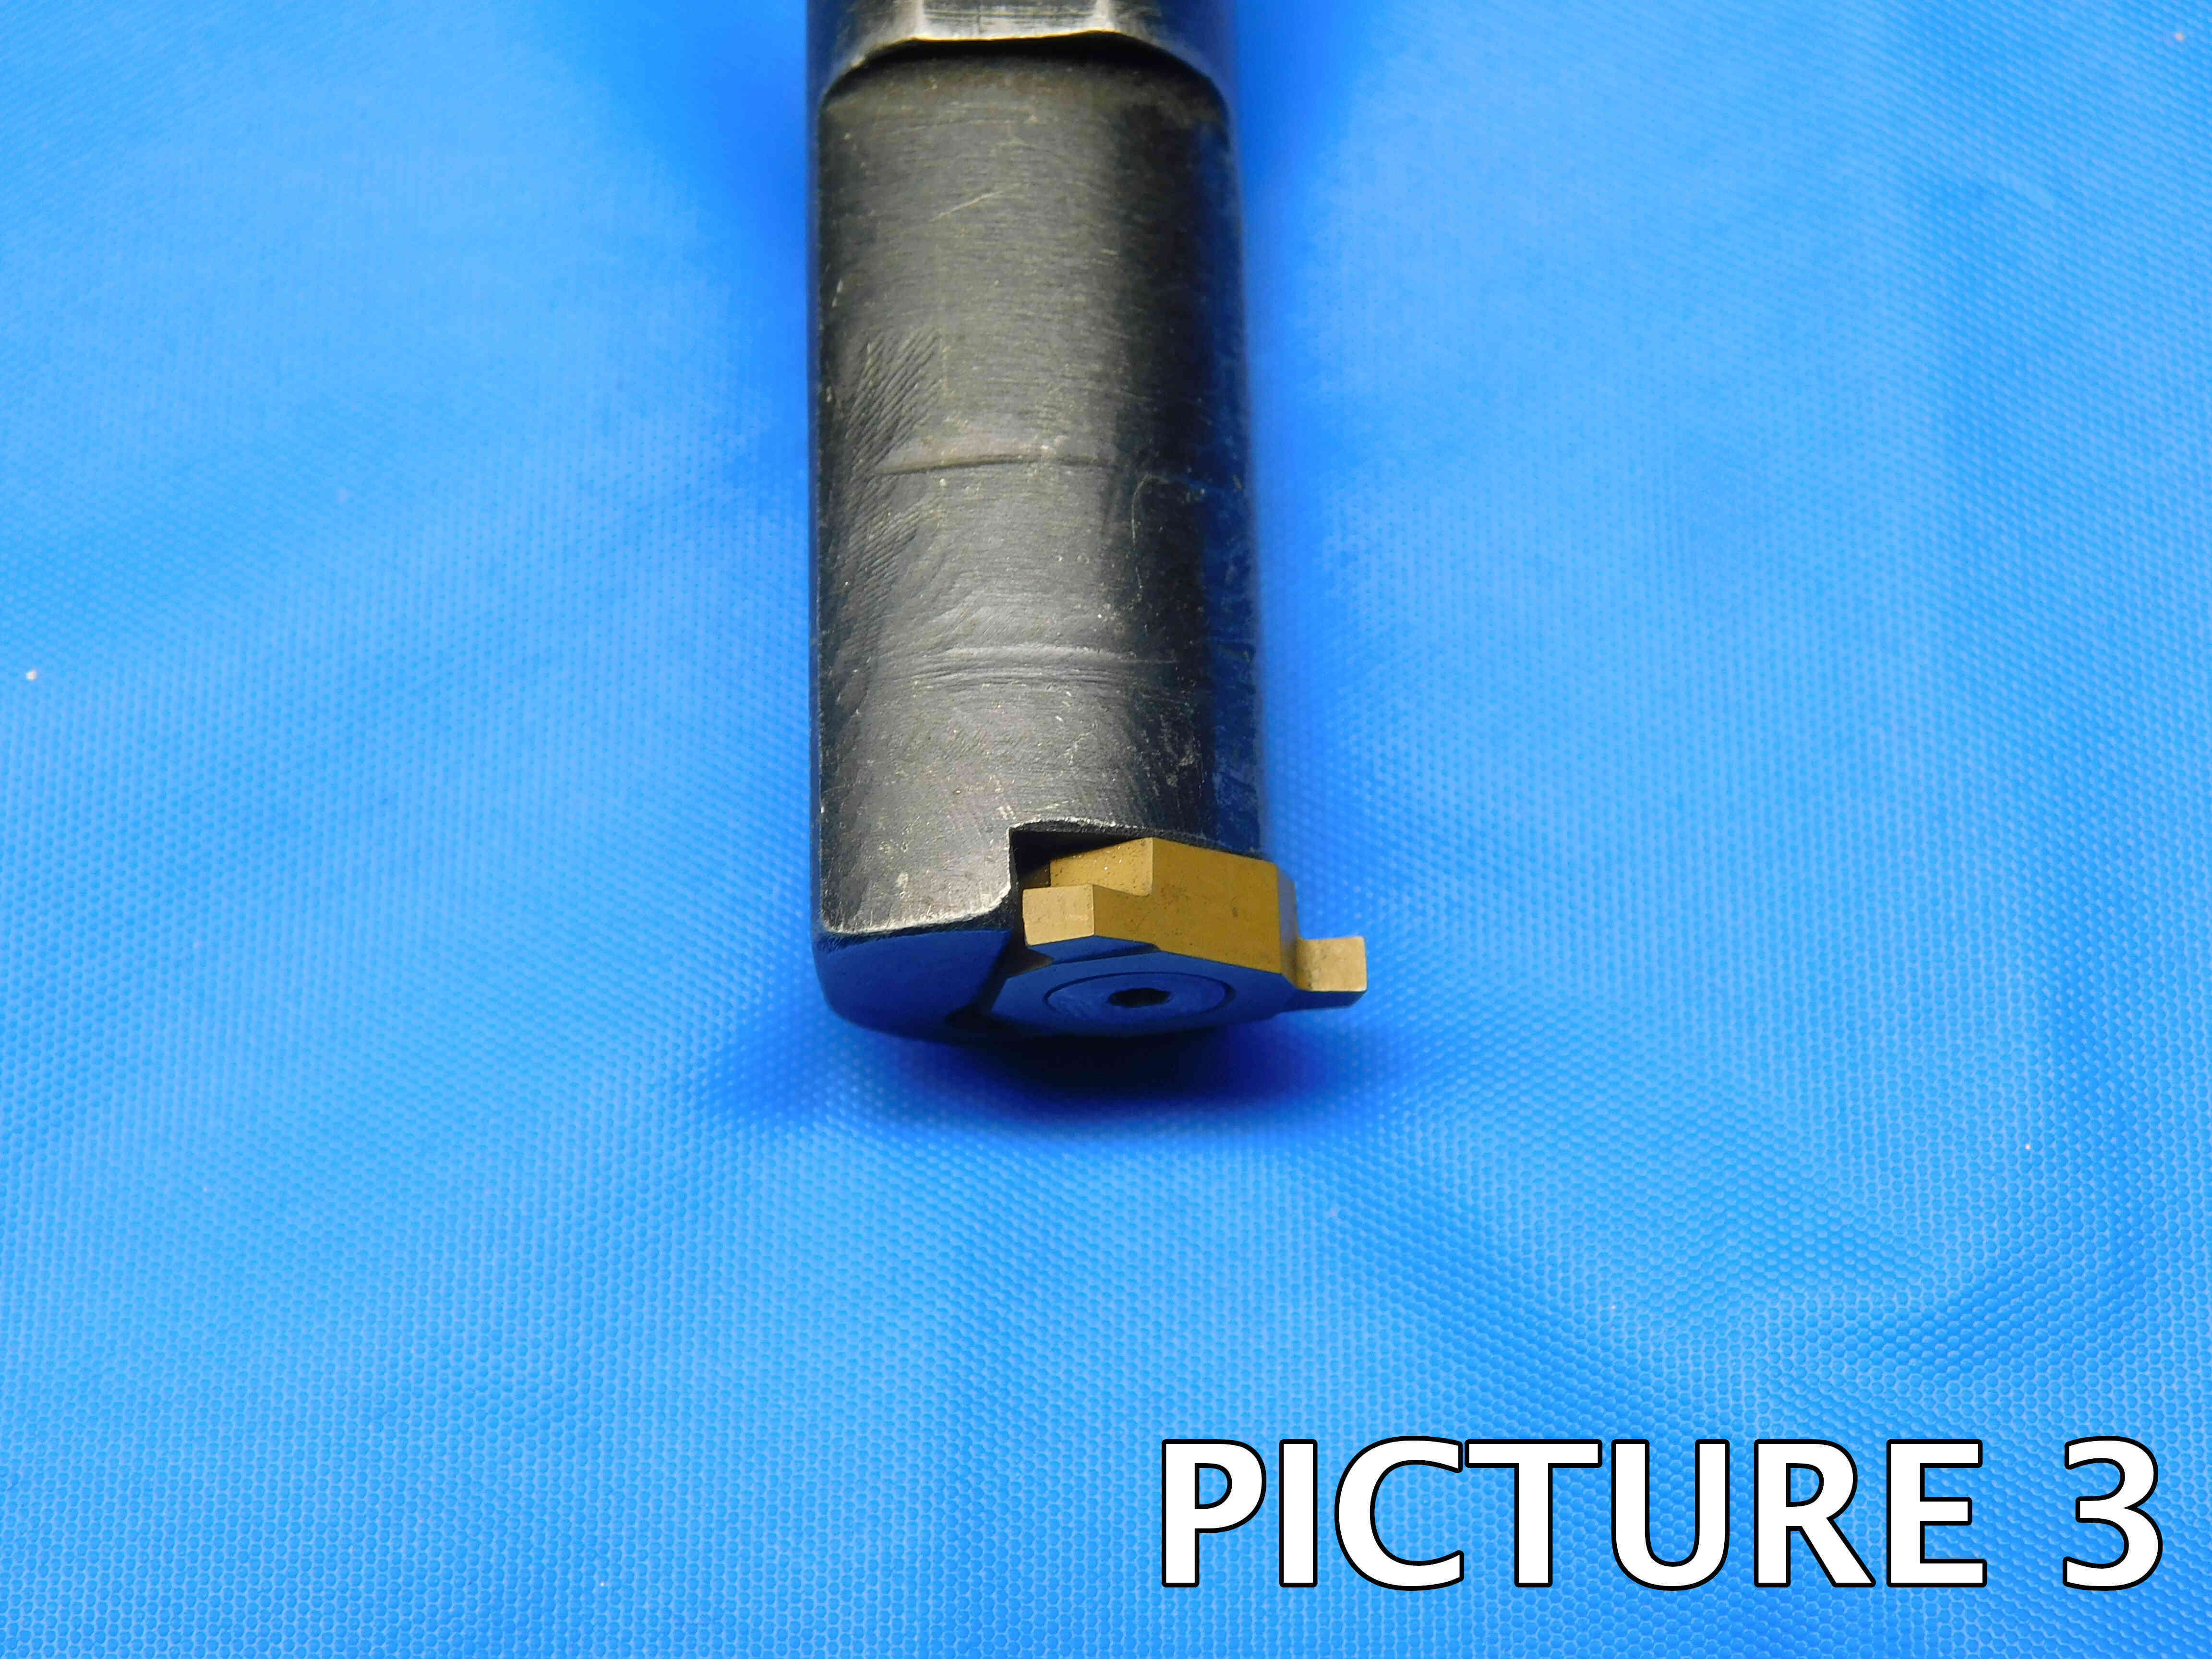
6th Picture: A close-up shot of the labeling. This may require more than one picture if there is labeling on multiple different sides of the tool, such as in the second example below. If there is no labeling present, skip this picture.
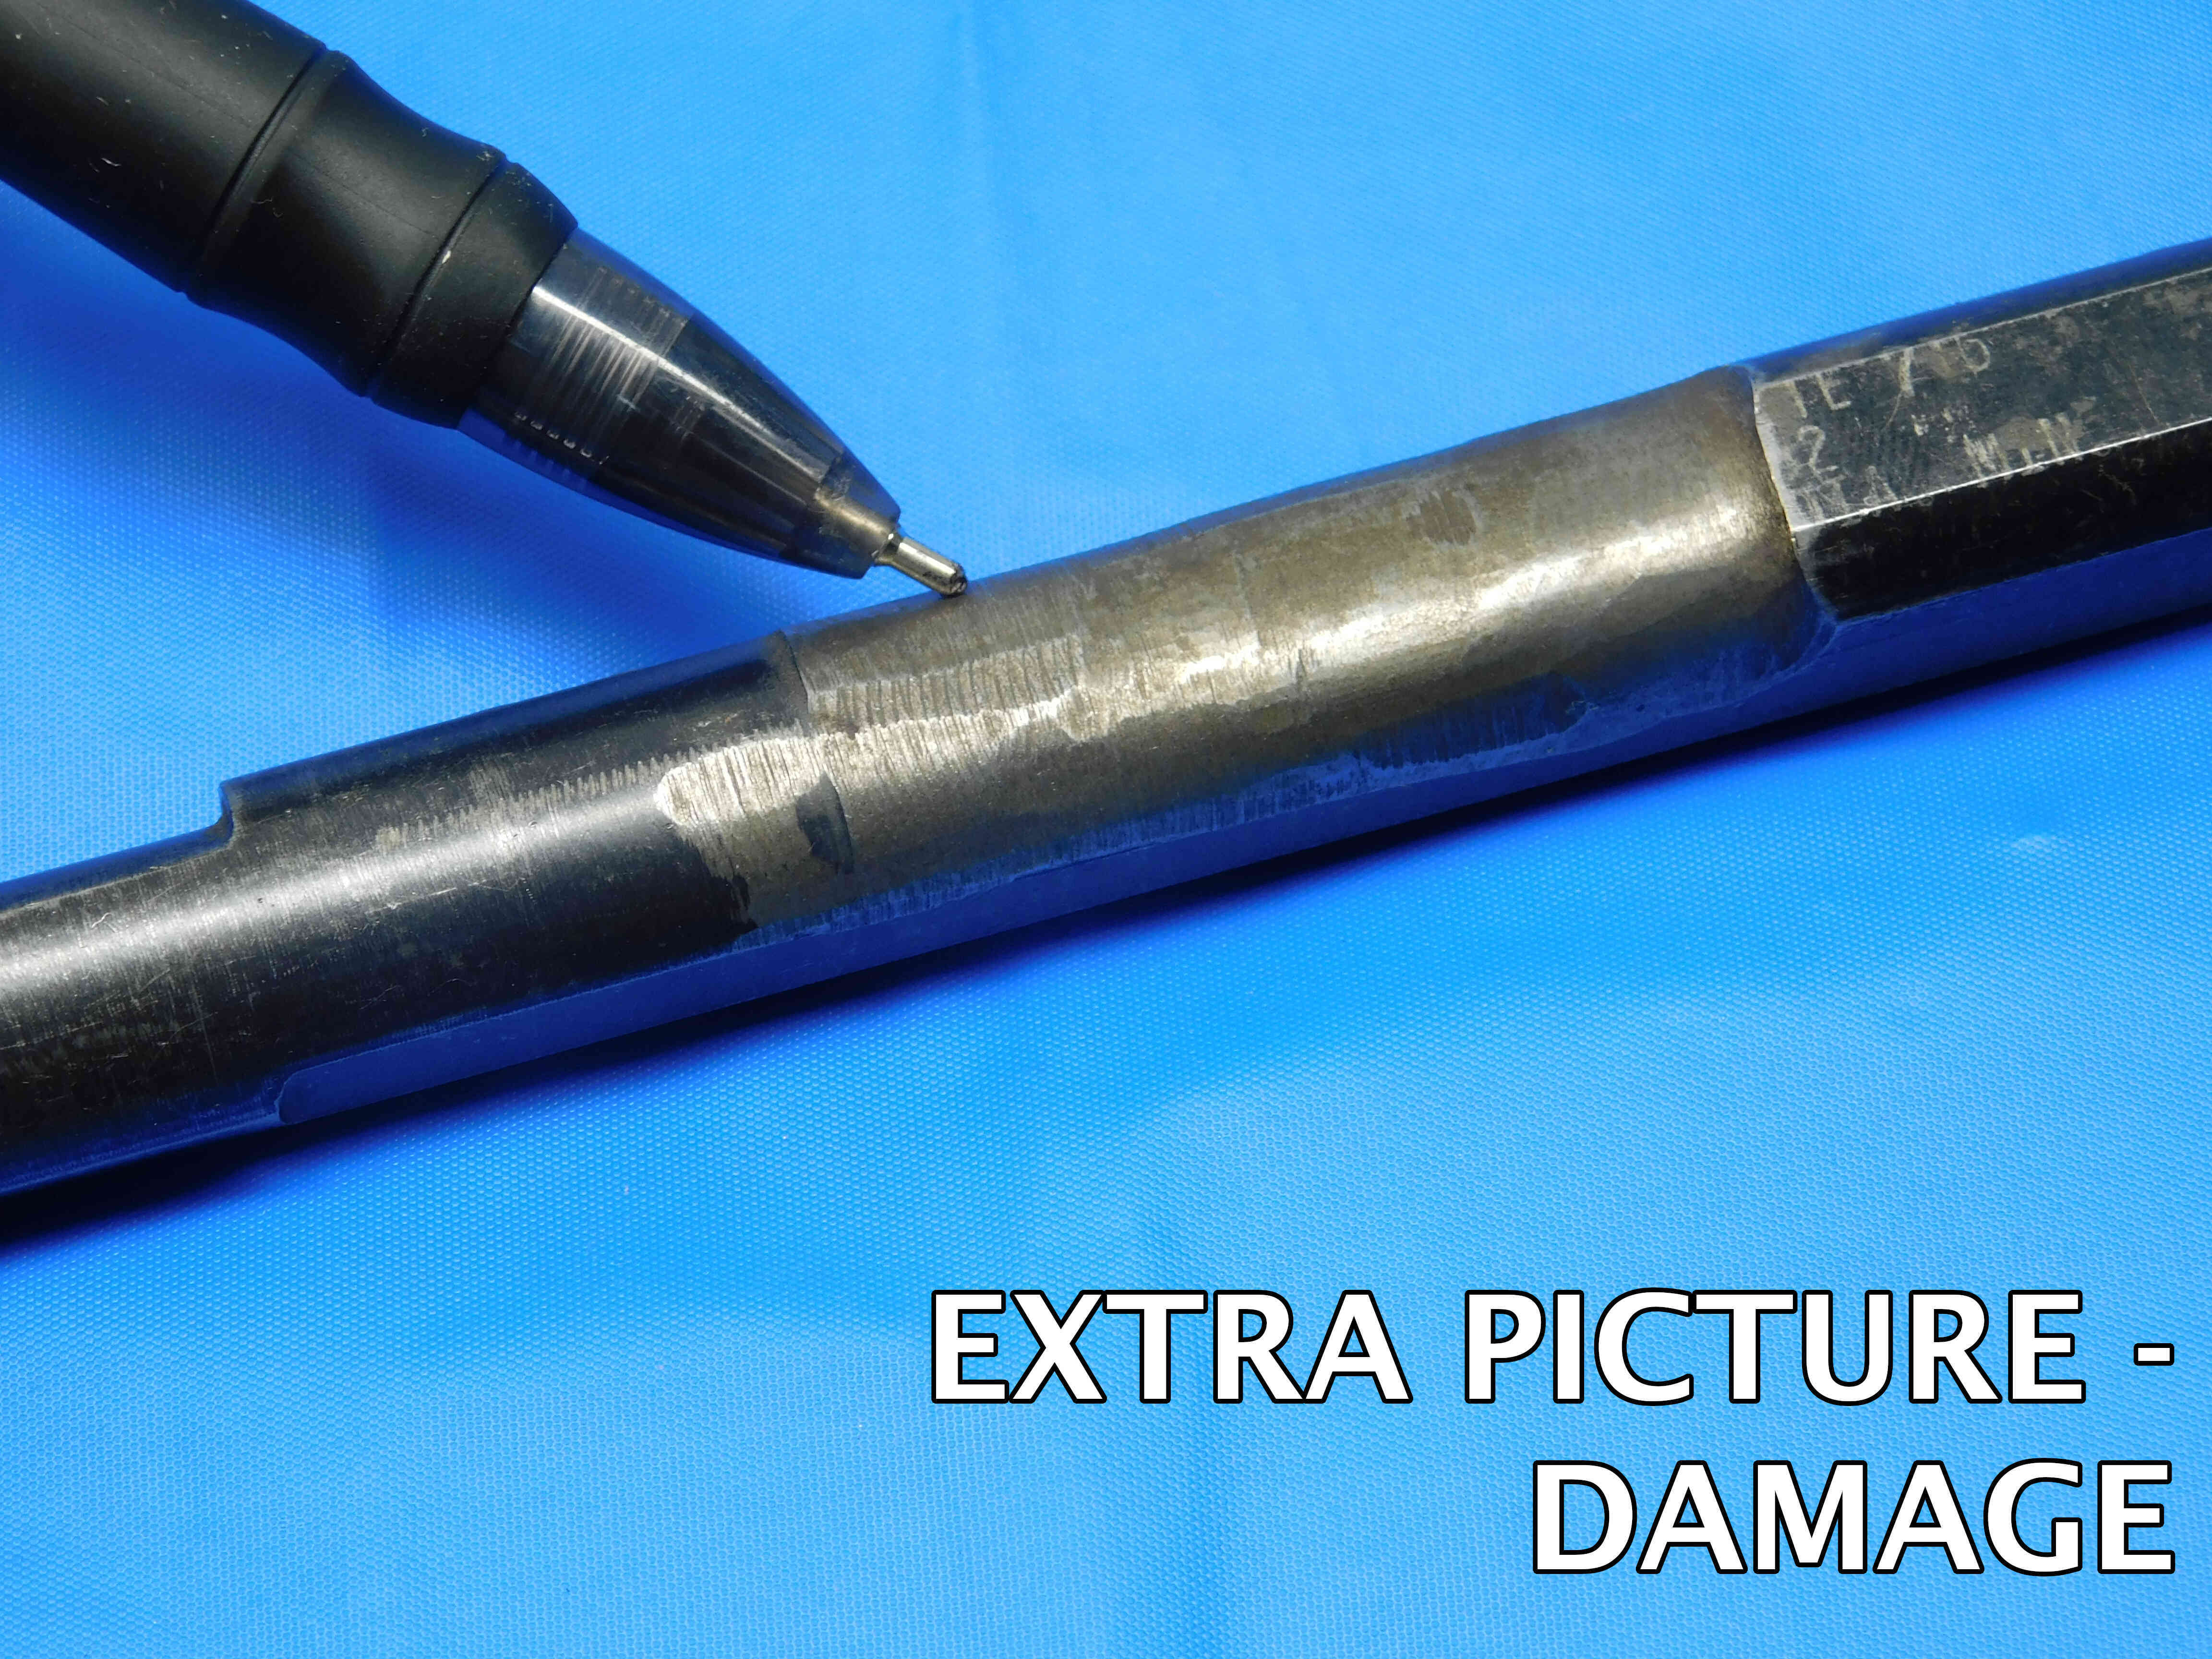
Additional Pictures: Any damage or modification to the insert pocket or shank must be clearly pictured. Use a pen to point to the damaged / modified area. If there are any flat sections on the shank (whether manufactured or modified) which are not clearly visible in the previous pictures, they should be shown in an additional picture as well. If you believe additional pictures are needed for any other reason, contact your trainer to verify if it is necessary.
Please refer to the pictures below for examples:
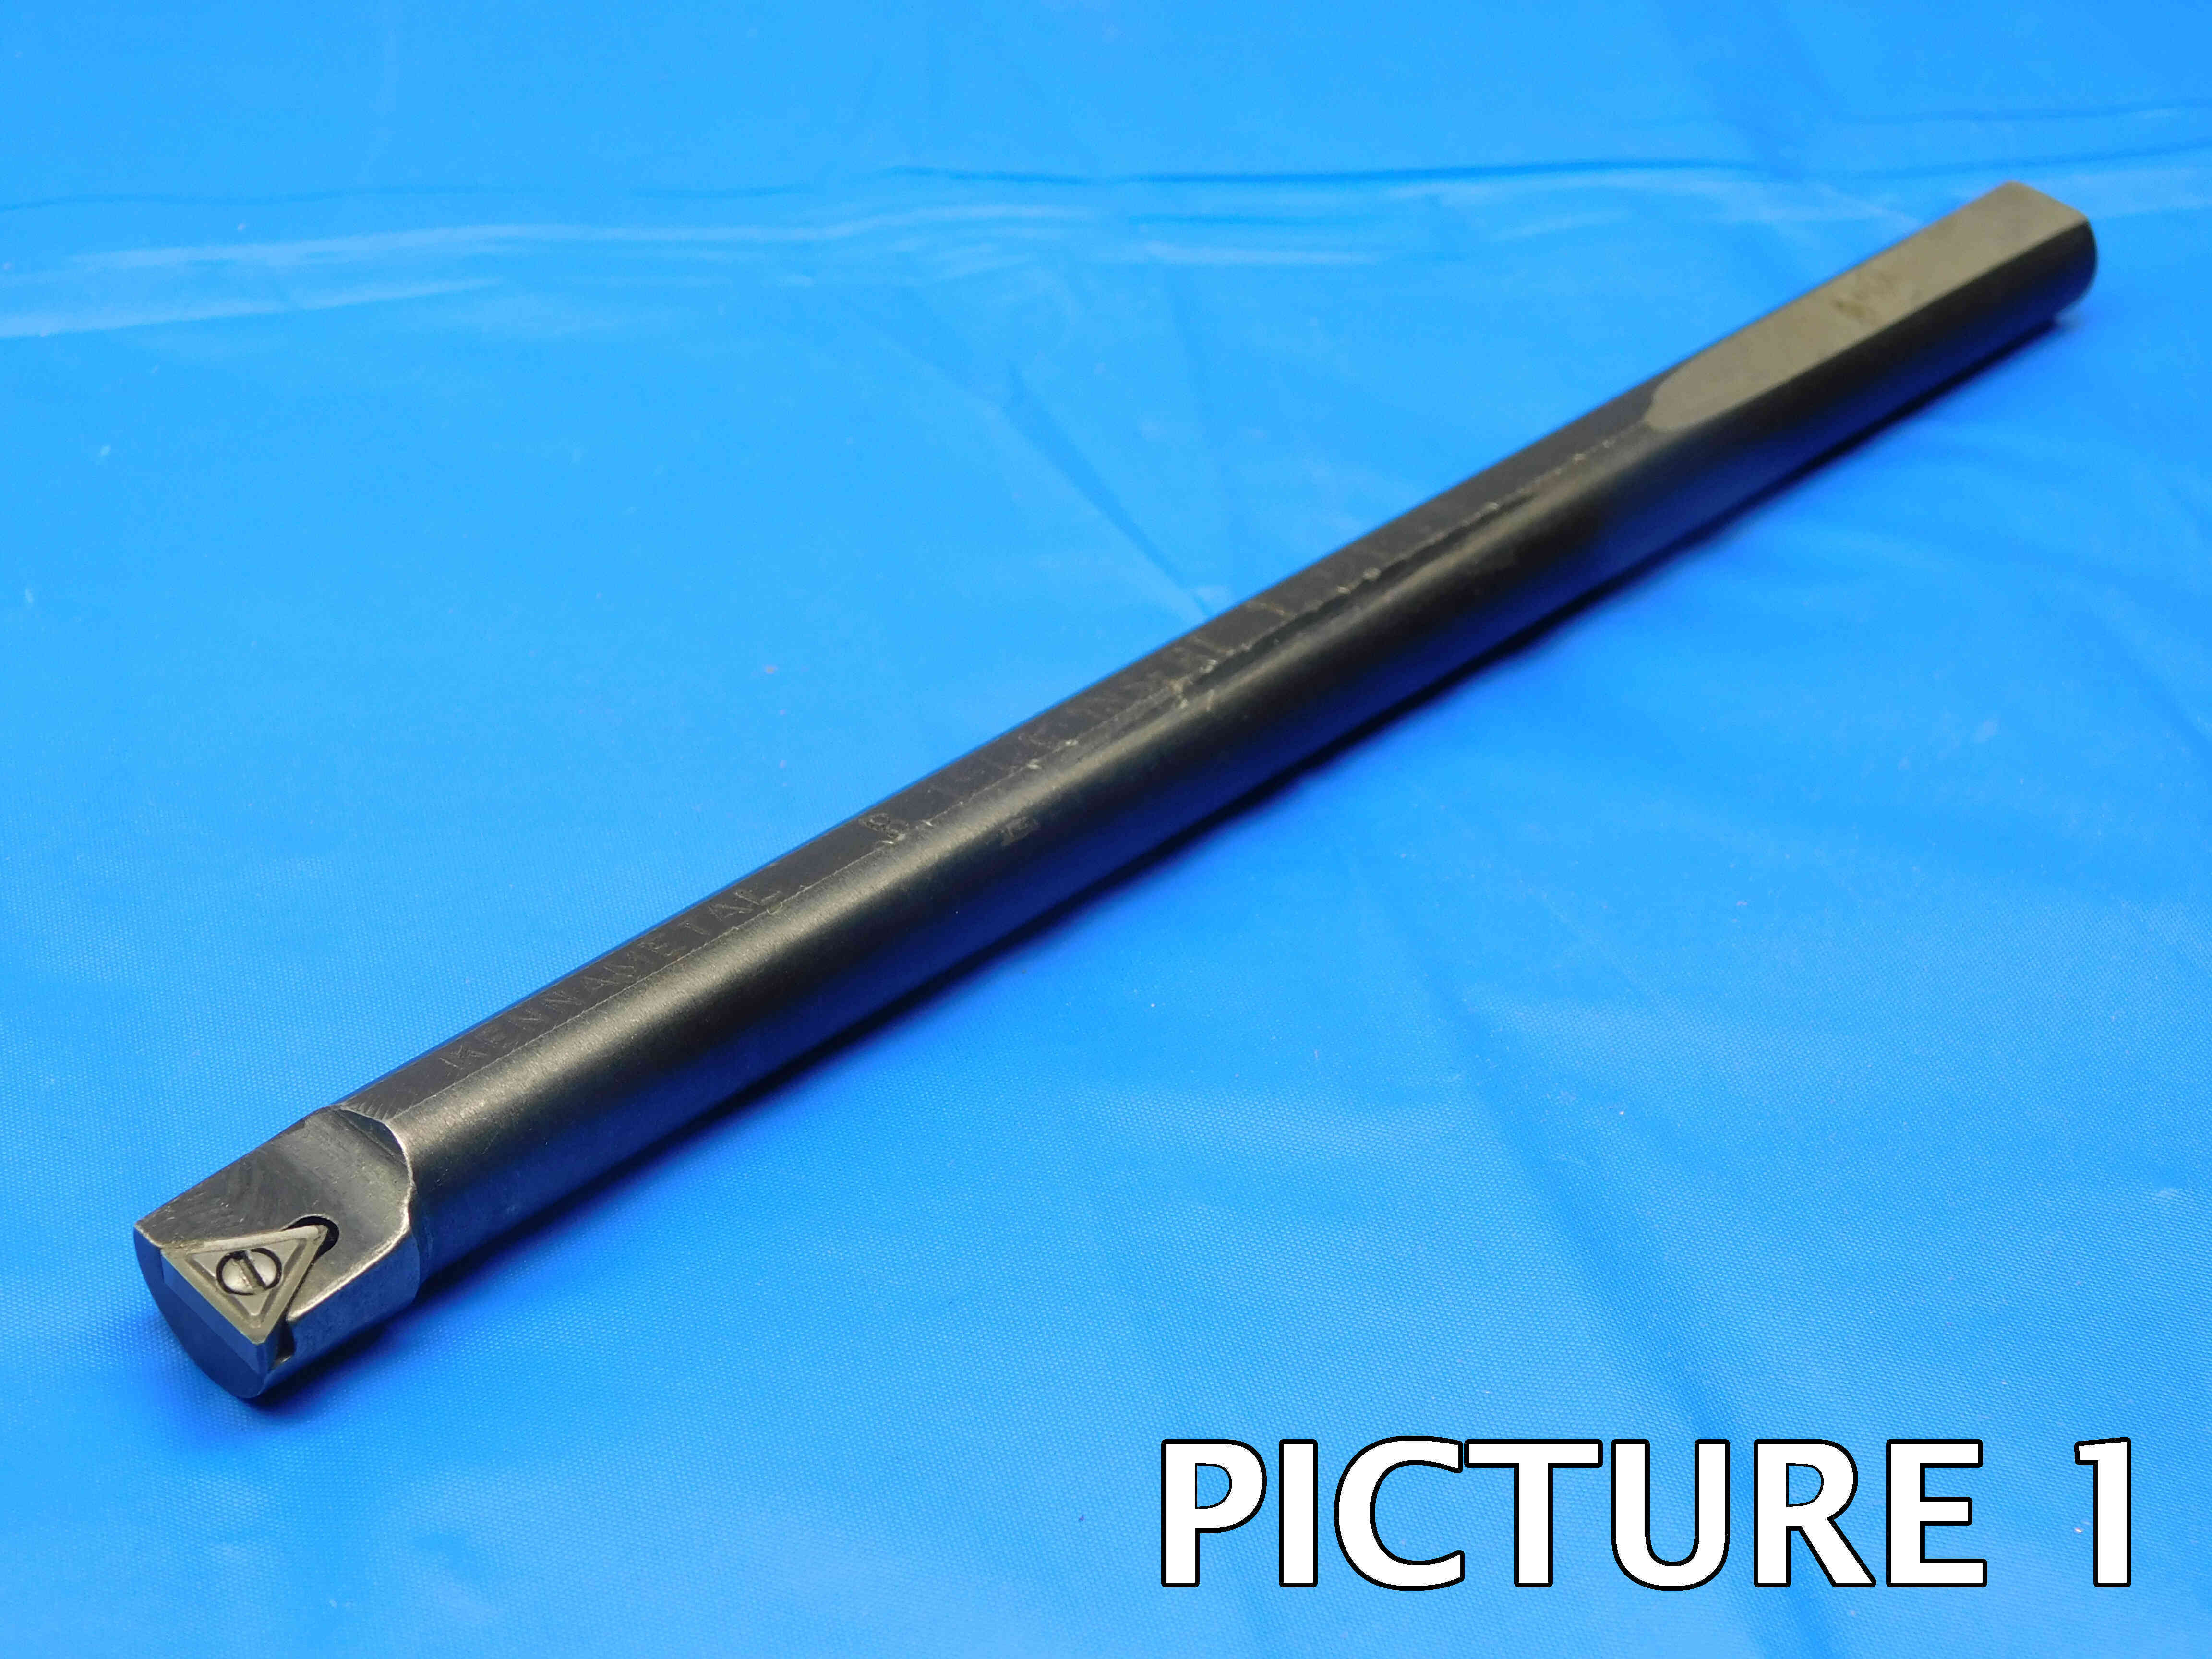
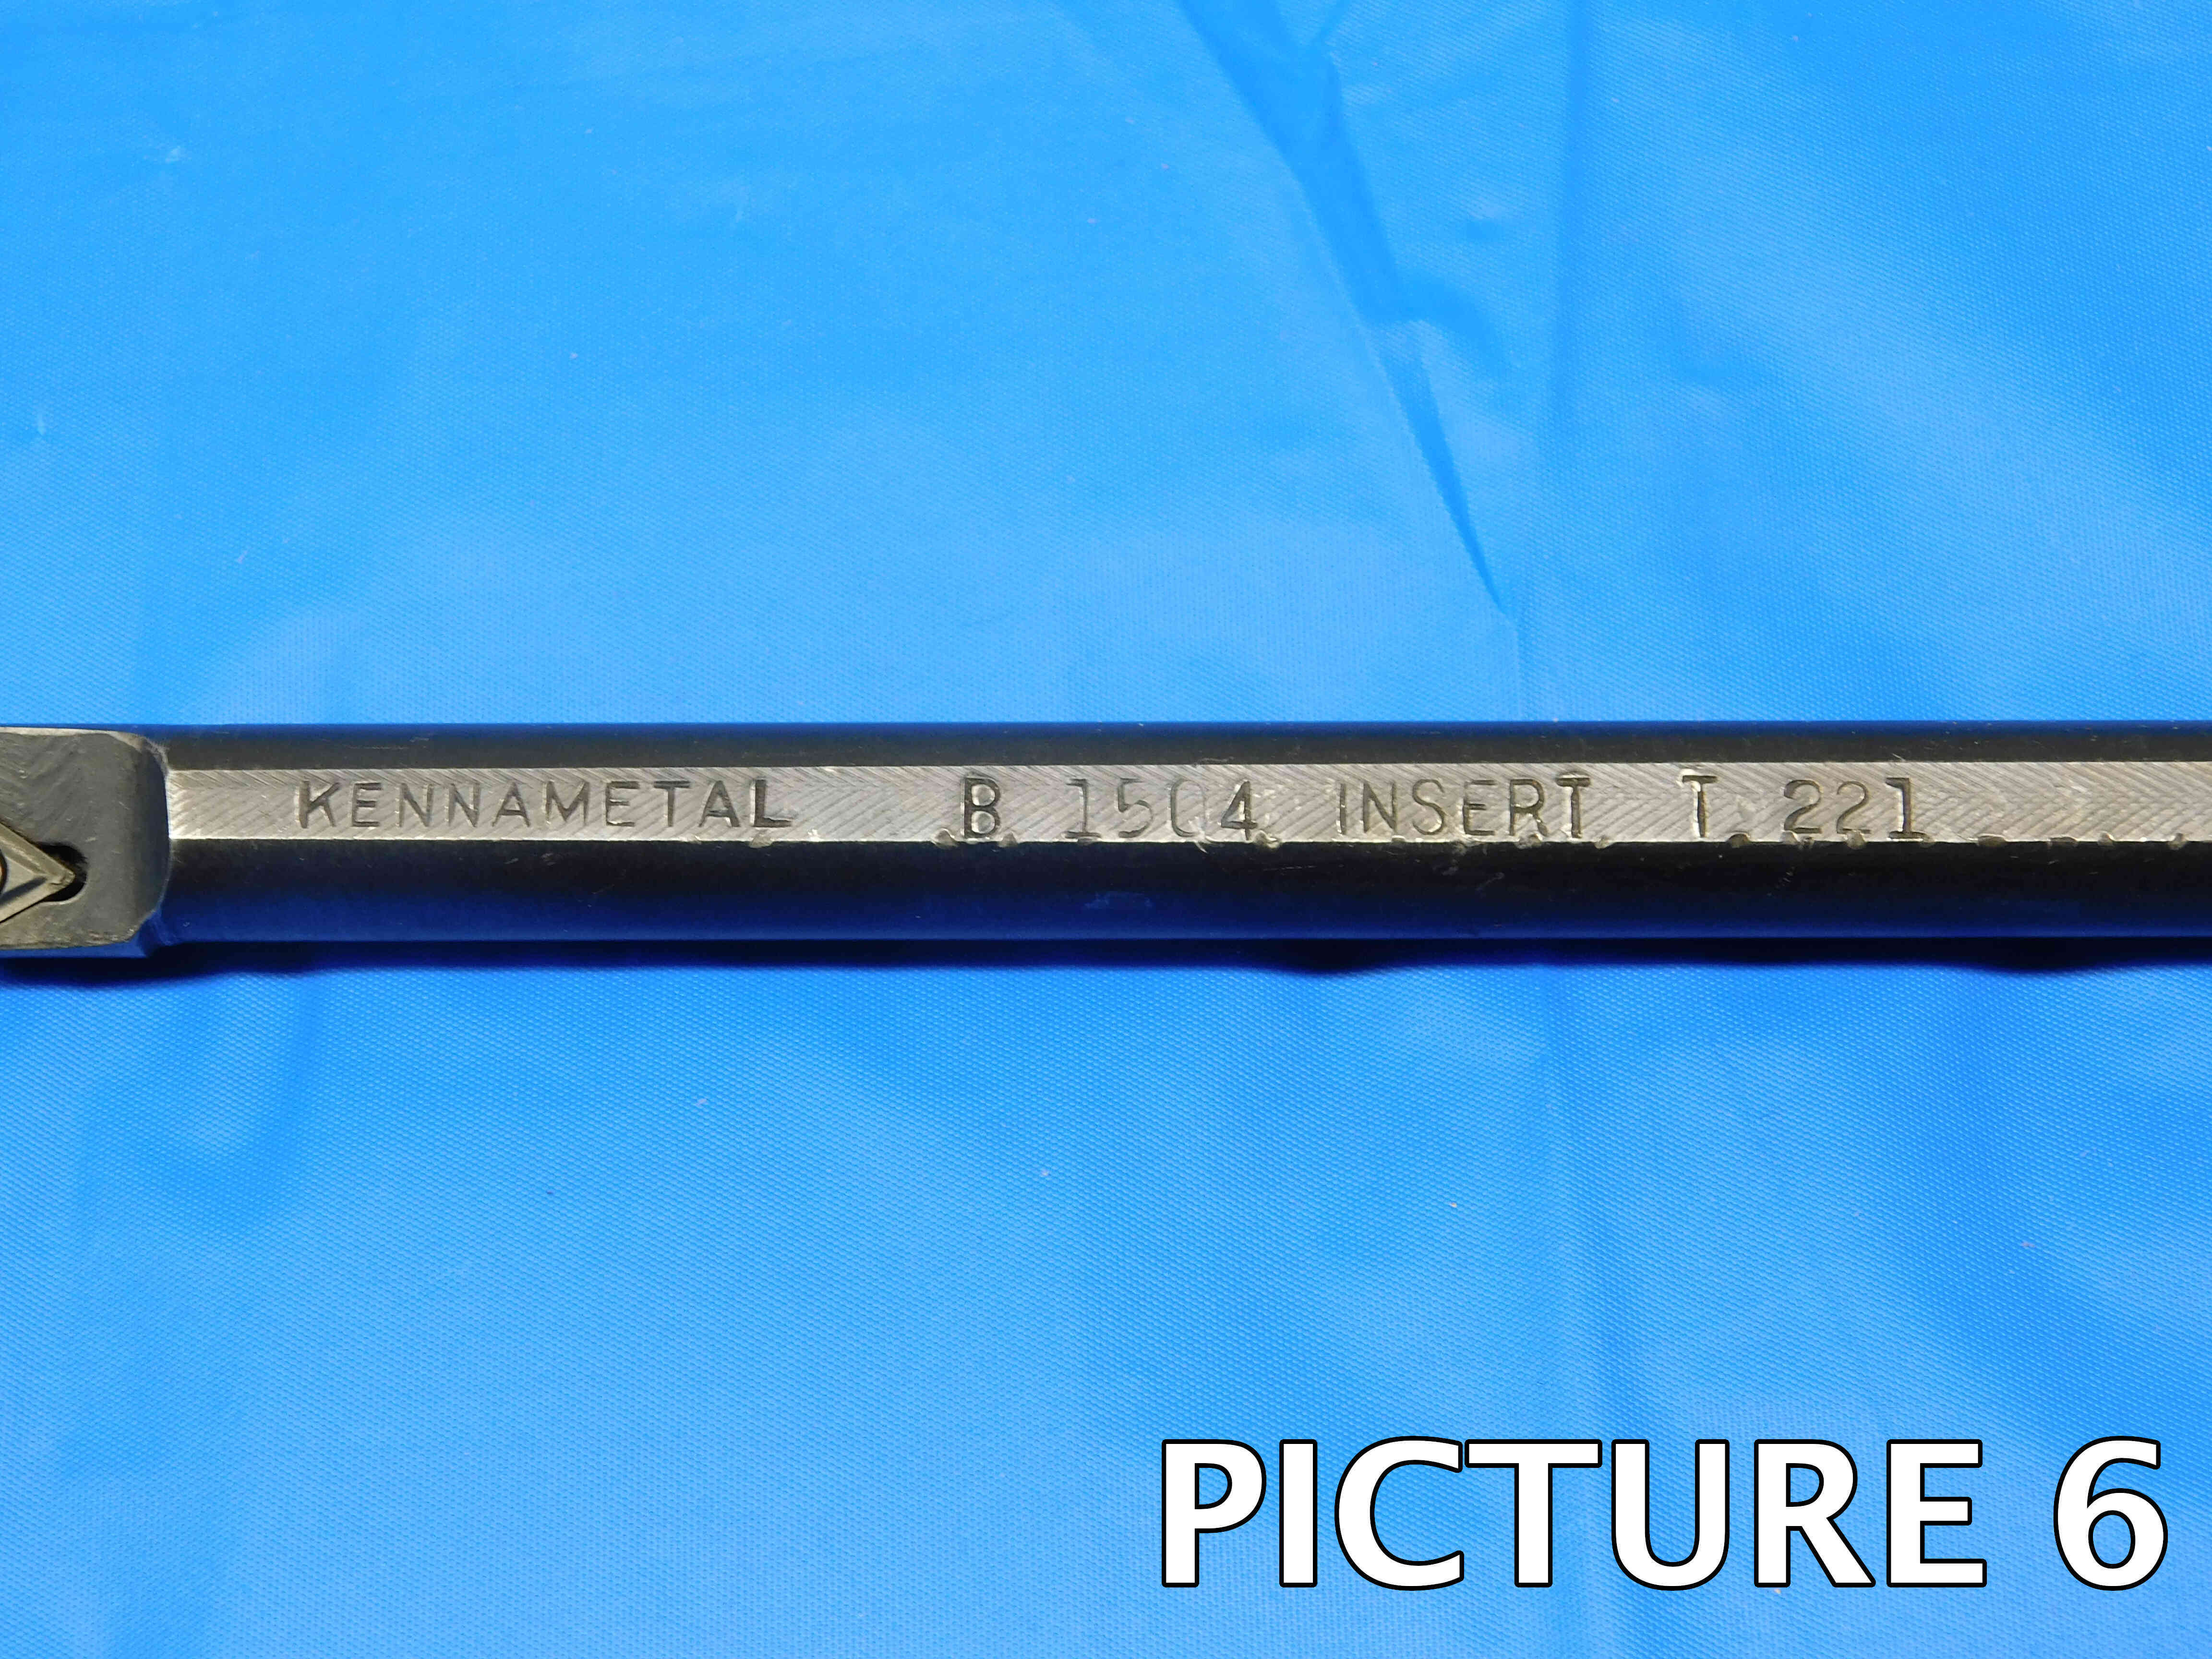
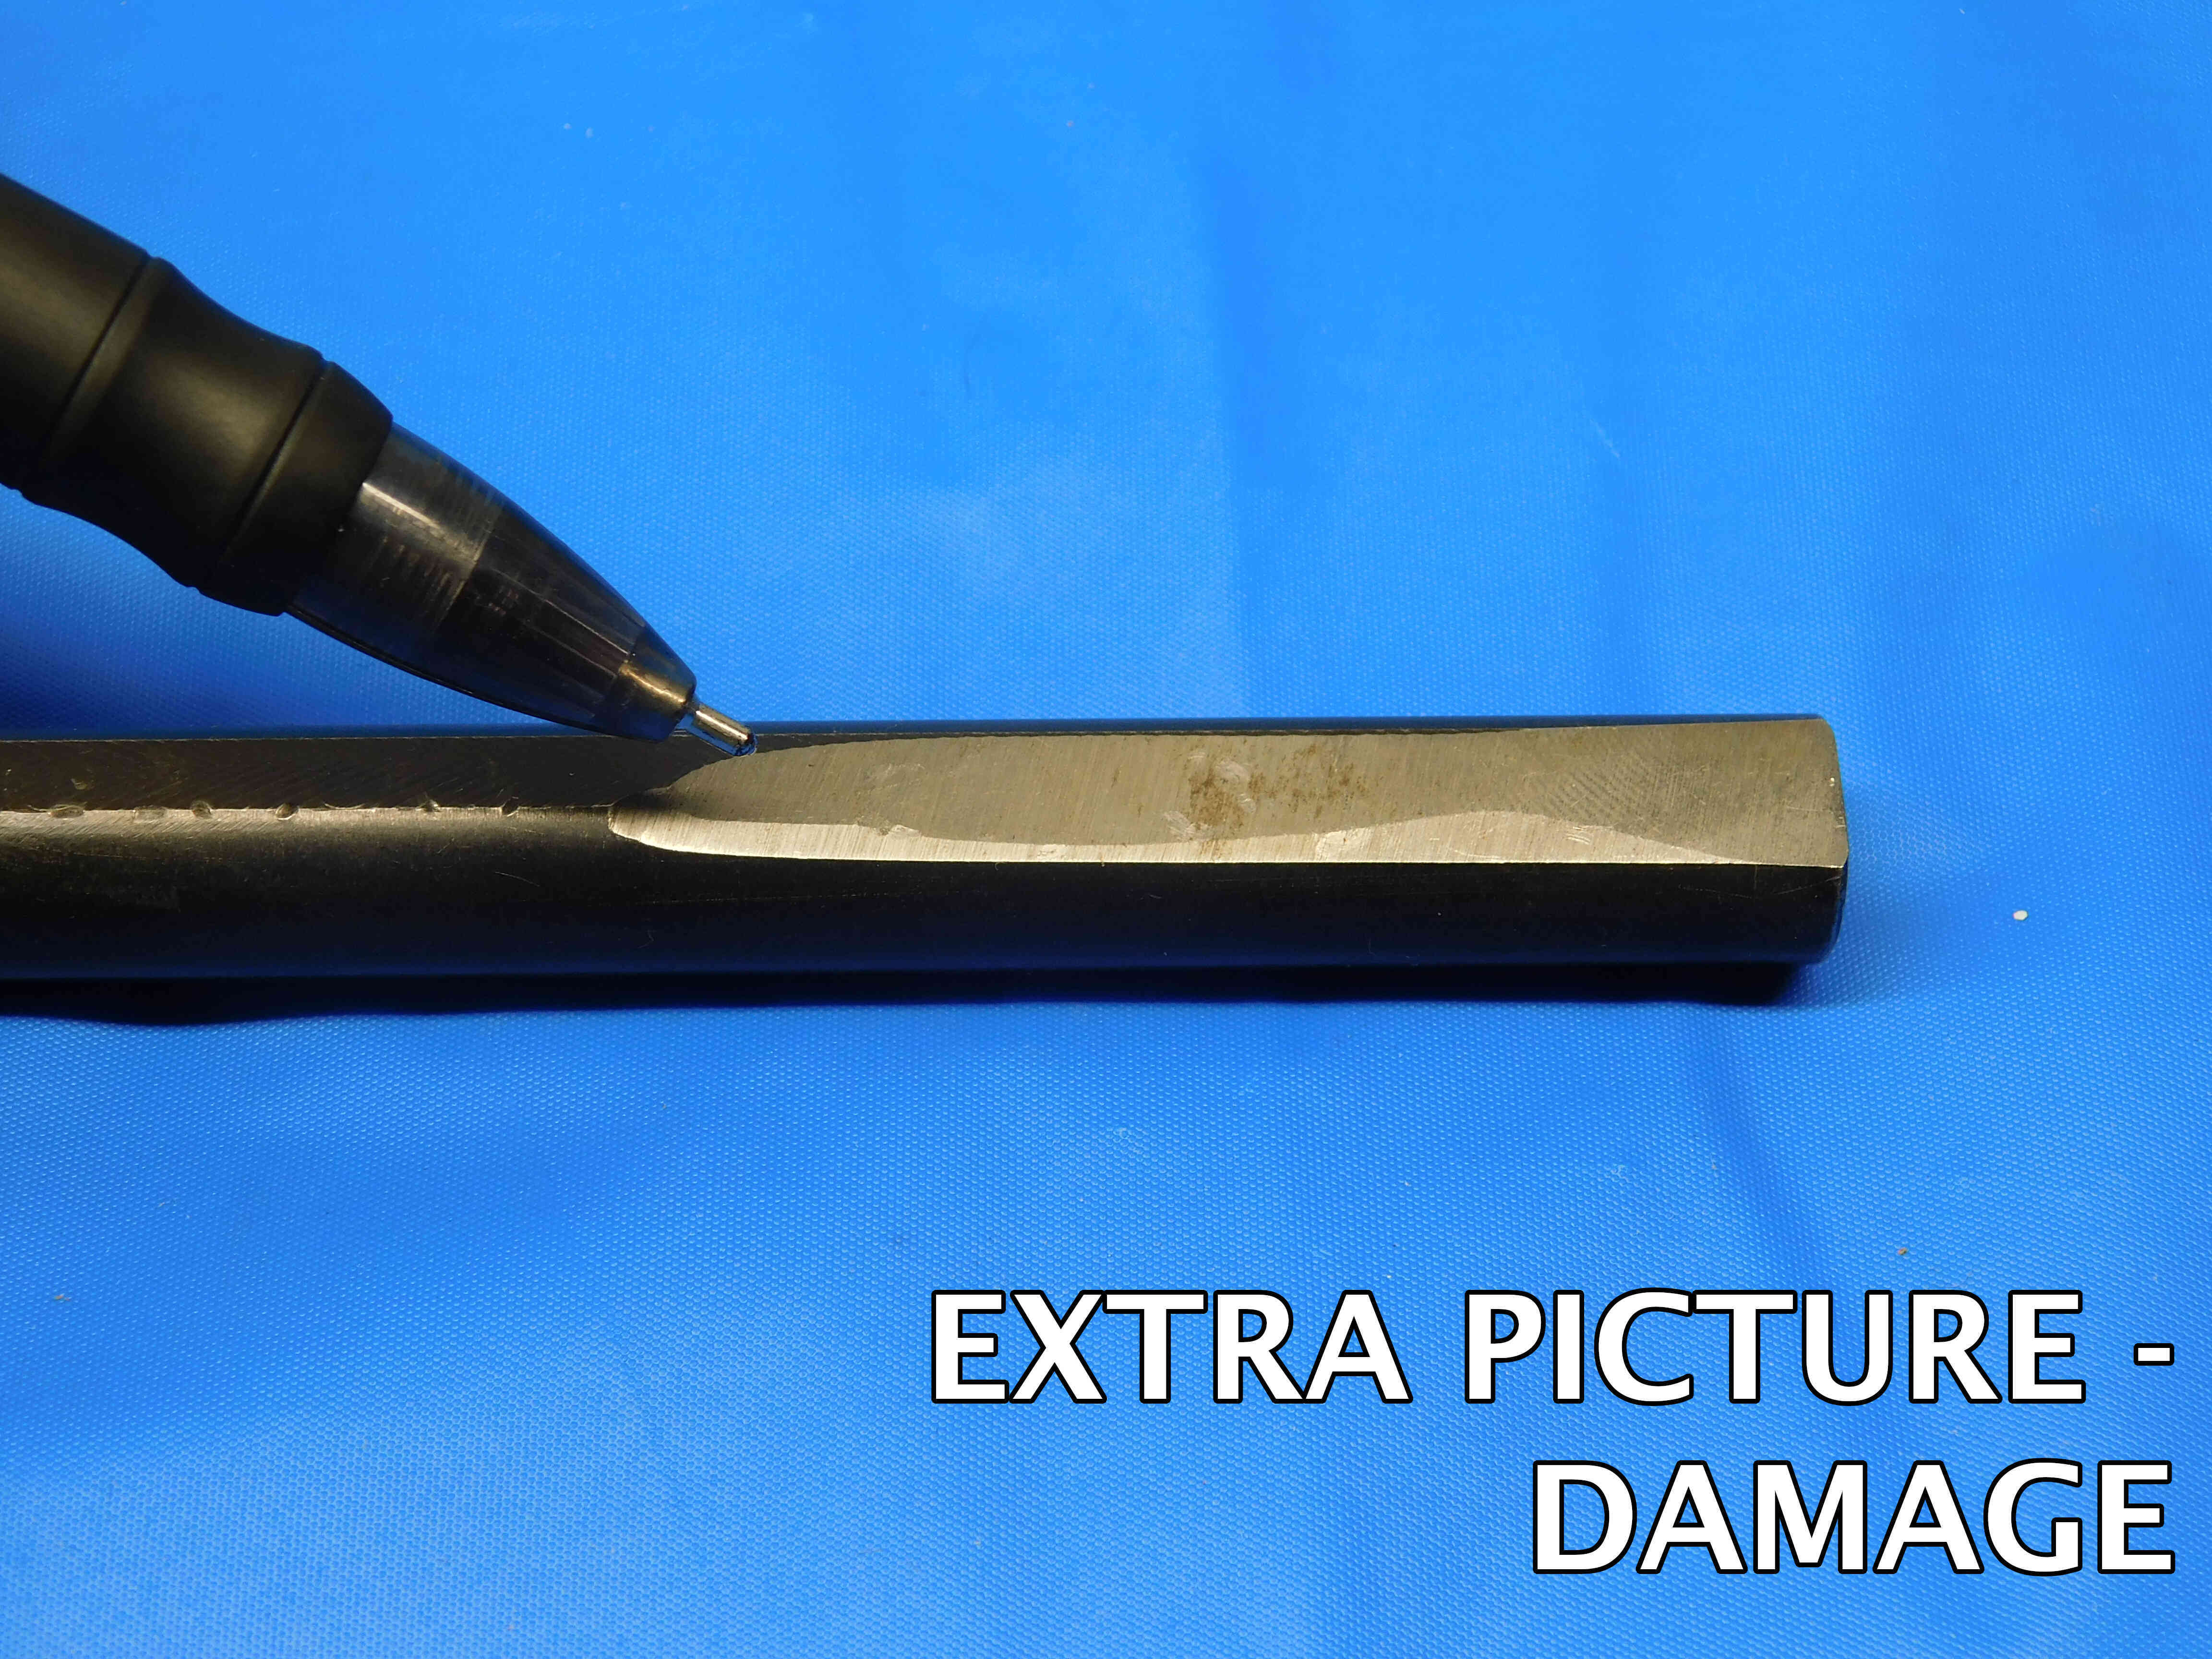
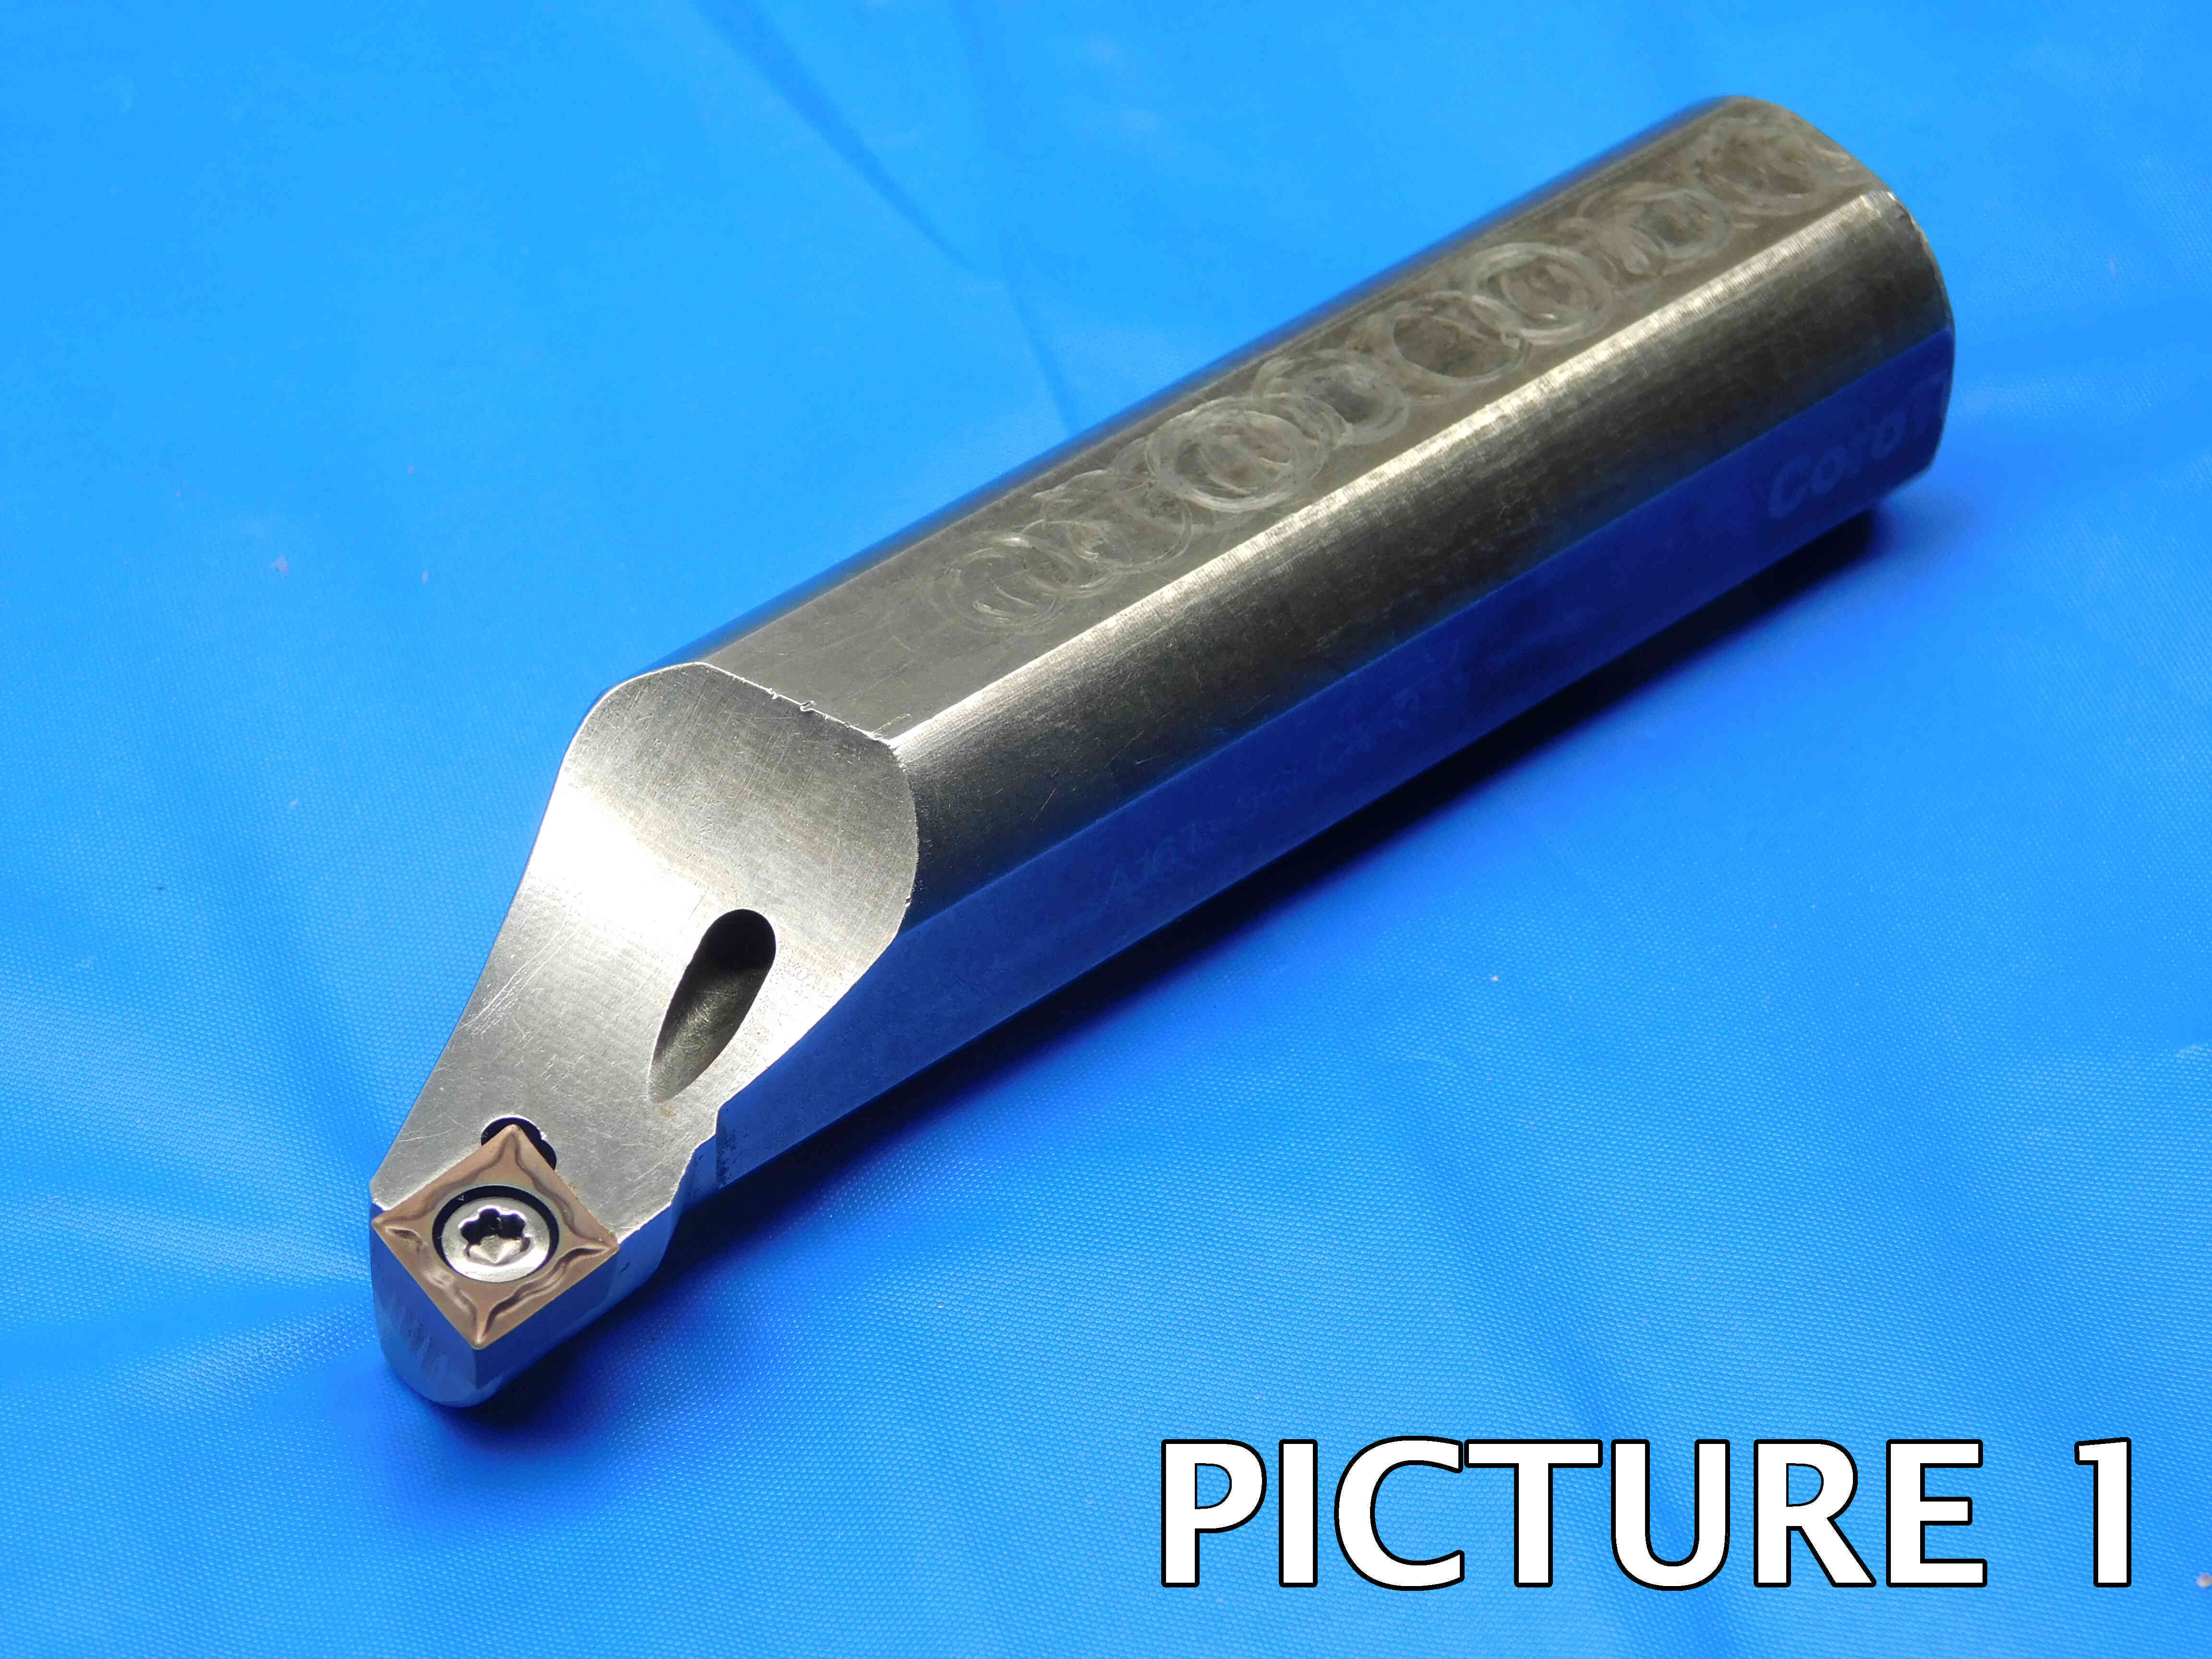
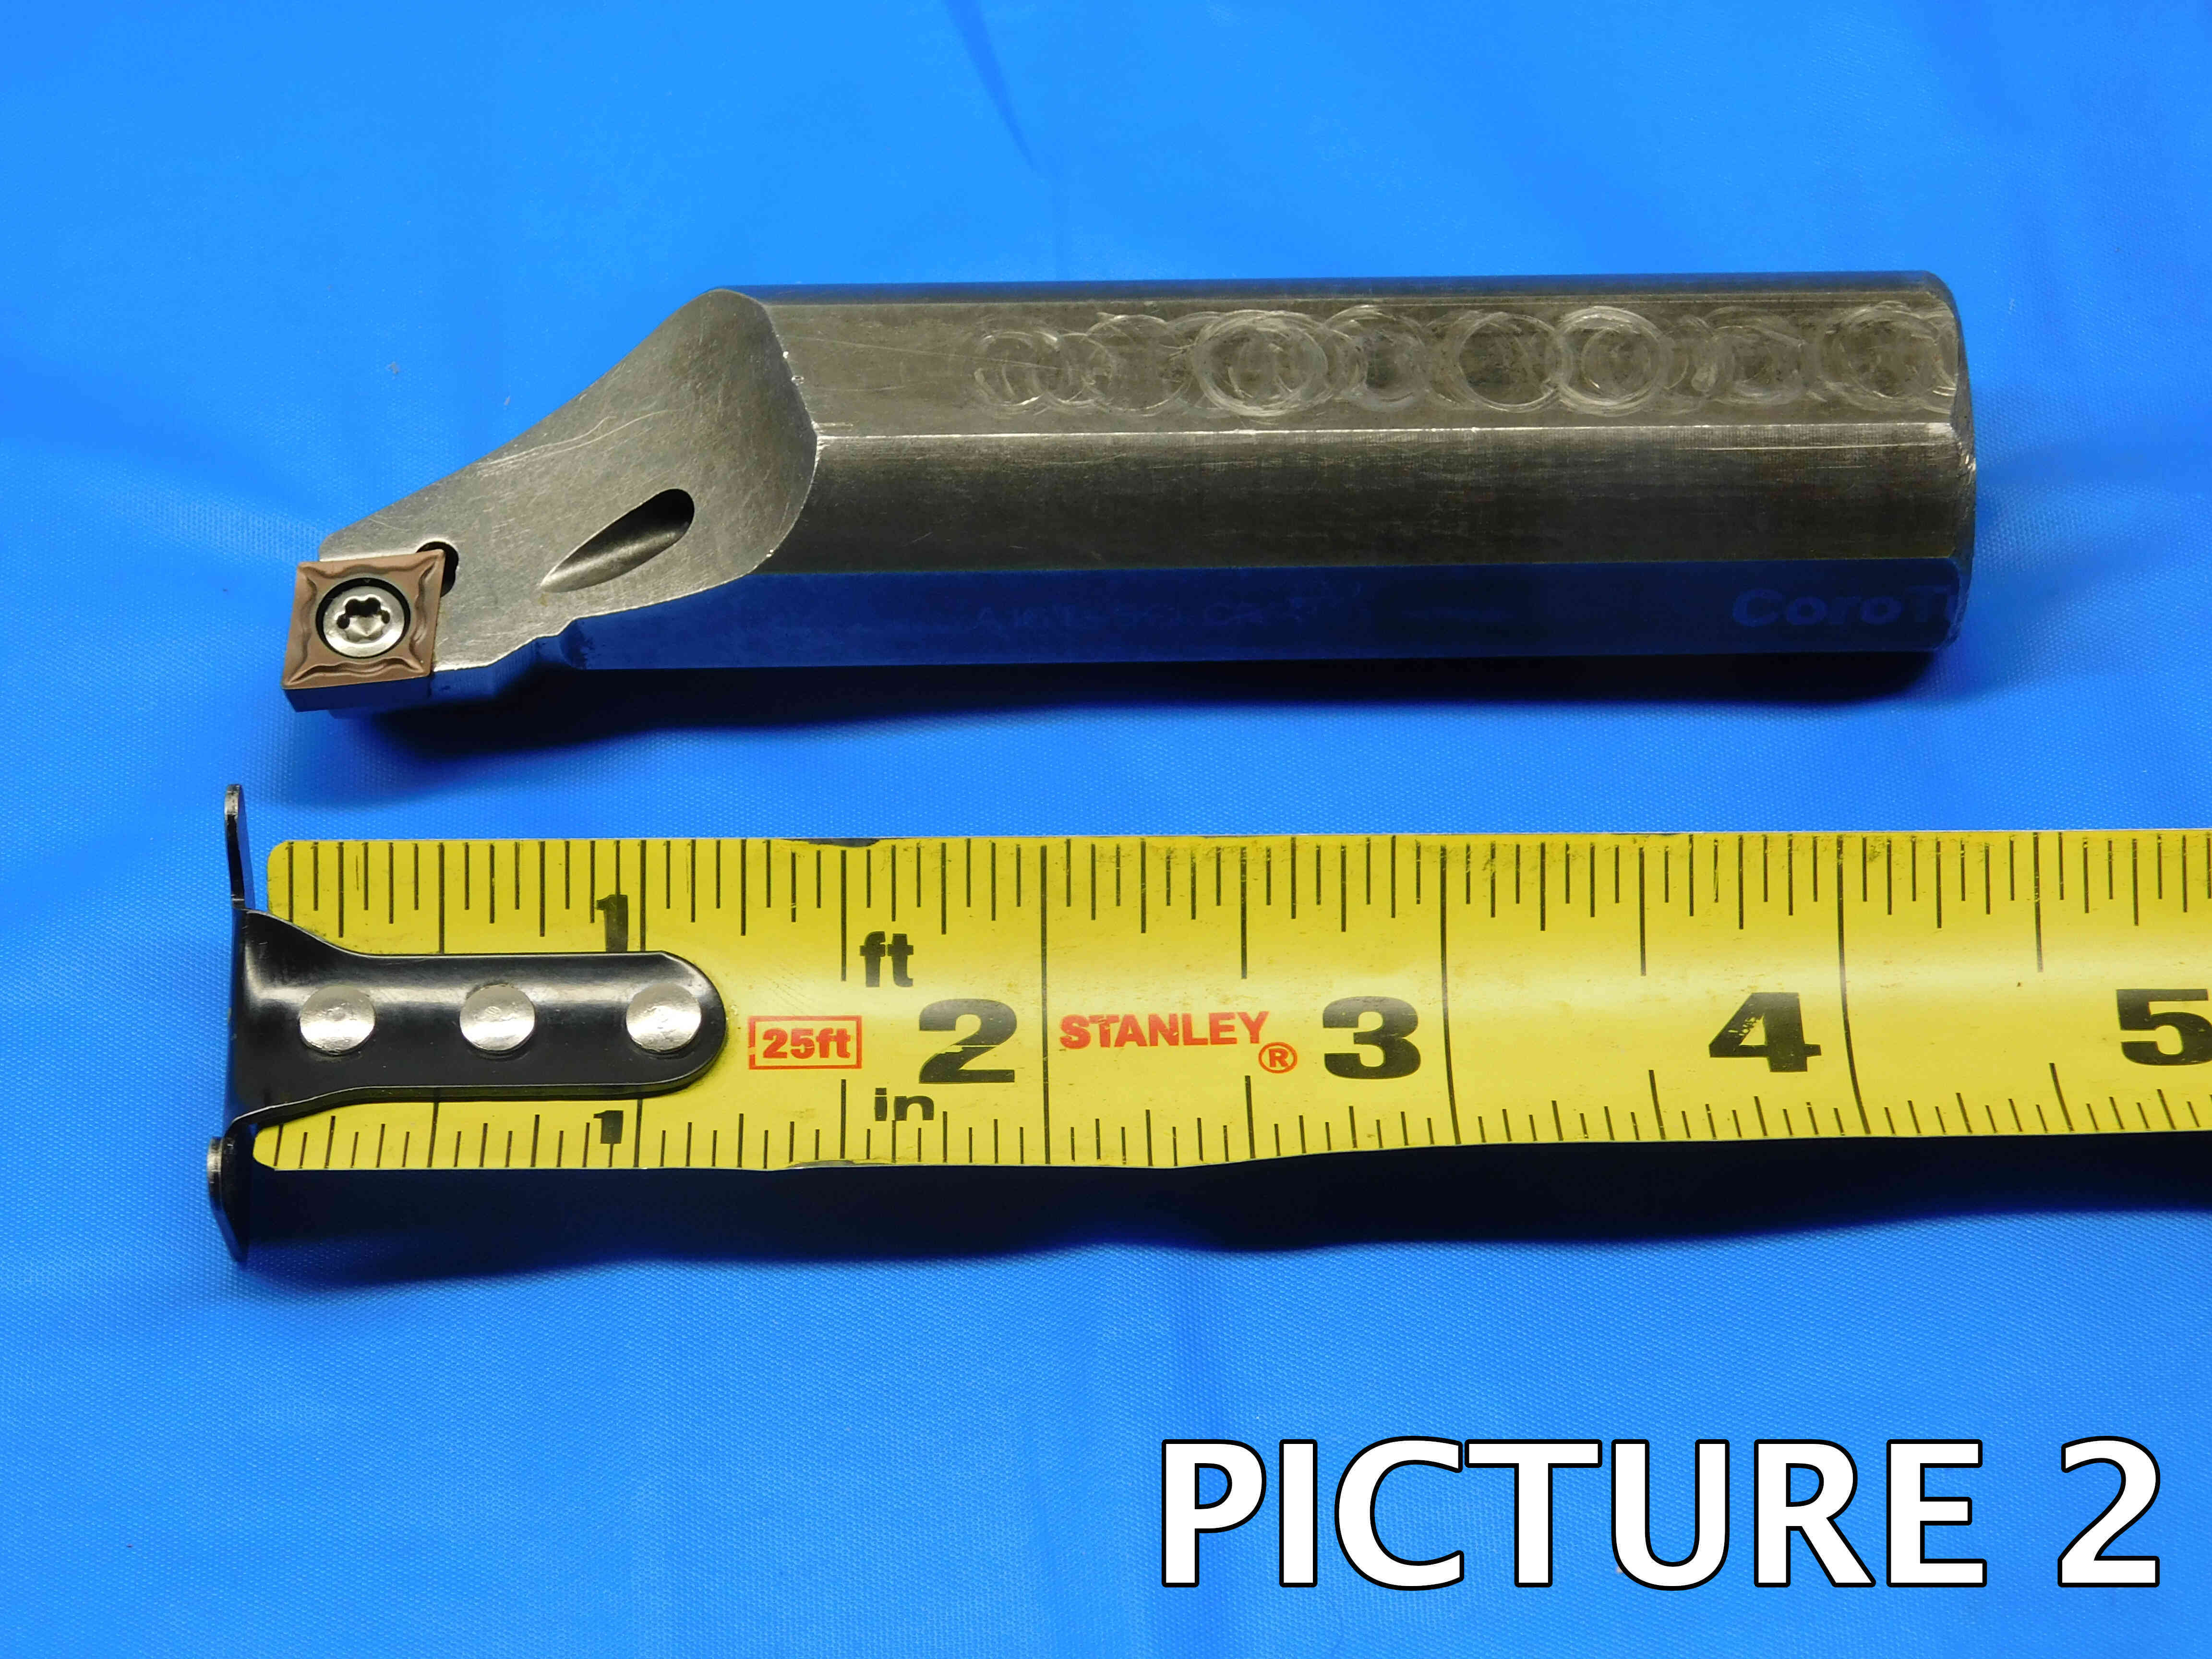
One common brand to look out for is Kennametal, which can often be identified even without labeling. Many Kennametal tools are labeled with a yellow, oval-shaped sticker which frequently gets damaged or removed entirely as the tool is used. Whenever you see a blank, oval-shaped indentation like in the second picture below, it can be assumed that the brand is Kennametal.


If the brand is not labeled, click the "Unlabeled" button to the right of the brand cell. Make sure this cell is not left blank, or the listing will not upload properly. Note: Items are often labeled with the country of origin (USA, China, Japan, Poland, etc). This should NOT be entered as the brand, and furthermore should not be included in the listing at all EXCEPT for USA which can be used as a filler.
Boring bars are typically made of steel, carbide, or heavy metal.
Steel is the most common as it is relatively inexpensive and good for a variety of applications. Please note that boring bars are made specifically from Tool Steel and NOT High Speed Steel (which is used for a variety of cutting tools such as drills and reamers). However, steel boring bars are typically listed as simply “steel”.
Carbide is popular for its higher rigidity and hardness which make it better suited for more precise tasks. Uncoated carbide has a darker gray color than steel and is very heavy, weighing about twice as much as steel.
Heavy Metal is less common than steel and carbide and is sort of a middle ground between the two in terms of hardness and durability. It can be difficult to distinguish from steel and will generally need to be identified using labeling.
Some boring bars have holes which allow coolant to pass through, which helps to control temperature and prevent overheating. This will be seen near the insert seat, where there will be a hole that runs through the entire bar and connects to a hole at the end of the shank where the coolant enters.

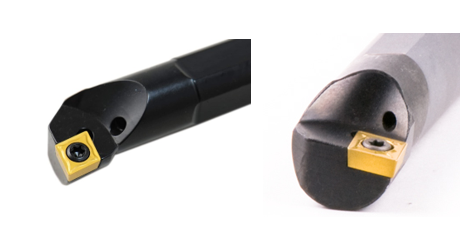
Indexable refers to tooling that uses removable inserts (typically made from carbide) as the cutting material, which are held in place by a screw or clamp. Indexable tooling is very popular because inserts can simply be replaced when they are used up without the need to replace the entire tool.
A large majority of boring bars used today are indexable, however non-indexable boring bars do exist as well. In the pictures above, the boring bar on the left is indexable (it has a replaceable insert held by a screw), and the one on the right is not (it has a non-removable cutting edge manufactured directly into the bar itself).
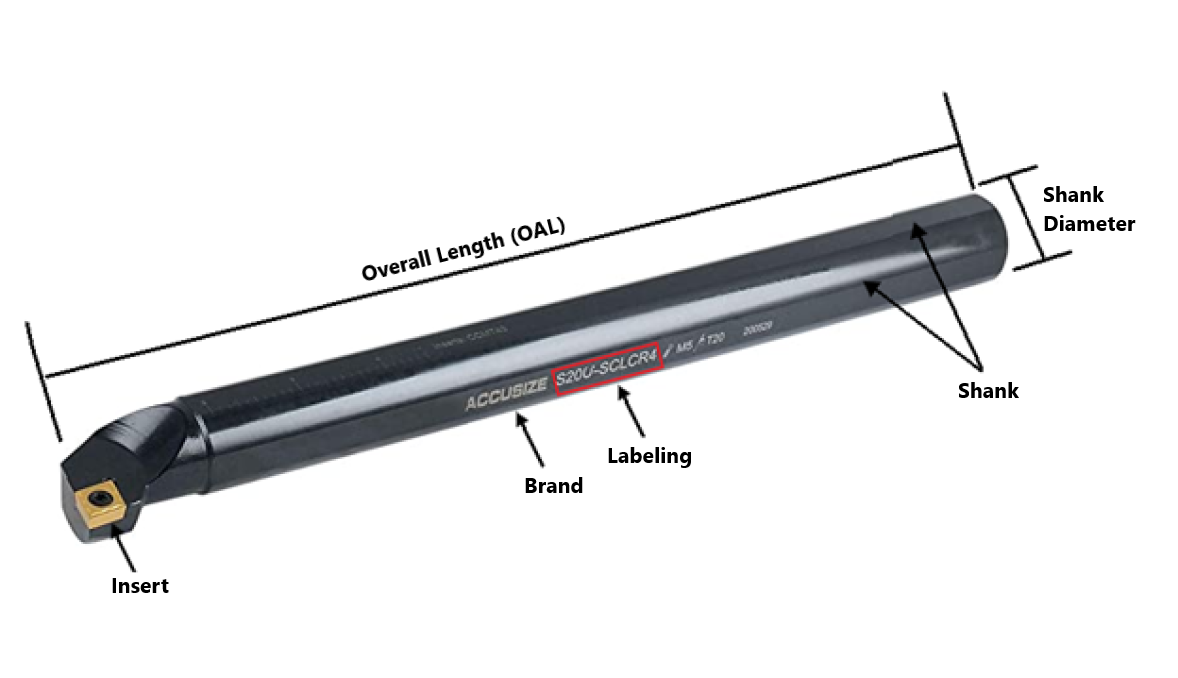
Many boring bars use a standard labeling formula which describes most of the important characteristics of the tool. Not all of this information is necessarily important for the listing, but understanding what some of these letters and numbers correspond to can be helpful in determining certain aspects such as the material (1) or type of insert (5 & 9), so refer to the charts below for more information:
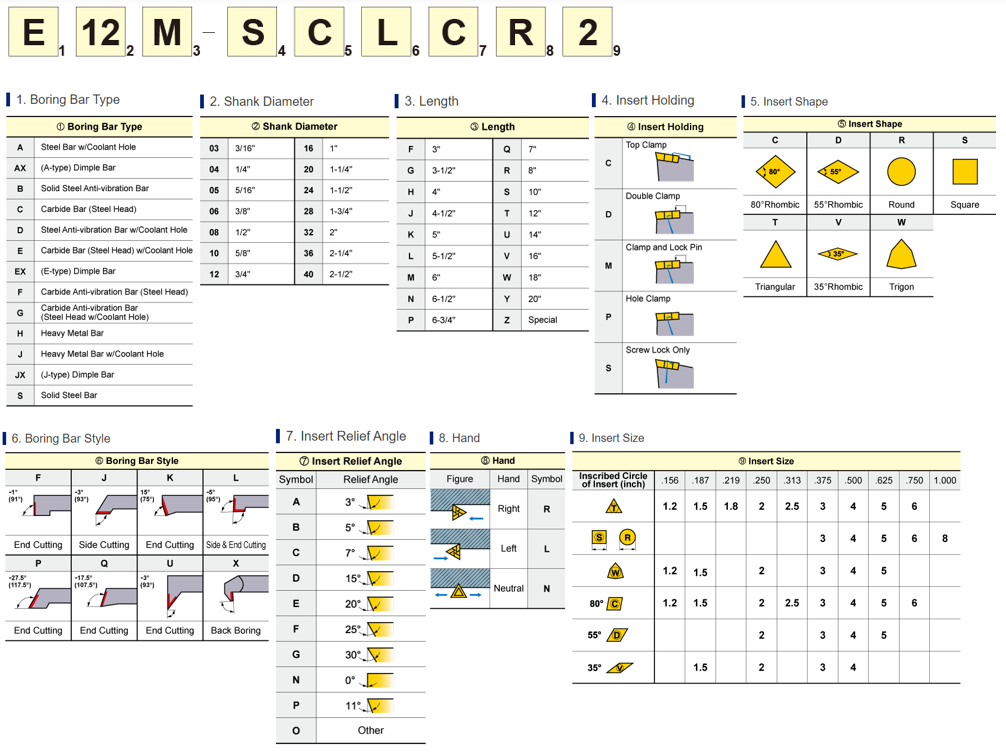
Shank Diameter and Overall Length (OAL)
The Shank Diameter may be indicated by labeling and can also be measured using calipers. If the shank has flat sides, the diameter should be measured across the cylindrical edges and NOT the flats. Boring Bars typically have "on-size" shanks (3/4", 1 1/2", 2", etc.), but this is a precise measurement and should not be rounded if it is more than .005" off from a fractional size. If you are getting an unusual "off-size" measurement, try converting it to millimeters, as it may be a metric size.
The Overall Length (OAL) can also be indicated by labeling, however it is common for machinists to modify the length of a boring bar, as the full length is often not needed. Because of this, the OAL of a used boring bar will frequently not match the length that is indicated by the labeling and will need to be measured to determine its exact size. This is a less precise measurement than the shank diameter and can simply be measured with a tape measure.
Note: When entering a whole-number inch size, always include the " sign. The " sign should not be included for any size including a fraction or decimal. So, for example: If a boring bar's shank diameter is exactly one inch, it should be entered as 1" and not just 1. If the shank diameter is one and a half inches, it should be entered as 1 1/2 or 1.5 and not 1 1/2" or 1.5".
Metric size measurements should be entered with a lowercase "mm" (ex.: 16mm, 40mm).
Indexable boring bars hold inserts which sit on a seat / shim and are held in place by a clamp or screw. Be sure to always look out for damage to the insert pocket and seat, as any damage could affect the tool's ability to hold an insert properly. Damage must always be clearly pictured and described in the listing's "special condition" section.
Information about inserts should be included in the listing whenever possible. The type of inserts a boring bar holds will sometimes be specifically labeled (often by “INS” followed by the insert type), but can also be identified by other means.
For more in-depth information on identifying inserts, please refer to the Identifying Inserts FAQ page.
About Indexable Hardware (Insert Seats, Screws, Clamps, etc.)
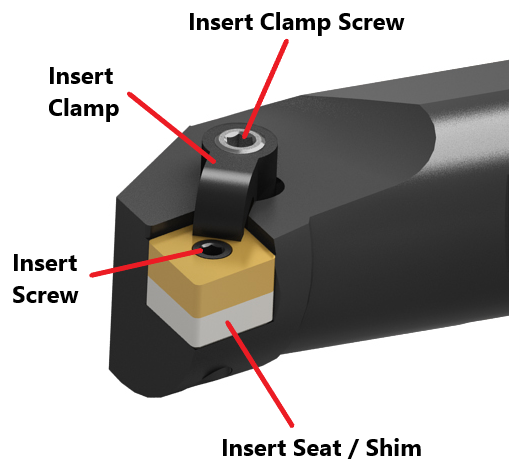
Most boring bars will include an insert seat (also called an insert shim), a screw which holds the insert and seat in place, and possibly a clamp which further secures the insert. If any of these parts are missing or damaged, it MUST be mentioned in the Special Condition section. Note that some boring bars may not require all of these parts (specifically, some boring bars will hold the insert using only a screw and no clamp, or vice-versa). Contact your trainer if you are not sure whether a piece of hardware should be considered missing.
The "Filler" section is used to add other relevant information to the title which is not covered by the other sections. Fillers can be a good way to increase a listing's visibility - we always want to include as much information as possible that we think a customer might be searching for in order to make sure that our listing is coming up in their search results.
There is not necessarily one right answer when it comes to fillers, and often it will be up to you to decide what should and should not be added as filler. Boring bars occasionally have extra space for fillers, so here are some suggestions for what can be included:
-Secondary labeling or branding / product names
-"USA" or "USA Made" for any US Manufacturers (you may need quickly research a brand if you are not sure since this will not always be specifically labeled)
-Words related to the specific applications of a particular boring bar such as "Threading", "Grooving", "Top Notch" - this will be related to the type of inserts the tool holds
-Common insert types that the tool can hold - for example, if the boring bar is labeled "CN-43", you can add "CNMG" or "CNGA" as fillers since those both fall under the "CN" category. Some other common inserts include: TNMG, TNMA, TPMA, CCMT, WNMG, WNMA, VNMG, SNMG, SPEB
-"Lathe" is an appropriate filler for all boring bars
Note: Keep in mind that titles have a maximum limit of 80 characters.
Additional Specifications & Special Condition
The Additional Specifications section should be used for any secondary labeling or additional measurements that do not fit in the other sections of the listing. There is no character limit here so any relevant information that is not already covered should be included (within reason - we don't want to overload the listing with unnecessary information, so ask your trainer if you are not sure whether or not to include something in this section).
The Special Condition section should be used for any special notes about the item's condition such as damage or modification. Try to be specific when describing the condition, and reference pictures that point out the damage / modification if applicable. For example, "This is missing the insert clamp" or "One side of the shank has been flattened - see picture #4 for details." General wear and tear does not need to be mentioned, but anything that will affect the tool's usage should be included here.
Once all information is entered, click here for the next steps.
